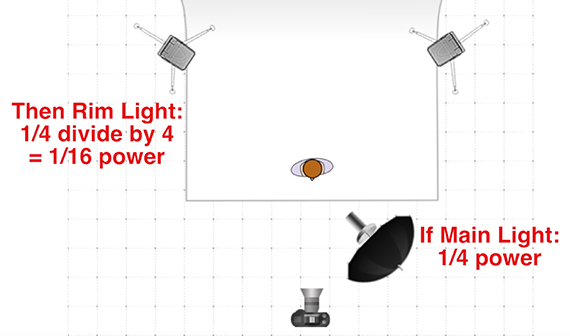
Understanding rim lighting is one of the greatest steps a photographer can make toward mastering the studio. However, getting it right can be an arduous process of trial and error. Andrew Boey of Beyond Photography Academy chimes in with his own personal strategies in hopes of simplifying the process once and for all:
The purpose of a rim light is to separate. Rather than allowing elements to visually “bleed” into one another, the light is used to highlight shape and make details a bit more distinct.
The first step toward attaining this goal is to have your gear all set up. Ideally, you’ll want your rim lighting to be positioned several feet behind to subject, aimed so the light is pointing directly at the subject’s back. The following diagram illustrates what this setup might look like from a bird’s eye view:

Rim Light Setup
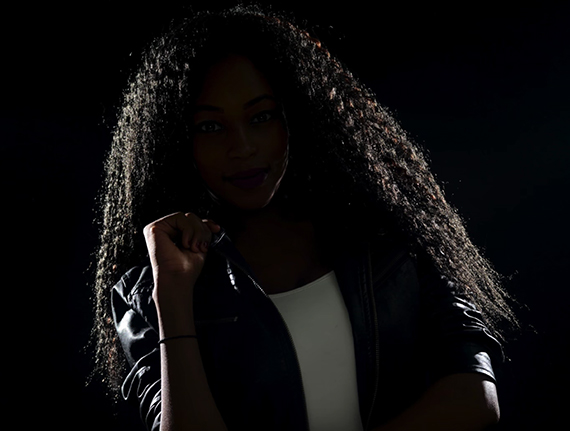
To test out whether your lighting is behaving correctly, you’ll actually want to turn off your main light. This way, it’s easy to see how exactly the rim light is impacting the photograph. From there, you can make adjustments to the power level of the lights as well as the angling of the flash. Be sure that the entirety of your subject is outlined, and be vigilant of flares that can crop up from lights directed head-on toward the camera.

Rim Light Only
The final step is to bring in your remaining light sources and balance exposure settings properly. As you would with any supplementary lights, it’s important to make sure that no single element entirely overpowers the impact of its surrounding elements. Once you have the basics set in place, you can begin building off of them to make more complex photographs. For instance, Boey brings in colored gels to attach to his rim lights. The pops of color add an interesting element to the otherwise straightforward portrait.

And that’s about all there is to it! On its own, a single light may not seem as though it can make much of a difference. But, as the rim light proves, a light is capable of strengthening a photograph substantially when used wisely.
Go to full article: Rim Light Photography Tutorial
What are your thoughts on this article? Join the discussion on Facebook
PictureCorrect subscribers can also learn more today with our #1 bestseller: The Photography Tutorial eBook
The post Rim Light Photography Tutorial appeared first on PictureCorrect.
from PictureCorrect http://ift.tt/2DUB8Cv
via IFTTT


0 kommenttia:
Lähetä kommentti