


The world we live in is three dimensional. We see in three dimensions, yet when we photograph, we see only two dimensions. In order to create images that add a third dimension, we need to add some perspective or depth. The big question is what is perspective and how do we add it?
Related reminder: only a little while left for the Composition Cheat Sheets  Autumn Sale
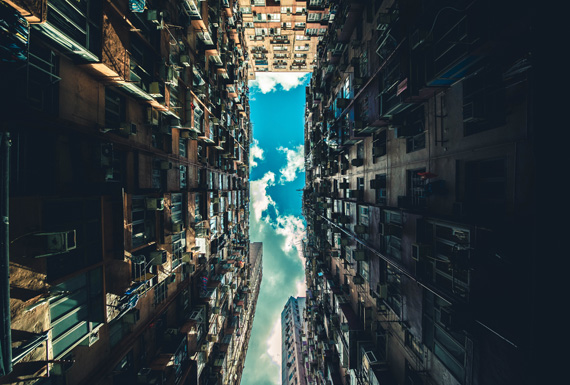
Photo by Rikki Chan; ISO 320, f/4.5, 1/1600-second exposure.
Because we can’t see a third dimension in our images, we need to create an impression that there is depth to the photograph. This is created by the relationship between elements in the image—showing the space between them and giving a sense of depth. Our brains need to discern which elements are near and which are far away. If we can do this, then the sense of perspective is created and the third dimension is added. So what types of perspective can be created to give this sense of depth and scale?
1. Lens perspective
Your choice of lens, whether wide angle or telephoto zoom, will determine the amount of perspective created in your photo. Although perspective doesn’t actually change, you can get the impression that it does by your choice of lens. Real depth and perspective is created by wide angle lenses with elements appearing at a greater distance from each other. Telephoto lenses compress thereby giving a more crowded feeling. So lens choice is vital to creating those images with real depth.
2. Lines and perspective
Parallel lines in an image fool the brain into believing that they are moving away from the viewer. Here’s how it works. Imagine looking down a row of crops or a railway line that disappears into the distance. The parallel lines never meet or touch but as they disappear an impression is given that they do. This is what fools the eye and brain into believing that there is distance in the image. It is best illustrated when using a wide angle lens. Be sure though to include the focal point which is also known as the vanishing point, which is the point where the lines disappear into nothing.
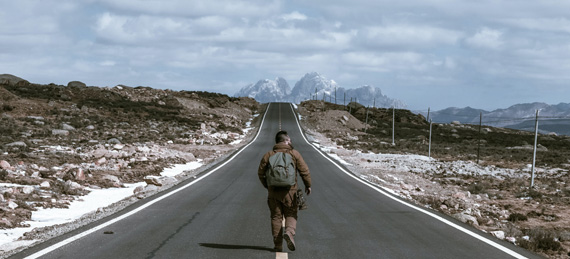
Photo by Preillumination SeTh; ISO 500, f/16.0, 1/1250s, 85mm.
3. Diminishing perspective
Diminishing perspective of scale refers to the appearance of size that our eyes see. Take for example a row of telephone poles disappearing into the distance. Our brain tells us that they all should be the same height. But, because they are all gradually getting smaller the brain says they must be getting further apart. If you use this sense of perspective you will find it extremely effective in giving depth to your images. So when you are trying to achieve this, look for fences, trees, telephone poles, and similar repeated objects to include in your photo which will help create the depth.
4. Scale and comparison
When trying to achieve a sense of scale, choose two elements with one having a recognisable height or size, e.g. a person or a vehicle. By placing them next to a large object, such as waterfall or dam wall you get an idea of how large the wall is because you know the size of the recognisable person or object. If you know the height of the person then in relation to them the dam wall must be incredibly large.
5. Stretching Perspective
There is another very effective way of showing perspective and this is by using a wide angle lens. The lens by itself stretches the perspective naturally and this is quite dramatically increased by including an object in the foreground. When this object which you know how large it is, is compared to something in the distance such as a building or tree, the sense of scale is increased. It reveals extreme distances and gives the image real depth. This is creates a strong impression of diminishing scale or perspective.
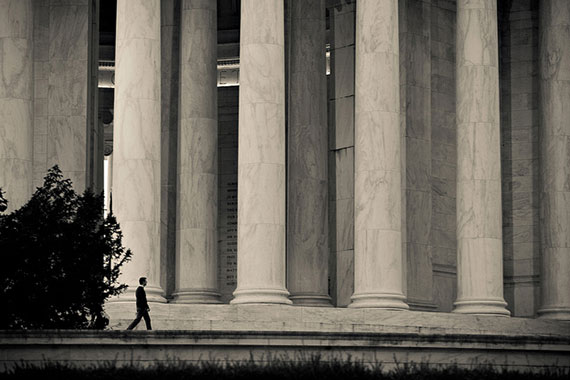
Photo by Aftab Uzzaman; ISO 200, f/3.2, 1/25-second exposure.
Photos with depth or perspective are far more dynamic and dramatic, revealing that third dimension lacking in most images. If you are able to implement this as you learn digital photography, then you are well on the way to stunning images. Happy shooting!
About the Author:
Wayne Turner has been teaching photography for 25 years and has written three books on photography. He has produced 21 Steps to Perfect Photos, a program of learner-based training using outcomes based education.
For Further Training on Composition:
Are you ever tired of your photos looking dull or boring? These popular Composition Cheat Sheets have you covered. With clear, concise information on all the essential elements of composition, you’ll never be unprepared again. They are currently 81% off for a Autumn Sale which ends soon if you want to check them out.

Composition Cheat Sheets (see all the elements covered)
The perfect companion for any photographer. Print one out whenever you need it. These cheat sheets consolidate crucial composition-related information, allowing you to concentrate on what truly matters – composing striking photographs.
Autumn sale ending soon: The Composition Cheat Sheets at 81% Off
The post Tips for Using Perspective and Scale in Photography first appeared on PictureCorrect.
from PictureCorrect https://ift.tt/3su4vXQ
via IFTTT


Great advice here — using lines, foreground elements and familiar objects really does transform a flat photo into a 3-D scene with real depth and scale! One thing I’ve found useful when applying these tips is post-processing: subtle color grading and contrast tweaks can further enhance perspective and lead the viewer’s eye more powerfully. If anyone’s interested in editing workflows or color adjustments to get that extra visual punch, you might find BeatColor beatcolor.com
VastaaPoistahelpful — I often share examples and techniques there. Keep up the inspiring work!