perjantai 31. lokakuuta 2025

PictureCorrect.com: The Importance of the Subject in Your Photography

I cannot emphasize how important it is to give your subject the place of importance in an image. Its correct placement and the removal of any competition only makes the photo more effective. Besides creating photographs that are truly memorable it gives an overall quality to your photos.

Relevant note: offer ending soon at the iPhone Photo Academy Halloween Sale

point of focus

Photo by Jonathan Kos-Read; ISO 100, f/3.2, 1/320-second exposure.

Let’s try something in order to illustrate this point. Go to your old photo albums or shoebox full of pictures, or, if you’re totally digital, go through the folders on your computer. If you have a photo album get yourself a box of those little red dot stickers that come on a roll. If you have a shoebox of pictures get ready to sort them, and if you’re digital get ready to drag and drop into two new folders.

Now here’s what to do. Choose a selection of your images, for example, the first 10 pages of the album, a pile from your shoebox or a folder on your computer. Sort them into two piles, drag them into two folders or place a red dot on the images in the album. In one pile place all the images that have a clear subject. If the subject can be clearly identified as the central focus of the photo put it in one pile, drag it to a folder, or place a red dot on it in the album.

So what’s the purpose of this exercise? What I am trying to illustrate is that you will probably find that the pile, folder, or red dots will be much smaller or fewer than the other pile. Why? Because most people just don’t give the right amount of attention to their subjects. It’s remarkable but it’s true. Without any subject, focal point, or an object of attention the image can only be mediocre. A photo needs a clear subject. Here’s how to improve your photos.

1. Choose a Clear Subject

If you’re at a family gathering don’t just take general photos of large groups. Zone in on people and create smaller groups of twos and threes. Make sure that when someone views your images the subject clearly says, “I am the subject.” In every play or movie there is always an actor that takes the lead and can clearly be identified. The same goes for your images. If the subject is not clear then the photo is not clear.

gathering subject

Photo captured by Arthur Poulin

2. Be Selective

The problem faced by many amateur photographers is that there are too many subjects and they’re not sure which to include. The answer is simple, be more selective. Narrow down the options and shoot just one. If the others are important then feature them in their own images. It’s better to take three images each with its own subject than to take one in which no one can identify the subject. The focal point is vitally important, as it draws the eye.

3. Exclude Clutter

Competition is the enemy of any subject in an image. A subject should never have to compete for attention in a photo. If it doesn’t clearly say, “I’m the subject,” then it isn’t the subject. Clutter does just that. Anything that clutters an image and has the eye jumping between different parts of that image has to go. Look around the scene when looking through your viewfinder or at the LCD screen and see if anything encroaches on the edges. You can crop the image on your computer, but it’s always better to do it in camera.

4. Get in Closer

Besides helping you to exclude clutter from around the edges of the image it helps you to give the subject a more prominent place in the photo. Bigger is better when creating memories. It’s the subject of the image you want to see in 20 years’ time, and if you need a magnifying glass to see a loved one, then it’s not a real memory. Size will always help a subject take its rightful place in an image. You don’t always have to have every bit of the subject in the image. Sometimes just the face is better than the whole person or part of the car is better than the whole.

photography focus

Photo by Patrick Emerson.

5. Place Your Subject Carefully

The rule of thirds states that a subject or focal point should be placed slightly off center in an image. Why? It makes a far more pleasing photos and the eye is drawn to those points in an image. Having the subject placed slap bang in the middle of the image is not as effective. If you divide your image into thirds vertically or horizontally like a tic-tac-toe or noughts and crosses grid, where the lines intersect is where you place your subject. Try it and you’ll see just how effective it is.

Happy Shooting!

About the Author:
Wayne Turner has been teaching photography for 25 years and has written three books on photography. He has produced 21 Steps to Perfect Photos; a program of learner-based training using outcomes based education.

For Further Training:

iPhone Photo Academy is an in-depth online course that will show you how to take incredible iPhone photos. With the right knowledge an iPhone can be used to take photos that are so good that most people would never even believe that they were taken with a phone. It is currently 84% off for their Halloween Sale which ends soon!

iphone photo tutorials

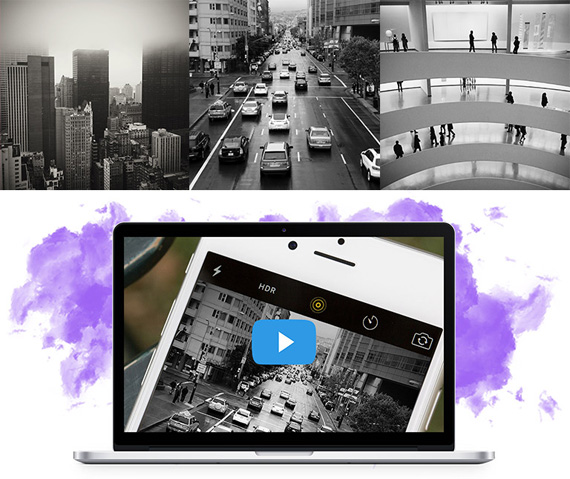
iPhone Photography Tricks (Click to See More Examples)

The best camera is the one that is always with you. But having the iPhone with you is only half of the equation. The other half is knowing how to use it to take outstanding photos.

Deal ending soon: The iPhone Photography Academy Halloween Sale

The post The Importance of the Subject in Your Photography first appeared on PictureCorrect.


from PictureCorrect https://ift.tt/Aio8JUg
via IFTTT

keskiviikko 29. lokakuuta 2025

PictureCorrect.com: Perfecting Focus in Flower Photography

Flower photography is an enchanting pursuit, yet it is fraught with potential mistakes that can detract from the beauty of your final image. Among the myriad aspects to master, focus stands out as a critical element. Achieving sharp, well-defined images requires more than just a steady hand; it necessitates an understanding of focus modes, the selection of the right focus point, and sometimes, the fine-tuning capabilities of manual focus. Let’s delve into these aspects and explore how they can enhance your flower photography or, if overlooked, potentially ruin your shots.

Related note: offer ending soon for the Photo Adventure Cheat Sheets 🍂 Autumn Sale

flower focus

Photo captured by Nicolas Ladino Silva

1. Choosing the Right Focus Mode

Digital cameras typically offer various focus modes, each suited to different scenarios. In flower photography, the two most relevant focus modes are Single-Servo AF (AF-S) and Continuous-Servo AF (AF-C). AF-S, ideal for stationary subjects, allows you to lock focus on a static flower. AF-C, on the other hand, is better suited for moving subjects and might not be as useful for static floral shots unless you’re dealing with elements like swaying flowers in a breeze. Selecting the wrong focus mode can result in missed focus or blurry images, especially if the flower moves after locking focus in AF-S mode.

2. Utilizing the Appropriate Focus Point

The focus point you choose can dramatically affect the impact and clarity of your flower photographs. Many photographers default to using the center focus point, but this can lead to mundane compositions. By moving the focus point to the most striking part of the flower, such as the stamen or a vivid petal edge, you can create more compelling images. Modern cameras allow for easy adjustment of focus points, enabling you to be precise about where you want the viewer’s eye to be drawn.

3. Harnessing Manual Focus for Fine-Tuning

While autofocus is incredibly useful, there are times when manual focus (MF) becomes indispensable, especially in macro flower photography where every millimeter counts. Autofocus might struggle with small or intricate subjects, leading to a focus that’s slightly off. By switching to manual focus, you can fine-tune the point of sharpest detail, ensuring that the most important part of your subject is in crystal clear focus. This is particularly beneficial in situations where the camera’s autofocus is deceived by foreground elements or complex patterns.

4. Avoiding Focus Over-reliance and Overlook

Relying solely on your camera’s autofocus without understanding its limitations can be a critical mistake. Autofocus systems, though advanced, are not foolproof and can be confused by complex scenes or low-contrast subjects like some flowers. Additionally, overlooking the need for manual fine-tuning in challenging focusing conditions can result in a lack of sharpness where it matters most.

5. Depth of Field and Focus Relationship

Understanding the relationship between focus and depth of field (DoF) is crucial. A very shallow DoF can make focusing accurately even more critical, as the margin for error is minimal. Conversely, a deep DoF can forgive slight focusing inaccuracies but might detract from the subject by including too much background detail. The aperture setting you choose directly affects DoF, so it’s essential to select it thoughtfully based on your desired focus effect.

In Conclusion

Focusing effectively in flower photography is a nuanced art that involves more than just pointing and shooting. By selecting the appropriate focus mode, carefully choosing and adjusting your focus points, and knowing when to switch to manual focus for fine-tuning, you can avoid common pitfalls that lead to unsatisfactory images. Remember, focus is not just a technical necessity but an artistic tool, guiding the viewer’s eye and emphasizing the beauty of your floral subject. With practice and attention to these details, your flower photographs can achieve a new level of clarity and impact.

For Further Training:

For help remembering the camera settings for difficult situations like this, a set of Photography Adventure Cheat Sheets are designed to help. They are currently 80% off for an Autumn Sale 🍂 which ends soon if you want to check them out.

photography adventure

New! Cheat Sheets for Your Photography Adventures (see how they work)

The perfect companion for any photographer. Print one out whenever you need it. Whether you’re going on vacation or seeking out a specific photography adventure, these cheat sheets can provide you with the knowledge and inspiration you need to create your best work yet.

Deal ending soon: Photo Adventure Cheat Sheets 🍂 Autumn Sale

The post Perfecting Focus in Flower Photography first appeared on PictureCorrect.


from PictureCorrect https://ift.tt/CRHxcSg
via IFTTT

tiistai 28. lokakuuta 2025

PictureCorrect.com: Photographing Pattern, Form, and Texture

If you want to add a new dynamic to your photography then try adding pattern, form and texture. They will add a new depth to your images and help you rise to a new level in your photography.

Relevant note: only a little while left for the Complete Landscape Guide at 58% Off

pattern form texture

Photo by Maria Teneva

1.Patterns

Patterns can be found everywhere—in nature and man-made constructions. They are made up of repeated objects, shapes, or colors and whether they’re random or ordered can be very pleasing to the eye. You can use patterns as the main subject of your photo with the focal point on the patterns. Or, you can use the patterns as a backdrop to something else.

logs as pattern

photo by iangbl

Sometimes the interest of a focal point is the break in a pattern. For example, a tray of eggs is great pattern of beige, uniform eggs in rows. Break one of the eggs in half and the yellow yolk will break the pattern and form a focal point. And of course remember the rule of thirds and the intersections, any break must be on an intersection.

Sometimes a pattern is not so obvious to the eye because of size. But starting looking at detail in your potential subjects by getting in closer and you see a world of patterns. A bright red fire engine may not seem to have patterns, but, get in closer to the grill or the weave of a hose and the world of patterns opens up. A keen observer will always find new patterns in old subjects.

2. Texture

While the structure of an object is its form, the material from which it is made constitutes its texture. To simplify it, the texture conveys how the subject feels. Is it hard or soft, smooth or rough? If you can convey these feelings then you are translating texture visually. Contrasting a smooth object and a rough one allows you to see texture. Again, getting in closer helps achieve this feeling as well.

sandy texture

photo by theilr

The angle of light falling on to the texture will lift it off the image and give it feeling. It’s best revealed by angled light coming more from the side, top, or rear. Front lighting will make it feel flat and uninteresting, although side lighting is the most popular way of revealing texture.

Shoot subjects like rope close up to reveal the fibrous detail by isolating it from the other elements in the scene. If you really want to emphasize the effect of texture, angle the light more. This is achieved by shooting early morning and late afternoon.

3. Form

Shape is very two dimensional, while form adds a third dimension because of the volume of an object. The eye is immediately drawn to form in an image and the art of creating this form is achieved by showing the contours of a subject—the human body as in a sumo wrestler, or the bold contours of round rocks on the seashore.

rock form with side lighting

photo by r. nial bradshaw

Good side lighting in early morning or late afternoon brings out the contoured form through shadow. Direct sunlight from above gives a very flat appearance to an image but when clouds pass over the sun form immediately rises and you have a perfect subject.

Here’s a tip when trying to convey form in an image. Don’t stand front-on parallel to your subject because all you tend to view is the shape without any form. Change your angle of view by moving around until shadow starts to reveal the form.

By learning to photograph texture, form, and pattern correctly and adding these to elements to your images you will find that a new dimension will be added to your bag of skills and your photos will improve dramatically.

About the Author:
Wayne Turner has been teaching photography for 25 years and has written three books on photography. He has produced 21 Steps to Perfect Photos, a program of learner-based training using outcome-based education.

For Further Training:

If you are looking for more help with your landscape photography, you may want to check out this in-depth guide while it is currently 58% off. It contains 237 pages jam-packed with training, illustrations, and assignments for photographers seeking to take better landscapes.

landscape photography guide

New: The Complete Landscape Photography Guide

It covers everything you need to know to take consistently great landscape shots – lens and gear help, developing your own style, post-processing guides, composition tips, how to get unique images, and much more.

Deal ending soon: The Complete Landscape Photo Guide at 58% Off

The post Photographing Pattern, Form, and Texture first appeared on PictureCorrect.


from PictureCorrect https://ift.tt/eqiwzPo
via IFTTT

maanantai 27. lokakuuta 2025

PictureCorrect.com: How a Fisheye Lens Works

A fisheye lens is a type of ultra wide-angle lens that produces strong visual distortion to create a wide panoramic or hemispherical image. Named for the visual effect they create, which is similar to how the world might look through a fish’s eye, these lenses achieve an extremely wide field of view by bending incoming light rays in a way that is radically different from a typical camera lens.

fisheye lens image

Photo captured by Stewart Munro

Here’s a more technical explanation of how this works:

  1. Light collection: Fisheye lenses have a much wider field of view than normal lenses. This means that they collect light from a larger area.
  2. Lens shape: The front element of the lens is bulged in a way that resembles a hemisphere rather than being flat or mildly curved. This unusual shape is crucial to the lens’s ability to capture such a wide field of view.
  3. Light bending: The convex shape of the lens causes incoming light rays to bend more toward the edges. This bending of light, also known as refraction, allows the lens to capture light from a wider field of view than would be possible with a lens that does not cause as much bending.
  4. Image projection: The lens projects the light onto the camera’s sensor or film plane in a different way than normal lenses. Normal lenses aim to project light in such a way that straight lines in the real world are reproduced as straight lines in the image. Fisheye lenses, however, project light so that straight lines are reproduced as curves if they do not pass through the center of the image.

The outcome of all this is an image that has a unique aesthetic: an extremely wide field of view, significant distortion towards the edges of the frame, and a certain kind of perspective “warping” that can make the image feel more immersive or dramatic.

It’s worth noting that there are two main types of fisheye lenses: circular fisheye lenses, which produce a round image with a 180-degree field of view in all directions, and full-frame fisheye lenses, which produce a rectangular image with a 180-degree field of view only in the diagonal direction. The type of fisheye lens used can have a significant impact on the look of the final image.

For Further Training:

This #1 bestseller is the most in-depth eBook on how to capture amazing photography anywhere. Over 250 pages of photography tips & tricks from industry insiders. Currently 78% off today for an Autumn Sale if you want to check it out.

ebook pages

Pages from The Photography Tutorial eBook

It is the product of over a DECADE of research as an insider in the photography industry, assembled to help you learn quickly and avoid the mistakes that I made along the way.

Deal ending soon: The Photography Tutorial eBook Autumn Sale

The post How a Fisheye Lens Works first appeared on PictureCorrect.


from PictureCorrect https://ift.tt/X9j1q4M
via IFTTT

sunnuntai 26. lokakuuta 2025

star trail on the lake by manupgi (500px.com/manupgi)


star trail on the lake via 500px https://ift.tt/NGnCA3i

PictureCorrect.com: Desert Photography Tips and Gear Protection

Desert photography presents a unique set of challenges, from harsh sunlight to unpredictable weather conditions. However, the breathtaking landscapes and stunning light make it a worthwhile endeavor for any photographer. In this article, we will discuss essential tips for photographing in desert conditions, including how to protect your gear and which camera settings to use for optimal results.

Relevant note: only a little while left for the Complete Landscape Guide at 58% Off

desert photography

Photo captured by Ivana Cajina

Protecting Your Gear

The desert environment can be unforgiving to your photography equipment. Here are some tips to help protect your gear:

  • Use a camera bag with ample padding and compartments to safeguard your equipment from the elements and accidental drops.
  • Bring ziplock bags or rain sleeves to protect your camera and lenses from sand, dust, and moisture.
  • Carry a rocket blower or brush to remove dust from your camera and lenses.
  • Don’t forget to pack lens hoods to shield your lenses from direct sunlight, which can cause flare and reduce image quality.
  • Keep your gear in a shaded area when not in use to avoid overheating.

Camera Setup for Desert Photography

To capture the essence of the desert, consider the following camera settings:

ISO: Use the lowest possible ISO setting (e.g., 100 or 200) to minimize noise and maximize image quality. Deserts tend to have bright, intense sunlight, so a low ISO should be sufficient for most situations.

Aperture: Choose an appropriate aperture based on your desired depth of field. For landscape shots with a deep depth of field, consider using a smaller aperture (larger f-number, e.g., f/11 or f/16). For portraits or subjects where you want to isolate the focus, use a larger aperture (smaller f-number, e.g., f/2.8 or f/4).

Shutter Speed: Adjust your shutter speed to properly expose the image based on your ISO and aperture settings. In bright sunlight, you might need a fast shutter speed to avoid overexposure (e.g., 1/500 or 1/1000). Use a tripod if you need to use a slow shutter speed for creative effects or in lower light situations.

White Balance: Desert environments can have strong color casts due to the sand and sunlight. Adjust your white balance accordingly, either by using the “Daylight” or “Sunny” preset or by manually setting the color temperature (around 5200-5500K). You can also shoot in RAW and fine-tune the white balance during post-processing.

Graduated Neutral Density (GND) Filters: In high-contrast situations, such as a bright sky and dark foreground, consider using a GND filter to balance the exposure. This can help retain detail in both the sky and the landscape.

Polarizing Filters: A circular polarizing filter can help enhance the colors, reduce glare, and improve the overall contrast in your desert photos.

Bracketing: Consider using exposure bracketing to capture a range of exposures. This can be helpful for creating HDR images or ensuring you get the best possible exposure in challenging lighting conditions.

desert photo

Photo captured by Sergey Pesterev

Composition Tips

To create visually stunning desert photographs, keep these composition tips in mind:

  • Utilize leading lines, such as sand dunes, to guide the viewer’s eye through the image.
  • Look for interesting textures and patterns in the sand or rock formations.
  • Incorporate elements of scale, like a lone cactus or human figure, to emphasize the vastness of the landscape.
  • Shoot during the golden hour (shortly after sunrise or before sunset) for soft, warm light that adds depth and dimension to your images.

Dealing with Heat Haze

Heat haze, caused by rising hot air, can make distant objects appear blurry. To minimize its impact, avoid shooting during the hottest part of the day and use a telephoto lens with a polarizing filter to cut through the haze.

Stay Safe and Respect the Environment

Finally, remember to stay safe and respect the fragile desert ecosystem. Carry plenty of water, wear sun protection, and adhere to local guidelines for leaving no trace.

Conclusion

Desert photography can be challenging, but with the right approach, you can capture the beauty and wonder of these unique landscapes. By following these tips and protecting your gear, you’ll be well-prepared to document your desert adventure in stunning detail.

For Further Training:

If you are looking for more help with your landscape photography, you may want to check out this in-depth guide while it is currently 58% off. It contains 237 pages jam-packed with training, illustrations, and assignments for photographers seeking to take better landscapes.

landscape photography guide

New: The Complete Landscape Photography Guide

It covers everything you need to know to take consistently great landscape shots – lens and gear help, developing your own style, post-processing guides, composition tips, how to get unique images, and much more.

Deal ending soon: The Complete Landscape Photo Guide at 58% Off

The post Desert Photography Tips and Gear Protection first appeared on PictureCorrect.


from PictureCorrect https://ift.tt/cP7abRC
via IFTTT

lauantai 25. lokakuuta 2025

PictureCorrect.com: Rembrandt Lighting: Creating Mood & Depth in Portraits

Rembrandt lighting, named after the famous Dutch painter Rembrandt Harmenszoon van Rijn, is a popular lighting technique used in photography and cinematography to create a dramatic effect that draws attention to the subject’s features. This technique is characterized by an illuminated triangle under the eye of the subject, on the less illuminated side of the face. This lighting style emphasizes depth and dimension, making it a favorite among portrait photographers.

Related reminder: only a little while left for the Lighting Cheat Sheets 🍂 Autumn Sale

rembrandt lighting portrait

Why Use Rembrandt Lighting?

The allure of Rembrandt lighting lies in its ability to add a sense of volume and drama to a portrait. It enhances the facial features and brings a sculptural quality to the photograph. This technique is particularly useful for creating moody and evocative images that convey emotion and character, making it ideal for artistic portraits, actor headshots, and even moody fashion photography.

Setting Up Rembrandt Lighting

To achieve Rembrandt lighting, you’ll need to follow these steps:

  1. Light Source: Begin with a single light source, such as a strobe or continuous light. The key is to use a light modifier like a softbox or an umbrella to soften the light, reducing harsh shadows.
  2. Positioning the Light: Place the light at a 45-degree angle from the subject, slightly above the head level, so that the light points down towards the face. This angle is crucial as it determines the shape and presence of the characteristic triangle of light.
  3. Adjust the Subject: Have the subject turn their face away from the light until the shadow of the nose and cheek meets to form a small triangle of light on the cheek opposite the light source. This triangle should not be larger than the eye and no longer than the nose.
  4. Experiment with Modifiers: Utilizing different modifiers can alter the softness and spread of the light. Experiment with reflectors to fill in shadows mildly, which can be particularly useful in softening the contrast for female portraits or commercial shots.

rembrandt lighting diagram

Visual Examples and Their Analysis

When examining photographs that utilize Rembrandt lighting, you’ll notice the play of light and shadow creates a compelling visual narrative. For instance, a portrait with Rembrandt lighting can highlight the rugged features of a male subject or the gentle curves of a female subject’s face, adding layers of depth and emotion to the image.

Common Mistakes to Avoid

  • Overexposing the lit side of the face, which can lead to loss of detail.
  • Underexposing the shadow side, which might bury essential facial features in darkness.
  • Misplacing the light, which fails to form the triangular highlight and loses the effect.

Applications in Different Photography Genres

While traditionally used in portraits, Rembrandt lighting can also be adapted for use in various other genres like fashion photography, where it can add a dramatic flair, or in product photography, where it can enhance texture and contrast.

face with rembrandt lighting

Rembrandt lighting is more than just a technical skill; it’s a creative tool that allows photographers to explore the interplay between light and shadow. By mastering this technique, photographers can elevate their portraits, capturing not just images, but stories and emotions. Whether you’re a budding photographer or a seasoned professional, incorporating Rembrandt lighting into your photographic repertoire can significantly impact your visual storytelling.

For Further Training:

Lighting is arguably the most important aspect of photography; but do you know how to use it? These new Photography Lighting Cheat Sheets are designed to help. With critical information on ALL the types of natural light and artificial light you can use. They are currently 80% off today for an Autumn sale 🍂

lighting cheat sheets

New! Cheat Sheets for Photography Lighting (see how they work)

Whether you’re a seasoned professional or just starting out, photography cheat sheets can be a valuable resource for improving your skills and taking your photography to the next level. By having all the key information you need in one place, you can focus on what’s important – capturing amazing photos.

Autumn sale ending soon: The Photography Lighting Cheat Sheets at 80% Off

The post Rembrandt Lighting: Creating Mood & Depth in Portraits first appeared on PictureCorrect.


from PictureCorrect https://ift.tt/U4AqpbN
via IFTTT

perjantai 24. lokakuuta 2025

PictureCorrect.com: Why Photographers Love the 35mm Focal Length

When it comes to selecting a focal length, photographers have a multitude of options, each offering distinct perspectives and creative possibilities. Among these choices, the 35mm focal length stands out as one of the most preferred and widely used by photographers around the world. In this blog post, we’ll delve into why the 35mm lens is so popular and how you can utilize it to enhance your photography.

Relevant reminder: 🍂 Autumn sale ending soon for the Camera Cheat Sheets

35mm photo

35mm Photo captured by Yves Cedric Schulze

The 35mm Focal Length: An Overview

The 35mm lens is often regarded as a wide-angle lens on full-frame cameras, offering a broad yet natural field of view. On crop sensor cameras, it approximates a 50mm standard lens. This versatility makes it a favorite for a variety of photography genres, from street photography to landscapes.

Why Do Photographers Prefer 35mm?

  1. Versatility: The 35mm lens offers a wide field of view that is still close to what the human eye perceives, making it ideal for a broad range of subjects, from landscapes to environmental portraits. Its slight wide-angle perspective provides a more immersive experience.
  2. Storytelling Ability: The 35mm lens is known for its ability to capture context and environment along with the subject. This makes it perfect for storytelling, allowing photographers to include background elements that add depth and narrative to the image.
  3. Minimal Distortion: Compared to wider lenses, the 35mm offers minimal distortion, making it suitable for portraits and architectural photography where straight lines are essential.
  4. Portability: Many 35mm lenses are compact and lightweight, making them easy to carry around for extended periods. This portability is especially beneficial for travel and street photographers.
  5. Low Light Performance: Like the 50mm, many 35mm lenses come with wide apertures (f/1.8, f/1.4, or even f/1.2), allowing for excellent performance in low light conditions and beautiful background blur (bokeh).
  6. Creative Flexibility: The 35mm focal length encourages photographers to think creatively. Its fixed focal length challenges photographers to move around and find the best angles and compositions, fostering a more engaged and dynamic approach to photography.

How to Make the Most of Your 35mm Lens

  • Street Photography: The 35mm lens excels in street photography due to its wide yet natural field of view. It allows you to capture candid moments and scenes with context, providing a sense of place and atmosphere.
  • Environmental Portraits: Use the 35mm lens to capture portraits that include the subject’s surroundings. This adds depth and context to your images, telling a more complete story about the person and their environment.
  • Landscapes and Architecture: While not as wide as some landscape lenses, the 35mm can still capture expansive scenes with great detail. Its minimal distortion makes it suitable for architectural photography, preserving the integrity of lines and structures.
  • Documentary Photography: The 35mm lens is a favorite among documentary photographers for its ability to capture real-life scenes with authenticity. Its versatility allows you to move seamlessly between different subjects and scenes.
  • Travel Photography: The compact size and wide field of view make the 35mm lens perfect for travel. It’s capable of capturing everything from grand vistas to intimate street scenes, all while being easy to carry.

Summary:

The 35mm focal length has earned its place as a go-to lens for photographers due to its versatility, storytelling ability, and minimal distortion. Whether you’re capturing the hustle and bustle of city streets, the beauty of natural landscapes, or the intimate moments of everyday life, a 35mm lens can help you tell your story with clarity and impact. If you haven’t yet experienced the benefits of this focal length, consider adding a 35mm lens to your kit. Its unique perspective might just become your new favorite way to see the world.

For Help with Tricky Lighting & Camera Settings:

Have you ever wanted to photograph an amazing moment but missed the shot because you didn’t know the right camera settings to use? That’s where these fundamental Camera Cheat Sheets come in. They are currently 75% off for an Autumn sale if you want to check them out.

fundamental photography sheets

New: Fundamental Photography Cheat Sheets

Whether you’re a seasoned professional or just starting out, photography cheat sheets can be a valuable resource for improving your skills and taking your photography to the next level. The perfect companion for any photographer. Print one out whenever you need it.

Autumn sale ending soon: The Camera Cheat Sheets at 75% Off

The post Why Photographers Love the 35mm Focal Length first appeared on PictureCorrect.


from PictureCorrect https://ift.tt/PsvNBG6
via IFTTT

torstai 23. lokakuuta 2025

PictureCorrect.com: 6 Tips to Help You Start a Successful Newborn Photography Business

So, you’ve decided to become a full-time photographer specializing in newborn and baby photography. Perhaps, you had a full-time job doing something else and are now committed to transforming your part-time passion into a full-time vocation. Or perhaps, you’re a photography graduate fresh out of art school. Regardless of how you’ve come to this decision, you want to succeed in this highly competitive niche working for yourself.

Related note: only a little while left for the Earn Money with Photography 🍂 Autumn Sale

mother and baby photo

photo by Phalinn Ooi

While you may have the talent, skills, and expertise needed to succeed in this field, starting a successful newborn and baby photography business can be as challenging as it is rewarding. Check out the following tips to help you begin your journey.

1. Be ready to run your business from the ground up.

Yes, you’re a passionate and creative artist, but to succeed as a freelancer in a competitive niche, you also have to be a smart entrepreneur. Starting your own business will require you to wear many hats and master additional skills. You have to be a customer service representative, marketing director, bookkeeper, social media expert, PR specialist, website builder, administrative assistant, financial manager, and a CEO.

baby detail photography

photo by Harsha K R

As you grow your business, you’ll eventually have the means to delegate responsibilities that are outside your main job description to trusted professionals. But as a start-up, it pays to learn how to run your business from the ground up.

2. Set clear business goals and create a buyer persona.

No business will succeed without clearly defined business goals. You’ll have to work out how many hours a week you’d like to work, how much money you’ll need to set aside for various expenses, and how much money you’ll need to make annually to ensure that your business stays profitable. Consider purchasing home business software to help you set your schedule, budget, and revenue goals.

infant photo shoot

photo by Katie Tegtmeyer

More importantly, you’ll need to define your target market. During the first few months, you may have to be less picky when choosing clients, as you are still establishing your business and growing your reputation. However, as time goes by, you will need to focus on attracting the right clients if you want to keep your business profitable.

You will need to create a buyer persona, which is a fictional and generalized representation of your ideal customer. By creating a buyer persona, you can attract the right clients to your business more easily and weed out clients who cannot afford you, who do not share your values or aesthetic goals, and who might be too far away from your location.

3. Create pricing packages, draft contract templates, and get the right insurance.

You need to know how much to charge your clients for your services. Moreover, your rates shouldn’t be significantly higher or lower than what other photographers in your area are charging. To set fair rates, find out how much other newborn and baby photographers in your area are charging.

You’ll also need to draft contract templates to ensure the smooth operation of your business and outline all expectations ahead of time.

Your contract templates should include the following:

  • Final sales agreement. This contract is signed on the shooting day and informs the client of a final sale. This contract also waives any cooling off laws that allow a client to change his or her mind.
  • Album design agreement. Producing an album for a client can cost you hundreds of dollars. Signing this agreement means that the client has accepted the proof prior to ordering the album.
  • Product delivery agreement. By signing this agreement, the client agrees that he has received all the commissioned products from you.
  • Portrait contract and model release. This contract governs the relationship between you and your clients. It also covers provisions like completion schedules and ordering deadlines.

Just as important as the actual contract is the need to protect yourself and your clients with the right insurance coverage. You’ll need to budget roughly $500 to $2,000 annually for property liability and other types of business insurance.

4. Purchase the right photography gear, props, editing software, and other items.

As a newborn and baby photographer, you’ll generally be doing two types of photography: posed/studio photography and lifestyle photography. For posed/studio sessions, you could convert part of your home into a professional studio. Alternatively, you can rent a studio space for photo shoots.

props for baby photography

photo by Elizabeth Cooper

Aside from securing the proper studio space for your business, you’ll also need to purchase the right photography gear, props, editing software, and additional items to make your job easier. All these are available on online photography stores like Adorama, so it will no longer be a problem. But it’s important to purchase only what you need. Photography gear can cost hundreds, or even thousands, of dollars, and you wouldn’t want to make the mistake of investing in expensive gear you’ll never use.

Props are also expensive, which is why it’s important that you invest in the right ones. It’s best to keep them basic at the start and slowly build up your prop collection as you gain more experience (and revenue).

Props you should consider investing in include:

  • Beanbags
  • Throws
  • Hats
  • Headbands
  • Blankets
  • Baby-safe baubles and accessories

Never use breakable, flammable, or toxic props that might endanger the newborn in any way.

As for editing software, Adobe Photoshop and Adobe Photoshop Lightroom are industry standards, though other commercial software is available for you to consider.

You’ll also need to invest in the following additional accessories:

  • Backdrop stands and clamps
  • A space heater (to keep the temperature in the studio adequate for the newborn)
  • Audio equipment that emits white noise (to avoid startling the newborn with your camera’s shutter sound)

5. Build your brand and portfolio.

To market your business successfully, you’ll need to create a strong visual brand identity. The visual elements found in your logo, website, and stationery need to be crafted specifically to appeal to expecting mothers, parents, as well as young children.

newborn photo shoot

photo by Gabriel Pinto

Natural/rustic imagery, soft pastel colors, and other maternal visual elements are appropriate for your branding. To ensure polished results, consult a graphic designer to help you craft your visual brand identity.

You’ll need to build an equally strong portfolio to impress prospective clients. Build and edit your portfolio carefully over time, as it is one of your business’s main marketing tools. As for showcasing your portfolio, consider uploading it to your website, posting it on your social media profiles (especially Facebook and Pinterest), and printing physical albums or brochures to show to clients on-site.

6. Focus on word-of-mouth marketing and digital marketing.

Word-of-mouth marketing is one of the most effective means of gaining new clients and growing your business. By producing excellent work, delivering products on time, and treating newborns and their parents with patience and respect, you’ll increase your chances of getting positive reviews from your clients. They’ll willingly refer you to other parents, who will then contact you for inquiries and bookings.

baby and parents

photo by Kristin Banks

As valuable as word-of-mouth marketing is digital marketing. Aside from maintaining an up-to-date business website, you also need to have up-to-date social media profiles on key platforms like Facebook and Pinterest. By maintaining a dynamic online presence, you’ll grow your network and, as a result, garner more new clients for your business.

Lastly, you should consider hiring a reputable digital marketing agency to help you grow your business. Digital marketing agencies use a variety of tactics—such as search engine optimization, paid advertising, blogging, and social media marketing—to promote your business online. A carefully planned digital marketing strategy can source new leads and prospects for your business. These leads and prospects can then be nurtured and converted into clients.

baby with dad

photo by Taro Taylor

There’s an old adage that says, “Never work with children or animals.” Fortunately, for millions of parents out there, photographers who specialize in newborn portraiture are happy to prove that saying wrong. Babies may not always be the easiest subjects to capture, but the challenges of photographing newborns are what make it so rewarding—and lucrative. Whether you’re a professional going into a new niche or a hobbyist turning a part-time passion into a full-time vocation, you’ll have a booming baby photography business in no time at all by combining your technical skills and business savvy with a good understanding of babies (and their parents!).

For Further Training:

This in-depth eBook has helped thousands of photographers turn their passion into profit—and here it’s at its lowest price ever to start the Autumn season 🍂.

photography career

Packed with proven strategies in all types of photography and even printable contract templates you can use with clients right away, it’s your shortcut to making money with photography.

Deal ending soon: Earn Money with Photography Autumn Sale

The post 6 Tips to Help You Start a Successful Newborn Photography Business first appeared on PictureCorrect.


from PictureCorrect https://ift.tt/tpnOWUM
via IFTTT

keskiviikko 22. lokakuuta 2025

PictureCorrect.com: What is Noise in Photography?

When we talk about “noise” in the world of photography, we’re not referring to audible sound. Instead, this term signifies something entirely different. Noise in photography denotes the visual distortion seen in an image, often manifesting as random specks or grain. But what exactly causes it, and how can we minimize it? Let’s delve deep into understanding the phenomenon of noise in photography.

Related note: 🍂 Autumn sale going on now for the Fundamental Camera Cheat Sheets

noise in photography

Photo captured by Dollar Gill

1. Defining Noise in Photography

In simple terms, photographic noise can be likened to the ‘static’ or ‘snow’ you might remember seeing on old televisions when the signal was weak. It appears as tiny, irregular colored pixels or specks scattered throughout an image, giving it a coarse, grainy look. Noise can make your photos look less sharp and degrade the overall quality.

There are two types of noise that commonly occur in digital photography – luminance and chrominance noise. Luminance noise affects the brightness of pixels, producing a grainy effect akin to film grain, whereas chrominance noise results in random color pixels appearing in the image.

2. Causes of Noise

There are several reasons noise can occur in your digital images. The most common culprits are high ISO settings, long exposures, and inadequate lighting.

  • High ISO settings: ISO measures the sensitivity of your camera’s sensor to light. A higher ISO value amplifies the sensor’s response to light, helping to capture images in low-light conditions without using a flash or tripod. However, this amplification process also magnifies the inherent electronic noise in the sensor, resulting in a noisier image.
  • Long exposures: Long exposure photography involves keeping your camera’s shutter open for a prolonged period, which can result in noise. As the sensor of the camera continues to record light, it also heats up, and this increase in temperature can cause digital noise.
  • Inadequate lighting: Underexposing your photos, either intentionally or due to poor lighting conditions, can also contribute to noise. When you try to brighten such images in post-processing, the noise gets amplified along with the brightness.

3. Managing Noise in Your Photos

While you cannot completely avoid noise, there are techniques to manage it effectively.

  • Optimum ISO Settings: As a rule of thumb, it’s best to stick to the lowest possible ISO setting that allows you to adequately expose your image. Modern cameras perform very well at higher ISOs, but it’s still wise to stay as low as possible to reduce the risk of noise.
  • Correct Exposure: It’s always better to get your exposure right in-camera. Underexposing your photo and trying to fix it in post-processing is a sure way to introduce noise.
  • Use Noise Reduction Software: Many software tools can help reduce noise in post-processing. Such as Topaz Photo AI or Lightroom and Photoshop.

4. Embracing the Noise

While noise is generally seen as undesirable, it’s not always a bad thing. When used creatively, it can add a sense of atmosphere, mood, or a retro aesthetic to your images. It’s all about your vision as an artist and how you want to express it.

Noise in photography is often seen as an unwelcome guest, but with the right understanding, you can control and sometimes even embrace it. Photography, at its core, is about capturing light, and noise is part of this process. So the next time you see those grainy specks in your images, remember – it’s just your camera’s unique way of recording the world around you.

For Help with Tricky Lighting & Camera Settings:

Have you ever wanted to photograph an amazing moment but missed the shot because you didn’t know the right camera settings to use? That’s where these fundamental Camera Cheat Sheets come in. They are currently 75% off for an Autumn sale if you want to check them out.

fundamental photography sheets

New: Fundamental Photography Cheat Sheets

Whether you’re a seasoned professional or just starting out, photography cheat sheets can be a valuable resource for improving your skills and taking your photography to the next level. The perfect companion for any photographer. Print one out whenever you need it.

Autumn sale ending soon: The Camera Cheat Sheets at 75% Off

The post What is Noise in Photography? first appeared on PictureCorrect.


from PictureCorrect https://ift.tt/RVTatMk
via IFTTT

Backyard sky by LuigiNegri (500px.com/LuigiNegri)


This pictures is made out of 100 pictures taken at 25 seconds exposure via 500px https://ift.tt/W7e6A1c

tiistai 21. lokakuuta 2025

PictureCorrect.com: Tips for Photographing Autumn Colors

As the air turns crisp and leaves begin to transform into fiery shades of red, orange, and gold, autumn offers some of the most breathtaking scenes a photographer can capture. Whether you’re shooting in the woods, at a local park, or along a scenic road, a few thoughtful techniques can help you make the most of the season’s palette.

Related note: only a little while left for the Photo Adventure Cheat Sheets 🍂 Autumn Sale

autumn leaf

Photo by Balbidur; ISO 50, f/2.4, 1/20-second exposure.

1. Plan for Peak Color — and Micro-Windows of Light

Professional landscape photographers know that timing is everything. Don’t rely on luck — research peak foliage forecasts for your region, and scout locations in advance. Because colors can shift dramatically in just a few days, scheduling multiple sessions over a 1–2 week window increases your chances of catching optimal conditions.

Equally critical is micro-timing with light. Autumn’s lower sun angle means golden hour lasts longer, and the color temperature is warmer — perfect for enhancing reds and oranges. Arrive early and work fast: the window where mist, frost, or backlight align with peak color can be as short as 10 minutes.

Pro Tip: Use apps like PhotoPills or The Photographer’s Ephemeris to map the sun’s exact path and position your compositions before the light peaks.

2. Master Polarization and Control Your Reflections

A polarizing filter isn’t just a “nice to have” in autumn — it’s essential. It allows you to dial in the level of reflectivity on leaves, water, or wet ground, cutting glare and revealing saturation that’s often invisible to the naked eye. But over-polarization can flatten skies or cause uneven tones at wide focal lengths.

Rotate your polarizer while looking through the viewfinder or EVF to fine-tune the effect. On overcast or wet days, this is especially powerful — saturated leaves + subdued highlights = painterly results.

Advanced Tip: Stack a polarizer with a soft ND grad filter to balance skies against dark, shadowy foregrounds. The effect can mimic the look of medium-format dynamic range in-camera.

3. Shape the Scene with Color Theory

Great autumn photography often hinges on color contrast and harmony. Think in terms of color theory:

  • Complementary Contrast: Fiery reds and oranges stand out against a deep blue sky — classic and bold.
  • Analogous Harmony: Golds, yellows, and soft greens create serene, timeless landscapes.
  • Accented Neutrals: A bright leaf against muted tones of fog or earth can produce minimalist, editorial-grade images.

Position these relationships deliberately within your frame. Professional photographers often scout a single tree, turn, or reflection and wait for the perfect light to complete the composition.

4. Use Depth and Layers to Build Dimension

Autumn is an inherently textural season — mist, backlit leaves, long shadows, and layered forests. To make your photos feel immersive:

  • Use a longer focal length to compress layers of color in distant hillsides.
  • Incorporate foreground elements like grasses, branches, or stones to create depth.
  • In foggy conditions, lean into atmospheric perspective — cooler, desaturated backgrounds recede while warm tones in the foreground pop.

For extra dimensionality, bracket exposures and blend manually in post to control highlight roll-off and midtone separation.

5. Leverage Weather for Drama

Some of the best autumn images aren’t taken under clear skies. Rain, fog, and overcast light can add a cinematic quality:

  • Fog: Creates mood, depth, and separation. Look for backlit fog early in the morning.
  • Rain: Intensifies saturation, especially on fallen leaves. Use your polarizer to control shine.
  • Wind: Motion blur with a slower shutter can create dynamic, painterly effects.

A small weather window can produce more compelling results than an entire week of “perfect” sunshine.

6. Expose for Color — Not Just for Light

Autumn hues are rich, but they can easily clip or muddy if exposure isn’t precise. Consider:

  • Expose to Protect Highlights: Especially with backlit foliage. Warm colors can blow out fast.
  • Use RGB Histogram: R channel clipping is common in fall reds and oranges. Monitor carefully.
  • Shoot RAW: Non-negotiable. It allows you to recover highlight detail and fine-tune color temperature later.

Pro Tip: Manually setting white balance to 5500K–6500K often retains richer, more natural reds than auto WB, which tends to neutralize them.

7. Break Out Specialty Lenses

Professionals often go beyond the standard zoom kit during autumn. Consider:

  • Tilt-shift lenses to control plane of focus and create painterly depth.
  • Macro lenses for intricate leaf textures, veins, and dewdrops.
  • Telephotos (200mm+) to isolate trees or compress hillsides into striking patterns.
  • Fast primes for shallow depth of field and creamy background blur in portrait sessions.

8. Refine with Intentional Post-Processing

Autumn post-production isn’t about cranking up saturation — it’s about refinement. Key adjustments to master:

  • HSL Panel: Selective color tweaks can make specific hues stand out without pushing the entire image.
  • Luminance Masking: Brighten leaves without lifting shadows globally.
  • Color Grading: Subtle warm midtones and cool shadows often give autumn photos a cinematic feel.
  • Local Contrast: A touch of clarity or Dehaze can make fog or mist more pronounced.

For commercial work, consider building a consistent color palette or LUT across a series for a cohesive seasonal collection.

9. Create Series, Not Just Single Shots

Pros don’t just hunt for “the shot” — they build visual stories. Think in terms of sequences:

  • Wide establishing shot of a valley at peak color
  • Medium framing of a single tree or trail
  • Close-up or macro details of leaves and textures
  • Portrait or human element for scale

This approach is invaluable for editorial submissions, galleries, or cohesive client sets.

10. Respect the Ephemeral Nature of the Season

Autumn color peaks are brief. Returning to the same location at different times of day or over consecutive weeks can yield dramatically different results. By combining planning, technical control, and creative vision, you can transform this short season into a portfolio-defining opportunity.

Bottom line: Autumn rewards photographers who pay attention to the subtleties of light, color, and timing. It’s a season where artistry and technical skill intersect. Don’t just capture the colors — craft images that feel like fall.

📸 Bonus tip: Keep a color journal — noting temperature, light direction, and foliage stage — to anticipate future peak conditions at your favorite locations.

For Further Training:

For help remembering the camera settings for difficult situations like this, a set of Photography Adventure Cheat Sheets are designed to help. They are currently 80% off for an Autumn Sale 🍂 which ends soon if you want to check them out.

photography adventure

New! Cheat Sheets for Your Photography Adventures (see how they work)

The perfect companion for any photographer. Print one out whenever you need it. Whether you’re going on vacation or seeking out a specific photography adventure, these cheat sheets can provide you with the knowledge and inspiration you need to create your best work yet.

Deal ending soon: Photo Adventure Cheat Sheets 🍂 Autumn Sale

The post Tips for Photographing Autumn Colors first appeared on PictureCorrect.


from PictureCorrect https://ift.tt/uHQ83hg
via IFTTT