keskiviikko 31. tammikuuta 2024

PictureCorrect.com: How to Set Up the Ultimate Travel Photography Backpack

Embarking on a photography adventure? Whether you’re scaling the misty mountains of Scotland or navigating the bustling streets of Tokyo, having a well-prepared travel photography backpack is essential. In this post, we’ll guide you through setting up your ultimate travel photography kit, ensuring you’re equipped and ready to capture those once-in-a-lifetime shots.

travel photo backpack

Photo captured by Sead Dedic

1. Choosing the Right Backpack:

The foundation of your travel photography gear is the backpack. Look for something durable, weather-resistant, and comfortable to carry. Size matters too; it should be spacious enough to fit your gear but compact enough to meet airline carry-on requirements. Consider backpacks with customizable compartments to securely fit your camera equipment.

2. Camera and Lenses:

Your camera is your most important tool. Whether you prefer a DSLR, mirrorless, or a compact camera, ensure it’s up to the task. Pack lenses that cover a range of focal lengths; a wide-angle lens for landscapes, a standard zoom for general purposes, and maybe even a telephoto lens for distant subjects. Don’t forget lens cleaning kits to keep your shots spotless.

3. Tripod:

A lightweight, compact tripod is a game-changer for travel photography. It’s essential for long exposure shots, night photography, and self-portraits. Look for one that’s sturdy yet folds down small enough to easily fit in your backpack.

4. Extra Batteries and Memory Cards:

You don’t want to miss a shot because you ran out of battery or memory. Pack extra batteries and memory cards, and consider a portable charger for emergencies.

5. Filters:

Filters can be useful in certain situations. A polarizing filter is great for reducing reflections and enhancing colors, while neutral density filters allow for longer exposure times in bright light.

6. Laptop or Tablet:

For longer trips, consider bringing a laptop or tablet for editing and backing up photos. Ensure it’s lightweight and has a good battery life. Don’t forget the external hard drive for extra storage.

7. Personal Comfort and Safety:

Pack for personal comfort and safety. This includes weather-appropriate clothing, a water bottle, sunscreen, and snacks. If you’re venturing into remote areas, a first-aid kit and a multi-tool can be lifesavers.

8. Miscellaneous Essentials:

Don’t forget the small stuff – lens cloths, a notebook and pen for jotting down details, and plastic bags to protect your gear in unexpected rain.

9. Customizing Your Pack:

Customize your pack based on your destination and the type of photography you plan to do. For wildlife photography, more telephoto lenses might be necessary. For urban landscapes, perhaps a few fast prime lenses.

Packing the ultimate travel photography backpack is about balancing the need for equipment with the need for mobility. Every item in your backpack should serve a purpose. With careful planning and the right gear, you’ll be well-equipped to capture stunning images that tell the story of your travels. Happy shooting!

Remember: less is often more; don’t overpack.

Currently limited stock: Peak Design Everyday Camera Backpack

- - - - - - - - - - - - - - - - - - - - - - - - - - - - - - - - - - - - - - - - - - - - - - - - - - - - - - - - - - - - - - - - - - - - - - - - - -

This post How to Set Up the Ultimate Travel Photography Backpack appeared on PictureCorrect.


from PictureCorrect https://ift.tt/YQUM79E
via IFTTT

tiistai 30. tammikuuta 2024

PictureCorrect.com: The Importance of a Focal Point

A focal point is the part of an image that draws the eye of a viewer to the most important part of the image or the area that you want to highlight. How you do this will make or break the final image. If you don’t know how to create this point then you will not achieve much in your photography.

point of interest in photographs

photo by Dominic Alves

The professionals have all worked this one out and if you are attempting to create similar images then learn this point well. It frustrates the eye of a viewer if there is no focal point, as the eye is not drawn to any one particular part of the photo. The focal point only occupies a small part of the scene but will make or break the whole image. The simplest form of this is an isolated object seen from a distance on a plain background.

So how is this achieved successfully? Let’s take a look at a few pointers.

1. Placing the Focal Point

Fundamental to photography this rule needs to be learnt well and executed to perfection. If you know where to place your focal point then you will shoot great images every time. A focal point needs to be off centred and never in the middle of an image. The rule of thirds places it at a point that is very pleasing to the eye as discovered by the ancient Greeks. This golden rule will bring you success every time. Imagine a noughts and crosses or tic-tac-toe grid. Two lines across the image and two lines down the image—vertically and horizontally placed. Equally spaced, they cut the image up into thirds. Where these lines intersect are your focal points. The horizontal lines are where you place your horizons. The human eye loves to view subjects placed at these intersections. Take a magazine or travel book and take a look at how many times this rule is used effectively and see how your eye is drawn to them.

2. Selective Focus

This is an incredibly effective way to focus attention on your subject of focal point. You need to know how aperture and depth of field works in order to use it properly. But, basically it’s very simple. Your settings (e.g. f/2.8, f/4, f/5.6 and so on) change the size of your aperture all the way up to f/32. You only need to be concerned with the lower apertures for this effect. If your lens goes to f/1.2, brilliant, but most lenses won’t take you below f/4 or f/2.8, as they get more expensive the wider the aperture. Depth of field is the area of focus in front of and behind your subject. With the aperture wide open at f/2.8 you will have very little in focus which makes it so effective with selective focusing. Everything not on the same focal plane as the subject will be out of focus and thereby excluded from the viewer’s attention. The longer your lens, the less depth of field you will have and the more you will be able to selectively focus.

It’s a great way of drawing attention when used in conjunction with the rule of thirds.

3. Exposure

By underexposing parts of the image (i.e. making them darker), the areas that are light will stand out. If you are able to able to use this effectively the light parts will stand out as focal points and whatever you place here will become the point of focus in the photo. This really works well if you have a subject that is lighter than the underexposed, darker areas. Key to the process is knowing what the final image will look like in mind’s eye.

4. Light Source

This really pushes your photographic eye to the limits and if you see the opportunity and go for it, will result in a stunning photo. How this works is that when you see a shaft of light or a ray of sunlight entering a window or coming through the clouds, use it to place your subject. A patch of late afternoon sun in dimming light will create an area that is much lighter than the surroundings.

exposure focal

Photo captured by Anton Porsche.

When you shoot an image and take the metering off this area, the surrounding environment will appear darker. The image now has a focal point that draws the eye in to the image. This will also work at night where a solitary window is lit and the surrounding area is dark. Experiment with this technique and you will soon be creating dramatically lit photos.

5. Eyes

By placing a person’s eyes on a two thirds intersection a viewers eyes are immediately drawn to that area. When the subject is looking down on something else like a child or an object your eye will be naturally drawn to the point where the subjects eyes are focused. Whenever you shoot a person eyes they will automatically become the focal point so if they are the focal point then you have a problem and they will compete for attention.

eyes and light

Photo captured by Dmitry Ratushny; ISO 100, 1/80s.

6. Two Focal Points

Sometimes you will have two focal points and there will be competition, but, you can offset this by using size. One of the focal points must be considerably larger which will draw the eye but immediately your focus will move to the smaller focal point. If they are the same size the viewer’s eyes will dart between them. So be very careful when using a double focal point.

A focal point is essential to any great image and you need to be able to create this in every image. An image lacking this will appear flat and without impact. As you learn digital photography it will become easier and easier to place it in the right position. Happy shooting!

About the Author:
Wayne Turner has been teaching photography for 25 years and has written three books on photography. He has produced 21 Steps to Perfect Photos; a program of learner-based training using outcomes based education.

For Further Training, Deal Ending Soon:

This updated & expanded in-depth guide rolls years and years of practical knowledge, condensed into 239 pages packed with training, illustrations, and assignments. Advanced Composition goes far beyond knowing what composition is… (or, even knowing what the tools of composition are). Develop the SKILLS of anticipation, pre-visualization, and timing that are core to capturing great photography. It is currently 77% off until the end of the month, January 31 if you want to check it out.

advanced composition

Updated: The Advanced Composition Guide at 79% Off (Learn More)

Broken into 84 key lessons, 38 assignments, & 117 self-check questions – it delves DEEP into the artistic and technical aspects of photographic composition. With this guide you will learn to SEE light, shadow, lines, curves, space, repetition, and focal points.

Final day: The Advanced Composition Guide at 77% Off

- - - - - - - - - - - - - - - - - - - - - - - - - - - - - - - - - - - - - - - - - - - - - - - - - - - - - - - - - - - - - - - - - - - - - - - - - -

This post The Importance of a Focal Point appeared on PictureCorrect.


from PictureCorrect https://ift.tt/vburc3o
via IFTTT

maanantai 29. tammikuuta 2024

PictureCorrect.com: Using Symmetry or Asymmetry in Photography Composition

Photography, at its core, is an art form that thrives on composition – the way elements are arranged in a frame. Two powerful tools in a photographer’s arsenal are symmetry and asymmetry. Mastering the use of these can dramatically alter the feel, balance, and appeal of a photo. In this blog post, we’ll explore how to effectively use symmetry and asymmetry to enhance your photography.

symmetry composition

Photo captured by James Best

Understanding Symmetry in Photography

Symmetry is all about balance. When a photograph is symmetrical, it means that one side of the frame mirrors or closely resembles the other. This can be vertical symmetry (top to bottom), horizontal symmetry (left to right), or even radial symmetry (centered around a central point).

How to Use Symmetry:

  1. Look for Natural Symmetry: Nature is full of symmetrical patterns. Reflections in water, the wings of a butterfly, or the structure of a leaf are all great examples.
  2. Architectural Symmetry: Buildings and urban landscapes often have symmetrical designs. Capturing the essence of these structures can create visually striking images.
  3. Center Your Subject: In symmetrical photography, placing your subject in the center can enhance the impact of the symmetry. This works exceptionally well in portrait photography.
  4. Use Symmetry to Create Harmony: Symmetrical compositions often feel harmonious and pleasing to the eye, creating a sense of calm and balance.
  5. Reflections Are Your Friend: Water bodies, glass, and other reflective surfaces can be used to create natural symmetry.

Embracing Asymmetry in Photography

Asymmetry involves an imbalance in the composition, where one part of the frame does not mirror the other. It’s a powerful way to create dynamic, interesting, and thought-provoking images.

asymmetry

Photo captured by Daniel Harmatiy

How to Use Asymmetry:

  1. Rule of Thirds: Imagine your image is divided into nine equal segments by two vertical and two horizontal lines. Place your subject along these lines or at their intersections for a more engaging composition.
  2. Leading Lines: Use lines within your frame to lead the eye to your subject. These can be natural, like a row of trees, or man-made, like a winding road.
  3. Play with Angles: Sometimes, just changing your angle can introduce asymmetry in an image. Look for unique perspectives or viewpoints.
  4. Contrast and Color: Use contrasting elements or colors to create a focal point in your image. This can draw the viewer’s eye to a specific part of the photo.
  5. Fill the Frame Differently: Instead of centering your subject, place it off to the side and let the rest of the frame ‘breathe’. This can create a sense of movement or action.

Tips for Both Symmetry and Asymmetry

  • Understand Your Message: The choice between symmetry and asymmetry should depend on the story you want to tell. Symmetry often conveys peace, stability, and balance, while asymmetry can convey excitement, movement, or unease.
  • Experiment: Try both symmetrical and asymmetrical compositions in the same setting to see how they change the mood of the photo.
  • Post-Processing: Sometimes, symmetry can be enhanced or created during the editing process, while asymmetry can be emphasized by cropping or adjusting angles.
  • Keep Practicing: The more you practice, the better you will become at seeing and utilizing these compositional elements in your photography.

In conclusion, both symmetry and asymmetry have their unique appeals and can greatly impact the composition and storytelling of your photographs. By understanding and applying these principles, you can add depth and interest to your photography, regardless of your subject. So, grab your camera and start experimenting with these composition techniques today!

For Further Training, Deal Ending Soon:

This updated & expanded in-depth guide rolls years and years of practical knowledge, condensed into 239 pages packed with training, illustrations, and assignments. Advanced Composition goes far beyond knowing what composition is… (or, even knowing what the tools of composition are). Develop the SKILLS of anticipation, pre-visualization, and timing that are core to capturing great photography. It is currently 77% off until the end of the month, January 31 if you want to check it out.

advanced composition

Updated: The Advanced Composition Guide at 79% Off (Learn More)

Broken into 84 key lessons, 38 assignments, & 117 self-check questions – it delves DEEP into the artistic and technical aspects of photographic composition. With this guide you will learn to SEE light, shadow, lines, curves, space, repetition, and focal points.

Only 1 day left: The Advanced Composition Guide at 77% Off

- - - - - - - - - - - - - - - - - - - - - - - - - - - - - - - - - - - - - - - - - - - - - - - - - - - - - - - - - - - - - - - - - - - - - - - - - -

This post Using Symmetry or Asymmetry in Photography Composition appeared on PictureCorrect.


from PictureCorrect https://ift.tt/lD18oNZ
via IFTTT

sunnuntai 28. tammikuuta 2024

PictureCorrect.com: 5 Advanced Tips for Street Photography

So you know how to read the light and capture a sharp shot. You’re confident in your compositions. You’re not afraid to capture people candidly. You’ve found that this is something that you enjoy doing and you want to continue with it and further your skills.

selfie bowery street photography

What comes next? Here are some tips that I think are important to learn and pay attention to as you continue to practice and improve.

Think About How Your Photographs Are Going to Age

Take a look at great street photography from the past. Some of the best images might not have seemed so special back then. A simple shot of a store window back in the 1940s looks much more interesting to me than a shot of the Empire State Building. Everyone photographed the Empire State Building back then, but not many people captured shop windows.

Most of us would do anything to be transported back to a busy street corner in the past to capture images. Every single detail would be fascinating to us. Similarly, people thirty years in the future will feel the same way about every detail surrounding us.

Think about how things will change and try to capture them before they do.

emotion gesture street photography

Capture Emotion and Gesture

Once you get over your fear of capturing people candidly, it is easy to capture a shot of a relatively interesting person walking down the street or hanging out somewhere, but the result is often a boring image because nothing is happening. The next step is to capture emotion and gesture. Try to capture people when they have an expression on their face, a look in their eyes, or a gesture in their body.

It is very hard to be in the right position when this happens, but when you are able to make it work the results will be so much better. When you see that person walking down the street, try to watch their face and capture them when an emotion sneaks through. If you pay close enough attention, this happens frequently, but it is very tough to capture because these looks disappear in an instant.

When capturing a person’s body, wait for them to give an elegant gesture. You want them to be loose and in the moment to linger until you see it happen. Most of the time it will not happen, but you’re just waiting for the couple of times that it does.

matching jordan shoes street photography

Create Themes in Your Work

After you have shot for enough hours, days, months, and years you will start to notice ideas and themes in your work. These ideas will start to mimic who you are and how you see people and the world. Shoot in the same areas over and over. The more you photograph the more you will start to see your point of view shine through in your work.

Editing well is the key to noticing this. Make sure to have an organized archive that you can go back to. Star your best images and group them into ideas and themes. Sit back with your work and think about it. The more you do this, the more you will notice ideas within your work, and the more you will see when you are out shooting.

gentrification street photography

Photograph Where You Live and Work

I am very lucky to live in and to teach a lot of workshops around New York. It’s the mecca of cities for street photography because there is so much content. But some people only shoot street photography when they travel. Some people think that they can only do this type of work here or in another busy city.

That is so far from the truth. New York has been photographed to death. It is so hard to create a somewhat unique image here. Capture life where you are from. Even if there are not many people, there are still elements of culture that you can capture. Capture shots of life without people. Experiment and walk around your town, city, suburb, or rural area searching for these candid slices of life.

The advantage is that you know these areas well so you can show their true essence. Your images will have knowledge and meaning behind them that goes way beyond the tourist type of capture. The more intimate you are with the area the better.

street photography black and white

Be Consistent

The real key to improving your street photography is simply to do it day in and day out. Repetition and consistency is necessary for your ultimate development. You should try to create a way that will force you to photograph every few days, even if it is for only ten minutes or during a lunch break.

I know many of you probably have a larger SLR, and that is fine if that is the only camera that you have, but you might also want to consider investing in a smaller camera. This will make it enjoyable for you to carry a camera with you no matter where you are going. This will allow to photograph more often. If you don’t have the money to purchase one of these cameras, as they are not cheap, then a cellphone camera will also work pretty well for the times that you don’t want to carry your SLR around. The key is that you get out there consistently and capture images with whatever tool you have available.

About the Author:
James Maher is the author of Essentials of Street Photography, which covers everything about the genre even down to specific post processing techniques that can bring the best out of street scenes.

- - - - - - - - - - - - - - - - - - - - - - - - - - - - - - - - - - - - - - - - - - - - - - - - - - - - - - - - - - - - - - - - - - - - - - - - - -

This post 5 Advanced Tips for Street Photography appeared on PictureCorrect.


from PictureCorrect https://ift.tt/PeuwFdE
via IFTTT

lauantai 27. tammikuuta 2024

PictureCorrect.com: Photo Composition: How to Tell a More Compelling Story

They say that a picture is worth a thousand words. That means that your photographs should be a great way for you to communicate. The question is, do your photographs communicate the right thousand words to tell your story?

best composition story

Photo by E_Bass; ISO 400, f/4.5, 1/45-second exposure.

Have you ever had the experience of photographing in a wonderful location, feeling eager to rush home and look at your pictures, only to be disappointed in the results? It’s quite a challenge to convert a three-dimensional, full sensory experience into a two-dimensional photograph.

I would like to share a few tips on composition that I think can boost your success rate in capturing your experience while photographing. Instead of just raising your camera for a quick snapshot, take the time to make a careful composition that will guide your viewer to understand what you think is important in the scene, and even how you feel about it.

Tip #1: Choose colors and tones that reinforce your story

Light is the fundamental building block of any image. Light produces two kinds of contrast: color contrast and tonal contrast. Color is the hue that you see, like red, or green, or purple. Tone is another word for brightness, or how light or dark something is. Our brains are good at forming associations, and we associate colors and tones with particular feelings. These same associations appear in our spoken language. You’ve heard the expressions, “He was in a dark mood,” and “She was feeling blue.”

Blue connotes melancholy or tranquility. It’s also a color associated with stability and reliability. (What color are the logos of IBM, Microsoft, and Ford?) Red is the color of passion. Photographing an orange beach umbrella gives a stronger impression of a hot day than a purple one. Using dark tones creates a sense of gloom and foreboding. Light-toned images make us feel light-hearted and uplifted. Consider carefully whether the tones and colors in your image strengthen the story you want to tell or contradict it.

composition by professionals

Photo by Susanne Nilsson; ISO 200, f/11.0, 1/1000-second exposure.

Tip #2: Use lines to guide your viewer’s eye

Color and tone also reveal lines in your image. Lines are the boundaries created where two contrasting colors or tones meet. A thin shape, like a road, the stem of a plant, or a tree branch, may also be perceived as a line in your photograph. The brain’s visual cortex is programmed at a fundamental level to follow lines.

This is a powerful tool for you as a photographer. You can guide your viewer’s eye toward what you consider important in the image by using something in the environment to point to it. Conversely, be careful not to inadvertently place lines so that they lead your viewer out of the image.

Tip #3: Orient the lines in your image so that they convey the right emotion

Just as with colors, our brains also make emotional associations with line orientation. Vertical lines in an image give an impression of power, strength and pride. Horizontal lines are stable and calm. Diagonal lines, on the other hand, are dynamic, and signify motion or change. Curved lines may convey a sense of melancholy or of hope, depending on the direction in which they curve.

composition tips

Photo by Mike Steinhoff; ISO 200, f/5.0, 1/125-second exposure.

Think carefully when composing your image so that you include colors, tones, and lines that reinforce the story you’re trying to tell. You’ll be much more likely to create a photograph that captures and communicates how you felt when you were observing the original scene.

About the Author:
Julie Waterhouse writes for Ultimate Photo Tips, which provides friendly education and encouragement for photo enthusiasts around the world, presented in a way that’s clear, organized, and easy to understand. Whether you’re looking for the answer to a specific question, or just want to explore and learn.

- - - - - - - - - - - - - - - - - - - - - - - - - - - - - - - - - - - - - - - - - - - - - - - - - - - - - - - - - - - - - - - - - - - - - - - - - -

This post Photo Composition: How to Tell a More Compelling Story appeared on PictureCorrect.


from PictureCorrect https://ift.tt/Ma1zxS4
via IFTTT

perjantai 26. tammikuuta 2024

PictureCorrect.com: Top 10 Composition Tips in Photography

Photography is all about composition. If you can’t compose an image, you can’t take photos. That’s the bottom line. This is where your photography journey starts as a beginner. Learning to place the elements in the photo is natural for some, but the rest of us we have to learn.

clear subject

photo by Giuseppe Milo

So what is composition? The dictionary definition is “the act of combining parts or elements to form a whole.” What you are looking to do in composing an image is to take the important parts of the scene and combine them to create a photo that’s pleasing to the eye. This is all well and good, but how can we do this most effectively? Here are my top ten tips.

1. Clearly identify your subject

This is the non-negotiable of photography. Unless your subject is the focal point of the image you don’t have a photo. When looking at the image, a person should be able to clearly identify the subject. So make sure you give enough attention to the subject of your focus.

2. Fill your frame

One of the most common mistakes made by budding photographers is failing to fill the frame with their subject or the major elements of the image. Get in closer and exclude the parts that you don’t want. Open space serves no purpose when the subject is too small or cannot be identified.

fill frame

Photo captured by Brent Ninaber; ISO 320, f/5.6, 1/50s.

3. Horizontal vs. vertical

Camera manufacturers are to blame for this dilemma because all cameras are designed to be held in a horizontal format. It shouldn’t be an ‘either or’ situation but rather a ‘both’. Try to shoot 50 percent of the time in both formats. There is no rule which is best, and the key is to experiment.

4. Dramatic angles

Shoot from high up or low down. Use your feet and move around the subject looking for an optimum angle. Don’t be afraid to get down on your stomach or climb a tree. Look for different and dramatic angles that will make your images more striking.

5. Don’t amputate

This means that you shouldn’t cut off part of your subject unless it is intentional to create an effect. Missing parts of people or objects irritate the viewer and create an incomplete image. It distracts the eye. So watch the edges of your image.

6. The rule of thirds

Imagine a tic tac toe grid or noughts and crosses lines running across your image dividing it into thirds horizontally and vertically. Where the lines cross or intersect are the best placement points for your subjects or objects. Never place the horizon of a landscape image in the center of your image. Always place it on a horizontal two thirds line. Subjects like lighthouses can be placed along one of the vertical two thirds lines.

7. Look for frames

Frames come in two types: natural or man-made. An example of a natural frame would be an opening in trees or a rock formation with a hole in it. Man-made frames are doorways, windows, or arches. All of these help contain the subject or scene in a form that is pleasing to the eye.

8. Simplify

Trying to include too much in an image often spoils it. An image that is cluttered causes the viewer’s eye to dart around the image trying to make sense of it. Less is more, as the old adage goes. Eliminate anything that’s distracting or unnecessary to the memory you are attempting to create.

eliminate distractions

photo by damon jah

9. Watch your background

Make sure that there is nothing in the background that detracts from your subject—things like chimneys growing out of heads and other subjects diverting the eye from the main subject. You want balance by not going in too close but including enough of the environment of the subject to contextualize it.

10. Lines, patterns and shapes

Look for interesting patterns, lines and shapes. Lines lead the eye to focal points. A river, road, fence or path in a classic ‘s’ shape draws the eye along the route into your image. Strong verticals give height to your image, and diagonals add depth. Turn your viewfinder, allowing straight lines to travel from corner to corner in the image.

Key to great composing is thought. Think before your press the shutter button and consider all of these points. Create a mental check list to help you add these elements and create that great composition.

About the Author:
Wayne Turner has been teaching photography for 25 years and has written three books on photography. He has produced 21 Steps to Perfect Photos; a program of learner-based training using outcomes based education.

For Further Training, Deal Ending Soon:

This updated & expanded in-depth guide rolls years and years of practical knowledge, condensed into 239 pages packed with training, illustrations, and assignments. Advanced Composition goes far beyond knowing what composition is… (or, even knowing what the tools of composition are). Develop the SKILLS of anticipation, pre-visualization, and timing that are core to capturing great photography. It is currently 77% off which ends soon if you want to check it out.

advanced composition

Updated: The Advanced Composition Guide at 79% Off (Learn More)

Broken into 84 key lessons, 38 assignments, & 117 self-check questions – it delves DEEP into the artistic and technical aspects of photographic composition. With this guide you will learn to SEE light, shadow, lines, curves, space, repetition, and focal points.

Deal found here: The Advanced Composition Guide at 77% Off

- - - - - - - - - - - - - - - - - - - - - - - - - - - - - - - - - - - - - - - - - - - - - - - - - - - - - - - - - - - - - - - - - - - - - - - - - -

This post Top 10 Composition Tips in Photography appeared on PictureCorrect.


from PictureCorrect https://ift.tt/BMdpEqs
via IFTTT

torstai 25. tammikuuta 2024

PictureCorrect.com: The Rule of Odds in Photography Composition

In the world of photography, where the quest for perfect composition is endless, there exists a simple yet profound guideline known as the “Rule of Odds”. This rule, often overlooked but incredibly impactful, can transform an ordinary snapshot into a captivating visual story. Today, let’s dive into what the Rule of Odds is and how it can enhance your photographic compositions.

rule of odds

Photo captured by Giorgio Trovato

1. What is the Rule of Odds?

The Rule of Odds suggests that images are more visually appealing when they contain an odd number of elements, typically three or five. This rule is rooted in the way our brains process information. Odd numbers create a sense of harmony and balance, yet they add a touch of intrigue and complexity.

2. Why Does It Work?

Odd numbers, especially the number three, have a unique charm. They provide a central focal point and encourage the viewer’s eyes to move around the frame, creating a more dynamic and engaging experience. This happens because with even numbers, our eyes tend to pair up elements, which can lead to a static and less interesting composition.

3. Implementing the Rule of Odds in Your Photography

Implementing this rule is about more than just counting objects. It’s about understanding balance and interest in a scene. Here are some tips:

  • Seek Natural Oddities: Nature is full of odd numbers. Three flowers, five stones in a riverbed, or a single tree standing apart from others can all be effective subjects.
  • Create Your Own Composition: Arrange still life or portrait subjects in odd numbers. This can be particularly effective in food photography or in creating compelling group portraits.
  • Use Negative Space: The space around your subject counts too. A single bird in the sky with two clouds can form a trio of elements.
  • Focus on the Central Element: In a group of three, the central element often becomes the focal point, drawing the viewer’s eye and giving your image a sense of depth and interest.
still life subjects

Photo captured by Anya Chernik

4. Breaking the Rule

As with any rule in photography, the Rule of Odds is not absolute. It’s a guideline to enhance your compositions, but sometimes breaking it can lead to equally stunning results. Trust your creative instincts!

To Summarize:

The Rule of Odds is a simple yet powerful tool in the photographer’s arsenal. It nudges us towards compositions that are balanced yet intriguing, harmonious yet dynamic. Whether you’re a seasoned photographer or just starting out, experimenting with this rule can lead to surprising and delightful results. Remember, the ultimate goal of photography is to capture and convey your unique perspective of the world, and rules like these are just stepping stones along that creative journey.

For Further Training, Deal Ending Soon:

This updated & expanded in-depth guide rolls years and years of practical knowledge, condensed into 239 pages packed with training, illustrations, and assignments. Advanced Composition goes far beyond knowing what composition is… (or, even knowing what the tools of composition are). Develop the SKILLS of anticipation, pre-visualization, and timing that are core to capturing great photography. It is currently 77% off which ends soon if you want to check it out.

advanced composition

Updated: The Advanced Composition Guide at 79% Off (Learn More)

Broken into 84 key lessons, 38 assignments, & 117 self-check questions – it delves DEEP into the artistic and technical aspects of photographic composition. With this guide you will learn to SEE light, shadow, lines, curves, space, repetition, and focal points.

Deal found here: The Advanced Composition Guide at 77% Off

- - - - - - - - - - - - - - - - - - - - - - - - - - - - - - - - - - - - - - - - - - - - - - - - - - - - - - - - - - - - - - - - - - - - - - - - - -

This post The Rule of Odds in Photography Composition appeared on PictureCorrect.


from PictureCorrect https://ift.tt/VDRGuSi
via IFTTT

keskiviikko 24. tammikuuta 2024

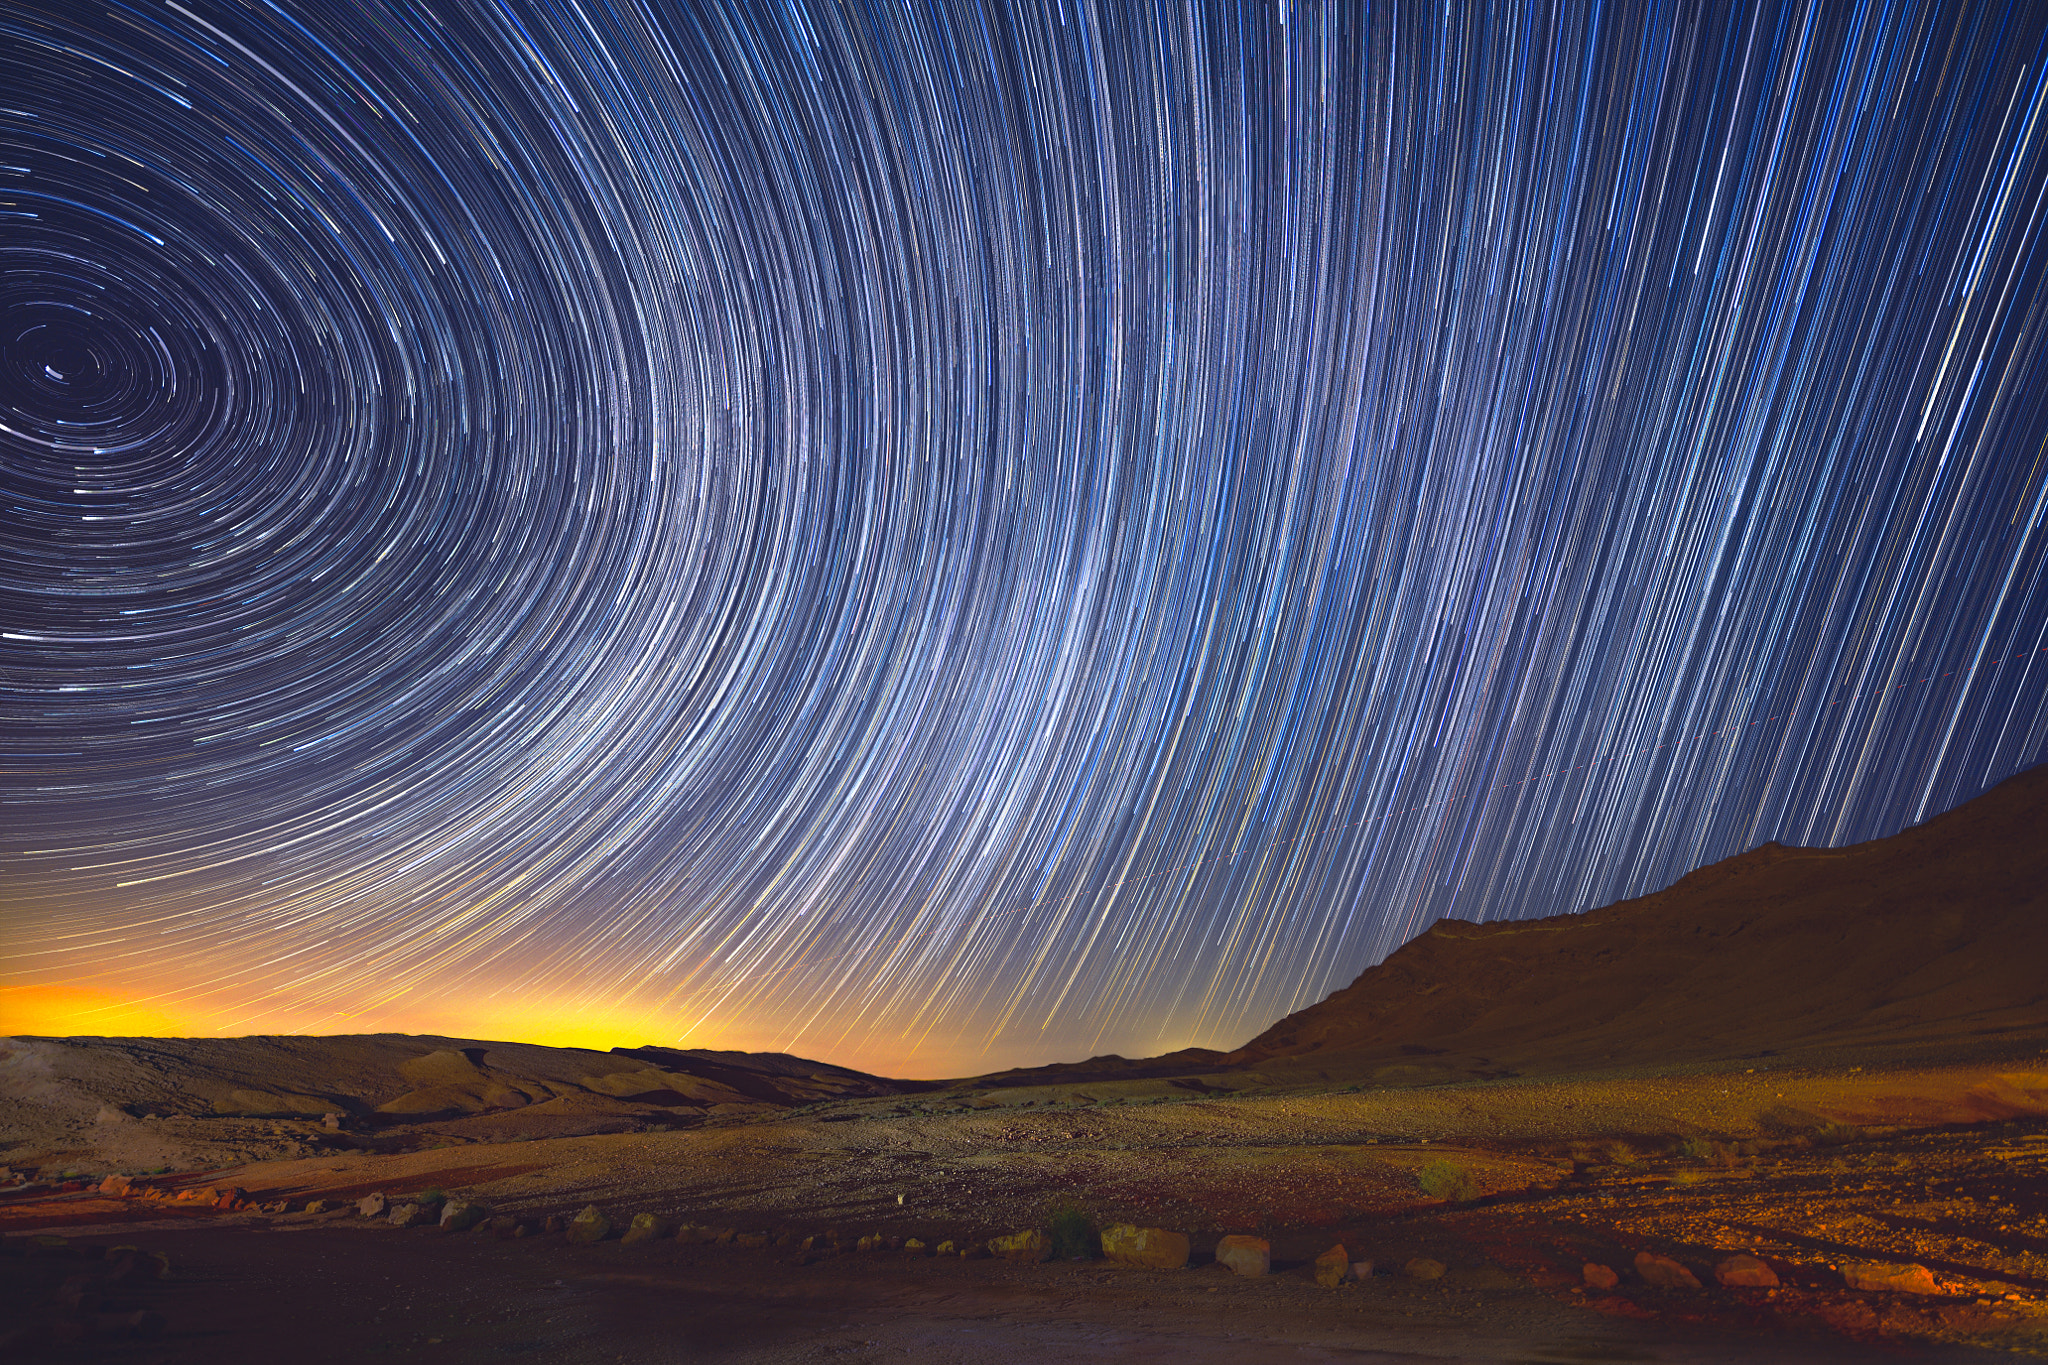
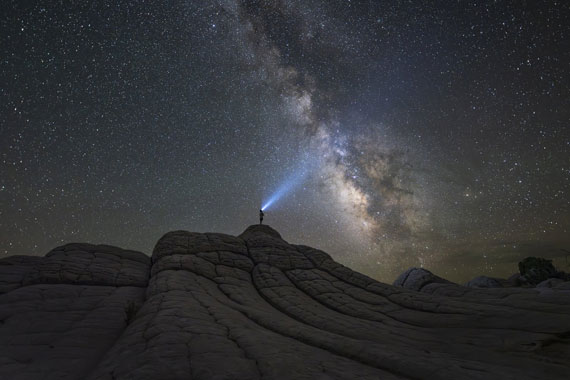
Star trails over Ramon Crater by noctraeon (500px.com/noctraeon)


Follow me on Instagram -- instagram.com/boris.eliav via 500px https://ift.tt/vl57VDA

PictureCorrect.com: The Advanced Photography Composition Guide

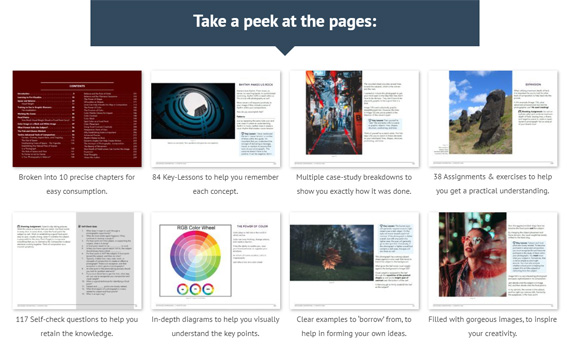
This updated & expanded in-depth guide rolls years and years of practical knowledge, condensed into 239 pages packed with training, illustrations, and assignments. Advanced Composition goes far beyond knowing what composition is… (or, even knowing what the tools of composition are). Develop the SKILLS of anticipation, pre-visualization, and timing that are core to capturing great photography. It is currently 77% off today if you want to check it out. Deal found here: The Advanced Composition Guide at 77% Off

advanced composition

Updated: The Advanced Composition Guide at 77% Off (Learn More)

Broken into 84 key lessons, 38 assignments, & 117 self-check questions – it delves DEEP into the artistic and technical aspects of photographic composition. With this guide you will learn to SEE light, shadow, lines, curves, space, repetition, and focal points.

Some of the Many Topics Covered:

  • 47+ ways you can move beyond the rule of thirds and why you can still follow the rule of thirds and have a poorly composed photograph…
  • 3 easy-to-implement techniques award winning photographers use (but never talk about) that allow you to better visualize each and every shot…
  • Essential skills in advanced photography previously only discussed during graduate-level art seminars…
  • How you can dissect, pick apart, and critique what makes some photographs work and what makes others fail (this guide is worth this knowledge alone, even if you only use it at art museums) …
  • The can’t miss technique behind perfect timing. If you’ve ever thought some photographers could predict the future to get a better shot—you’re right. Read this and learn how you can too!
  • 4 key steps you’ll use to train yourself to capture award winning photographs with incredible, absolutely predictable consistency…
  • How to understand light, shadow, lines, curves, space, repetition, focal point, movement and more using the same laws, rules, and techniques behind some of the world’s most famous photographs…
  • Why “Subject Weight” isn’t what you think it is (if you’ve already heard of it) and innovative ways to frame your subject to better convey messages to your viewers…
  • 6 steps to pre-visualization mastery. After you’ve learned these 6 steps, you’ll never need to use the screen on the back of your DSLR again…
  • True VS. False Subjects – Do you know the difference? Your audience doesn’t either so when you have a false subject in your photograph, you end up distracting them. Learn how to make your true subject shine through…
composition example

Advanced Composition Example (Learn more within)

  • The 1 single most misused photography element and why it’s distracting viewers from your subject and artistic message…
  • Conscious decision making during image creation – Over 2 dozen techniques you can use to arouse visual interest and tell stunning, beautiful, and absolutely breathtaking photographic stories…
  • 12+ copy and paste “see into the future” tricks that separate amateurs from professionals (HINT: This is why amateurs snap away and cross their fingers while pros only need to take one shot) …
  • Positive Space and Negative Space – You’re about to learn the difference, how they’re used, and how you can create both for more powerful photographs…
  • Should your images be symmetrical or asymmetrical? And do you make this decision in the lens or in the digital darkroom? Find out the answer to both of these questions on page 95…
  • Defining center, un-center, and balance—you’ll not only discover what they mean but you’ll learn why even uneducated viewers of your images notice you’re an amateur if you miss use them…
  • 1 of the most pervasive rules in the entire art world (and really mathematics too). Find out why you see this everywhere but have no clue what it is yet (it’s so pervasive, it’s actually the secret behind the rule of thirds) …
  • When looking outside the viewfinder is better than looking through it. Did you know you could take better pictures without ever looking at your subject(s)?
  • Color & Emotion – You’re about to learn how to evoke deep emotions in your audience through the use of color. Match the wrong color to the wrong subject and/or composition and you’ll send a mixed message…
  • Why contrast can be your best friend and worst enemy at the same time. Find out when high contrast is good, when it’s bad, when it distracts, and when it will win awards…
  • How to tell better stories with lens selection. Just like a narrator in a fiction novel, your lens choice changes the point of view of your photographic story…
  • Framing outside the frame, juxtaposition, adding movement, predicting movement, advanced depth of field, 43+ compositional strategies, “on the street” storytelling…
  • 38 must try assignments guaranteed to improve your photography (even seasoned pros can benefit from trying these exercises)…
  • And much more… this is just the tip of iceberg! (239 Pages Total)
pages from advanced composition

Pages from Advanced Composition (See More Within)

About the Author:
Kent DuFault has helped thousands of photographers like you, with his various best-selling books. He has an incredible teaching method. It’s simple to follow, easy to understand and never boring. Imagine sitting down with an old friend for a fireside chat. That’s what learning from Kent is like. The art of masking can seem intimidating. With this guide Kent provides you with easy step-by-step instructions.

How to Get a Discounted Copy Today (With Bonuses):

Advanced Composition is currently 77% off (total value $130, currently just $29). It also comes with a 365-day happiness guarantee so there’s no risk in trying it. Plus, you’ll get a bonus video and cheat sheet on how to analyze composition, a pre-visualization cheat sheet, and 7 composition tutorial videos by travel photographer Jason Row – all of which ends soon.

Deal found here: The Advanced Composition Guide at 77% Off

- - - - - - - - - - - - - - - - - - - - - - - - - - - - - - - - - - - - - - - - - - - - - - - - - - - - - - - - - - - - - - - - - - - - - - - - - -

This post The Advanced Photography Composition Guide appeared on PictureCorrect.


from PictureCorrect https://ift.tt/gxM6XGe
via IFTTT

tiistai 23. tammikuuta 2024

PictureCorrect.com: Just Released: Gigapixel Photo Editor Version 7

In photo editing news, Topaz Labs just announced a new update to Gigapixel AI (version 7). Designed to upscale your photos by up to 600%, rebuilt from the ground up to be better and faster. See how it works: Gigapixel Version 7

gigapixel

What’s New in Gigapixel AI v7:

  • Run locally: Upscale and enhance quickly right on your desktop. Use easy batch processing to optimize your workflows.
  • Premium AI Models: More than five years of advanced AI training has made Gigapixel 7 best-in-class.
  • Lighting Speed: Gigapixel 7 is faster than ever and optimized for your machine.

gigapixel photo

Print any image, bigger and better.

Generate more resolution in your images – allowing you to digitally crop and upscale without loss of pixels.

Perfect for large-format prints where every pixel counts.

See how it works: Gigapixel A.I. Version 7

- - - - - - - - - - - - - - - - - - - - - - - - - - - - - - - - - - - - - - - - - - - - - - - - - - - - - - - - - - - - - - - - - - - - - - - - - -

This post Just Released: Gigapixel Photo Editor Version 7 appeared on PictureCorrect.


from PictureCorrect https://ift.tt/8n9AURz
via IFTTT

maanantai 22. tammikuuta 2024

PictureCorrect.com: Focusing on the Fundamentals: Rookie Mistakes in Photography

Final reminder: only hours left for Digital Camera Mastery at 80% Off

Embarking on the journey of photography is both exhilarating and daunting. As beginners, we are often driven by passion but can be hindered by common pitfalls. Understanding these early mistakes can pave the way for a smoother, more fulfilling photographic adventure. Here are some of the most common missteps that budding photographers make.

photography mistake

Photo captured by Daniele D’Andreti

1. Overlooking Composition Basics

One of the first and most significant mistakes is neglecting the rules of composition. The Rule of Thirds, leading lines, framing, and the importance of negative space are not just artistic whims; they are the backbone of captivating images. Beginners often focus solely on their subject, forgetting how its placement and the surrounding elements can transform a good photo into a great one.

2. Ignoring Lighting Conditions

Light is the essence of photography. Beginners frequently disregard the quality, direction, and color of light. Shooting in harsh midday sun or with improper indoor lighting leads to unflattering shadows and colors. Understanding the golden hour, diffused lighting, and the basics of artificial lighting can dramatically improve your photos.

3. Relying Too Much on Post-Processing

In the age of digital photography, it’s easy to fall into the trap of “fixing it in post.” While post-processing is a powerful tool, relying on it too heavily can be a crutch. Beginners often overlook getting it right in-camera first, which is crucial for authentic and high-quality images.

4. Not Understanding Camera Settings

Auto mode is a safe haven for beginners, but it severely limits creative potential. Not learning how shutter speed, aperture, and ISO work together leads to missed opportunities in capturing images as envisioned. The fear of manual mode can be overcome with practice and experimentation.

5. Neglecting the Importance of the Subject

Sometimes, in the quest to get technically perfect shots, beginners forget about the soul of the photograph – the subject. Whether it’s a person, a landscape, or a street scene, understanding and connecting with the subject is vital. It’s this connection that breathes life into a photograph.

6. Overdoing Edits and Effects

The allure of filters and effects can be strong, especially with social media trends. However, over-editing can make photos look unnatural and unappealing. Learning restraint in editing and developing a personal style that complements the photograph is key.

7. Not Backing Up Photos

Losing photos due to a technical glitch or a lost device is heartbreaking. Beginners often overlook the importance of regularly backing up their work. Investing in reliable storage solutions and developing a habit of backing up after every shoot is essential.

Every photographer, no matter how skilled, started as a beginner and made mistakes. The key is to learn from these errors and view them as stepping stones in your photographic journey. By being mindful of these common pitfalls, you can accelerate your growth and enjoy the process of capturing the world through your lens.

For Further Training:

You didn’t buy your expensive camera to take photos on Auto mode forever. This popular in-depth course, Digital Camera Mastery, is designed to get you off the Auto mode once and for all so that you can take outstanding photos that leave your friends and family speechless. It is currently 80% off which ends soon if you want to check it out.

camera mastery

Digital Camera Mastery (see preview)

You can take this course from your computer, tablet or smartphone, which is really convenient when you want to try out specific photography techniques while being away from home. You know you’re smarter than your camera. So why let it make all the decisions for you?

Final day: Digital Camera Mastery at 80% Off

- - - - - - - - - - - - - - - - - - - - - - - - - - - - - - - - - - - - - - - - - - - - - - - - - - - - - - - - - - - - - - - - - - - - - - - - - -

This post Focusing on the Fundamentals: Rookie Mistakes in Photography appeared on PictureCorrect.


from PictureCorrect https://ift.tt/BUWjzC8
via IFTTT

sunnuntai 21. tammikuuta 2024

PictureCorrect.com: Milky Way Photography: A Modern Day Approach

Historically, one of the greatest challenges in Milky Way photography was in how to showcase the landscape, but also have the Milky Way properly exposed in the same image. But, the game has very recently changed my friends, and hallelujah! For those of you who do not have experience shooting the Milky Way, when you shoot the photo, the Milky Way will look properly exposed, but the landscape itself will look very dark or even completely black. With this new technique that we are going to discuss, this creates a quick solution, while providing fantastic results.

milky way image

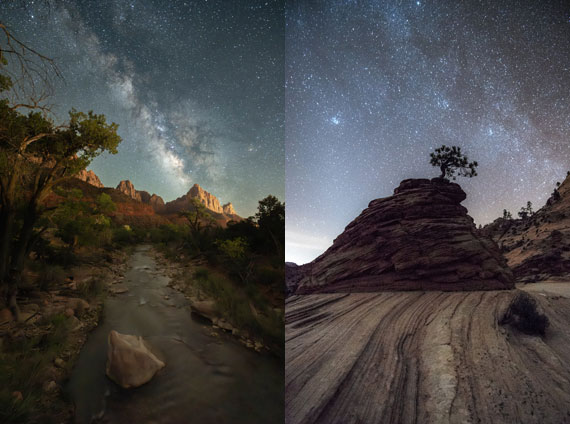
Captured by Seth Hamel; ISO 10,000, 15 seconds, f1.8, 14mm

This modern approach is due to the advancements in camera technology, combined with the powerful new AI tools that have been implemented into Lightroom and Photoshop recently. In this article we are going to discuss equipment, camera settings, considerations for specific scenes, and lastly, an intro into editing your RAW files. This is not a detailed outline of how to shoot Milky Way photos. I do have some settings in here, but this article is written for those who have a basic understanding of how to shoot night photos (i.e. how to set focus, the need for a tripod, etc).

First, we need to discuss the other techniques that are currently used to showcase the landscape and the Milky Way into a photo. The first technique would be light painting. In this approach, while exposing your photo on a long exposure, you shine a light onto your subject, or bounce that light off of something to light your subject. This can be a great technique for certain situations, mostly for individual landscape features that protrude into the night sky. However, if you are shooting a massive scene like the Bryce National Park, Zion National Park or Yosemite Valley, you would not be able to evenly light the scene due to its expansiveness. If you tried, the light would be so bright it would be quite intrusive to other visitors, it would be harsh, uneven and it wouldn’t have the aesthetic needed to do the area justice.

The second technique is doing a blue hour blend. This is where you take 2 separate images at different times of the day then blend them together, but you must keep your tripod and camera unmoved between the 2 photos. Your first image would be taken around 40 minutes after sunset during blue hour. You would be using settings like f14 and ISO 100 to create the most crisp image possible, while obtaining full depth of field. Your second image would be taken once the night sky becomes dark and the Milky Way is in the position that you like. Click. Ok, now you have your two photos. One is properly exposed for the landscape, and one is properly exposed for the night sky. From there you would need to take both photos into Photoshop and use layers to combine them. This is a laborious process, and requires you to have a pretty strong skill set in Photoshop. When I’m running workshops, the majority of guests do not have that experience level and that is likely the case for many of you reading this. Well, couldn’t you just open those in Lightroom and merge them into an HDR? Unfortunately no. The landscape, the skyline and the Milky way have to blend together seamlessly, and HDR doesn’t blend, it merges images as a full scene, not blending two portions of a photo together. Two different things.

Blue hour blends certainly create the sharpest, cleanest and most detailed photos, so I’m not saying it’s a bad approach. But the reality is that this is not the most practical or realistic approach for the vast majority of hobbyist landscape photographers. To briefly list those reasons: You need a strong skill set in Adobe Photoshop, editing is time consuming and the biggest reason for me is that it only allows for one landscape image to be created from the night. I’m a very mobile shooter. I love the adventure of running around, looking at different scenes, composing in many different ways and getting playful with photography under the stars, so the blue hour approach for me is not so appetizing.

Now… onto this new mysterious approach. The basic idea is that you are going to shoot your night landscapes including the Milky Way VERY bright! Far brighter than what you would think you want. In fact, I promise you, that when you go out and shoot this way your first time, you will look at your playback and you will think “The Milky Way is all washed out!” or… “It looks like daytime!”. No need to panic my enthusiastic photography comrades! The reason we are doing this is that we need to expose enough information in the shadows of the photo so you can showcase the wonderful landscape that you’re standing in.

Equipment:

This technique is going to benefit more modern cameras as they have better ISO technology and have the ability to push the ISO further without getting the dreaded “pink haze” (I’ll explain later).

Examples of modern setups are:

  • Nikon – Z series mirrorless cameras, D850
  • Canon: Mirrorless camera models, 5D Mark IV.
  • Sony: a7r IV and above

Lenses are the next thing to discuss. You’ve assuredly read that an f2.8 or wider lens is best. Correct. With that being said, with this approach of trying to shoot the scene very bright, f2.8 will work, but it’s far better to use a wide angle lens that will open up wider than that (i.e. f1.4, f1.8 or f2.0).

milky way photos

Captured by Seth Hamel; ISO 10000, f1.8, 20 seconds, 14mm And ISO 12800, f1.8, 20 seconds, 14mm

Camera Settings:

Hold onto your hats, and no heart attacks please, because we are about to go into some settings that are probably going to feel uncomfortable.

  • Shutter speed determined by using the rule of 500 (do a google search if you’re unfamiliar)
  • Aperture wide open
  • ISO anywhere between ISO 6400 all the way up to 12,800. Why the range? Different scenes have different lighting conditions, even at night time. Here’s an example. Being a photographer in Zion National Park, if I were to go to the east side of the park, that area has a landscape that has a lot of rolling white rock domes which reflects tons of light from the star filled sky. In fact, you can see the landscape just fine with your eyes even on a moonless night on that side of the park because of that white reflective rock. For bright night landscape scenes such as these, you can shoot using a really wide aperture using ISO 6400 and the landscape would show up nicely. However, if I were to drive into the Scenic Canyon area of Zion, that is a deep canyon which has very dark rock which does not reflect light. In this situation, I would shoot at ISO 12,800 in order to pull in enough light from the shadows. If I were to shoot at ISO 6400 the shadows would not have enough information to work with in post production, hence not showing the landscape in the photo. Even if you could pull those up in post production, the scene would look quite soft, lack detail, and would actually have more graininess than if shot at 12,800. Pulling up dark areas at high ISO’s introduces more grain, so it’s best to shoot it bright.

I mentioned the term “pink haze” earlier in this article. All of our cameras have limitations in their ISO performances. At a certain point, if you keep pushing your ISO higher and higher, eventually your images will start to not only have noise from the high ISO’s, but there will actually be a visible pink or purple haze that is likely at the bottom of your image. At that point, the ISO has been pushed too far, so you should come down a little at a time until that is not visible. I would encourage you to experiment with your camera. Try the extreme high side of your ISO range and then come down more and more until you no longer see the pink haze. Then you’ll know the absolute upper limit of your camera’s ISO ability. That pink haze can be very difficult to impossible to remove in post production.

One more thing to mention, since the night sky will look so bright in the field while shooting, be sure to look at your histogram to ensure that you are not overexposing anything in the sky.

Post Production:

This is where everything comes together. When you pull up your RAW file in Lightroom, Bridge or Photoshop, the first thing that you will notice is that the sky is far too bright, and the Milky Way looks dull and without contrast. Ok, we’re gonna fix that, and we’re going to make this basic and easy.

Step #1 – Use the “Select Sky” tool and edit your sky. You will likely want to pull down the exposure, add a bit of contrast, clarity and dehaze. (If you are unfamiliar with working with “select sky” I would recommend watching some Youtube videos)

Step #2 – Use the “Select Sky” tool again, but this time hit the “invert” button so you are working on the landscape only. At this point, you will likely want to pull the exposure up or down, use the” Whites” slider to pull up some brightness and add contrast, add clarity in order to get the landscape the way you like it.

The goal in these first two steps is to get both portions of the image to look harmonious in both it’s brightness and contrast throughout the photo as a whole. Bringing the landscape brightness up, and the sky down too much will result in an unrealistic photo, so be careful with that. I find my favorite images showcase the Milky Way, and the landscape being a bit darker, subtly showcasing its features. .

Step #3 – Now that you have balanced the brightness and contrast of both parts of the scene, this is a great time to pull up your “compare” or “Y/Y” feature. Pulling up your original photo next to the edited version will give you immediate feedback on what looks wonky in your edit.

Step #4 – At this point I work on the photo as a whole using the basic tab, and color corrections to my liking.

Step #5 – The game changing moment (in addition to the select sky tool :). We will now go down to the “detail” tab, and hit the” DeNoise AI” button. At this point, a dialog box will pop up and you’ll have the option to have more or less noise removed. 50 and below is best from my experience. Once you’ve done that, you can hit enter and Voilà! You will now have an edited second copy of your photo, but with the noise reduction applied. The amount of noise removal while keeping good detail is literally hard to believe. What a technological progression for photography!

tree with milky way

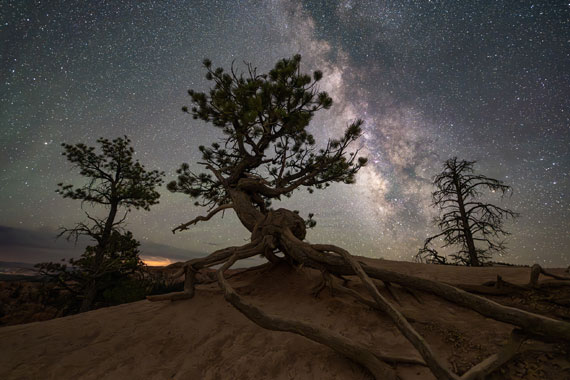
Captured by Seth Hamel; ISO 12800, f1.8, 15 seconds, 14mm

So, maybe you have some older Milky Way photos on a hard drive. I’d recommend pulling some of those into Lightroom or Bridge and try the post production techniques. Even if you didn’t shoot as bright as what I went over in this article, give those photos a new edit with these techniques and I’m confident you’ll be pleased with the results.

I’m not here to say that this is the best approach to Milky Way photography. In fact, I don’t subscribe to the term “best” in the world of photography. Our approaches, our styles, how we want to interact with photography and the landscape, who we are as people…. We are as diverse as the eternities and there can not be a one size fits all in artistic pursuits. I’m hoping that by sharing this technique with you, that you will experiment with it and that will assist you in creating images and memories of your time in the wilderness that you will love and be proud of! Happy shooting friends!

About the Author:
Seth Hamel is a professional landscape photographer based on the borders of Zion National Park. As owner of Enlighten Photography Excursions, he has been guiding and mentoring hobbyist photographers for the past decade in Southern Utah and Iceland. Seth offers single night as well as multi-night Milky Way photography workshops throughout the year in the Zion and Bryce National Parks for every level of photographer. Learn more about available guided Zion, Bryce and Iceland photography opportunities at zion-photography.com.

- - - - - - - - - - - - - - - - - - - - - - - - - - - - - - - - - - - - - - - - - - - - - - - - - - - - - - - - - - - - - - - - - - - - - - - - - -

This post Milky Way Photography: A Modern Day Approach appeared on PictureCorrect.


from PictureCorrect https://ift.tt/TqyIQlm
via IFTTT

lauantai 20. tammikuuta 2024

PictureCorrect.com: Do You Have a Photography Checklist? Here is a Quick Start

Modern DSLR and Mirrorless cameras have so many features that it is sometimes difficult to keep track of all the settings. One of my biggest concerns is that a shot will be ruined because some switch was not in the correct setting for what I wanted to create. I don’t want to be like the wedding photographer who accidentally shot an entire wedding with the camera set to the small JPEG setting.

why you should have a photo checklist

Photo by Cat Mayer

To help ensure that such things are unlikely to happen, I decided to take a lesson from the way pilots operate. Pilots don’t just jump in the pilot’s seat and take off. Instead, they have a list of items that they check. Similarly, photographers can have a list of things to check before starting a photo session. Thus, the subject of this article is creating a photographer’s list of things to check to make sure that everything is done right.

Camera Items to Check

Sensor: Is the sensor free of dust?

Lens: Are the lenses and filters clean?

Battery: Is there enough power in the battery? Are spare batteries easily accessible?

Memory: Is there enough space on the memory card? Are spare memory cards easily accessible?

Image Recording Quality: Is the image quality set properly?

best photography checklist

Photo by Chechi Peinado

Image Settings: If not shooting raw, are the image settings set properly?

ISO: Is the proper ISO for the shot selected?

White Balance: Is the white balance set correctly?

Metering Mode: Is the proper metering mode selected?

Shooting Mode: Is the camera in the correct shooting mode (e.g., fully automatic, manual, aperture priority, or shutter priority)?

Drive Mode: Is the drive mode set properly (e.g., single or continuous shooting)?

Auto focus: Is the auto focus turned on?

Scene Items to Check

Image Periphery: Are any objects protruding into the image from the periphery?

Objects in the Image: Are there any unwanted objects (e.g., an old beer can) in the image?

Tripod Items to Check

Camera Level: Is the camera level (this is best done with a bubble level)?

Tripod Levers/Knobs: Have all of the tripod levers/knobs been tightened?

Tripod Weighted: If desired, has the tripod been weighted?

Remote Switch: If desired, has a remote switch been connected to the camera?

Mirror Lockup: If desired, has the mirror lockup been enabled?

checklist for good photography

Photo by Kevin Law; ISO 800, f/4.0, 1/1000-second exposure.

That’s pretty much it. At some point, this all becomes automatic. Until then, it is not a bad idea to memorize your list.

About the Author:
Ron Bigelow (www.ronbigelow.com) has created an extensive resource of articles to help develop photography skills.

- - - - - - - - - - - - - - - - - - - - - - - - - - - - - - - - - - - - - - - - - - - - - - - - - - - - - - - - - - - - - - - - - - - - - - - - - -

This post Do You Have a Photography Checklist? Here is a Quick Start appeared on PictureCorrect.


from PictureCorrect https://ift.tt/Xhc4MBH
via IFTTT

perjantai 19. tammikuuta 2024

PictureCorrect.com: A New Photographer’s Guide to Composition

It’s easy to be swept away by the technical demands most cameras require. But as a new photographer, it’s critical that you develop your composition skills. Your ability to compose a powerful, visually captivating image is one of the most important keys to a great photograph.

So how do you begin?

First, let’s dive into what composition is and what composition isn’t. Many beginners get the wrong notion of the skill and as a result find improvement difficult, if not impossible.

long exposure

Photo by Azrul Nahar Zailah @ Lazim; ISO 100, f/16, 3-second exposure.

What is Composition?

To start, composition is not a series of rules or testaments you must follow. The rule of thirds, leading lines, and simplicity are all guidelines with one sole purpose: to get you to see what you were previously blinded to.

Each “rule” makes us aware of a specific visual cue. The rule of thirds, for example, teaches us to see our frame in three separate sections, vertically and horizontally. Leading lines opens our eyes to all the visual lines around us.

Herein lies their fault.

If we rely solely on 4, 7, or 11 composition rules, we’re allowing our vision to be limited. Instead, use these composition rules for what they’re meant for—opening our eyes.

So how do you open your eyes up to as much visual beauty as possible? And how can you do it quickly, being new to the art of composition?

This post will serve to guide you along just that path. You’ll be given a few simple but effective ways for opening your eyes and, consequently, improving your compositions.

reflection photography

Photo by Neil Howard.

1. Become Aware of Visual Space

Each and every shot you take is comprised of visual space. You have your subject, background, foreground, and secondary elements.

It’s the arrangement of these that determines how viewers respond.

Most newbies compose photos the following way: they see a subject, point their camera at the subject, and snap their picture.

Consequently, these compositions tend to have the subject dead center with little attention to the background, foreground, or objects to the left or right. As a result, the image tends to look cluttered and hard to follow.

Your first step to improving your compositions is simple. Become aware of all the visual space within your frame.

Find the subject you want to capture and then make it a point to observe all elements within your frame.

What objects are to the left of your subject? How about the right? Above? Below?

What colors are present? Which grab the most attention? Which fall under the radar and are obscured?

Awareness begins the process of change. By becoming aware of all of these elements within the frame, you start to recognize visual space. This recognition allows you to better control it.

You cannot change what you do not know exists.

So start simple by exploring the visual world around you. When you see a great photograph or work of art, analyze it. What did the artist do with the space they were given?

The fact is that all photographers have the same approximate viewfinder. It’s only a select few, however, that can turn this empty space into something breathtaking.

Great composers understand that control over this visual space is the key. You too want to control this space. Control over visual space allows you to guide the viewer exactly how you’d like. You dictate what draws their eyes. You dictate what they look at first. And you dictate how they’ll emotionally respond.

When you understand how to control and guide your viewer, taking great compositions is really quite intuitive.

There are several techniques that allow you to do just that. Let’s explore one more of them.

2. Find and Accentuate Patterns

Without light, you have a 100 percent black frame. As you add light, lines and shapes begin to emerge. And with this, patterns.

Finding and responding to visual patterns is a natural habit of our minds.

cloud photography

Photo by Martin Gommel.

Objects of the same size, color, shape, or light intensity tend to get categorized as similar. This allows our mind to float right past these similar elements along to the next piece of visual novelty.

What happens when you look at a tree? There are thousands upon thousands of leaves but your mind filters this excess and renders a shape—the typical tree bush outline children draw in grade school.

When our minds look at a photograph, however, patterns become much more difficult to find.

Without the ability to see “depth” in an image, everything is compressed into one dimension. If the image is not composed so that this one dimensional shot is easy to grasp and utilizes patterns, many will skip right past it.

The way to avoid this is to compose without clutter.

Patterns are everywhere around you. Becoming more aware of these patterns makes composition so much easier.

Patterns create simplicity which makes viewers find your photograph more easy to digest. By luring viewers in with a pattern, you can then guide them from corner to corner, allowing them to explore the subtleties of your image.

3. Make Entry Easy

The most difficult task of a composition is getting your viewer “into” the frame. Once this is accomplished, everything else is secondary.

Fortunately, the use of lead-ins makes this process quite simple.

Lead-ins are simply visual cues that guide viewers into the content of your frame. They are constructed the same way that you would construct a lead-in in the physical, real world.

If you want to make your home look inviting, do you leave the door opened or closed? When saying hello to a friend, do you cross your arms into horizontal barriers or open your arms into a diagonal visual, producing imaginary lines toward your body?

floral close up

Photo by Theophilos Papadopoulos; ISO 100, f/5.6, 1/400 exposure.

Lead-ins guide the viewer from the corners of the frame toward the inner areas. They tend to form imaginary lines that guide viewers.

A foreground figure looking towards the center of the frame is a typical example as is a silhouetted archway leading viewers to look within the outlines contents.

The use of lead-ins makes compositions easier to grasp as they give a quick, easy path for viewers to follow. Instead of observing the image and trying to determine what to look at, viewers intuitively follow the lead-in. This makes visual communication easier and more efficient.

Nevertheless, even the best lead-in will not save a photograph that’s too complex for viewers to grasp.

4. Keep the Image Simple No Matter How Complex Your Composition

It’s easy to take photos with dozens of varying elements within your frame. Capturing an image with several elements carefully structured into a cohesive, simplistic whole is much more difficult.

As Michael Freeman said, ““The ability to bring order from chaos has become one of the skills most admired in photography.”

So how do you compose images with simplicity?

To start, remember that your photograph is comprised of visual space. And not all of this visual space is equal. Some elements will carry more weight than others.

And most varying elements will clash with one another.

Several varying colors will compete for attention as will several objects of different shapes, sizes, and depth.

By eliminating multiplying varying elements and focusing on a few, you simplify your image.

Although photography is quite different from theater, your camera should work to act as somewhat of a “spotlight”. Use it to isolate a specific theme—a unique pattern—and minimize the details of everything else.

So how do you isolate, outside of using a shallow depth of field or perspective?

5. Seek Out and Control the Strongest Visual Cues

When many think of simplicity, the thought of shallow depth of field and perspective usually come to mind. Shooting from below or above work great to reduce background clutter and focus the viewer’s attention on your subject.

With that said, strong visual cues are much more influential over simplicity.

Extremely bright colors, light traps (areas of extreme brightness surrounded by darker areas), and strong shapes are all examples of strong visual cues that naturally draw our eyes.

german train

Photo by André Schreck.

Strong visual cues, no matter if they’re in the background of a shallow depth of field image shot from above, will steal all the attention.

When you have multiple strong visual cues combined together within one frame, you tend to produce confusion and avoidance.

Avoid this by ensuring that the strongest visual cue is your primary subject.

If other secondary elements have strong visual cues, work to eliminate or minimize them through your composition. Stand on your toes, crouch down, or use a different focal length that will remove these visual cues.

This will simplify your image and produce that “spotlight” effect that guides viewers to exactly what you want.

6. Think in Terms of the Frame

Here’s a quick little composition check. When you go out and take photographs, what do you set as the four corners of your frame?

If you’re like most, you rely on your camera’s viewfinder to do this. While convenient, forcing yourself to see the world through your camera viewfinder robs you of control and creativity.

You are essentially following your camera’s “frame” guidelines and trying with all your might to fill this frame with what can be labeled a “beautiful” composition.

This is all wrong.

Instead, see the world around you and find exactly what you want to capture. Where do you want the four corners of the frame to be?

Once you’ve decided this, use your camera as what it is—a tool. Capture the image and visualize the exact aspect ratio. Although your camera may not create the aspect ratio you desire, a quick crop in any photo editor can fix this in seconds.

7. Leave Room for Interpretation

We’ve focused quite a bit on controlling the visual experience of your viewers. While this may seem to be a strange approach to photography, composition is nothing more than the design of a user’s visual experience. Great designs create great photographs.

With that said, a great composition is more than just an image filled with directions. The true art to composition is in ambiguity.

Yes, you want to compose to guide your viewer into your frame. Yes, you want to simplify your arrangement so as not to confuse and annoy. But you also want your viewer to be an active participant in your visual work.

An image that is easy to grasp is often just as boring as a complicated image that’s too difficult. Great compositions, while usually visually simple, contain an element of ambiguity. An element of intrigue. An element that, if you asked 1,000 people about, you’d get 1,000 unique interpretations.

It’s here where true beauty shines. For beauty, as they say, is in the eye of the beholder.

About the Author:
Alphonso Sanchez, founder of IrisMasters, shows others how to open their eyes to the breathtaking photo opportunities all around them.

- - - - - - - - - - - - - - - - - - - - - - - - - - - - - - - - - - - - - - - - - - - - - - - - - - - - - - - - - - - - - - - - - - - - - - - - - -

This post A New Photographer’s Guide to Composition appeared on PictureCorrect.


from PictureCorrect https://ift.tt/Qx5J1TH
via IFTTT