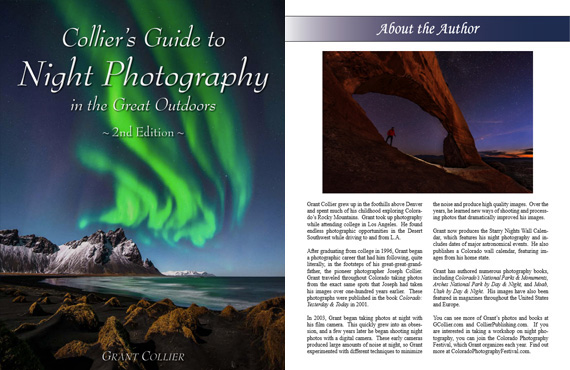
This article is based on concepts from Collier’s Guide to Night Photography. Our readers can get a discount by using the promo code picturecorrect at checkout.
Our small blue planet is located on a spiral arm far out from the center of the Milky Way galaxy. When we look towards the galactic center, we can view one of the most spectacular sites imaginable. Thousands of stars are clustered together to form a hazy band in the sky known as the Milky Way.

Pawnee Buttes, Colorado, 50mm, f/1.6, 10 seconds, ISO 6400, 86 images stitched. (Photo by Grant Collier)
If you enjoy photographing the Milky Way, the winter months can seem especially long. During these months, Earth is pointing away from the center of the galaxy at night, and you can only see the fainter parts of the Milky Way. It can still be photographed, but the shots probably won’t be as dramatic as they are at other times of the year.
Fortunately, the bright galactic center becomes visible again in the spring. In March, it rises shortly before dawn in the Northern Hemisphere. So you will need to stay up all night or get up very early to photograph it. Every day, it rises a little earlier in the night, and by June it will be rising about the same time that the sun sets.
The great thing about photographing the Milky Way in the spring and early summer months is that you can capture the full band of the Milky Way arcing across the sky. By August, you would need to stitch together a much wider image to fully capture the scene, as it will be higher in the sky in the Northern Hemisphere when it gets dark.
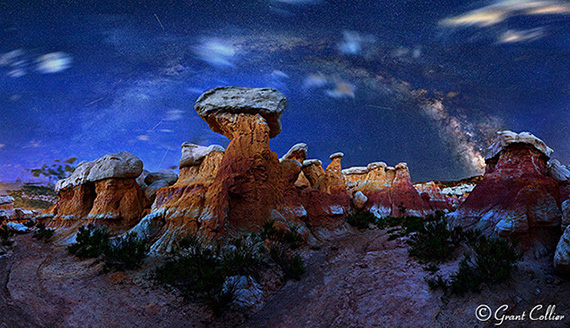
Mushroom rocks, Colorado, 20 exposures for land: 24mm, f/16, 0.6 seconds, ISO 100; 80 exposures for sky: 50mm, f/1.8, 13 seconds, ISO 6400. (Photo by Grant Collier)
If you’re shooting in the Southern Hemisphere, you will have a longer timeframe to capture the full band of the Milky Way. From about February to June, you can capture it in the southern part of the sky just after the galactic center rises above the horizon. From about June to September, you can capture it just before it sets in the west.
Since the Milky Way spans such a large portion of the sky, you will need to stitch together multiple images to capture all of it in one photograph. I explain how to do this below.
Equipment
There is some specialized equipment you can use to capture stitched images of the Milky Way, such as a panoramic tripod head, a leveling base and even a robotic camera mount. However, most of the time you won’t need any special gear. Anyone with a good tripod and a DSLR can capture the full arc of the Milky Way.
You can use any lens from about 14mm to 50mm to capture your images. If you use a longer lens, like 50mm, you’ll need to take and stitch a lot more images together. This can be more time-consuming, but you will also capture much larger image files with greater detail and less noise.
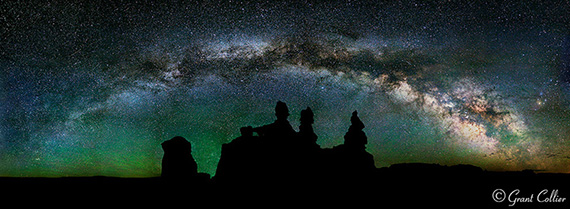
Goblin Valley State Park, Utah, 50mm, f/1.4, 10 seconds, ISO 6400, 36 images stitched. (Photo by Grant Collier)
Ideally, you’ll want to use a lens with a very wide aperture, like f/1.4 or f/2.8. It is also helpful to have a tripod with a bubble level on top of its legs and a tripod head that has a rotating base.
Planning Your Shots
You can visualize how the Milky Way will appear at any time and location using a program, which is free to download, called Stellarium. You can also find it in any app store, or use other apps like PhotoPills, Sky Safari, or Night Sky.
You will usually want to shoot images of the Milky Way under no moon. If the moon is out, it will obscure the stars and the Milky Way will not look as impressive. One exception to this is if you want the moon to illuminate the foreground. You can shoot with a waxing crescent moon that is about 20 percent illuminated. You’ll need to plan it so that the moon is directly behind you and obscures the stars as little as possible.

Landscape Arch, 360-degree panorama, 24mm, f/2.8, 15 seconds, ISO 6400, 44 images stitched. (Photo by Grant Collier)
You will want to get far away from any city lights when shooting images of the Milky Way. Light pollution can create an unnatural color cast in the image and it can obscure your image. Also, be sure to check the weather forecast to make sure there will be clear skies.
Composition
Once you know how the Milky Way will appear and have determined the best time to shoot it, you need to decide where to take your photograph. Although the full band of the Milky Way can be spectacular on its own, your images will be more compelling if you include an interesting foreground. If you’re in the Northern Hemisphere, you should find a composition facing east, since that is where the shallow arc of the Milky Way will be visible shortly after it rises. If possible, I recommend arriving before it gets dark to set up your shot. It’s much easier to determine the best composition and focus your camera when it is still light out.
Camera Settings
You can use the rule of 500 to calculate the exposure time for your images. Simply take 500 divided by the focal length of your lens to get the number of seconds to expose the shot. For example, if you’re using a 50mm lens, take 500 / 50 = 10 seconds per exposure.
You’ll typically want to use the widest aperture on your lens when shooting stitched images. You’ll generally want to use the highest native ISO that doesn’t cause any highlights to be blown out. As long as you don’t have any close foreground objects in the shot, you can focus at infinity.
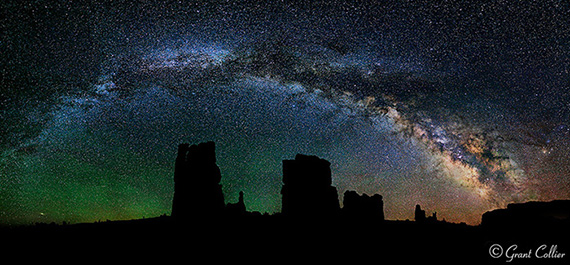
Moab, Utah rock formations, 50mm, f/1.6, 10 seconds, ISO 5000, 50 images stitched. (Photo by Grant Collier)
I’ve found that a white balance of about 3800K works well at night with no moon out. However, as long as you’re shooting in RAW, you can set it to Daylight and adjust the white balance later.
Turn off Long Exposure Noise Reduction, as it can take too long, causing the stars to move too much between the exposures and making it difficult to stitch the images.
Taking the Photos
You will need to make sure your camera is level using a bubble level or your camera’s built-in leveling feature. Ideally, you’ll also want to make sure your tripod head is mounted on a level surface by using a bubble level on top of your tripod legs or a leveling head. This will ensure that your camera remains level as you turn it.
Before beginning the stitched image, I recommend taking a test shot. Point your camera towards the brightest part of the scene you will be photographing and take an image using the camera settings you have decided on. Check the histogram to make sure you are not overexposing the image. If you are, lower the ISO until you are not clipping the highlights. You’ll also want to zoom in on your shot and make sure everything is in sharp focus.
If everything looks okay, you can start taking your stitched image. I always recommend capturing a wider view of the scene than you want in your final image. You’ll have to crop the image after you stitch it since the stitched images will never be perfectly rectangular. So it’s always better to capture too much of the scene than too little.
Position your camera to take an image of the far bottom left corner of the scene you want to capture. After you take the first shot, you’ll need to quickly rotate your camera to the right before taking the second shot.
You can use what I call the “750 Method” to determine exactly how far to rotate the camera each time. Take 750 divided by the focal length of your lens to determine the number of degrees to rotate your tripod head each time. For example, if you use a 50mm lens, take 750 / 50 = 15. You would then rotate your camera 15 degrees between each shot. You’ll need degree markings on your tripod head to do this. If you don’t have this, just try to rotate the tripod head about half of the field of view of your camera.
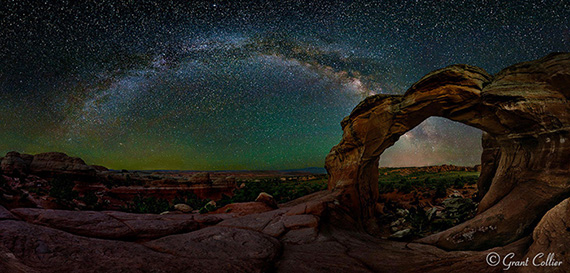
Broken Arch, Utah, 6 exposures for land, 14mm, f/11, 10 seconds, ISO 1600; 30 exposures for sky, 24mm, f/2.8, 15 seconds, ISO 6400. (Photo by Grant Collier)
Now, continue taking shots and rotating the camera to the right until you’ve captured the entire horizontal field of view that you want to capture. To capture the full band of the Milky Way, you’ll typically need to shoot a multi-row panorama. You can rotate the camera up about half of the field of view of the camera and then shoot a second row of images. Keep doing this until you’ve captured the entire vertical field of view you want to capture.
Stitching the Images
You can stitch images within Lightroom CC. Simply select all of the images you want to stitch, right-click on them, and select Photomerge > Panorama. Lightroom will then attempt to stitch the images. Occasionally, Lightroom will be unable to stitch the images together. If this happens, I recommend trying a great, free program for PCs called Image Composite Editor. For Macs, you could try stitching in Photoshop, or there’s a free program called Hugin and a paid program called PTGui.
Once you’ve mastered stitching images, you can start learning more advanced techniques that will allow you to get good detail in the foreground, as well as the sky. You can do this by blending separate stitched images of the land and the sky or by both stacking and stitching images. I explain how to do this in detail in the new, second edition of Collier’s Guide to Night Photography.
For Further Training:
In this fully-updated 2nd edition, Grant Collier sheds light on how to capture these otherworldly images by sharing secrets he has learned over the past 17 years. He explains how to take photos of the Milky Way, northern lights, meteors, eclipses, lightning, and much more.
Our readers can get a discount by using the promo code picturecorrect at checkout which ends soon.
Found here: Night Photography Guide 2nd Edition
Go to full article: Milky Way Photography Tutorial
What are your thoughts on this article? Join the discussion on Facebook
PictureCorrect subscribers can also learn more today with our #1 bestseller: The Photography Tutorial eBook
The post Milky Way Photography Tutorial appeared first on PictureCorrect.
from PictureCorrect https://ift.tt/3wS8zku
via IFTTT


0 kommenttia:
Lähetä kommentti