Related reminder: only 2 days left for the Long Exposure Photo Guide at 71% Off
In this article, I will discuss an important topic in photography. Although this can be treated as an intermediate to advanced technique, I will try to keep it as simple as possible to make it seem like a piece of cake to all my readers.
ND stands for Neutral Density
ND filters are useful when you are looking for a specific type of effect under adverse lighting conditions. OK, OK. Let me break that down for you. What do you do when you go out on a sunny day and you know you are going to spend a lot of time outdoors? You get a cap and sunglasses. That’s right. You want to counteract the effect of direct sunlight so that you are not “blinded”. A camera works in a similar way. But not exactly the same way, as we are not “blinded” by continuously looking at a moderately lit scene. Let me explain more on camera terms with an example. Say you are taking a photo of a waterfall and you want to have that “creamy” and “silky” effect of the flowing water.
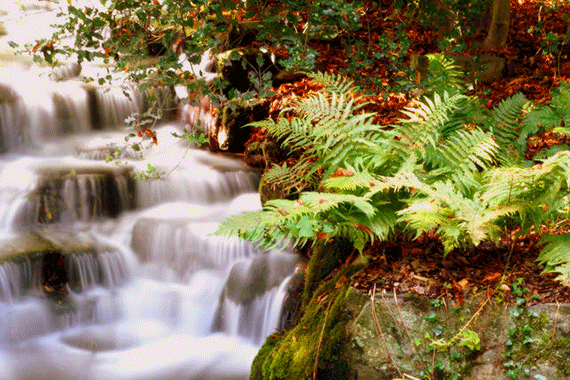
Photo by Sarah Fraser63; ISO 50, f/22.0, 30-second exposure.
The enemy of a slow shutter speed is the ambient light. Just try this experiment: Put the camera on a tripod in P mode. Making sure the flash is off, point your camera toward any object, and press the shutter half-way. Record the shutter speed and aperture setting that are automatically selected by the camera. Now change the mode to M and select the same shutter and aperture. Take the photo with this setting–it should not come out that bad. Now the fun part. Slowly reduce the shutter speed one tenth of a second at a time and see how the photo looks. You will notice the photo is becoming brighter and brighter, and at some point everything is so bright that nothing can be seen clearly. Pros refer to this condition as a blown-out photo.
But say you NEED slow shutter speed to get that motion blur. Of course, you can reduce aperture. But how much? F/16, F/22, F/39? There will be a situation in broad daylight when you have the aperture set to the camera-supported minimum, and still you are not able to lower the shutter speed enough to get that motion-blur without blowing-out the photo. Yeah, yeah, now we are talking photography.
You wish somehow you could reduce the amount of light reaching the camera sensor so that the photo isn’t blow-out, yet you can comfortably reduce the shutter speed to achieve motion-blur AND all this at a decent aperture setting.
Ladies and gentlemen, welcome the ND filter.
The filter acts like sunglasses on your eyes, limiting the amount of light that reaches the camera sensor, eating up light so that you can take photos in broad daylight and still set the shutter speed as slow as one second (can you believe it? the flowing water will be as creamy as ever) at a reasonable aperture of F/22.
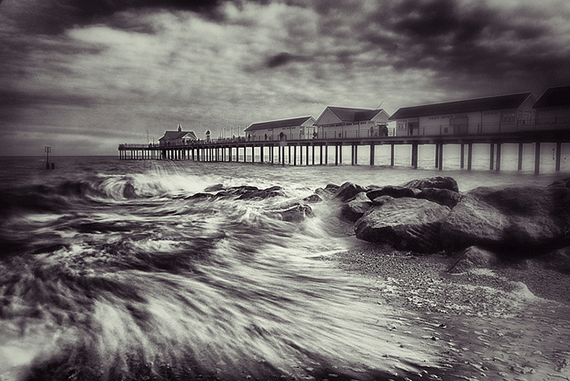
Photo by Neil Hall; ISO 100, f/8.0, .5-second exposure.
Standard settings I use for the silky/creamy water flow effect putting the ND filter on:
- Mode: Shutter Priority (TV)
- Shutter Speed: start with 1/10 secs and reduce it gradually till you get the desired amount of blurriness effect
- Aperture: F/13-22
- ISO: 100 or lower
- White Balance: AWB or Cloudy
- Metering Mode: Evaluative (if I have bright area in the scene, I do a partial metering)
Consider another situation, where you want to focus only on the subject, keeping the background out of focus. You widen the aperture to the smallest value your camera/lens supports (say F/2.8) and guess what, the photo becomes blown-out. You try to increase the shutter speed, but alas, even the maximum supported shutter speed is producing a blown-out photo. You guessed it right: the ND filter is again our rescue crew. Put on a ND filter and you can keep the minimum F-stop with a reasonable shutter speed and still get the subject in focus with rest of the scene out of focus (I am deliberately avoiding the concept of depth of dield to keep this article simpler.
Of course, you can try lowering the ISO to 50 or lower, but the effect of reduction of light, by lowering ISO sensitivity is negligible compared to ND filters. What I mean is lowering ISO is no match against the ND filter in reducing the impact of “amount of light” on brightness of the photo.
Types of ND filters
There are different types of ND filters available and they are classified based on the amount of light they block (or the darker/denser the glass is).
The greater the optical density, the more light it will absorb. So a ND filter is sometimes classified in terms of density
0.1, 0.2, 0.3, 0.4, 0.5, 0.6, 0.7, 0.8, 0.9, 1.0, 2.0, 3.0, 4.0, and so on.
The light blocking capacity of the ND filters is also measured by the reduction of f-stops. The more f-stops an ND filter will reduce, the less light it will allow to pass. Thus a 2-stop ND filter blocks double the amount of light of a 1-stop ND filter.
So this is one way of specifying the “darkness” of the filter. There’s another. Different manufacturers use different conventions. ND4 filter means a 2 stop ND filter. Huh? A little bit of math here…
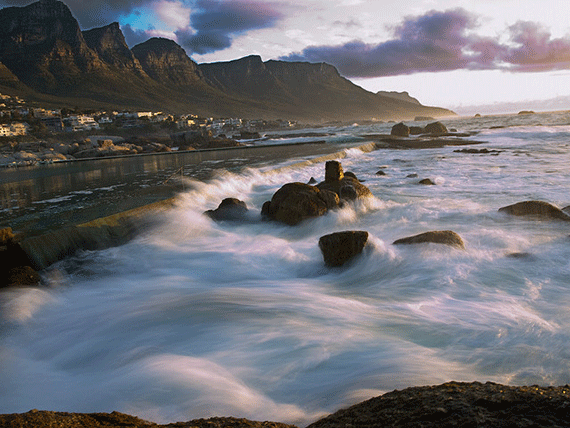
Photo by Neil Howard.
ND2 means 1 stop ND filter (2=2 to the power 1) allowing 50% of light to pass (transmittance). ND4 means 2 stop ND filter (4=2 to the power 2) allowing 25% of light to pass. ND8 means 3 stop ND filter (8=2 to the power 3) allowing 12.5% of light to pass and so on…
If you are a little bit lost, do not worry; all you need to understand is that “darker” ND filters block more light. ND8 is darker, ND2 is less dark. A 0.9 ND Filter is darker and a 0.3 ND filter is less dark. A 3 stop ND filter is darker and a 1 stop ND filter is less dark, and so on and so forth. That should work for now.
Which filter should I use and when?
The ND filter you need depends on how much light you want it to absorb so that you can achieve the desired shutter speed or the desired aperture size at the ambient lighting conditions. (Remember the first statement in this article?) This depends on how much ambient light you are working in. So, overall, this is more or less experimental. The rule of thumb is that if you want a lot of motion blur or absolute silkiness, use the darkest ND filter (ND8) so that you can really slow down the shutter. If it’s dark (overcast, dawn or dusk), you may not need the darkest ND filter, because there is already less light. So you may try a medium dark filter (ND4) to achieve the same effect. For sports, to bring that motion blur, you may need just a slightly dark filter (ND2) if don’t want too much blur.
Do I really need ND filters?
You will most likely need ND filters (of various strengths) if you shoot landscapes a lot (like me, which you can see in my photoblog–75% of my best collections are landscapes). Or if you shoot sports a lot in bright daylight. But, as I said, you will KNOW you need a ND filter when you have reached your camera/lens limit of blocking light and do not have any further options.
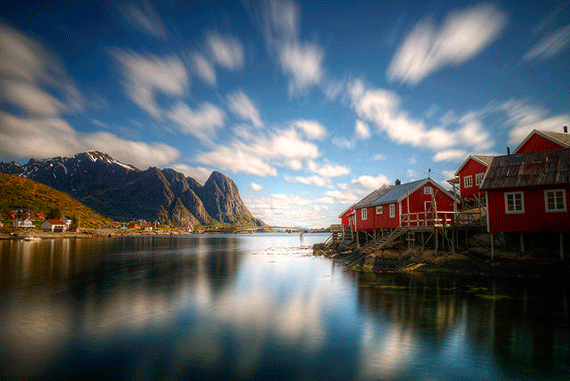
Photo by mariusz kluzniak; ISO 100, f19.0, 30-second exposure.
BONUS TIP: You can always “stack” up one filter on the other to increase the darkness even more. But beware of vignetting on wide angle shots (18-20mm) with stacked up filters, along with other “combination” effects.
How many ND filters do I need to buy?
Well… in my opinion, you should get ahold of a 0.9 ND filter first, and then if you need to, go for a 0.6 ND filter. Then you can stack them up to get an even darker filter. I have rarely used my 0.3 ND filter.
When NOT to use an ND filter
A word (or sentence) of caution: Most ND filters are effective only on the visible spectrum of light and do not proportionally reduce ultra-violet or infrared radiation.
This can be specially dangerous if you are using ND filters to view sources like the sun or white/red hot metal or glass which emit intense non-visible radiation that is not blocked by ND filters. This can seriously damage your eyes, as the source does look dim when viewed through the filter. Do NOT look directly at sun through the viewfinder even with an ND filter. You eyes are precious, especially if you enjoy photography!
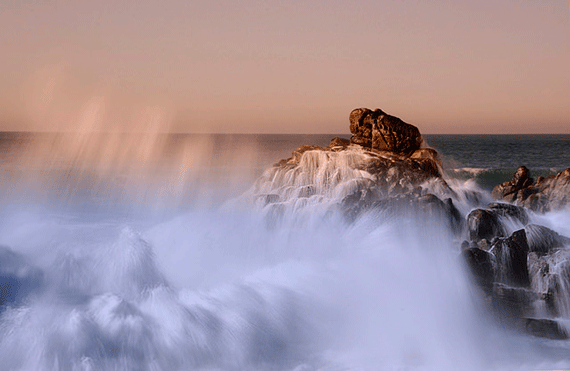
Photo by Steve Corey; ISO 100, f/20.0, 1/6-second exposure.
Another situation to avoid using an ND filter is when the scene has a mixture of areas with higher and lower brightness (i.e., not uniformly lit). For example, during a sunset the horizon is bright but the ground is dark. Using an ND filter will make the darker spots more dark, thus losing the appropriate detail (this is opposite to being blown-out and is called burn-out).
What are the available varieties?
There are different flavors of ND filters available on the market. To start with, I would always suggest to go for multi-coated filters, as they are better quality than normal glass–and worth the price. The normal glass filters are cheaper and have a lot of side effects (color-casts) associated with them. Of course, there are pro filters that cost a lot, but then they are durable, scratch-resistant, and high quality.
Options include different brands like Hoya, Singh Ray, B+W, Tiffen, and Lee filters. These are GREAT filters with no color casts, but the cost varies with make and model. I own Hoya filter sets, and I am quite happy with the quality of the light reduction at a reasonable price. Singh Ray filters are relatively costly but with high optical precision. For experimental learners, I would recommend getting your hands on Hoya filters.
Why are these sunglasses for cameras called “Neutral”?
Good question. Because these sunglasses (should) “eat up” light of all wavelengths equally. This means during absorbing, no color is given preference over the other. Thus the term “neutral”. But not all ND filters on the market are made perfectly. Especially the cheap ones that create color casts on photos, as they cannot reduce intensity of all wavelengths equally. I recommended getting standard, branded, and quality ND filters (the multi-coated ones). Research on the Internet; read reviews and forums to find out the best ND filter to suit your needs and your wallet.
About the Author:
Sudipta Shaw is a software professional and a self-made photographer. He also likes to teach and mentor.
For Further Training on Long Exposure Photography:
Photographer Dieter Appelt said, “A snapshot steals life that it cannot return. A long exposure creates a form that never existed.” If you’ve ever been mystified by other photographers’ tack sharp extended exposures and mind-blowing daytime long shutter speeds, then you may want to take a look at this popular in-depth eBook while it is marked down 71% off until the end of the month!
This guide was designed to walk you through every step of long exposure photography with a complete description and a visual reference. Each lesson is broken down into easy-to-follow steps, recommended resources, and self-check quizzes to make sure you understand each and every technique.
Deal ending soon: The Long Exposure Photography Guide at 71% Off
Go to full article: Neutral Density Filter Tips for Long Exposures During the Day
What are your thoughts on this article? Join the discussion on Facebook
PictureCorrect subscribers can also learn more today with our #1 bestseller: The Photography Tutorial eBook
The post Neutral Density Filter Tips for Long Exposures During the Day appeared first on PictureCorrect.
from PictureCorrect https://ift.tt/2Go0qdu
via IFTTT


0 kommenttia:
Lähetä kommentti