This article is based on concepts from the The Photography Action Cards if you want to dig deeper for further training.
The act of capturing a fabulous photo of your pet is rewarding and well worth the effort.
However, our critters often have their own agenda, which doesn’t always mean posing for pictures.
In this blog post, we’ll discuss some ideas on how to capture great shots of your beloved pets.
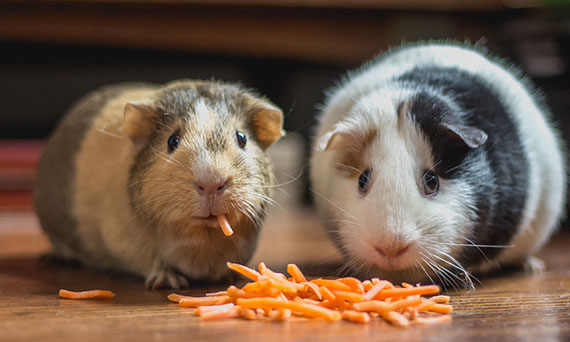
Photo by Bonnie Kittle
Pet photography often looks its best when:
- You capture their image from their level.
- They are engaged in some activity (even a simple one).
- The lighting highlights the color and texture of their fur, feathers, or scales without clipping the highlights or the shadows.
- The lens focus is placed directly upon the eyes.
- You can ‘effect’ an expression. (For example, the hamster on the left is eating, but he or she most certainly has an expression. This is an ‘effected’ expression.)
Let’s examine three pet pictures together and discuss what worked and what didn’t.
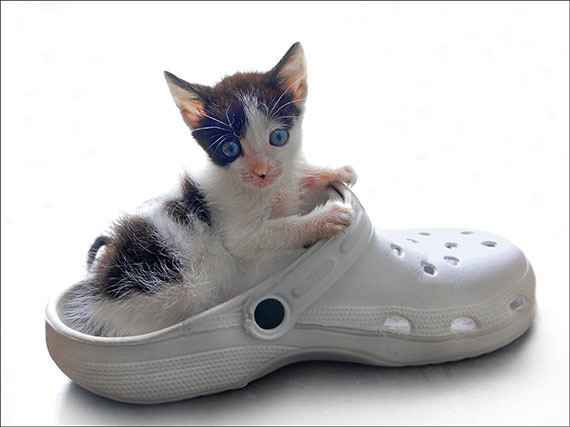
Photo by Ernesto Carrazana
Key Thought: Rarely will backlighting provide the best photograph of your pet. If you’re interested in playing around with backlighting, try to do a silhouette.
In the above pet picture, the camera angle is low, thus getting down to the kitty’s point of view, and the kitty is engaged with a prop. Those elements work well. However, the backlighting did not work to show off the kitten’s fur or highlight those beautiful eyes.
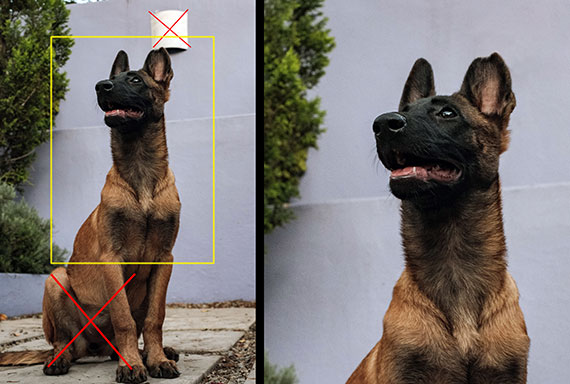
Photo by Gerrie van der Walt
Key Thought: When you want to get down to the pet’s point of view, judge that position by the face.
For this pet portrait, the camera position is too low. The low camera placement showcased unnecessary body parts and also resulted in distractions behind the dog’s head.
Cropping the image and cloning out the light fixture helped improve this shot.
However, it’s still not a great capture of the pup’s facial expression, as there’s no eye contact.
Take note that the lighting is excellent for pet photography. It allowed a nice even exposure of the fur and placed a highlight in the dark eyes.
IDEA: If your pet has dark eyes, a highlight in the eyes will open them up and help to create an effected expression. You can create a highlight in the eyes by how you position the pet relative to the light source. You can also use a very low powered electronic fill flash on the camera (only outdoors!) Or, you can create a bounce card with cardboard and tinfoil that you place in front of the pet’s face.

Photo by alexandra lammerink
This is an exquisitely captured pet photograph.
- The camera is at eye level to the pup.
- The critical focus has been placed upon the eyes.
- The background adds a sense of place and mood without causing distractions.
- The lighting accentuates the fur and places a highlight in the dark eyes.
- The pup has a happy and alert effected expression.
Lighting
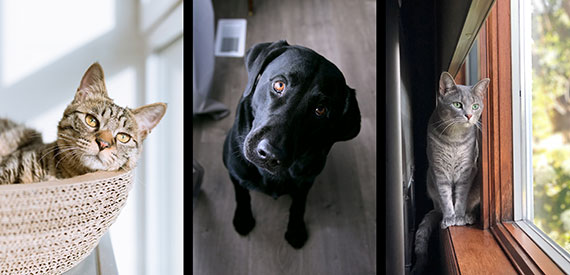
Left photo by Eric Han, Center photo by Sharon McCutcheon, Right photo by author
Key Thought: Without additional lighting resources, your best lighting for indoor pet pictures will be by a window or a doorway. Make sure the light is indirect. In other words, you don’t want the sun shining right into that window.
IDEA: A simple homemade reflector can often save a picture. The shadow side of the black lab has clipped off the shadows (they are too dark) – even with the soft window light. A reflector placed just to the dog’s left would’ve improved this picture by bringing up the exposure level on the shadow side.
To make a reflector, obtain a piece of sturdy cardboard or foam board that is about 3 feet x 4 feet.
Make one side of your board flat white, and on the other side, glue on tin foil. The white side will reflect a soft, even light, and the tinfoil side will reflect a brighter, more specular light.
NOTE: Which side will you use? This depends upon the light source and the color of your pets’ fur, in general, for darker fur use the tin foil side and lighter fur use the white side.
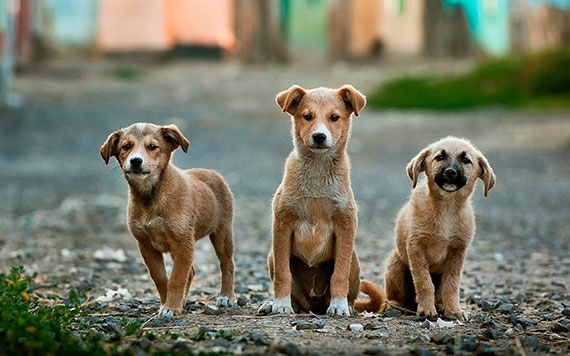
Photo by Anoir Chafik
Key Thought: To obtain the best lighting for an outdoor pet picture – there are three opportune situations.
- Place your pet in the shade, so that no direct sunlight is involved. Make sure that the shaded area is consistent and not dappled with light, as this would create exposure problems.
- Photograph your pet on a slightly overcast day. A thin veil of clouds works best. Heavy cloud cover can reduce your exposure and create white balance problems.
- Photograph your pet during the Golden Hour. The Golden Hour works wonderfully for pets as well as people. Be sure to observe the color of the light. If it is too yellow, orange, or red, place the sun behind the pet and expose for the face.
Containing the Wiggles
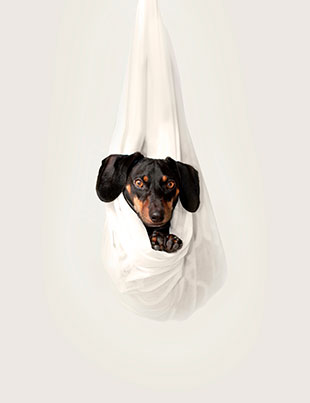
Photo by Erda Estremera
Many pets simply don’t have the patience to sit still while you photograph them. It’s up to you to get creative and come up with some interesting ideas on how to contain them in a working area.
This dachshund is contained, and the resulting picture is fun and very cute to look at.
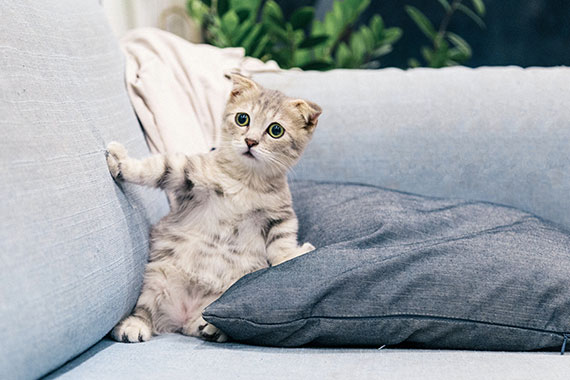
Photo by Tran Mau Tri Tam
This kitten is contained by the location. Three sides of possible escape are effectively blocked. It works because of the kitten’s expression. Don’t forget to remove unnecessary and disruptive objects from the background!
IDEA: Treats and toys can help contain a pet, as well as direct their attention to you. Hold the treat or toy near the camera lens for the best effect.
The Human Element
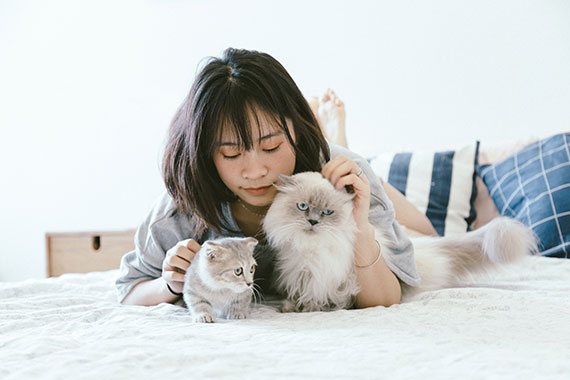
Photo by Tran Mau Tri Tam
Key Thought: Including a family member is a great way to provide containment while also adding a personal touch to your pet picture.
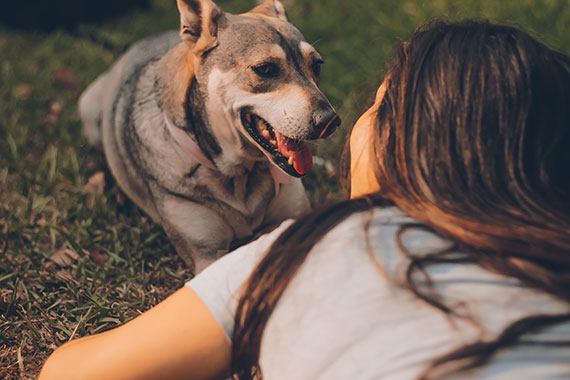
Photo by Manuel Meza
Key Thought: Keep in mind several points in pet photos. Don’t awkwardly cut off the pets’ ears, paws, or tail on the edge of the frame. Plus, if you include the human element, the best pictures occur when you see the faces of both the pet and the person.
Activity and Personality
Left photo by Bruce Galpin, Center photo by author, Right photo by Daniel Tuttle
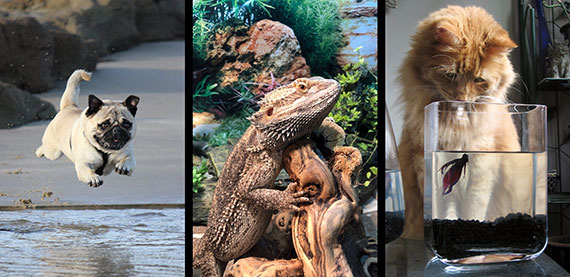
Successfully capturing your pet’s personality and activity is going to be one of your more significant challenges. Pets rarely do their fun stuff under perfect photography conditions.
IDEA: If you haven’t embraced the purpose of the mobile phone camera, give it a try, especially for indoor pet pictures. Mobile phone cameras do a darn good job when a quick shot is needed. Images like the bearded dragon, and the cat on the right, can be perfectly captured with a mobile phone camera indoors.
When the situation requires a DSLR or mirrorless camera, such as the running pug puppy, try these settings to get started.
- Use shutter priority and set according to the level of activity.
- Set the ISO to Auto. If your camera allows it, set a maximum allowable ISO. For most cameras, I would suggest a maximum allowable setting of ISO 1200.
- Use a center-weighted metering pattern.
- Use the camera raw file setting.
- Use Auto WB.
- Use continuous drive – low or high according to preference.
- Use all focus points or a center cluster if preferred.
- Use the continuous focus mode or auto mode if your camera has it.
- A zoom lens provides maximum creative options.
Problem Solving
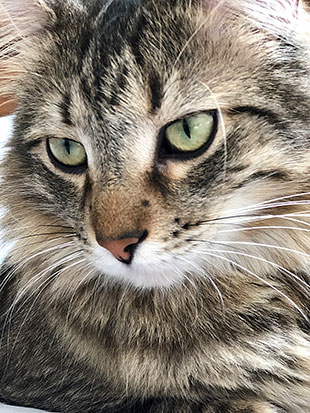
Photo by author
With many pet pictures, the errant whisker is a real problem. Let’s take a look at how you can quickly fix this.
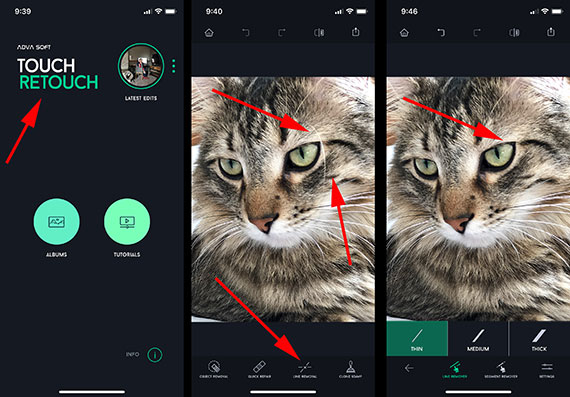
Photo by author
TouchRetouch is a standalone editing app that is available for IOS, Android, Windows, and Mac OS. It’s a powerful and inexpensive tool to remove unwanted objects from a photograph.
It works particularly well for lines, such as whiskers.
- Import the photo into the TouchRetouch app.
- Select Line Removal
- You remove the line by dragging along the whisker that you wish to remove. There are several options for settings. You’ll have to play with them as each picture works a little differently.
Once you get the hang of TouchRetouch, you’ll wonder how you ever got along without it.
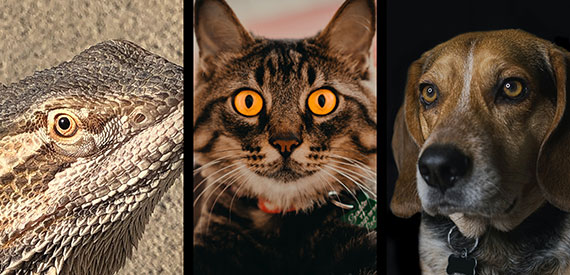
Capturing the Eyes
Left photo by author, Center photo by Thiago Cerqueira, Right photo by Dan LeFebvre
It’s often said that the eyes are the window to the soul, and nowhere is that truer than staring into the eyes of your pet.
This is why the number one factor to a successful pet photo is placing the critical focus on the eyes!
IDEA: Many pets can have exotically colored eyes. I would discourage the practice of brightening and oversaturating the color of the eyes. When you do this, the picture becomes all about the color and not about the pet.
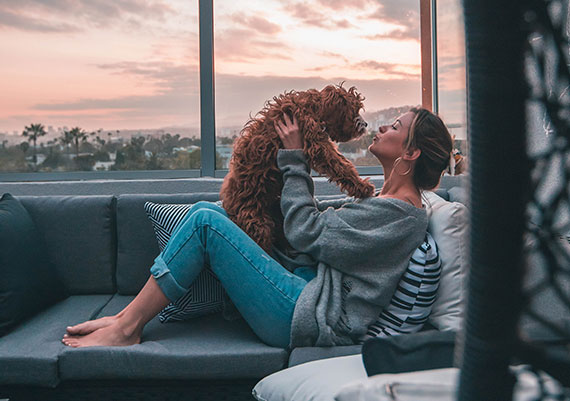
Photo by Roberto Nickson
Closing Thoughts
- Any camera can capture great pet pictures – even your smartphone camera!
- If using a DSLR or mirrorless camera, making use of a zoom lens gives you more room to quickly recompose your pet picture.
- While indoors use window light. While outdoors use a shady area, a lightly overcast day, or use the Golden Hour.
- An electronic flash isn’t recommended, especially indoors.
- Pet play toys or treats can help with containment and expression.
- Have your camera set and always at the ready.
About the Author:
Kent DuFault is an author and photographer with over 35 years of experience. He’s currently the director of content at the online photography school, Photzy.
For Further Training and Exercises:
65 beautifully designed & printable Photography Action Cards are now available that will give you over 200 photography assignments, covering everything you can imagine. They are currently 88% off today if you want to try them out.
These Action Cards discuss a photographic topic, provide you with suggested considerations, and give you specific photographic assignments.
Deal found here: The Photography Action Cards at 88% Off
Go to full article: At Home Pet Photography Tips
What are your thoughts on this article? Join the discussion on Facebook
PictureCorrect subscribers can also learn more today with our #1 bestseller: The Photography Tutorial eBook
The post At Home Pet Photography Tips appeared first on PictureCorrect.
from PictureCorrect https://ift.tt/37aKCsG
via IFTTT


0 kommenttia:
Lähetä kommentti