


Lighting plays an important role in setting the mood in your photos. Photographer Gavin Hoey from Adorama shows you how you can use two flashes to create a high contrast, dramatic portrait. The split lighting effect has a distinctive shadow running through the center of the subject’s nose and is also known as badger lighting:
Basic Lighting Setup
To create a dramatic portrait with a cinematic feel, you’ll need two basic bare flashes. Place them on either side of the subject so that the lights and the subject are roughly on a straight line. Then, meter the lights so that both of them illuminate the subject equally.
Hoey uses two eVOLV 200 flashes placed at the same height as the model’s head. He meters both of them at f/8 by pointing the light meter toward the light source.
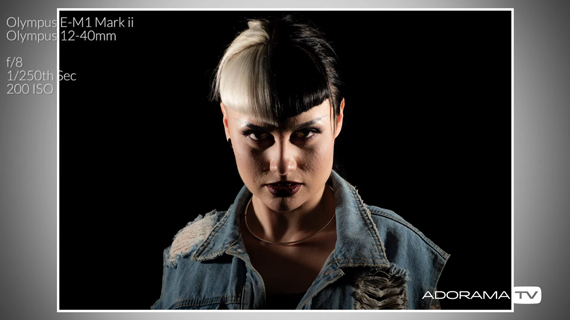
In the image above, both sides of the model’s face are lit equally with a shadow running through the middle of her face. But all of this changes as the subject moves toward or away from the camera.
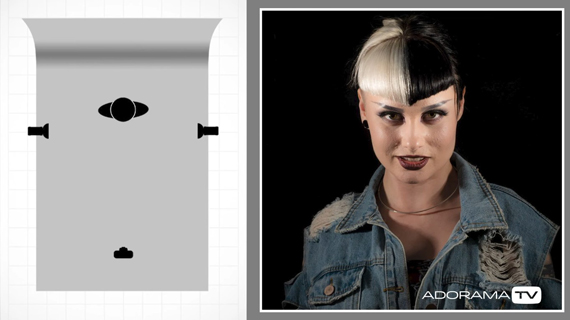
If you need fewer shadows on the subject’s face, simply ask them to take a step back, away from the camera. The lights will illuminate the subject’s face more evenly this way.
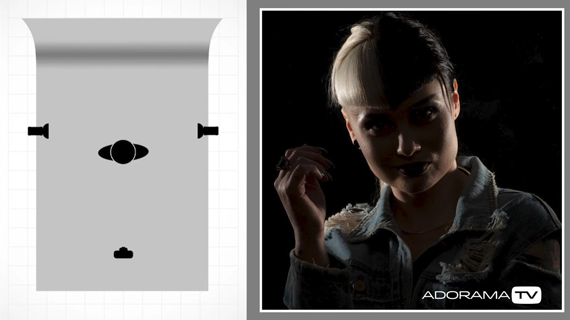
But, if you need more shadows on their face, ask them to take a step closer to the camera. More of the subject’s face will be in the shadows this way.
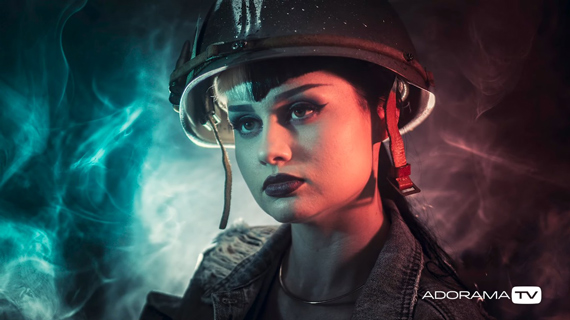
Adding a Background Light
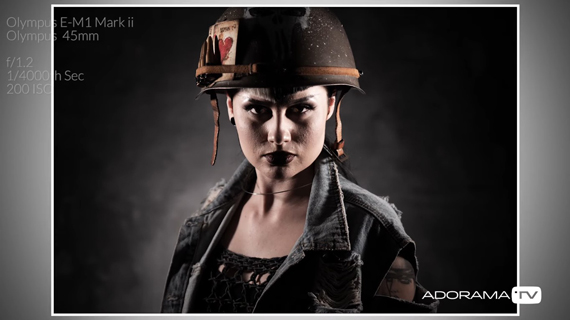
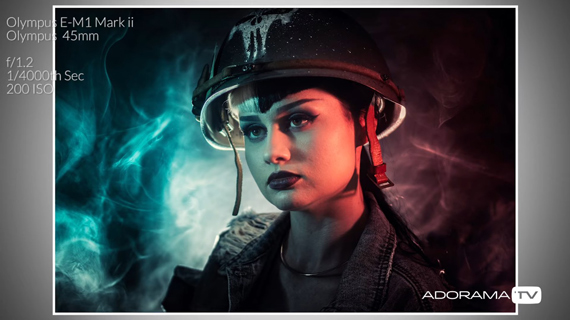
To take the image to the next level, Hoey adds in one more light behind the subject, pointing toward the background. This gives a nice separation between the subject and the background thereby making the subject stand out more.
Using Gels to Add Color
To spice things up a bit, Hoey adds in some colored gels to the flash.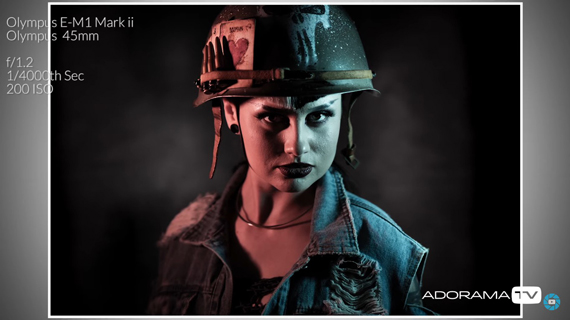
And finally, Hoey gives the images a finishing touch by adding smoke.
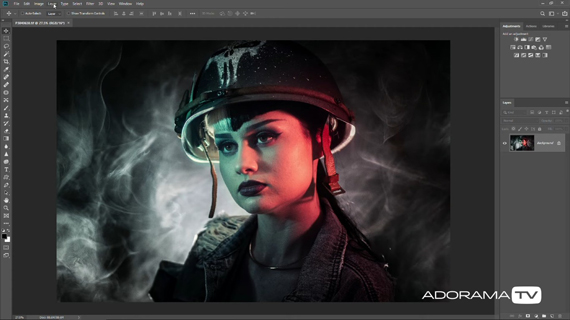
Post Processing
The use of smoke can make the image appear washed out. To fix this, Hoey uses Photoshop. If you look at the image below, you can see that the blue and pink colors behind the subject appear washed out.
You can add in more color with the following steps:
- Create a new blank layer.
- Select the blue color using the dropper tool on the subject’s eye.
- Using a big soft brush tool, paint the area that needs to be blue.
- Change the blending mode to “color” and adjust the opacity so that it doesn’t look overdone.
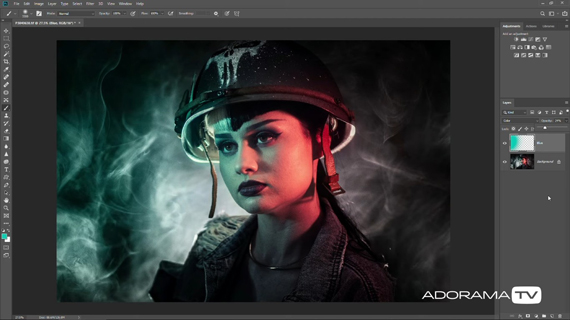
Next, here’s what you can do to add in the red color to the other side:
- Create another blank layer.
- Select the red color using the dropper tool on the subject’s eye.
- Using a big soft brush tool, paint the area that needs to be red.
- Change the blending mode to “color” and adjust the opacity to taste.
- To reduce the saturation of the red color, go to Image > Adjustments > Hue/Saturation and tweak the hue, saturation, and lightness to taste. You can even completely change the hue.
The interesting thing about this shoot is that you can get interesting results using almost any kind of light. You can even use a speedlight or continuous LEDs as your light source.
“Whatever light source you use, make sure it’s a hard light source for that dramatic, contrasty look.”
Go to full article: Hero or Villain Portrait Lighting Tutorial
What are your thoughts on this article? Join the discussion on Facebook
PictureCorrect subscribers can also learn more today with our #1 bestseller: The Photography Tutorial eBook
The post Hero or Villain Portrait Lighting Tutorial appeared first on PictureCorrect.


from PictureCorrect https://ift.tt/33X9guV
via IFTTT


0 kommenttia:
Lähetä kommentti