A circus means fun, music, and colorful lights. So when it comes to photographing a circus-themed photo shoot, you need to make sure that you replicate its ambiance. But how do you do that in a small home studio? Photographer Gavin Hoey from Adorama has the perfect solution:
Background
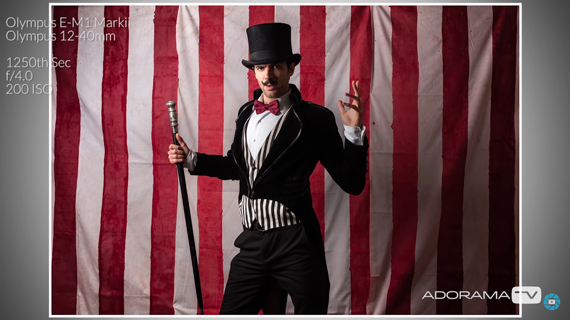
“Nothing says circus like a good stripey background.”
For occasional photo shoots, get yourself some red and white fabric, cut it into thin strips, and hang the trips on the wall. But if you plan to shoot more regularly, invest in painting red stripes on white fabric.
Costumes for Circus Themed Photoshoots
Have the model dressed to match the circus theme. Either put the costumes together yourself or rent them from your local costume or fancy dress store.
Lighting
Single Light Setup
Hoey starts from a basic single light setup and builds from there. First, he uses his eVOLV 200 in a 70cm softbox. He makes sure not to target the model to allow him to have his flamboyant moves.

Key Light with Two Back Lights
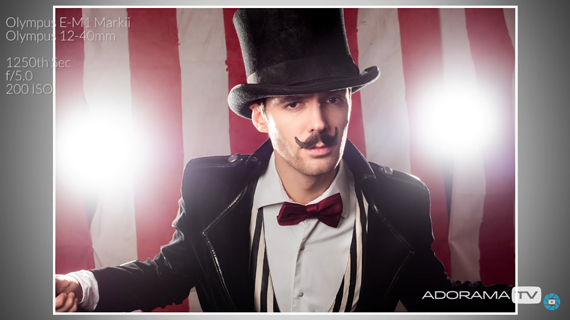
In order to make the images appear more theatrical, Hoey adds in two eVOLV 200 in the background, pointing straight at the camera. Their purpose is to add flare to the image, making it appear more dramatic.
“Start with the two back lights on their lowest possible power because they can be quite blinding.”

Adding Colors to the Back Lights
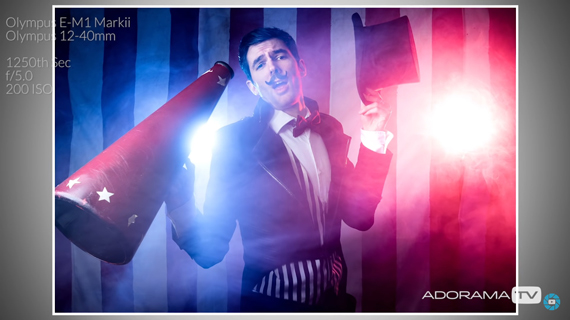
To add a real circus feeling to the image, Hoey’s idea is to add more colors to the back lights. He does this by adding colored gels to them. And to spice things up some more, he also adds smoke to the scene with the help of a smoke machine.

Post-Processing Circus Themed Photos
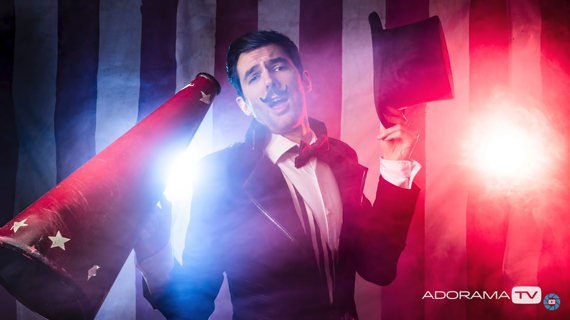
When setting up the lighting, Hoey made sure that he didn’t target the model, because the model had to move around a lot while playing the part of a ringmaster. Hoey’s aim while post-processing the image is to achieve the look of a tight beam of light using Camera Raw. Here are some of the basic adjustments that Hoey makes to the image:
- Using the radial filter, he decreases the exposure around the model by about one and a half stops. This puts greater emphasis on the subject. He also increases the clarity on the outer part of the radial filter to maximum to give the image a distressed feel.
- To make the blue color bolder, he adjusts the color temperature to the cooler side.
- He increases the contrast so that the model’s appearance cuts through the smoke.
- To mute the colors down a bit, he decreases the vibrance a little.
Once happy with the global changes Hoey goes on to make some local changes to give the image a final touch:
- Using the adjustment brush tool, he increases the exposure around the lights to make them brighter.
- To make the subject’s face appear natural, he adds warmth to it using the adjustment brush tool.
- Finally, he decreases the exposure on the loudhailer by using the adjustment brush tool again.

How about trying a circus-themed photo shoot just for fun?
Go to full article: Circus Themed Photo Shoot in a Home Studio
What are your thoughts on this article? Join the discussion on Facebook
PictureCorrect subscribers can also learn more today with our #1 bestseller: The Photography Tutorial eBook
The post Circus Themed Photo Shoot in a Home Studio appeared first on PictureCorrect.
from PictureCorrect http://bit.ly/2N46PTb
via IFTTT


0 kommenttia:
Lähetä kommentti