Focus stacking is the technique of blending together multiple exposures of the same scene. These exposures are exactly the same, except for one aspect: the focus point. The idea behind this technique is to create an image with a larger depth of field than what is possible with a single image. Mark Denney explains:
The most likely use of focus stacking is in landscape photography, since it’s one of the most definitive ways to produce a vast depth of field that’s impossible to create even with a small aperture like f/16 or f/22. Focus stacking, however, can just as easily be used in architecture or any other type of photography.
How to Shoot for Focus Stacking
Use a lens that you can focus manually. You’ll also need a solid tripod.
For extra sharpness, use a remote trigger or a camera app to shoot the images and reduce camera shake.
There are two ways to focus: manually using the focusing ring or by using the AF point selector.
In this video, Denney shoots four images, each time correcting the focusing point to focus at a different point (or distance) in the image. You’re free to choose as many images as you’d like for your scene.
Post-Processing
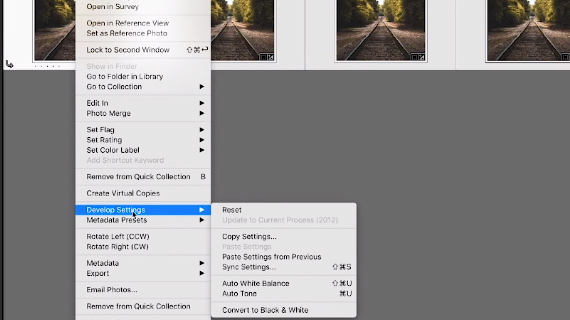
Once you’re done shooting, head to your favorite image editing program to post process them. As Denney explains, the process of developing these images doesn’t need to be repetitive. Just process one frame and sync the development settings with the other images.
- Highlight all the images, including the one you edited.
- Right-click on the image you edited.
- Go to Develop Settings and Sync Settings and hit Synchronize.
All the images will be synced with the edits you made to the first image.

Sync Settings
Open these images as layers in Photoshop. With the selection in place, right-click and select Edit In > Open as Layers in Photoshop.
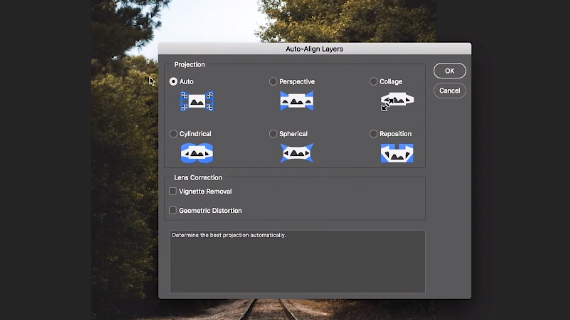
The next step is to auto-align these images. Auto align is necessary for instances when you suspect that the camera might have moved or an element moved between the shots. Photoshop will take care of these issues. Select all the layers. Select Edit > Auto-Align Layers.

Auto-Align Layers
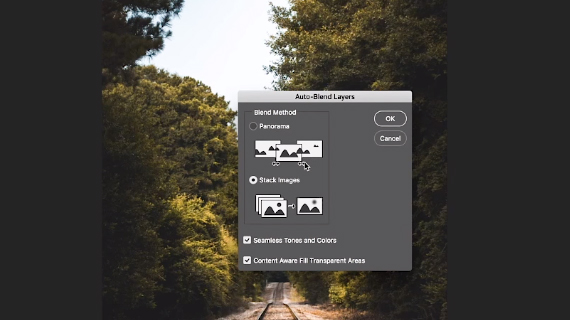
And, finally, the fun stuff. This is where you get to blend the layers and create one image with a large depth of field. Go back to Edit and select Auto-Blend Layers. Select Stack Images to create the blended image.

Auto-Blend Layers
Photoshop uses its proprietary algorithm, going through each of the layers looking for what’s in focus and what’s out of focus. When it finds an area that is out of focus in a particular layer, it creates a layer mask and blends the focused area from the other layers.

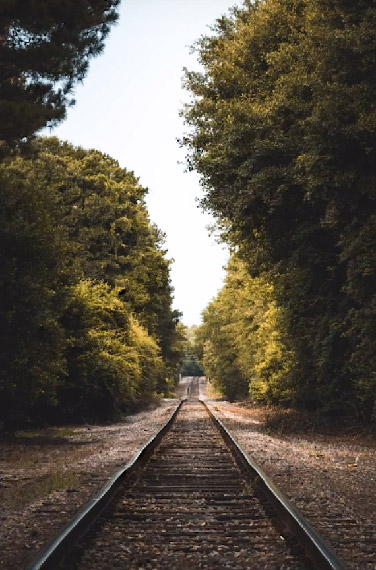
Focus Stacking
And there you have it, a focus stacked image that’s tack sharp throughout!
Go to full article: Focus Stacking Tutorial for Landscape Photographers
What are your thoughts on this article? Join the discussion on Facebook
PictureCorrect subscribers can also learn more today with our #1 bestseller: The Photography Tutorial eBook
The post Focus Stacking Tutorial for Landscape Photographers appeared first on PictureCorrect.
from PictureCorrect http://ift.tt/2Gb1hBy
via IFTTT


0 kommenttia:
Lähetä kommentti