via 500px https://ift.tt/gKm4eHE


Quick note: only 1 day left for this Flower Photography Guide April Sale
You see them everywhere: flowers in full bloom. They are colorful and so easy to photograph. You can use them as art prints, backgrounds for images, Facebook cover images, or just for the joy of capturing the beauty of a flower. There are some tricks that can elevate your images beyond snapshot level, into images that really express a flower’s magic.
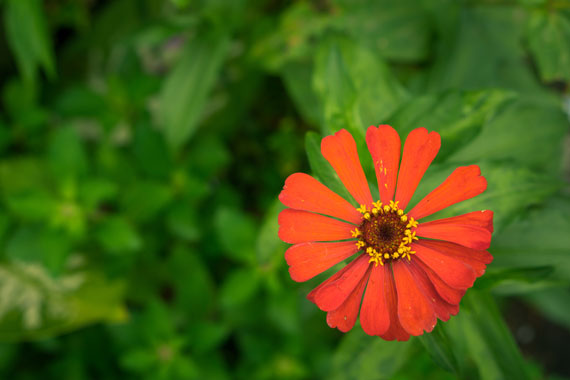
Photo captured by Mourizal Zativa; ISO 100, f/4.5, 1/100s.
If you add only a handful of these approaches to your photography, you will be amazed at the results.

photo by maf04

photo by solarisgirl
That old phrase, “stop and smell the roses” could also have you stopping to photograph the flowers. Blossoms don’t last long, but a well-planned photograph will enrich your life with a flower’s beauty forever.
About the Author:
Mark Laurie is a master photographer, international speaker, author, and studio mentor (InnerSpiritPhoto). He teaches extensively in England and Canada. His Revealing Glamour Photography Workshop is run in Italy. Mark has published seven books. You can find information on his books, photography, and training on his website.
Have you ever wondered how amazing flower photographs are created? I wondered as well… And then, I found this amazing, and gifted, flower photographer- who not only knows HOW to create dynamic flower photography- she also knows how to TEACH those tricks and techniques to other photographers through this in-depth eBook. It is currently 68% off until the end of the month with all the flowers blooming if you want to check it out.
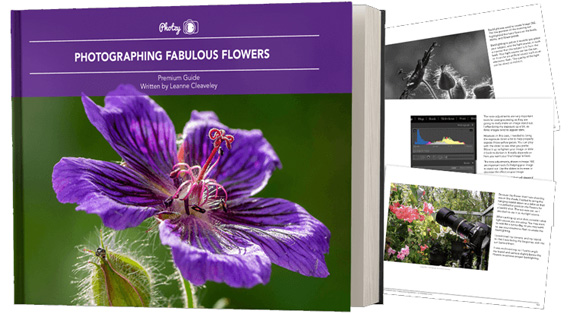
Flower Photography Guide (Take a Peek Inside)
156 page practical guide packed with Assignments, Key Lessons, and Self-Check Quizzes! (15 assignments, 26 key lessons, & 70 self-check questions!) With this guide, you’re getting a complete system for producing beautiful flower photographs. And, it’s at a fraction of the cost of an in-person workshop. Plus you can re-read the material anytime you want, whenever you need a quick refresh.
Only 1 day left: Photographing Fabulous Flowers April Sale
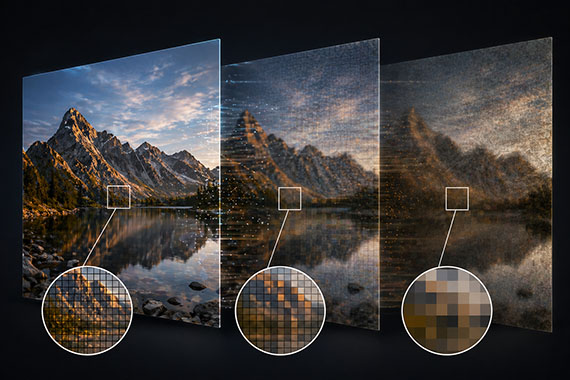
Most photographers assume image quality is determined at the moment of capture. And while getting things right in-camera absolutely matters, a surprising amount of quality is actually lost later — during editing.
Not because editing is harmful, but because small, reasonable adjustments compound quickly. What starts as a clean, detailed file can quietly turn into something softer, noisier, or less natural without it being obvious in the moment.
Related: only a little while left for the Photo Editing Cheat Sheets  April Edits Sale
Modern editing tools are incredibly powerful. With just a few sliders—clarity, sharpening, contrast—you can dramatically change an image in seconds.
The issue is that many of these adjustments work against each other.
For example, increasing clarity and sharpening can make details pop at first. But push them too far and edges become harsh, halos appear, and textures start to look artificial. Then noise reduction is added to compensate—which softens those same details you were trying to enhance.
This back-and-forth is where real image quality starts to disappear.
Noise reduction is one of the biggest culprits in image degradation.
It’s tempting to smooth out grain, especially in high ISO images. But aggressive noise reduction doesn’t just remove noise—it removes texture, fine detail, and micro-contrast.
The result is an image that looks “clean”… but also flat and lifeless.
A better approach is to accept a small amount of noise. Fine grain is far less damaging than smeared detail, and it often preserves the natural feel of the image.
Sharpening should enhance detail—not create it.
When overused, it introduces crunchy textures, jagged edges, and halos around high-contrast areas. This is especially noticeable in skies, foliage, and night photography where subtle detail matters most.
If sharpening is obvious, it’s already too much.
The goal is subtlety. Apply it carefully, and ideally only where it actually improves the image.
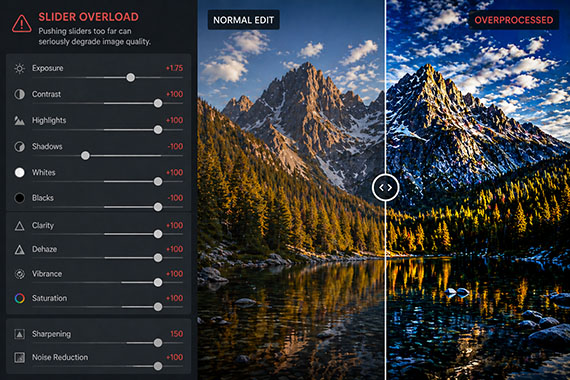
It’s easy to push contrast and saturation too far—especially when editing for impact.
But heavy contrast can crush shadows and clip highlights, permanently removing usable detail. At the same time, oversaturation can clip color channels, leading to unnatural tones and harsh transitions.
Images may look bold at first glance, but they often don’t hold up over time—or under closer inspection.
Even if your edit is solid, your export settings can undo a lot of that work.
Excessive compression, incorrect resolution, or repeated JPEG saves can introduce artifacts, reduce sharpness, and degrade overall clarity.
This is one of the most overlooked areas of image quality. Always export with intention—matching your settings to the final use, whether that’s web, print, or social.
Most image quality loss doesn’t come from one big mistake.
It comes from a series of small, reasonable decisions—slightly too much clarity, a bit too much noise reduction, a touch too much contrast.
Individually, they seem harmless. Together, they significantly degrade the image.
A few simple habits can make a major difference.
Edit with a lighter touch than you think you need. Regularly zoom in and check fine detail. Toggle adjustments on and off to see their true impact. And whenever possible, use selective adjustments instead of applying everything globally.
Most importantly, avoid the urge to “fix everything.” Minor imperfections are often what keep an image looking natural.
The best edits don’t draw attention to themselves.
They preserve what made the photo work in the first place.
If your image still feels natural, detailed, and clean after editing, you haven’t added quality—you’ve successfully protected it.
The April Edits Sale on the Photo Editing Cheat Sheets is wrapping up soon, making this a great time to bring clarity to your editing workflow. If editing often feels scattered or uncertain, these cheat sheets provide a clear, repeatable process for tackling exposure, color, masking, retouching, and finishing touches in the right order.

Paired with time-saving keyboard shortcuts, they help you edit faster, stay consistent, and know when an image is truly finished.
Deal ending soon: The Photo Editing Cheat Sheets April Edits Sale