keskiviikko 30. huhtikuuta 2025

PictureCorrect.com: Top 10 Ways to Earn Side Income as a Photographer

Photography isn’t just a passion—it can be a helpful side income stream, too. Whether you’re looking to monetize your weekends or build a creative business over time, there are many ways to make money with your camera. Here are 10 strategies that photographers of all levels can use to supplement their income.

Also thanks to our friends at finance-tips.ai with their Side Income Cheat Sheets who helped us with the list!

photo income ideas

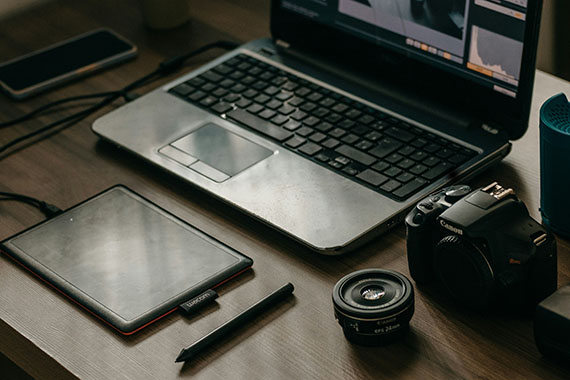
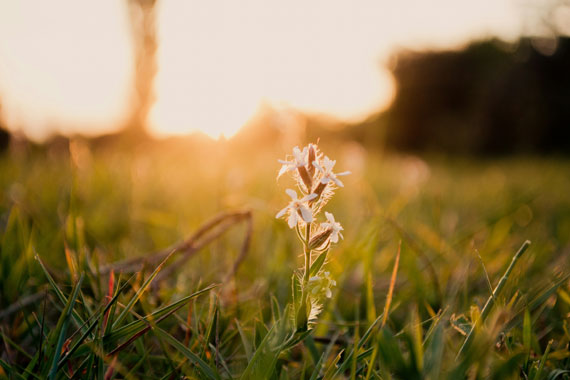
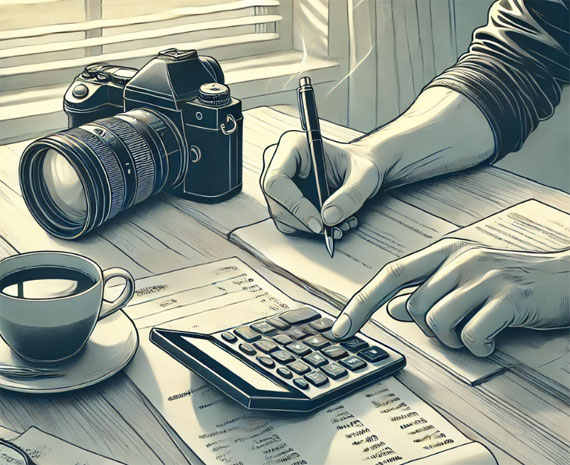
Photo captured by Kawe Rodrigues

1. Sell Stock Photography

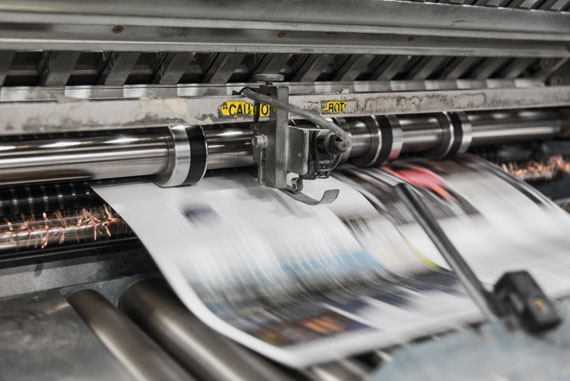
Stock sites like Shutterstock, Adobe Stock, Getty, and Alamy allow you to upload and license your images for commercial use. Every time someone downloads your photo, you get paid. While competition is high, the key is volume and relevance—focus on universally useful subjects like business environments, holidays, healthcare, and lifestyle imagery.

Pro Tip: Use keywords effectively, upload consistently, and think like a marketer. What kind of images would a website or company want to use?

2. Offer Mini Sessions

Mini sessions are short (15–30 minute) photo shoots offered at a reduced price and booked back-to-back in one location. They’re perfect for busy clients and for photographers who want to earn more per hour.

Example: You can book 8 sessions in one day at $150 each—earning $1,200 in a single afternoon. Ideal for seasonal shoots like fall leaves, holiday cards, or back-to-school.

Pro Tip: Use limited slots and urgency in your marketing to fill spots quickly.

3. Shoot for Airbnb Hosts

Airbnb listings with professional photos tend to perform better and get more bookings. Reach out to hosts in your area and offer a flat rate for a well-lit, stylized set of photos that showcase their space.

Pro Tip: Offer upsells like twilight shots, drone exteriors, or styled lifestyle images with people using the space. Hosts are often willing to invest if it means more bookings.

4. Sell Prints or Wall Art

Turn your scenic, abstract, or emotional images into art people can hang on their walls. Print-on-demand services like Fine Art America, Society6, or even Etsy make it easy to sell without managing inventory.

Pro Tip: Create themed collections (e.g., coastal landscapes, vintage cars, black-and-white street scenes) to appeal to specific décor tastes. Add mockups so buyers can visualize the prints in real spaces.

5. Teach Photography Workshops

If you’re confident behind the camera and enjoy teaching, workshops can be incredibly rewarding—and profitable. Offer beginner DSLR classes, smartphone photography tutorials, or genre-specific workshops like night or portrait photography.

  • In Person: Great for hands-on learning and photo walks
  • Online: Reach more students through platforms like Teachable, Skillshare, or Zoom

Pro Tip: Bundle your workshop with takeaway materials like a PDF guide or cheat sheet.

photography workshop

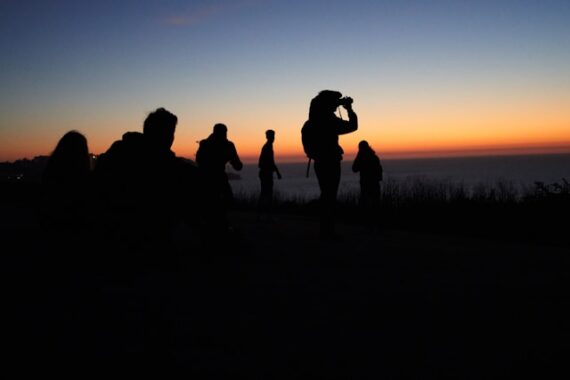
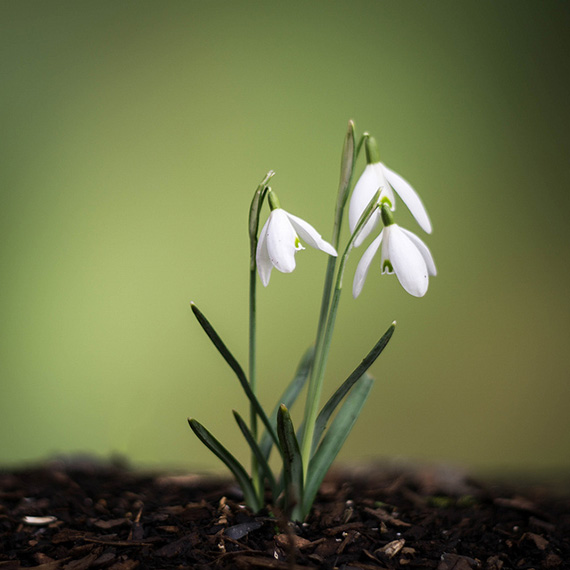
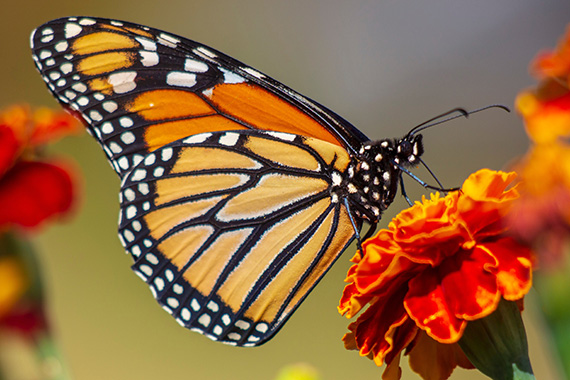
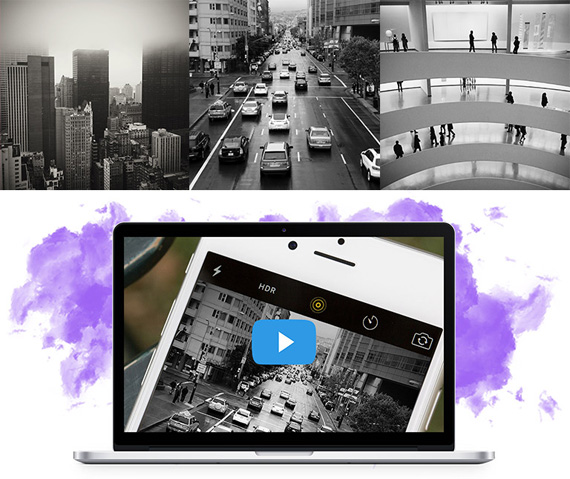
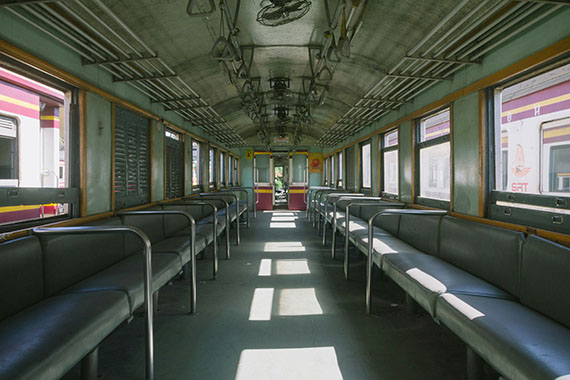
Photo captured by Drew Gilliam

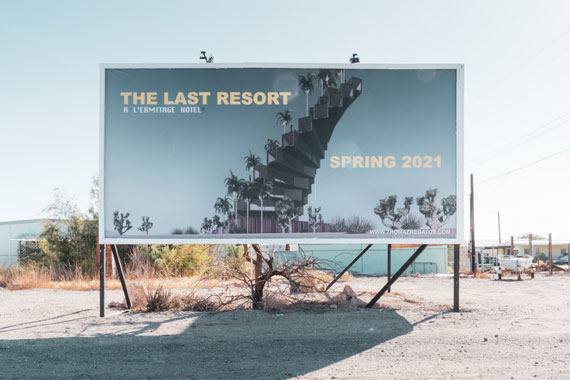
6. License Images to Brands or Bloggers

Smaller brands, bloggers, and websites often need unique imagery that doesn’t feel like generic stock. You can license your work directly by reaching out to them or by uploading to niche platforms like EyeEm or Wirestock.

Pro Tip: Build a small library of “brandable” content—think flat lays, lifestyle portraits, workspace setups, or health & wellness themes. Offer exclusive rights for higher fees.

7. Second Shoot for Events

Weddings, corporate functions, and concerts often require more than one photographer. Second shooters support the main photographer by covering alternate angles or moments. It’s less pressure but still pays well—typically $25–$75/hour.

Pro Tip: Connect with established photographers through local Facebook groups or wedding industry meetups. Be dependable, punctual, and professional—it can lead to more gigs.

8. Start a Photo Editing Side Hustle

Not every photographer enjoys post-processing. If you’re great at editing in Lightroom, Photoshop, or Capture One, you can offer services like culling, color correction, skin retouching, and album design.

  • Who Needs This? Wedding photographers, portrait studios, and influencers
  • Where to Offer: Fiverr, Upwork, Facebook groups, or your own site

Pro Tip: Offer sample edits or before/after comparisons to showcase your skill.

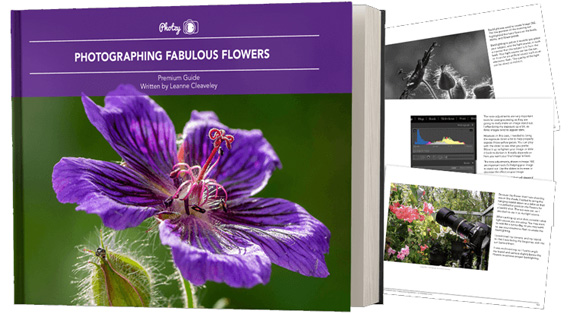
9. Create Digital Products

Think beyond the lens. Sell downloadable Lightroom presets, posing guides, photography business templates, or even eBooks. These products can earn passive income once created.

Pro Tip: Use Gumroad, Etsy, or your own website to sell, and promote them through Instagram, YouTube, or your email list. Give away a freebie to build your audience.

10. Offer Headshots and Branding Sessions

From corporate employees to small business owners and realtors—everyone needs a professional image. Headshot sessions are quick and repeatable, and brand sessions (which tell the story of a person or business visually) are in high demand.

Package Ideas:

  • $150 for a basic headshot session (15 minutes, 1 outfit)
  • $500+ for a brand shoot including location variety, props, and styled images

Pro Tip: Partner with local coworking spaces or networking groups to offer exclusive rates or shoot days.

Final Thoughts

Side income as a photographer isn’t just about snapping photos—it’s about identifying needs and solving problems with creativity. You don’t have to do everything at once. Start with the ideas that fit your style, schedule, and strengths—and scale from there.

For More Side Income Ideas:

Nearly half of working adults are exploring ways to earn extra income—and for good reason. Whether you’re saving, tackling debt, or seeking more freedom, side hustles can help. These Side Income Cheat Sheets show you how to turn your time and skills into real income—with clear steps and smart ideas to get started.

personal finances

They’re designed to give you a clear overview of what’s involved, what you can realistically expect to earn, and how to get started quickly.

Deal ending soon: The Side Income Cheat Sheets Launch Sale


from PictureCorrect https://ift.tt/8jw7sxL
via IFTTT

maanantai 28. huhtikuuta 2025

PictureCorrect.com: Butterfly Photography Tips and Techniques

Related reminder: only 1 day left for the Flower Photography Guide at 68% Off

As a nature photographer, the day often starts with the question: where do I begin? There are so many photographic opportunities, and it is not always easy to choose the right object at the right moment. But among all of nature’s amazing diversity, there is one species you just can’t take bad pictures of: namely, butterflies. With the right preparation you’ll easily get one final colourful image, due to these bright creatures and the colourful flowers they feed on.

While this seems an ideal subject for nature photography, many starting photographers find photographing butterflies quite challenging. These little winged creatures can be very active and in that way don’t keep still long enough to take the right shots. But with the following list of tips and the right amount of patience, you’ll see that photographing butterflies is a very rewarding photographic activity.

butterfly photo tips

Photo by Erin Wilson

Where and when

From April until late August, butterflies can be found almost everywhere. The most common species have adapted to live in urban areas, so you can find them easily by simply walking around in your own garden. You could even attract different species by planting flowers and bushes that attract these little insects. Certain butterflies can also be attracted by putting out rotting fruit.

In the past decades, butterflies have declined dramatically due to the loss of their habitats and the plants that a species of butterfly may be reliant upon. To find rare and endangered butterflies, you might have to drive to specific locations, where only a small population is left. Keep in mind that these populations are very vulnerable, so always try to take your photographs with great respect for nature and the environment.

Because butterflies depend on the warmth of the sun, I usually go out photographing them in the early mornings and evenings, as they are less active then. It might then be harder to find them, so look carefully for butterflies resting on flowers or grasses.

Don’t hesitate to go out on a clouded day as well; the light is soft then, which allows you to photograph in “good” light the whole day.

Once you have found an obliging individual, approach it carefully without disturbing it and take all the shots you can. It also helps to wear dark clothing because it doesn’t scare butterflies off as easily as light coloured clothing does.

Equipment to use

I could actually write a whole article about the equipment necessary for photographing butterflies, but if you’re just a starting photographer of butterflies, I would recommend the following material in particular. The best choice would probably be a DSLR combined with a macro lens, but if you don’t have that on hand, you could also use your telephoto lens. My first butterfly shots were taken with a Nikon Coolpix 995, so even a digital compact camera can get you started.

Furthermore, I would recommend a macro lens of 100mm or more, because they allow greater working distance. A longer focal length gives a nice out-of-focus background. I use a Sigma 150mm macro and this combination gives me very satisfying results when taking shots of butterflies.

Most of the time I use a tripod, as well. You will be working with rather small apertures in order to get the butterfly completely in focus, therefore resulting in low shutter speeds. If you go out early in the morning or on a cloudy day, the available light might be poor and a tripod really is necessary.

On a cloudy day, a flash unit can be used as a fill-flash to add an extra punch to your image or it can be used as an extra source of light. When photographing in full sun, use a fill-flash to soften the harsh shadows.

For really small objects, extension tubes allow an even closer focusing distance. An extender will allow a greater working distance and a remote cord can avoid blurry images due to camera shake, when photographing at very low shutter speeds.

Things to keep in mind

When photographing close-up, the depth of field is very small. So in order to have your butterfly completely in focus, you need a small aperture. For butterflies that have their wings closed, an aperture of f/5.6 will do, but for butterflies that have their wings spread open, you might need an aperture of f/10 and higher. If your camera has a depth of field preview button, use it to see how much of your subject is in focus.

butterfly photography tips

Photo by Kathy Servian

You should also pay attention to your background. Try to avoid cluttered backgrounds. By simply changing the position of your tripod a little, you might avoid distracting objects in the background. Images that have a soft out of focus background, isolating the subject, have far more impact on the viewer.

I suggest you use manual focus when doing close-up photography. The narrow depth of field requires an extremely precise focus and having your camera focusing on the wrong part of your subject can completely ruin your shot.

Look for a good composition, generally avoid placing your subject in the middle but use the rule of thirds, your image will have far more impact on its viewers. If your camera has a live preview function, you can also use this to check your composition.

Finally take a few shots and check your histogram for correct exposure.

I find that butterflies lean themselves very well for experimenting with light. Step away from the standard image and take that same shot using backlighting, you might be surprised about the results.

Good luck

As you can read, there are a few things to keep in mind. It is often very frustrating when you see a nice butterfly sitting on a colourful flower, you approach it very carefully, put your tripod and camera in position, and when you are about to take the first shot it flies off. But if you have enough patience I can assure you that some rewarding images can be taken. Think outside the box and try to add a little more drama to your shots by trying out different techniques. Don’t hesitate to photograph from different angles, in different light and you’ll soon notice that experimenting with all these elements will improve your pictures. I hope these basic tips can get you started, but don’t forget to be creative yourself.

About the Author:
Bart Heirweg is a professional nature & landscape photographer based in Belgium.

For Further Training on Flower Photography:

Have you ever wondered how amazing flower photographs are created? I wondered as well… And then, I found this amazing, and gifted, flower photographer- who not only knows HOW to create dynamic flower photography- she also knows how to TEACH those tricks and techniques to other photographers through this in-depth eBook. It is currently 68% off until the end of the month, April 30 with all the flowers blooming if you want to check it out.

flower photo guide

Flower Photography Guide (Take a Peek Inside)

156 page practical guide packed with Assignments, Key Lessons, and Self-Check Quizzes! (15 assignments, 26 key lessons, & 70 self-check questions!) With this guide, you’re getting a complete system for producing beautiful flower photographs. And, it’s at a fraction of the cost of an in-person workshop. Plus you can re-read the material anytime you want, whenever you need a quick refresh.

Only 1 day left: Photographing Fabulous Flowers at 68% Off


from PictureCorrect https://ift.tt/BjmWHwt
via IFTTT

tiistai 22. huhtikuuta 2025

PictureCorrect.com: Where and When to Photograph Cherry Blossoms

I’m a little late to publish this this year—but the inspiration just hit. I was walking through my neighborhood here in California and spotted a cherry blossom tree in full bloom. It completely stopped me in my tracks. The soft petals, the light breeze, the way it caught the afternoon sun—it reminded me just how magical this time of year can be for photographers.

So I decided to dig in and research the best places to photograph cherry blossoms, not just for next year’s planning, but to appreciate how widespread and stunning these blooms really are—whether you’re traveling the world or just walking down your street.

Relevant reminder: only a little while left for the Flower Photography Guide at 68% Off

Here are some of the top locations (famous and local) where you can capture the magic of cherry blossom season:

cherry blossoms

Photo captured by Yu Kato in Tokyo; 55mm, f/4.0, 1/55s, ISO 1000

🌸 1. Washington, D.C., USA

Best time to shoot: Late March to early April
The Tidal Basin in Washington, D.C. is one of the most iconic cherry blossom locations in the U.S. With over 3,000 trees gifted from Japan in 1912, the area becomes a pastel wonderland each spring. Arrive early to beat the crowds and catch the soft morning light reflecting off the water.

Pro Tip: Use a polarizer to reduce glare on the water and deepen the sky’s contrast behind the blossoms.

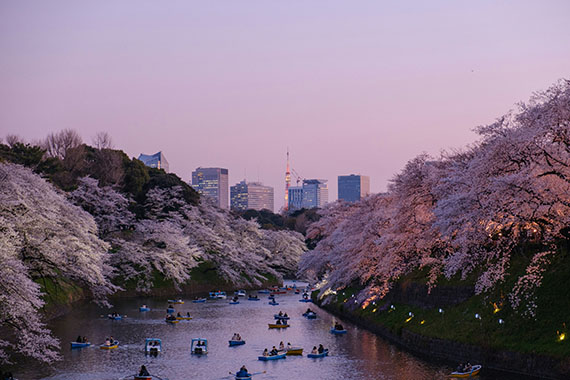
🗼 2. Tokyo & Kyoto, Japan

Best time to shoot: Late March to early April (varies by region)
Japan is the cherry blossom capital of the world, with countless temples, shrines, and riverside paths blanketed in pink. In Tokyo, head to Ueno Park or Chidorigafuchi for classic views. Kyoto’s Philosopher’s Path offers a tranquil, photogenic walkway lined with sakura trees.

Pro Tip: Shoot just after sunset for glowing lanterns beneath the blossoms—especially magical in Kyoto’s historic districts.

🏞 3. Vancouver, Canada

Best time to shoot: Early to mid-April
With over 40,000 cherry trees, Vancouver transforms into a blossom paradise each spring. Queen Elizabeth Park and Stanley Park are two of the best spots for framing mountain backdrops with blooms.

Pro Tip: Try low-angle shots for dramatic compositions with towering trees and blue skies.

cherry blossom street

Photo captured by Francis Nie

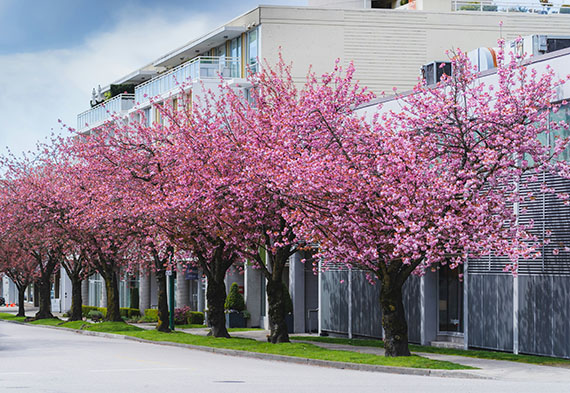
🏙 4. Brooklyn Botanic Garden, New York City

Best time to shoot: Mid to late April
The Cherry Esplanade in Brooklyn explodes with color each spring, with double-flowering sakura trees forming a tunnel of blossoms. The garden’s Sakura Matsuri Festival offers a great opportunity for candid and cultural shots.

Pro Tip: Visit on a weekday morning to avoid heavy crowds and capture a more serene vibe.

🏯 5. South Korea – Seoul’s Yeouido Park & Gyeongju

Best time to shoot: Early April
South Korea’s cherry blossom season is often overlooked but is equally stunning. Yeouido Park in Seoul offers urban vibes, while the ancient city of Gyeongju provides serene, historic settings with blossoms blooming around temples and tombs.

Pro Tip: Use leading lines (like roads, bridges, or temples) to guide the viewer’s eye through the floral scenes.

🌲 6. Your Local Park or Neighborhood

Cherry blossoms aren’t just found in famous locations—many cities and small towns plant ornamental cherry trees that offer beautiful surprises every spring. If you’re not traveling this year, grab your camera and scout local parks, botanical gardens, or even residential streets.

Pro Tip: Overcast days can actually enhance blossom colors. Try shooting during soft light for clean, pastel tones.

Final Thoughts

Cherry blossom photography is about more than just pretty petals—it’s about capturing a brief moment of seasonal transition. Whether you’re chasing them across continents or discovering them in your backyard, timing, light, and a touch of patience are key.

For Further Training on Flower Photography:

Have you ever wondered how amazing flower photographs are created? I wondered as well… And then, I found this amazing, and gifted, flower photographer- who not only knows HOW to create dynamic flower photography- she also knows how to TEACH those tricks and techniques to other photographers through this in-depth eBook. It is currently 68% off for a limited time with all the flowers blooming if you want to check it out.

flower photo guide

Flower Photography Guide (Take a Peek Inside)

156 page practical guide packed with Assignments, Key Lessons, and Self-Check Quizzes! (15 assignments, 26 key lessons, & 70 self-check questions!) With this guide, you’re getting a complete system for producing beautiful flower photographs. And, it’s at a fraction of the cost of an in-person workshop. Plus you can re-read the material anytime you want, whenever you need a quick refresh.

Deal ending soon: Photographing Fabulous Flowers at 68% Off


from PictureCorrect https://ift.tt/r5F32Zo
via IFTTT

maanantai 21. huhtikuuta 2025

PictureCorrect.com: Nailing the Focal Point with Fast-Moving Subjects

Capturing an image of a moving subject can be one of the most exciting yet challenging tasks for a photographer. Whether it’s a bustling crowd, a running animal, or a speeding vehicle, managing the focus in these situations can be tough. But with the right knowledge and techniques, it can be handled with ease. This blog post will take you through some helpful tips on how to deal with moving subjects when setting the focal point.

Relevant reminder: spring sale ending soon for the Composition Cheat Sheets

motion focal point

Photo captured by Scott Ymker; f/4, 1/40s, 1600 ISO

Understand Your Camera’s Autofocus System

Modern cameras come equipped with highly sophisticated autofocus (AF) systems. These systems have different modes to cater to different shooting scenarios, such as stationary or moving subjects. If you’re aiming to capture moving subjects, you should get familiar with the continuous or tracking autofocus mode.

In continuous autofocus (AF-C on Nikon, AI Servo on Canon, AF-C on Sony), the camera constantly adjusts the focus as long as the shutter button is half-pressed. This feature allows you to maintain focus on subjects moving towards or away from you.

In tracking autofocus mode, the camera tracks the subject across the frame and maintains focus on it. This mode is particularly useful for subjects moving erratically.

Pre-focus on a Predictable Path

In situations where your subject’s path is fairly predictable, such as a runner on a track or a vehicle on a road, pre-focusing can be very effective. To do this, set your camera to manual focus (MF) mode and focus on a spot where you expect your subject to pass through. Once your subject reaches the focused spot, take the shot.

Use the Right Focus Points

Most modern cameras offer the option of multiple focus points. When photographing moving subjects, it’s generally a good idea to use dynamic or expanded autofocus points. In this mode, the camera utilizes a group of focus points that can track a moving subject more efficiently.

focus points

Photo by Vincent van Zalinge

The Symbiosis of Focal Point and Composition

The focal point and composition in a photograph are intrinsically linked. Together, they control where the viewer’s eye is drawn in an image. While the focal point is the ‘star’ of the photo—the element on which the viewer’s eye lands first—composition is the ‘director,’ guiding the viewer’s gaze around the frame.

When photographing moving subjects, the focal point often is the subject itself. However, the composition can be used to enhance the sense of motion and direction. For example, by using the rule of thirds, you can place your moving subject off-center, suggesting where it’s heading. This can make your photo more dynamic and engaging.

In addition, leading lines can be a powerful compositional tool to direct the viewer’s attention towards your moving subject. These could be anything from a road or a fence, to a line of trees or a river—any element that creates a line leading towards the focal point.

Diagonal lines, in particular, can create a strong sense of action when photographing moving subjects. They suggest dynamism and change, reflecting the inherent nature of your moving subject.

Employ the Panning Technique

Panning involves moving your camera to follow a moving subject during the exposure. This technique results in the subject being relatively sharp against a blurred background, emphasizing motion. To effectively use panning:

  1. Set your camera to shutter priority mode (S or Tv) and select a slow shutter speed.
  2. Set your camera to continuous autofocus mode to maintain focus on your moving subject.
  3. As your subject moves, follow it with your camera, matching its speed and direction.
  4. While continuing to move your camera, press the shutter button.
panning focal point

Photo by Kieran Sheehan; f/14, 1/10s, ISO 100

Remember, panning requires practice to get the right balance between subject sharpness and background blur.

Use Burst Mode

Burst mode (or continuous shooting mode) allows you to take several photos in quick succession. This mode increases your chances of getting at least one sharply focused shot of your moving subject.

Practice, Practice, Practice

Mastering focus on moving subjects requires practice. Spend time familiarizing yourself with your camera’s autofocus system and experimenting with the tips mentioned above. With time, you’ll gain confidence and find it easier to capture sharp images of moving subjects.

In conclusion, dealing with moving subjects can be challenging, but with the right techniques and enough practice, it’s entirely possible to get that perfect shot. Embrace the challenge and remember – every missed shot is a step towards a stunning capture.

For Further Training:

Are you ever tired of your photos looking dull or boring? Our new Composition Cheat Sheets have you covered. With clear, concise information on all the essential elements of composition, you’ll never be unprepared again. They are currently 81% off today for a spring sale which ends soon if you want to check them out.

composition cheat sheets

Composition Cheat Sheets (see all the elements covered)

The perfect companion for any photographer. Print one out whenever you need it. These cheat sheets consolidate crucial composition-related information, allowing you to concentrate on what truly matters – composing striking photographs.

Spring sale ending soon: The Composition Cheat Sheets at 81% Off


from PictureCorrect https://ift.tt/BtISOYg
via IFTTT

Starnight in Golubickaya by antonenkori (500px.com/antonenkori)


Starnight in Golubickaya via 500px https://ift.tt/YHUZK5t

lauantai 19. huhtikuuta 2025

PictureCorrect.com: 10 Advanced Smartphone Camera Options for Avid Photographers

While most smartphone users are familiar with the basic features of their camera, there are lesser-known features and capabilities that can greatly enhance the photography experience. Some of these features may be device-specific or available through third-party apps, but photographers should be aware of the following:

Related reminder: only 1 day left for the iPhone Photo Academy Easter Sale

advanced smartphone photography

Photo captured by Omar Prestwich

1. RAW image capture: Many smartphones allow users to capture images in RAW format, which provides more control over post-processing.

2. Manual mode: Some smartphones have a manual mode that allows users to adjust settings like shutter speed, ISO, and focus, providing greater creative control.

3. Focus peaking: This feature highlights in-focus areas of the image, making it easier to determine the depth of field and ensure a sharp focus.

4. Long exposure: Some smartphones support long exposure photography, allowing users to capture light trails, star trails, or smooth water effects.

5. Bracketing: With bracketing, the camera takes multiple images at different exposure levels, allowing photographers to merge them for HDR photos or choose the best exposure later.

6. ProRAW: Exclusive to some iPhone models, ProRAW combines the benefits of RAW format and computational photography for greater flexibility in post-processing.

7. Night mode: This feature enables better low-light photography by taking multiple images and combining them to reduce noise and enhance detail.

8. Burst mode: By holding down the shutter button, users can take a rapid succession of images, making it easier to capture action or fast-moving subjects.

9. Time-lapse: Many smartphones have a built-in time-lapse feature, allowing users to create stunning videos by capturing images at specific intervals.

10. External lenses: To expand their smartphone’s capabilities, photographers can use external lenses, such as wide-angle, telephoto, or macro lenses, which can be attached to the phone’s camera.

Remember that not all smartphones may have these features, and updates or new models may introduce even more capabilities. To get the most out of your smartphone camera, it’s essential to explore and experiment with the available settings and features.

For Further Training:

iPhone Photo Academy is an in-depth online course that will show you how to take incredible iPhone photos. With the right knowledge an iPhone can be used to take photos that are so good that most people would never even believe that they were taken with a phone. It is currently 90% off for the Easter Sale which ends tomorrow! It is one of the largest discounts they have ever offered.

iphone photo tutorials

iPhone Photography Tricks (Click to See More Examples)

The best camera is the one that is always with you. But having the iPhone with you is only half of the equation. The other half is knowing how to use it to take outstanding photos.

Only 1 day left: The iPhone Photo Academy Easter Sale


from PictureCorrect https://ift.tt/Jxdh9j0
via IFTTT

keskiviikko 16. huhtikuuta 2025

PictureCorrect.com: How to Sharpen Images for More Clarity

Whether it’s a slightly blurry portrait, a soft landscape, or motion blur from an unsteady hand, image sharpness is often the difference between a good photo and a great one. Fortunately, you don’t have to settle for soft shots anymore.

Photo AI takes sharpening to the next level—beyond basic edge detection—using restorative AI that intelligently reconstructs lost details across the entire image. The result? Sharper, clearer photos that still look natural.

Here’s how you can sharpen your photos using Photo AI Version 3.6:

clear image

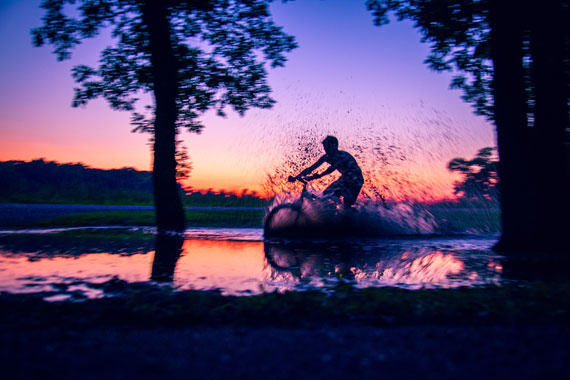
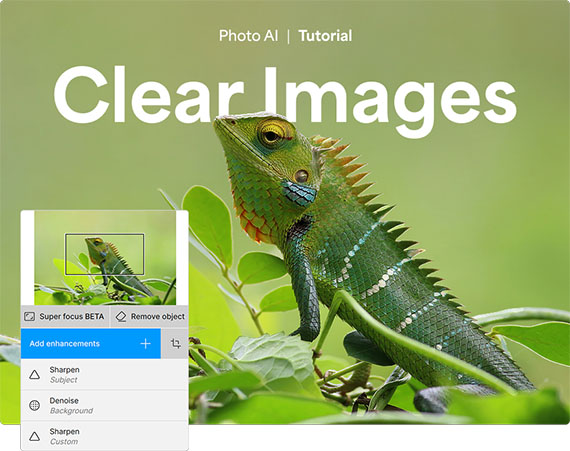
🛠 Step-by-Step: Sharpening Images with Photo AI

1. Launch Photo AI

Start by opening Photo AI on your device. If you don’t have it installed yet, download the latest version to access the latest sharpening models and enhancements.

📥 Pro Tip: The newest version (v3.6) includes Super Focus v2—500% faster sharpening with improved clarity.

2. Import Your Image

Drag and drop an image that needs help—perhaps it’s slightly out of focus, suffers from camera shake, or just feels a bit too soft.

Once loaded, Photo AI automatically analyzes the image and provides intelligent enhancement suggestions.

before image

3. Use the Sharpen Tool

Click the Sharpen enhancement from the right-hand panel. This tool does more than traditional pixel-edge sharpening—it analyzes the structure of your image and reconstructs missing details using deep learning.

You’ll immediately see a preview of the improvement—edges become crisper, details more defined, and textures more lifelike.

4. Edit Selection to Target Specific Areas

Sometimes you only want to sharpen part of an image—like a face or a product—but leave the background smooth and soft. That’s where Edit Selection comes in.

Use it to paint over or erase areas of your photo. You can isolate your subject for sharpening while keeping the background untouched.

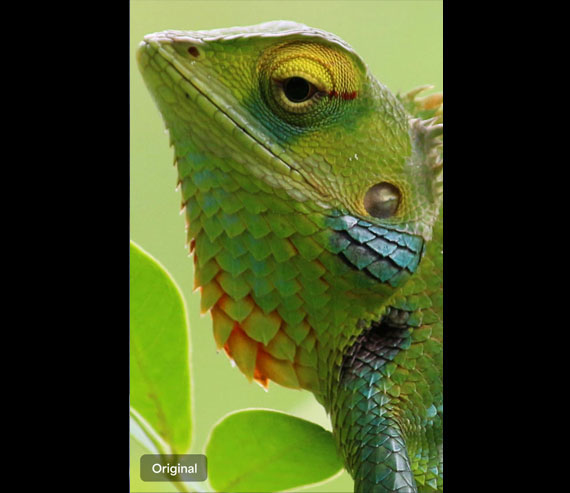
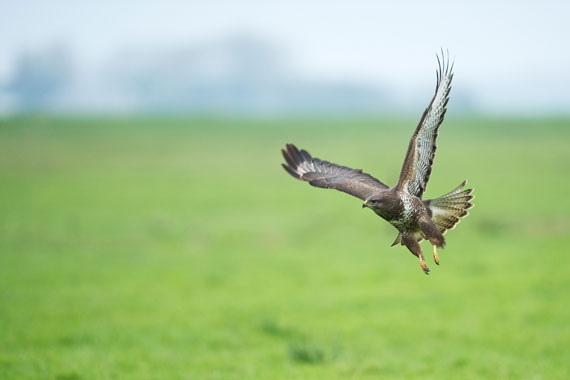
🎯 Use this for portraits, wildlife, or product photos where subject clarity matters most.

5. Fine-Tune with Models and Sliders

Photo AI includes several AI-powered sharpening models. Choose the one that best suits your photo:

  • Sharpen Motion – Best for fixing motion blur.
  • Sharpen Focus – Great for correcting minor out-of-focus issues.
  • Sharpen Standard – A balanced choice for general use.

Then adjust the Strength slider to control how much sharpening is applied. Subtle tweaks often produce the most natural results.

after image

6. Stack Enhancements for Even Better Results

Want even more control?

You can combine enhancements:

  • Use Sharpen Natural on your subject for gentle clarity without artifacts.
  • Add Denoise Standard to the background for a smoother look.

This approach lets you selectively enhance detail while maintaining a polished, professional finish.

✅ Final Tips for Sharpening Success

  • Zoom in to 100% when evaluating sharpness.
  • Don’t overdo it. Oversharpening can introduce halos or artifacts.
  • Try before/after comparisons to see the true impact.

🖼 Before and After: Seeing is Believing

Take a look at your edited image side by side with the original. The restored clarity, subtle edge detail, and enhanced textures will speak for themselves.

Photo AI gives you powerful, precise control over image sharpness with AI-driven tools that go far beyond traditional methods. Whether you’re rescuing a soft photo or simply refining a sharp shot to perfection, this tutorial will help you get the clarity your images deserve.

Try it on one of your photos: Topaz Photo AI 3.6


from PictureCorrect https://ift.tt/h51LNnm
via IFTTT

tiistai 15. huhtikuuta 2025

PictureCorrect.com: The Hierarchy of Compositional Elements in Photography

As photographers, we are storytellers, using the language of visual elements to translate the three-dimensional world onto a two-dimensional plane. Understanding the art of composition is crucial to capturing compelling images that narrate our unique perspective of the world. It’s like arranging the notes of a melody to create a harmonious song.

Related note: spring season sale ending soon for the Composition Cheat Sheets

composition order

Photo captured by Lachlan Gowen; f/9, 0.3s, ISO 100

However, the concept of an “order” to follow when considering the elements of composition isn’t carved in stone. Each scene, each subject, and each moment brings unique aspects that might prompt us to prioritize one compositional element over another. But for the sake of learning and practicing, it’s helpful to establish a guideline or a hierarchy of these elements. Let’s break down the sequence of considerations you might follow when composing a shot.

1. Vision and Intent

Before delving into the technical aspects of composition, start with the question: “What is my intent with this photograph?” Your vision is the driving force behind your composition. Do you want to highlight a certain emotion, convey a story, or just capture the beauty of the scene? Understanding your purpose will guide your use of compositional elements.

2. Framing and Placement of the Subject

Once you’re clear on your intent, consider the placement of your subject within the frame. The Rule of Thirds is a widely accepted principle to guide this step. The idea is to divide the frame into nine equal parts with two equally spaced horizontal and vertical lines, then place the key elements of your scene along these lines, or at their intersections.

3. Use of Leading Lines

Leading lines are a powerful tool to guide the viewer’s eye towards the subject or a point of interest. These lines can be anything – a pathway, a stream, architectural elements, or even a gaze. The key is to identify these lines in your scene and align your shot to leverage them.

4. Depth and Perspective

Creating a sense of depth adds dimension and realism to your photographs. Play with elements like foreground, middle ground, and background. Use perspective and depth of field to create a three-dimensional effect in a two-dimensional medium.

5. Balance and Symmetry

Ensure that your image feels balanced, which can be achieved both symmetrically and asymmetrically. Symmetry provides a sense of harmony and proportion, while asymmetry, when balanced correctly, can make your image more dynamic and interesting.

symmetry image

Photo captured by James Best

6. Patterns and Textures

Patterns and textures can add a rich layer of depth to your photographs. They can either be the subject itself or complement the primary subject. Patterns provide a sense of rhythm, while textures can evoke tactile sensations making the image more immersive.

7. Lighting and Shadows

Lighting is not just an illuminator, but a storyteller. It can dramatically change the mood, texture, and tone of your photograph. The interplay of light and shadow is crucial for highlighting your subject, creating depth, and revealing textures.

8. Color and Contrast

Lastly, consider the color scheme and contrast. Colors can evoke emotional responses and set the mood. Contrast, on the other hand, can draw attention to your subject, guide the viewer’s eye, and add drama to your image.

Remember, while this hierarchy can be a helpful guide, it’s not a set of rigid rules. Composition is as much about intuition and personal style as it is about guidelines. The more you shoot, the more you develop an instinct for composing impactful images. So grab your camera, and let the world be your canvas!

For Further Training on Composition:

Do you ever have trouble remembering all the elements of composition? These popular Composition Cheat Sheets have you covered. With clear, concise information on all the essential elements of composition, you’ll never be unprepared again. They are currently 81% off today for a Spring Sale if you want to check them out.

composition cheat sheets

Composition Cheat Sheets (see all the elements covered)

The perfect companion for any photographer. Print one out whenever you need it. These cheat sheets consolidate crucial composition-related information, allowing you to concentrate on what truly matters – composing striking photographs.

Spring sale ending soon: The Composition Cheat Sheets at 81% Off


from PictureCorrect https://ift.tt/oHbn7cI
via IFTTT

maanantai 14. huhtikuuta 2025

PictureCorrect.com: Refocus in a Flash: Photo AI 3.6 Supercharges Your Workflow

In photo editing news, the latest release of Photo AI (version 3.6) introduces several powerful tools and improvements designed to enhance image editing capabilities. Here’s a summary of the key features in this update:

photo ai image

New Features and Enhancements in Photo AI v3.6

If you’ve ever captured a moment that ended up blurry or just slightly off, this one’s for you. The new Photo AI v3.6 update just dropped, and it’s all about speed, control, and clarity.

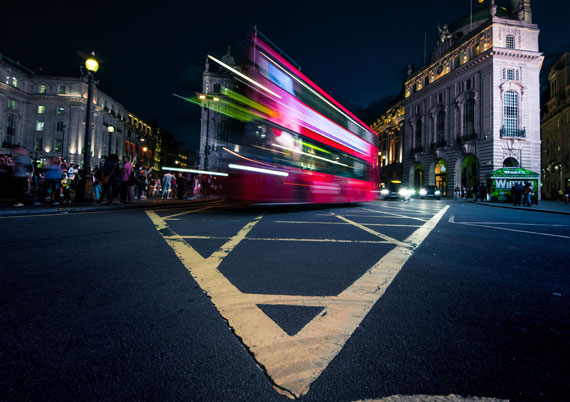
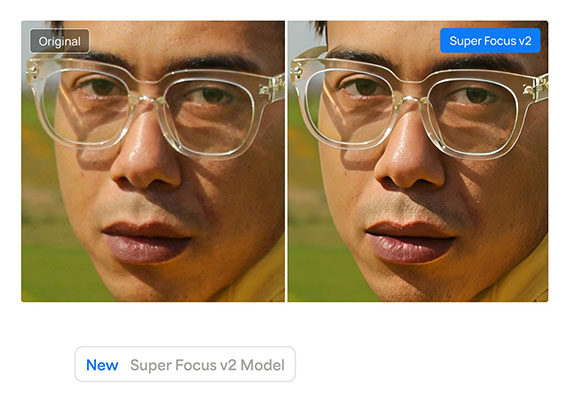
🚀 Introducing Super Focus v2 – 500% Faster Deblurring

Photo AI’s powerful deblurring tool just got a serious upgrade. Super Focus v2 delivers up to 500% faster performance than before, with improved consistency and better results across a wider range of images. Best part? After processing, you can now adjust sharpening intensity and fine-tune details without having to re-run the entire process. That means faster edits, less waiting, and more creative control.

💡 Manual Control with Adjust Lighting v2

Lighting tweaks just got more precise. The new manual sliders in Adjust Lighting v2 let you fine-tune highlights and shadows exactly how you want them. Want more flexibility with color? A new toggle lets you switch color optimization on or off depending on your workflow.

🔍 Better Navigation with Zoom to Fit

Tired of zooming in and out just to get started? The Zoom to Fit Preference gives you the option to change how images open—automatically fitting them to your screen. It’s a small tweak that makes a big difference in your editing flow. To enable it, go to Preferences > General and toggle it on.

See how it works: Topaz Photo AI Version 3.6


from PictureCorrect https://ift.tt/PmUvCYy
via IFTTT

sunnuntai 13. huhtikuuta 2025

PictureCorrect.com: Illuminated Blooms: Backlit Flower Photography Tips

Backlit photography, where the light source is positioned behind the subject, offers a unique way to capture the ethereal beauty of flowers. This technique can illuminate the delicate details of petals, create a luminous halo around the subject, and infuse your photos with a sense of depth and drama. Here are some invaluable tips to master backlit flower photography, transforming ordinary floral scenes into breathtaking works of art.

Relevant reminder: only a little while left for the Flower Photography Guide at 68% Off

backlit flower

Photo captured by Eliecer Gallegos

1. Choosing the Right Time of Day

The golden hours—shortly after sunrise or before sunset—are ideal for backlit photography. The soft, warm light during these times can add a magical glow to your flower subjects, enhancing their colors and textures. Midday sun, though not typically recommended due to its harshness, can be harnessed creatively for high-contrast, vibrant effects.

2. Positioning Your Subject

The placement of the flower in relation to the light source is crucial. Ensure the light is directly behind the flower to achieve a glowing effect. Experiment with different angles and distances to capture varying degrees of backlighting and shadow, adding depth and dimension to your images.

3. Camera Settings

Manual mode or aperture priority is your best friend in backlit situations, as it allows full control over exposure, aperture, and shutter speed. A larger aperture (smaller f-number) helps create a narrow depth of field, focusing attention on the flower while blurring the background. Adjust the exposure to highlight the luminous edges of petals without washing out the details.

backlit petals

Photo captured by Dominik Scythe

4. Lens Flare and Sunstars

Lens flare and sunstars can add an artistic touch to your backlit flower photos. To achieve lens flare, allow a bit of direct light into the lens. For sunstars, narrow the aperture to a high f-number, like f/16 or f/22, which can create a starburst effect from the sun. Both effects can add a layer of creativity and mood to your images.

5. Using Reflectors and Diffusers

Reflectors can bounce light back onto the darker side of the flower, reducing contrast and revealing more detail. A diffuser can soften harsh sunlight, especially useful during brighter parts of the day, ensuring your flower isn’t lost in shadow.

6. Post-Processing

Post-processing plays a key role in enhancing backlit images. Adjusting highlights, shadows, and colors can help recover details and enhance the glow effect. Tools like the dehaze slider can also be particularly useful in refining the contrast and clarity of backlit elements.

backlighting macro

Photo captured by Yair Mejía

7. Creative Experimentation

Don’t be afraid to experiment with different compositions, backgrounds, and lighting intensities. Sometimes, the most captivating images come from unexpected angles or lighting conditions. Play with silhouettes, close-ups, and varying degrees of backlighting to discover your unique style.

Summary:

Backlit flower photography can transform an ordinary bloom into a stunning, radiant subject. By understanding the interplay of light and shadow, mastering your camera settings, and employing post-processing techniques, you can create luminous, striking images that capture the ephemeral beauty of flowers in a new light. So, grab your camera and venture out into the golden hours, or even the midday sun, and start exploring the luminous world of backlit floral photography!

For Further Training on Flower Photography:

Have you ever wondered how amazing flower photographs are created? I wondered as well… And then, I found this amazing, and gifted, flower photographer- who not only knows HOW to create dynamic flower photography- she also knows how to TEACH those tricks and techniques to other photographers through this in-depth eBook. It is currently 68% off for a limited time with all the flowers blooming if you want to check it out.

flower photo guide

Flower Photography Guide (Take a Peek Inside)

156 page practical guide packed with Assignments, Key Lessons, and Self-Check Quizzes! (15 assignments, 26 key lessons, & 70 self-check questions!) With this guide, you’re getting a complete system for producing beautiful flower photographs. And, it’s at a fraction of the cost of an in-person workshop. Plus you can re-read the material anytime you want, whenever you need a quick refresh.

Deal ending soon: Photographing Fabulous Flowers at 68% Off


from PictureCorrect https://ift.tt/KJAYmnD
via IFTTT

keskiviikko 9. huhtikuuta 2025

PictureCorrect.com: Spring Season Photography

Spring is a season of awakening—when the last patches of snow give way to budding flowers and the world begins to hum with life again. For photographers, it’s a time of inspiration, filled with fleeting moments and delicate details that beg to be captured.

Related note: only a little while left for the Flower Photography Guide at 68% Off

snowdrops

photo by Mark Freeth

Light That Flatters

One of spring’s greatest gifts to photographers is the quality of its light. The sun sits lower in the sky than in summer, casting a softer glow that’s ideal for shooting throughout much of the day. Harsh shadows are fewer, and golden hour feels like it stretches just a little longer.

This kind of light makes it possible to shoot without relying heavily on reflectors or diffusers. Natural scenes often look their best with minimal intervention, especially when you’re after that fresh, organic feel.

Tiny Worlds, Big Impact

Spring’s charm often lies in the little things: dewdrops on petals, bees pollinating blossoms, or the intricate texture of new leaves. Macro photography is your ticket to explore this world, whether you’re using a dedicated macro lens or close-up filters.

But there are challenges. Spring breezes can make photographing tiny subjects a game of patience. Even a small gust can throw your focus off. A faster shutter speed—something in the 1/800s range—helps freeze the action, while bumping up your ISO slightly can help you maintain proper exposure. Don’t stress over a bit of noise; a sharp, well-exposed image with some grain usually beats a perfectly clean but blurry shot.

Get Low, Stay Grounded

Shooting spring details means getting on the same level as your subject. Whether it’s wildflowers or crawling insects, the most compelling shots come when you’re down in the dirt—literally. Angle your camera to shoot from below or right at eye level with your subject to create a sense of presence and intimacy. Bring a kneeling pad if needed, but don’t shy away from getting messy. That’s part of the process.

Stay Mobile—But Prepared

Tripods can offer stability, especially when working with macro or slower shutter speeds, but sometimes spring photography benefits from mobility. You never know when a butterfly will land just right, or a bird might swoop into frame. That said, having a lightweight tripod or monopod on hand gives you options if you’re planning to stay in one spot for a while.

deer and wild flowers

photo by Kyle Pearce

Wildlife & Wide Shots

Spring isn’t only about the small stuff. It’s also a fantastic time to spot wildlife before the fields fill with tall crops and dense foliage. Migratory birds return, and animals are more active as they emerge from winter. A telephoto lens can help, but even if your reach is limited, you can still capture dynamic shots with careful positioning and patience.

And don’t forget the skies. Spring offers some of the year’s most dramatic cloudscapes. The combination of warm days and cool nights often leads to moody skies, perfect for wide-angle landscapes or minimalist compositions with strong skies and subtle foregrounds.

Final Thoughts

Spring is the season of spontaneity and discovery. Nature is putting on a show—you just have to be ready for it. Keep your gear clean, your eyes open, and your mindset flexible. Whether you’re chasing bees, blooms, or birds, the opportunities are endless. Let the season guide you, and your photos will reflect the renewal and wonder of spring.

For Further Training on Flower Photography:

Have you ever wondered how amazing flower photographs are created? I wondered as well… And then, I found this amazing, and gifted, flower photographer- who not only knows HOW to create dynamic flower photography- she also knows how to TEACH those tricks and techniques to other photographers through this in-depth eBook. It is currently 68% off today with all the flowers blooming if you want to check it out.

flower photo guide

Flower Photography Guide (Take a Peek Inside)

156 page practical guide packed with Assignments, Key Lessons, and Self-Check Quizzes! (15 assignments, 26 key lessons, & 70 self-check questions!) With this guide, you’re getting a complete system for producing beautiful flower photographs. And, it’s at a fraction of the cost of an in-person workshop. Plus you can re-read the material anytime you want, whenever you need a quick refresh.

Deal ending soon: Photographing Fabulous Flowers at 68% Off


from PictureCorrect https://ift.tt/Ljuk96Z
via IFTTT

maanantai 7. huhtikuuta 2025

Star trail by AlbeGagliardi (500px.com/AlbeGagliardi)


via 500px https://ift.tt/uFQRoeY

PictureCorrect.com: Understanding DPI and Resolution

Whether you’re a photographer or someone who works in designing and printing, you must’ve come across the terms Dots Per Inch (DPI) and Pixels Per Inch (PPI) countless number of times. But do you understand them correctly? Don’t feel shy if you don’t because a lot of people out there get them wrong.

Related note: sale ending tomorrow for the Gigapixel Image Upscaler at $15 Off

dpi resolution

Photo captured by Bank Phrom; ISO 1250, f/4.0, 1/50s.

DPI vs PPI

Many use the terms DPI and PPI interchangeably and that is where all the confusion begins. It is necessary to understand that while DPI has to do with the number of dots a printer can print in one inch of the physical media, PPI is the number of pixels that an image has per inch.

An important thing to keep in mind here again is that dots are not the same as pixels. Dots exist in physical form while pixels are limited to the digital form of the image.

You can also alter the PPI you want your image to have using software such as Photoshop but DPI for a printer has a maximum limit. The maximum DPI of a printer is restricted by the hardware it’s using. For instance, while inkjet printers can have a resolution ranging from 300 to 720 DPI, laser printers can go anywhere from 600 to 2,400 DPI.

Wait, there’s one more thing you need to know about PPI. It is also used to measure the resolution of physical displays such as monitors and your phone’s screen. In this case, PPI represents the number of pixels that the screen has in every inch.

printed billboard

Photo captured by DesignClass; ISO 100, f/25.0, 1/20s.

How to Use DPI and PPI in Your Work

As a photographer or a designer, you have no control over DPI. But you need to understand that using a printer that has higher DPI capability with a high quality paper can produce very high quality and detailed prints. But again, it’s not always necessary to print using high DPI printers.

If it’s something that has to be held on the hands, like a photo album for instance, then the printer will use a printer with a high DPI, somewhere in the range of 300 DPI. On the other hand, if its something that is to be viewed from a great distance, like a billboard, then the image would look fine even when printed at 30 DPI. It is best you consult with your printer to figure out your DPI needs.

When it comes to choosing what PPI to work with, it is all up to you – the photographer or the designer. If the image that you’re working with will live online only in the digital platform, then rest assured that the PPI you use does not matter. Whether an image is 100 PPI or 1000 PPI, as long as you’re viewing it on a screen, it will appear exactly the same in both cases as the pixel size on a display is constant. The file size in the latter case will however be significantly larger (unnecessarily).

It is only when printing your image that your PPI setting will matter the most. When you choose to have a higher PPI setting, you’re essentially cramming up a lot of pixels into the image. Unlike displays where the pixel size is contant, printers can print pixels of varying sizes which means when printing a image with high PPI, the printer can print finer pixels resulting in a more detailed image.

On the other hand, if you print an image with a very low PPI setting, you will see that you can make out the pixels in the image. That’s what we called “pixelated”, an image that doesn’t appear sharp and detailed.

photo print dpi

Photo captured by Joshua Fuller; ISO 500, f/5.0, 1/50s.

Conclusion:

Your PPI setting is irrelevant if you have no intention of printing the image. Your monitor and other displays don’t even consider the PPI information on the image. The printer on the other hand will use that information to determine how detailed the print should be.

With this information, I really hope you will not get confused between the two.

For Help Increasing Photo Resolution:

In photo editing news, Topaz Labs is wrapping up a sale on their Gigapixel AI upscaling program tomorrow. Designed to increase the resolution of your photos by up to 600%, rebuilt from the ground up to be better and faster.

gigapixel photo

Gigapixel Version 7 (see how it works)

Generate more resolution in your images – allowing you to digitally crop and upscale without loss of pixels. Works great for large-format prints where every pixel counts. Currently $20 off today.

Deal ending soon: Gigapixel A.I. Version 8.3 at $15 Off


from PictureCorrect https://ift.tt/72iWOuA
via IFTTT