maanantai 31. maaliskuuta 2025

PictureCorrect.com: When to Use Horizontal vs Vertical Orientation for Photos

In the world of photography, whether you’re a professional or an enthusiast, understanding the impact of horizontal and vertical orientations can greatly influence the quality and storytelling power of your photos. Both orientations offer distinct benefits and can dramatically alter the viewer’s perception of a scene. This blog post delves into the differences between horizontal and vertical photo orientations, helping you decide which is best for various scenarios.

Quick reminder: Spring Sale going on now for the Photography Tutorial eBook

photo orientation

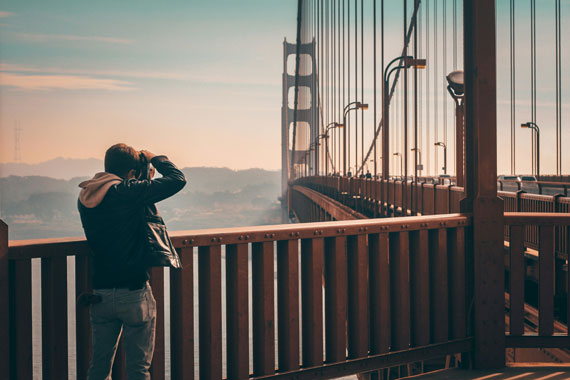
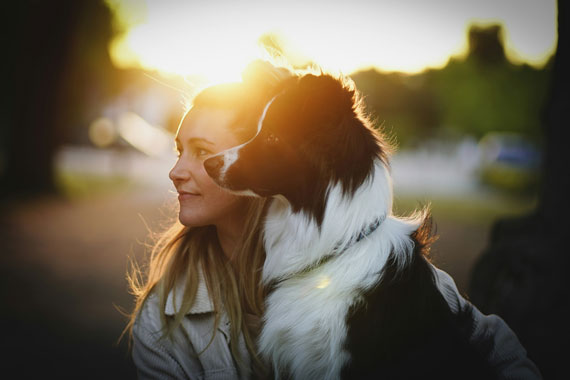
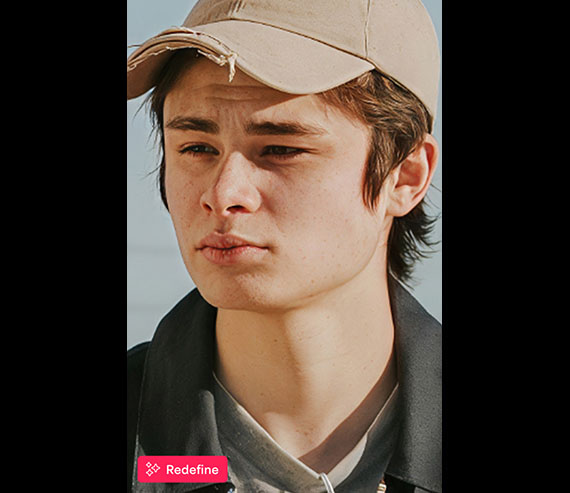
Photo captured by Shelby White

Horizontal Orientation: The Landscape’s Best Friend

Horizontal, or landscape, orientation is perhaps the most common way to capture photographs, especially in landscape photography. This orientation naturally aligns with the way human eyes perceive the world, offering a wide view that encompasses a lot of a scene. Here’s why and when to use it:

1. Stability and Balance:

Horizontal photos provide a sense of stability and balance, making them ideal for capturing expansive landscapes, group photos, and wide scenes where you want to include as much as possible.

2. Storytelling:

The wider frame of horizontal photos allows for more elements to be included, which can help in telling a more comprehensive story. For instance, a horizontal shot of a beach might include the sand, sea, and sunset, setting a vivid scene.

story landscape orientation

Photo captured by Eric Ward

3. Cinematic Feel:

Due to their similarity to the aspect ratio used in films, horizontal photos often evoke a cinematic feel, offering a dramatic canvas for showcasing grand vistas or dynamic action scenes.

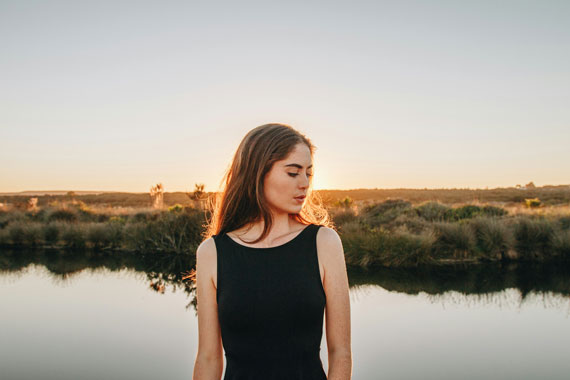
Vertical Orientation: The Portrait Specialist

Vertical, or portrait, orientation is more specialized but no less powerful. This layout is often used for portraits, fashion photography, and any subject that benefits from a focus on height or depth. Here’s why and when to use vertical orientation:

portrait photographer

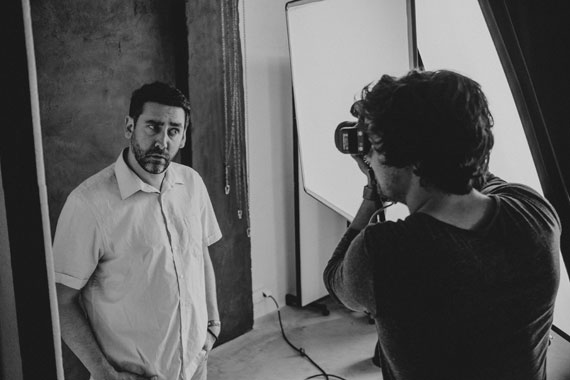
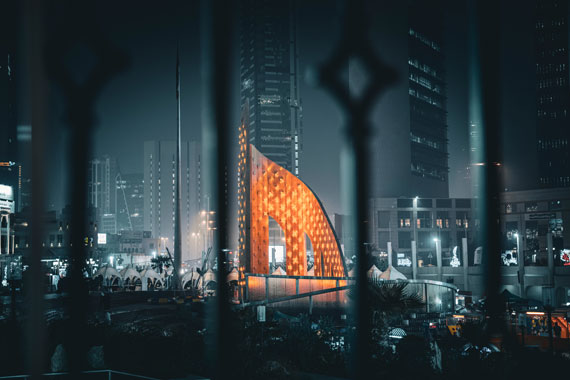
Photo captured by Daniel Wirtz

1. Emphasis on Subjects:

Vertical photos allow you to emphasize the subject effectively, drawing the eye along the length of the subject, whether it’s a person, building, or tree. This orientation highlights verticality and can make subjects appear taller or more imposing.

2. Depth and Perspective:

Vertical orientation can enhance the perception of depth, making it ideal for shooting in tight spaces or when you want to emphasize foreground elements that lead to the background, adding layers to the composition.

3. Mobile and Social Media Friendly:

With the increasing consumption of content on mobile devices, vertical photos are becoming more popular, especially for social media platforms like Instagram and Snapchat where the vertical layout fits perfectly with the user interface.

photo from phone

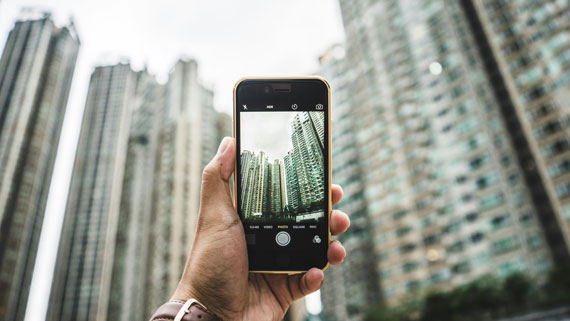
Photo captured by Redd F

Making the Choice

Choosing between horizontal and vertical orientation should be guided by the message you want to convey and the elements you wish to highlight. Here are a few tips:

  • Consider the End Use: Think about where the photo will be displayed. Horizontal images are great for websites and banners, while vertical images may suit magazine covers or Instagram stories better.
  • Experiment with Composition: Sometimes switching the orientation can reveal a more interesting composition or highlight different elements of a scene that you hadn’t noticed before.
  • Follow the Lines: Use the natural lines in your scene to guide your choice. Horizontal lines like horizons or streets often suggest a landscape orientation, while vertical lines like trees or skyscrapers might lean towards a portrait orientation.

In conclusion, whether you choose horizontal or vertical orientation can deeply affect the visual impact of your photos. By understanding the strengths of each and considering your photographic goals, you can more effectively capture images that are not only beautiful but also engaging and appropriate for their intended context.

For Further Training:

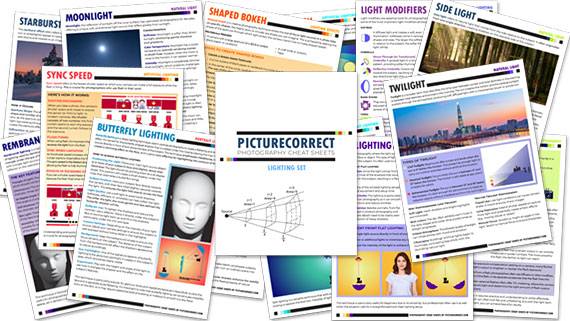
Our #1 bestseller is the most in-depth eBook on how to capture amazing photography anywhere. Over 250 pages of photography tips & tricks from industry insiders. Currently 78% off today for a Spring Sale if you want to check it out.

ebook pages

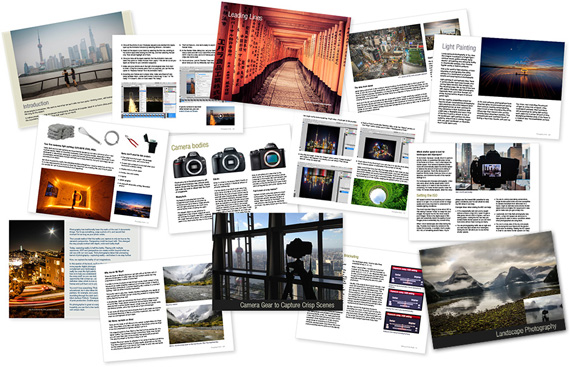
Pages from The Photography Tutorial eBook

It is the product of over a DECADE of research as an insider in the photography industry, assembled to help you learn quickly and avoid the mistakes that I made along the way.

Deal ending soon: The Photography Tutorial eBook Spring Sale


from PictureCorrect https://ift.tt/ic4uGR9
via IFTTT

lauantai 29. maaliskuuta 2025

PictureCorrect.com: Mastering Photoshop: Toughest Tools for Photographers

Photoshop has remained a linchpin in the world of photo-editing and graphics for decades. For photographers, mastering Photoshop can be the key to unlocking a world of creative potential. However, some tools are notoriously intricate and require a deep understanding to use effectively. Here’s a look at some of the most challenging tools in Photoshop for photographers.

Quick reminder: for further training on essential photo editing knowledge, the Fundamental Photo Editing Guide is currently on sale until the end of the month, March 31 for in-depth training on key skills.

photoshop tools

Photo by Optical Chemist

Pen Tool:

  • Purpose: The Pen Tool allows users to create intricate selections and paths.
  • Why it’s tough: Its Bezier curves require a lot of precision. Drawing clean and precise paths can be quite difficult, especially for complex shapes or objects.

Curves:

  • Purpose: It provides a visual representation of the image’s tonality and allows for precise adjustments.
  • Why it’s tough: A slight misadjustment can drastically change the look of an image. It requires a keen eye and an understanding of how tonal values relate.

Channels:

  • Purpose: Channels are grayscale images that store different types of color information.
  • Why it’s tough: Utilizing channels for selections, masking, or color adjustments can be complex. Understanding how different color channels relate and how they can be leveraged for specific tasks is essential.

Blending Modes:

  • Purpose: They dictate how two layers interact with one another in terms of their color and luminance.
  • Why it’s tough: There are numerous blending modes, each with its unique effect. Mastering when and how to use them requires both experimentation and experience.

Dodge & Burn Tools:

  • Purpose: Used to lighten (dodge) or darken (burn) specific areas of an image.
  • Why it’s tough: Overusing these tools can lead to unnatural results. The key is subtlety, understanding the tool’s range, and using them with a soft touch.

Frequency Separation:

  • Purpose: A technique primarily used in portrait retouching that separates the color and texture layers of an image.
  • Why it’s tough: It requires an understanding of layering, blending modes, and Gaussian blur. Missteps can lead to artificial-looking images.

3D Tools:

  • Purpose: Introducing a three-dimensional aspect to your images or creating 3D objects.
  • Why it’s tough: There’s an entirely new dimension (pun intended) to consider. Lighting, perspective, and texture in 3D can be quite complex.

Content-Aware & Healing Tools:

  • Purpose: Used to remove unwanted objects or imperfections.
  • Why it’s tough: While these tools can be straightforward, achieving seamless results on complex backgrounds or textures requires expertise.

While Photoshop offers photographers a vast array of tools to enhance and perfect their images, some can be particularly tricky to master. But with dedication, continuous learning, and a lot of practice, one can harness the full potential of these powerful tools.

For Further Training on Photo Editing Fundamentals:

This is a complete step by step guide to photographic editing from author Kent DuFault. Fundamental editing includes edits that aren’t going to fundamentally change the concept of the original photograph. It covers the steps required to take your original photo, as it came out of the camera, and turn it into the best image that it can be without going overboard. It is currently marked down 62% off until the end of the month, March 31 if you want to check it out.

fundamental photo editing

The Ultimate Guide to Fundamental Photo Editing (Take a Peek Inside)

Digital photography is so intrinsically tied to the editing process that you can’t really consider doing one without doing the other. I know many new photographers try and resist this at first. I was guilty of that myself.

Only 1 day left: The Fundamental Photo Editing Guide at 62% Off


from PictureCorrect https://ift.tt/3CzYayK
via IFTTT

perjantai 28. maaliskuuta 2025

PictureCorrect.com: Tips for Using Patterns in Photography

Related reminder: only a little while left for the iPhone Photo Academy March Mega Sale

Patterns are basically just repeated shapes, objects or colors either ordered in precise formations or just random designs scattered across a scene. The important thing about patterns is that they create images that are very pleasing to the eye and add a new dimension to your photos.

Using patterns in photos

Photo by Sharafat Khan; ISO 100, f/4.0, 1/200-second exposure.

Patterns can be found everywhere in our world, from natural forms to our urban and industrial environments. Use them effectively in an image and you’ll create a photo that is dynamic and attracts the eye to the main subject or focal point. It will help you learn digital photography in interesting ways.

There are two ways to look at patterns. Take a bird’s eye view and look down on say a car park where you’ll see predictable rows of vehicles. Then the other way is to get in closer and look for not so obvious patterns like tire treads and grill patterns. If you really want to be successful in shooting a pattern make sure that you fill the whole frame so that the pattern extends form edge to edge.

So what are the most effective ways to use patterns in your photography? Here are a few ways.

1. Regular patterns

These are easily identifiable and make really outstanding images especially when there is a lot of color involved. Rows and rows of soldiers in red jackets make up a really great pattern formation. Be sure to try different angles and viewpoints to get more interesting shots. Regular patterns are made up of ordered rows of geometric designs or other objects of the same shape and size. Office blocks made up of rows of windows, rows of trees in an orchard or even a honeycomb.

the best ways to use patterns in photography

Photo by _namtaf_; ISO 100, f/7.1, 1/800-second exposure.

2. Irregular patterns

These form an interesting image just by the irregular nature of the pattern. Objects that are randomly placed in a scene but fairly close together still reveal a sense of repetition. For example, a sky full of parachutists with colored parachutes above them or the leaves on a tree or even a forest floor with a carpet of leaves or acorns. None of these have regular patterns but they are still identified as patterns. Again by filling the frame edge to edge you will emphasize the actual pattern and contain it with great effect.

3. Multiple patterns

This is an interesting one and you’ll often see it in a wall of say an ancient building where different additions have been made. The regular pattern goes in one direction and changes as a new addition of bricks or tiles has been added hundreds of years later.

photography pattern tips

Photo by Sven Hoffmann; ISO 800, f/8.0, 1/170-second exposure.

Brick paving leading up to a tiled wall will reveal a contrast between two types of patterns. Sometimes you’ll see this with the old and new as in a stone wall with a corrugated metal structure behind it.

4. Breaking the pattern

Picture this. A tray of thirty eggs all uniform in color and size with just one egg that has been broken revealing the bright yellow yolk. The uniformity of pattern is interrupted by the single broken egg. This doesn’t weaken the patterned effect as you would think but strengthens the overall image quite dramatically. These are created pattern breaks, but, by looking for them occurring natural is the challenge. For example, the field of red tulips in a Dutch field with just one yellow flower growing in the middle, or, a row of cars at factory storage facility with one color breaking the pattern. A fun experiment is creating your own pattern breaks with shells on the beach or acorns in a forest. You don’t have to have an object that is different to the rest. I shot a great image of a tiny shoot of a baby pine tree pushing its way through a carpet of brown pine needles. The green shoot contrasted against the brown needles and made an outstanding image.

beautiful pattern photography

Photo by Matthias Weinberger; f/9.0, 1/1000-second exposure.

As you learn digital photography, the idea of using patterns creates an opportunity for seeing with your photographic eye. Look for patterns within patterns as with the car park I mentioned earlier. Taking the time to see is vital when trying to create a great image. You will often find that in getting closer and looking for detail you’ll often spot a unique pattern opportunity.

About the Author:
Wayne Turner has been teaching photography for 25 years and has written three books on photography. He has produced 21 Steps to Perfect Photos; a program of learner-based training using outcomes based education.

For Further Training:

iPhone Photo Academy is an in-depth online course that will show you how to take incredible iPhone photos. With the right knowledge an iPhone can be used to take photos that are so good that most people would never even believe that they were taken with a phone. It is currently 84% off for their March Mega Sale which ends soon!

iphone photo tutorials

iPhone Photography Tricks (Click to See More Examples)

The best camera is the one that is always with you. But having the iPhone with you is only half of the equation. The other half is knowing how to use it to take outstanding photos.

Deal ending soon: The iPhone Photography Academy March Mega Sale


from PictureCorrect https://ift.tt/raLZk3q
via IFTTT

torstai 27. maaliskuuta 2025

PictureCorrect.com: 5 Ways to Dissolve Your Photoshop Block

Have you felt this before?

You open up a new pic in Photoshop for the first time, excited to start transforming it into something special.

To re-create the beauty of what you saw at the time you captured it.

And to turn the flat and dull RAW file your camera gave you into something less pedestrian.

But a minute or two in and you’re still sitting there, staring at the un-edited RAW file wondering where the heck to start?

Or perhaps you’ve tried a few of your “go-to” technique to see what happens, but nothing seems to be working?

Well – here are a few ways you can overcome that creative block in PS.

Quick reminder: for further training, the Fundamental Photo Editing Guide is currently on sale until the end of the month, March 31 for in-depth training.

photoshop block

1) Have a pre-determined workflow.

Nothing gets you moving faster than knowing exactly what to do every step of the way from start to finish. Especially when it comes to taking that first step, that very first edit in Photoshop…

Over the years I’ve developed an order of doing things which has helped me and thousands of other Photographers by simply making order of the madness!

Every technique I could possibly use to edit an image is assigned to one of 6 stages of my “6 stage editing workflow”.

These 6 stages are:

  • Stage 1: RAW file preparation
  • Stage 2: Create an even exposure
  • Stage 3: Color correction & calibration
  • Stage 4: Contrast & light adjustments
  • Stage 5: Enhance and embellish
  • Stage 6: Resize, sharpen, & export

Feel free to use the above as a guide, or come up with your own order of doing things. The important thing is to have a plan of action before you start every edit. And using a set workflow has the added benefit of developing a level of consistency to your editing that you might not have seen before!

2) Immerse yourself

Take 10 minutes to browse some of the popular photos on your favourite photo sharing site (500px, Flickr etc) if you’re stuck finding your creative “vision”.

photo editing inspiration

Photo captured by Pankaj Patel

Simply immersing yourself in the amazing work of other photographers can be really inspiring – and just the tiniest spark of inspiration might be all you need to get your own juices flowing.

3) Deconstruct an oldie

Go back to one of your own favourite finished shots and deconstruct how you processed it, what you did to take it from RAW to WOW…

And then see if you can use that same roadmap to kick-start the editing process on your new shot.

What techniques worked well? Why? Can you find commonalities between your best and/or most favourite images and how you created them? How can you bring that forward into your future photos?

4) Talk it out

Have a chat in person or online with a fellow photographer. For me, just talking about photography really gets me in the mood for photography… And being “in the mood” is half the battle!

5) Learn something new

Learn something new and put it to use in your next shot. Learning a new method or technique can not only be the sledgehammer that smashes your creative block, but it will keep you moving forwards too.

And if you’re not moving forwards, you’re moving backwards.

For Further Training:

This is a complete step by step guide to photographic editing from author Kent DuFault. Fundamental editing includes edits that aren’t going to fundamentally change the concept of the original photograph. It covers the steps required to take your original photo, as it came out of the camera, and turn it into the best image that it can be without going overboard. It is currently marked down 62% off until the end of the month, March 31 if you want to check it out.

fundamental photo editing

The Ultimate Guide to Fundamental Photo Editing (Take a Peek Inside)

Digital photography is so intrinsically tied to the editing process that you can’t really consider doing one without doing the other. I know many new photographers try and resist this at first. I was guilty of that myself.

Only a few days left: The Fundamental Editing Guide at 62% Off


from PictureCorrect https://ift.tt/RdfBxJi
via IFTTT

tiistai 25. maaliskuuta 2025

PictureCorrect.com: How to Bring Blurry Images Back to Life with Redefine in Gigapixel

Blurry or pixelated images can still be salvageable, especially with the latest tools now available. In Gigapixel Version 8.3, the newest version of the Redefine tool offers improved generative AI for more realistic upscaling. Whether you’re working with an old low-res photo or a heavily compressed image, Redefine helps restore lost detail while keeping the results true to the original.

As part of the 8.3 release, Gigapixel is currently 15% off as the company celebrates the latest update.

redefine tutorial

Unlike typical upscaling methods that can make images look artificial or overly smoothed, Redefine prioritizes fidelity. When you set Creativity to a low level (around 1–2), Redefine focuses on restoring real, plausible details—filling in gaps caused by pixelation without straying too far from the original image.

The best part? You can run Redefine either locally on your computer or in the cloud, depending on your workflow and hardware.

How to Get Started with Redefine for Realistic Upscaling

Here’s a simple step-by-step process:

1. Launch Gigapixel.

2. Import a low-resolution or blurry image that you want to restore.

before redefine

3. Use Redefine, setting Creativity to 1–2, to emphasize realistic upscaling and fidelity. This ensures your final output stays true to the source while enhancing fine details.

4. Fine-tune using manual controls for sharpness, noise reduction, and structure to achieve the best possible results.

after redefine

Whether you’re restoring an old photo, improving a scanned image, or prepping assets for design work, Redefine offers a smart, fidelity-first approach to image upscaling that goes beyond typical enhancement tools.

As of now, Gigapixel Version 8.3 is available and includes the latest improvements to Redefine and overall performance. The company is currently offering a 15% discount in celebration of the update.

Deal ending soon: Gigapixel A.I. Version 8.3 at 15% Off

Got any before-and-after results you’re proud of? Share them in the comments —we’d love to see what you bring back to life.


from PictureCorrect https://ift.tt/HZQcJdK
via IFTTT

maanantai 24. maaliskuuta 2025

PictureCorrect.com: Understanding Profiles vs. Presets in Lightroom

In the world of photography, the magic often happens in the editing room. Adobe Lightroom, a staple in the photographer’s toolkit, offers a myriad of features to enhance and transform your images. Among these features, Profiles and Presets stand out as fundamental tools for photographers looking to streamline their editing process and achieve consistent results. But what sets them apart, and how can you use them to their fullest potential?

Quick reminder: for further training on essential photo editing knowledge, the Fundamental Photo Editing Guide is currently on sale if you want to dig deeper.

This post dives deep into the world of Profiles and Presets, helping you to understand their differences and how to leverage them in your workflow.

profiles vs presets

Understanding Profiles:

Profiles in Adobe Lightroom serve as a starting point for your editing journey. They apply a foundational adjustment to your image without affecting the basic editing sliders. Think of Profiles as the underlying character of your photo, setting the tone and atmosphere before you dive into more detailed adjustments. Adobe Lightroom offers a variety of built-in Profiles, ranging from Camera Matching Profiles, which aim to mimic the color science of your camera, to Creative Profiles, designed to add a unique stylistic touch to your images.

Key Features of Profiles:

  • Non-destructive adjustment layer
  • Affects the image globally without altering slider values
  • Provides a base look upon which further edits can be made
  • Includes both technical adjustments (Camera Matching) and creative enhancements (Artistic, B&W)

Exploring Presets:

Presets, on the other hand, are predefined adjustments that affect various editing sliders in Lightroom. With a single click, you can apply a complex edit to your image, adjusting everything from exposure and contrast to color grading and sharpening. Presets are incredibly versatile, allowing you to either apply comprehensive edits or target specific aspects of your image. They are perfect for achieving consistency across a series of photos or for quickly applying your signature style.

Key Features of Presets:

  • Apply a set of adjustments to the editing sliders
  • Can target specific adjustments (e.g., color grading, exposure corrections) or provide comprehensive edits
  • Save time by applying complex edits with a single click
  • Enable consistent style across multiple images

Profiles vs. Presets: Knowing When to Use Each:

The choice between using a Profile or a Preset depends on your editing goals. Profiles are best used at the beginning of your editing process, setting the overall mood of your image. They’re particularly useful for ensuring consistency in color rendering across different camera models. Presets come into play once you’ve established your image’s foundational look with a Profile. They allow you to fine-tune your edits or apply a signature style across multiple photos efficiently.

Practical Tips for Using Profiles and Presets:

  1. Start with a Profile: Begin your editing process by selecting a Profile that matches your vision for the final image.
  2. Customize with Presets: Once your Profile is applied, use Presets to adjust the finer details and apply your personal touch.
  3. Create Your Own: Both Profiles and Presets can be customized and saved, allowing you to build a library of your favorite looks.
  4. Organize and Manage: Keep your Presets and Profiles organized by categorizing them according to their use case or style.

Summary:

Profiles and Presets in Adobe Lightroom are powerful tools that, when used effectively, can significantly enhance your photo editing workflow. By understanding the unique roles they play, you can make informed decisions about how to apply them to your images. Remember, the best approach is one that complements your creative vision and workflow. Experiment with both Profiles and Presets to discover the endless possibilities they offer in transforming your photographs.

For Further Training on Photo Editing Fundamentals:

This is a complete step by step guide to photographic editing from author Kent DuFault. Fundamental editing includes edits that aren’t going to fundamentally change the concept of the original photograph. It covers the steps required to take your original photo, as it came out of the camera, and turn it into the best image that it can be without going overboard. It is currently marked down 62% off if you want to check it out.

fundamental photo editing

The Ultimate Guide to Fundamental Photo Editing (Take a Peek Inside)

Digital photography is so intrinsically tied to the editing process that you can’t really consider doing one without doing the other. I know many new photographers try and resist this at first. I was guilty of that myself.

Deal ending soon: The Fundamental Photo Editing Guide at 62% Off


from PictureCorrect https://ift.tt/ZpUKDkP
via IFTTT

sunnuntai 23. maaliskuuta 2025

PictureCorrect.com: Film vs. Megapixels: The Resolution Showdown

If you’ve ever wondered how a roll of 35mm film stacks up against today’s digital sensors, you’re not alone. One of the most common questions photographers ask is: How many megapixels is film equivalent to?

Relevant reminder: only a little while left to get Gigapixel Version 8.3 at $15 Off

The answer isn’t cut-and-dried—but let’s break it down.

california sunset photo

Photo by Matthew Pacheco.

The Basics: What Is a Megapixel?

In digital photography, resolution is measured in megapixels—a million pixels. A 24-megapixel camera, for example, produces images that are roughly 6000 x 4000 pixels in size. More megapixels generally means more detail, larger print sizes, and better cropping flexibility—but only if your lens and technique match the sensor’s capabilities.

How Is Film Resolution Measured?

Film doesn’t use pixels. Instead, it’s traditionally measured by how many lines per millimeter it can resolve. This reflects its ability to distinguish fine detail, much like pixels do in digital.

But unlike a fixed digital sensor, film’s resolution varies wildly depending on:

  • The type of film (fine-grain vs. consumer-grade)
  • The lens used
  • Exposure accuracy
  • Focus and stability (tripod vs. handheld)

This makes direct comparisons tricky.

So… What’s the Equivalent Megapixel Count?

Here are some commonly accepted ballpark estimates for 35mm film:

  • High-end 35mm film (perfect conditions): ~20–22 megapixels
  • Average 35mm film photo: ~10–14 megapixels
  • Consumer-grade film or casual snapshots: ~4–8 megapixels

If you’re shooting medium format film, the resolution potential jumps significantly—often rivaling or surpassing 40–50MP digital cameras, depending on the setup.

film versus digital camera

Photo by Tobias Gaulke; ISO 160, f/1.4, 1/2000 exposure.

Megapixels Aren’t Everything

Just because a digital camera boasts 40+ megapixels doesn’t mean every shot will be tack-sharp. Real-world image quality depends on:

  • Lens quality
  • Sensor size and dynamic range
  • Lighting conditions
  • Post-processing

The same applies to film. A high-res film scan won’t look great if the original was blurry or underexposed.

Where Film Still Stands Out

Film has its own kind of “resolution.” It captures color and tonal transitions in a continuous, analog way. There’s no pixel grid, no interpolation. This can give film a certain organic sharpness and richness—even when it technically resolves fewer “pixels.”

And while digital sensors often exaggerate sharpness through contrast and edge enhancement, film tends to preserve fine textures more naturally.

megapixel debate

Photo by Thomas Hawk; ISO 100, f/6.7, 1/180 exposure.

Final Thoughts

If you’re trying to compare apples to apples, good 35mm film is roughly equal to a 12–20MP digital sensor—but that range depends heavily on shooting conditions. For most everyday purposes (social media, prints, photo books), both film and modern digital cameras are more than capable.

So don’t get too caught up in the megapixel race. Whether you’re loading a roll of Portra or shooting with a 24MP mirrorless, great photography is still about light, composition, and timing—not just the numbers.

For Help Increasing Photo Resolution:

In photo editing news, Topaz Labs just announced a sale on their Gigapixel AI upscaling program to celebrate the most recent update. Designed to increase the resolution of your photos by up to 600%, rebuilt from the ground up to be better and faster.

gigapixel photo

Gigapixel Version 8 (see how it works)

Generate more resolution in your images – allowing you to digitally crop and upscale without loss of pixels. Works great for large-format prints where every pixel counts. Currently $20 off today.

Deal ending soon: Gigapixel A.I. Version 8.3 at $15 Off


from PictureCorrect https://ift.tt/7KXncmC
via IFTTT

lauantai 22. maaliskuuta 2025

PictureCorrect.com: The 7 Most Fundamental Photo Editing Skills to Master

Whether you’re shooting on a DSLR, mirrorless camera, or even your smartphone, photo editing is a key part of crafting a polished final image. Great editing can turn a decent photo into a stunning one—and the best part is, you don’t need to master every tool at once. By focusing on a few fundamental skills, you’ll build a strong foundation to take your photography to the next level.

This article is based on concepts from the Fundamental Photo Editing Guide which is currently on sale if you want to dig deeper for further training.

Here are the most essential photo editing skills every photographer should learn:

photo edit fundamentals

Photo captured by Joseph Pearson

1. Cropping and Straightening

Sometimes a great photo just needs a little compositional adjustment. Learning to crop thoughtfully helps remove distractions and guide the viewer’s eye toward the subject. Similarly, straightening horizons or vertical lines can make an image feel much more balanced and professional.

Tip: Use the rule of thirds grid when cropping to enhance composition.

2. Exposure and Contrast Adjustment

Exposure correction helps fix images that are too dark or overly bright. Tweaking contrast brings depth and definition, especially in flat or hazy photos. These basic adjustments can immediately make your photos more dynamic and true to life.

3. White Balance and Color Correction

Colors can shift depending on the lighting when you shoot. Learning to adjust white balance ensures that whites look neutral and skin tones appear natural. Mastering this gives your photos a clean, polished look—free from weird color casts.

4. Sharpening and Noise Reduction

A little sharpening can help details pop, especially when resizing for web or print. On the flip side, reducing noise (especially in low-light shots) helps smooth out grainy or pixelated areas while keeping important texture.

5. Cloning and Spot Removal

Dust spots, blemishes, and small distractions can sneak into even the best shots. Learning how to use the clone tool or healing brush helps you clean up these imperfections without altering the overall look of the image.

6. Dodge and Burn (Lighten and Darken Selectively)

This classic technique goes back to darkroom days. Use dodge and burn tools to subtly brighten or darken areas of your photo to enhance mood, draw focus, or add dimension. It’s a powerful way to guide the viewer’s eye.

7. Using Layers and Masks (for Advanced Editing)

If you’re diving into Photoshop or similar advanced editors, layers and masks are your best friends. They let you make changes non-destructively and apply adjustments with precision. Learning how to control what parts of the image an effect applies to opens up a new world of creative flexibility.

Final Thoughts

You don’t need to master every editing tool overnight. Start small—learn the basics, experiment, and build from there. Even subtle tweaks can have a big impact. As you gain experience, your editing will become an extension of your creative vision.

Master the fundamentals, and the rest will follow.

For Further Training on Photo Editing Fundamentals:

This is a complete step by step guide to photographic editing from author Kent DuFault. Fundamental editing includes edits that aren’t going to fundamentally change the concept of the original photograph. It covers the steps required to take your original photo, as it came out of the camera, and turn it into the best image that it can be without going overboard. It is currently marked down 62% off if you want to check it out.

fundamental photo editing

The Ultimate Guide to Fundamental Photo Editing (Take a Peek Inside)

Digital photography is so intrinsically tied to the editing process that you can’t really consider doing one without doing the other. I know many new photographers try and resist this at first. I was guilty of that myself.

Deal ending soon: The Fundamental Photo Editing Guide at 62% Off


from PictureCorrect https://ift.tt/cJu6K51
via IFTTT

perjantai 21. maaliskuuta 2025

PictureCorrect.com: How to Restore Old Photos with Gigapixel AI

Got a collection of old family photos or vintage images that have faded over time? Whether you’re working with scanned prints or low-resolution snapshots, Topaz Gigapixel AI’s new Recover v2 model offers an easy and powerful way to breathe new life into your cherished memories.

The new model is 5x faster than the previous generation and delivers sharper, more faithful results—making it perfect for restoring legacy photographs with care. Gigapixel is currently 15% off here as the company celebrates the most recent update.

Here’s how to do it step-by-step:

restore photo

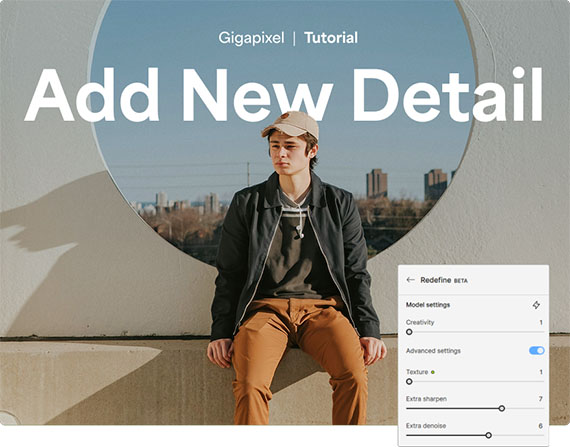
🔧 Step 1: Launch Gigapixel AI

Start by opening Topaz Gigapixel AI on your computer. If you haven’t updated recently, make sure you’re running the latest version to access Recover v2.

📁 Step 2: Import an Old or Vintage Photograph

Drag and drop your scanned photo (JPEG, TIFF, or PNG) into the workspace. Gigapixel AI supports a variety of formats and is optimized to work with older, lower-resolution images—whether it’s a faded photo album scan or a historical black-and-white portrait.

before photo

Pro Tip: For best results, start with the highest-resolution scan you can get, even if it looks blurry or grainy.

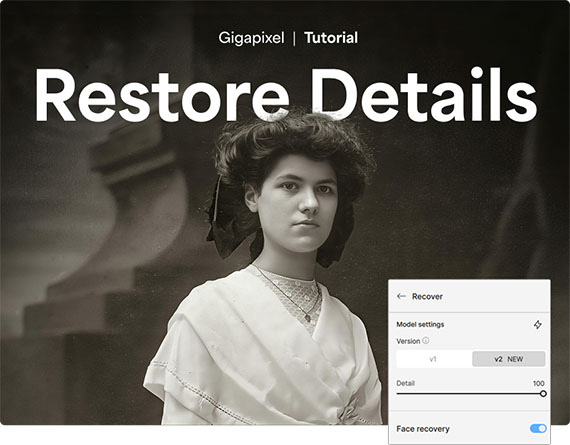
🛠 Step 3: Choose “Recover v2” for Realistic Upscaling

Once the photo loads, choose the Recover v2 model from the AI Model dropdown. This is Topaz’s most advanced recovery engine yet—designed specifically for bringing back texture, clarity, and fine detail in old or damaged photos.

Select the “Standard” or “High Fidelity” setting under the model options to prioritize realism over aggressive enhancement. This ensures the final image stays true to the original character of the photo.

🧑‍🎨 Step 4: Use Face Recovery (Optional, But Powerful)

If your photo includes people, toggle Face Recovery on. This specialized tool enhances facial features—eyes, mouths, and skin texture—without distorting identity.

It’s ideal for portraits where fine facial details may have been lost due to age or scanning artifacts.

🎛 Step 5: Fine-Tune with Manual Controls
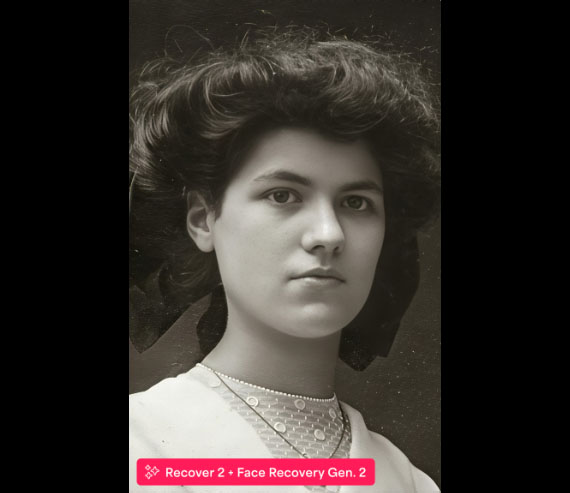
Now comes the fun part—customization. Use the sliders to fine-tune:

  • Remove Blur: Clean up soft edges without over-sharpening.
  • Noise Suppression: Reduce digital noise or film grain.
  • Detail Refinement: Adjust how much texture or sharpness is added.

after photo

Each image is unique, so don’t be afraid to experiment to strike the perfect balance between restored clarity and natural aesthetics.

💾 Save and Compare

Once you’re happy with the result, save your upscaled image. For comparison, keep the original handy—you’ll be amazed at how much detail is brought back with minimal effort.

Final Thoughts

Whether you’re restoring heirloom portraits or breathing new life into found vintage images, Gigapixel AI’s Recover v2 and Face Recovery tools give you professional-level results with just a few clicks. It’s a must-have for photo preservation enthusiasts and retouchers alike. Currently $15 off today.

Deal ending soon: Gigapixel A.I. Version 8.3

Got any before-and-after results you’re proud of? Share them in the comments or tag us—we’d love to see what you bring back to life.


from PictureCorrect https://ift.tt/WMJxr0H
via IFTTT

tiistai 18. maaliskuuta 2025

PictureCorrect.com: Adjusting Contrast vs Clarity for Better Photos

There’s been a lot of debate online regarding the Contrast adjustment versus the Clarity adjustment that appears within most digital photo-editing software products.

Both seem to affect the contrast within a photo.

So, what’s the difference when post-processing your images?

That’s the topic of today’s quick tip.

This article is based on concepts from the Fundamental Photo Editing Guide which is on sale today if you want to dig deeper for further training.

unedited flat photo

Photograph #1 By Kent DuFault

Photo #1, at first glance, looks to have average contrast and brightness, although it appears a bit flat to me.

use histogram to judge contrast and clarity

Photograph #2 By Kent DuFault

How do you most effectively judge the contrast of a photo?

The best way is to take a look at the histogram.

Anytime the histogram is ‘bunched up’ onto one section of the scale, the image is lower in contrast, and it doesn’t matter where on the scale that occurs. A full tonal range photograph, with typically appropriate contrast, will be more evenly distributed across the entire scale.

A Key Point: That rarely happens. Most digital photos require at least some adjustment in contrast, especially if they were originated in the camera raw file format.

illustrates majority of pixels bunched up

Photograph #3 By Kent DuFault

Photo #3 illustrates how the majority of pixels are ‘bunched up’ in the darker mid-tone range of the histogram scale. There are a few pixels in the dark shadow area, and there are even fewer pixels in the white highlight area. This is indicated by the yellow arrows in Photo #3.

Key Note: The vertical elevation of the scale indicates the number of pixels at that tonal range.

The contrast shown in Photo #3 could be adequate for some images. However, for this picture, I would like a fuller range of tones.

I want to improve the photo by brightening the whites and highlights (more pixels), while at the same time darkening the shadows a bit (a few more pixels), and at the same time maintaining the mid-tones (keeping the number of pixels that are already there).

So would that be a Contrast adjustment, or perhaps a Clarity adjustment?

contrast vs clarity on histogram

Photograph #4 By Kent DuFault

(I switched to Lightroom for Photo #4 to better illustrate the difference between a Contrast adjustment versus a Clarity adjustment.)

On the upper example photo (within Photo #4), I maxed out the Clarity setting. Look at what happened to the histogram. Clarity pushed pixels outward toward the shadow end and also the highlight end while maintaining the mid-tone range.

On the lower example photo (within Photo #4), I maxed out the Contrast setting. Look at what happened to the histogram. Contrast ‘also’ pushed pixels outward toward the shadow end and the highlight end but did so at the expense of the mid-tones!

Quick Tip: Adjusting the contrast of your photograph should be a combination of the Contrast and Clarity sliders. Use the histogram to accurately gauge your results. Also, use your eyes, not every picture will be its best with perfect contrast! Remember, Clarity increases contrast while maintaining the mid-tones. In addition, another advertised benefit to the Clarity setting is that it increases the apparent ‘sharpness’ of a photo without creating artifacts.

edited with focus on clarity adjustment

Photograph #5 By Kent DuFault

Photo #5 is my final edited photograph. In this case of fundamental editing, it was a combination adjustment of Contrast and Clarity with an emphasis on Clarity to maintain the mid-tones.

comparing before after histograms

Photograph #6 By Kent DuFault

Let’s compare the histograms from the original to the final version.

On the left of Photo #6 is the original histogram, and on the right is the final edited photo’s histogram.

I wanted you to see this because, at first glance, they may not appear all that different.

original vs processed

Photograph #7 By Kent DuFault

The original photograph is on the left and the post-processed photo is on the right.

Quick tip: Even a small amount of movement of the histogram scale can make a gigantic difference in the appearance of your final photograph!

About the Author:
Kent DuFault is an author and photographer with over 35 years of experience. He’s currently the director of content at the online photography school, Photzy.com.

For Further Training on Photo Editing:

This is a complete step by step guide to photographic editing from author Kent DuFault. Fundamental editing includes edits that aren’t going to fundamentally change the concept of the original photograph. It covers the steps required to take your original photo, as it came out of the camera, and turn it into the best image that it can be without going overboard. It is currently marked down 62% off if you want to check it out.

fundamental photo editing

The Ultimate Guide to Fundamental Photo Editing (Take a Peek Inside)

Digital photography is so intrinsically tied to the editing process that you can’t really consider doing one without doing the other. I know many new photographers try and resist this at first. I was guilty of that myself.

Deal ending soon: The Fundamental Photo Editing Guide at 62% Off


from PictureCorrect https://ift.tt/ZbADWYS
via IFTTT

maanantai 17. maaliskuuta 2025

PictureCorrect.com: Beyond Silhouettes: Advanced Techniques for Backlit Photos

Backlighting in photography can either be a challenging situation or a golden opportunity to create some truly special and striking images. When a light source is directly facing the camera from behind the subject, it can create silhouettes, which are beautiful in their own right. However, with the right techniques, you can go beyond silhouettes to capture detailed, dynamic, and engaging photographs that make the most of this unique lighting condition.

Today’s post is based on concepts from the Photography Lighting Cheat Sheets which are currently 80% off for a Winter’s Last Light sale.

backlighting photo

Backlit photo captured by Enrique Jimenez

Here’s how you can master backlighting by employing various techniques like metering, exposure compensation, using reflectors, and incorporating artificial light.

Understanding Metering Modes

Metering is your camera’s way of deciding how much light needs to hit the sensor to make a properly exposed photograph. In backlighting situations, metering becomes crucial because the bright background can trick the camera’s sensor into underexposing the scene, leaving your subject dark and undefined.

  • Spot Metering: This mode allows you to meter a very small part of your frame. By pointing this spot at your subject, you can ensure that the camera exposes for the subject and not the bright background.
  • Center-Weighted Metering: This is useful when your subject is in the center of the frame. It gives more priority to the exposure in the middle of the frame, balancing the bright background with the need to illuminate the subject.
  • Evaluative Metering: Modern cameras are quite sophisticated in this mode, considering the entire frame but giving precedence to the autofocus point. It can be a good starting point, but always review your shots and adjust as necessary.
backlighting metering

Photo captured by Tino Rischawy

Exposure Compensation

Even with smart metering, you might need to override your camera’s decisions. That’s where exposure compensation comes in. It allows you to dial in a bias towards overexposure or underexposure.

In backlight situations, dialing in a positive exposure compensation value can help illuminate your subject more clearly without overexposing the background too much. Start with +1 or +2 stops of compensation and adjust based on the results you’re getting.

Using HDR

HDR (High Dynamic Range) photography is a game-changer for backlit scenes, allowing you to capture a more balanced exposure across your image. By merging multiple shots taken at different exposure levels, HDR reveals details lost in shadows and highlights, creating a final photo that closely mirrors the natural range of human vision. This technique is particularly effective in backlighting situations, ensuring that your subject is well-lit without sacrificing the ambient beauty of the background. Whether you’re dealing with harsh sunlight or subtle backlight, HDR can bring out the nuances of your scene, providing a richer, more detailed image.

backlit hdr

Using Reflectors

Reflectors can be a simple and effective solution to combat the challenges of backlighting. They bounce the existing light back onto the face or side of the subject, filling in shadows and reducing contrast.

  • Choose a reflector size based on your subject; a larger reflector for groups or full-body shots, and a smaller one for portraits.
  • Silver or white reflectors are versatile for most situations, adding light without changing color temperature.

Introducing Artificial Light

When natural light isn’t enough to illuminate your subject in a backlight situation, introducing artificial light can be a game-changer.

  • On-Camera Flash: Use it to fill in shadows on your subject. Dialing down the flash power can provide just enough light to brighten the subject without looking unnatural.
  • Off-Camera Flash: For more control and a more natural look, use an off-camera flash. Position it opposite the main light source to fill in shadows effectively.
  • Continuous Lights: LED panels or other continuous light sources can also be used to illuminate the subject, allowing you to see the effect in real-time.
backlighting portrait

Photo captured by Sonnie Hiles

Summary:

Backlighting doesn’t have to limit your photography to silhouettes. With the right approach, you can create images that are rich in detail and emotion, making the most of this unique lighting condition. Experiment with these techniques, and you’ll find that backlighting can offer a new dimension to your photography, turning potential challenges into opportunities for beautiful, dramatic compositions. Whether you’re a seasoned photographer or just starting, mastering these techniques can elevate your photography from ordinary to extraordinary.

For Further Training:

Lighting is arguably the most important aspect of photography; but do you know how to use it? These in-depth Photography Lighting Cheat Sheets are designed to help. With critical information on ALL the types of natural light and artificial light you can use, you’ll never be unprepared again. They are currently 80% off for a Winter’s Last Light Sale until March 20 – the last day of winter.

lighting cheat sheets

New! Cheat Sheets for Photography Lighting (see how they work)

Whether you’re a seasoned professional or just starting out, photography cheat sheets can be a valuable resource for improving your skills and taking your photography to the next level. By having all the key information you need in one place, you can focus on what’s important – capturing amazing photos.

Only a few days left: Winter’s Last Light Cheat Sheets Sale


from PictureCorrect https://ift.tt/CqalSYI
via IFTTT