keskiviikko 31. joulukuuta 2025

PictureCorrect.com: Discussion: What is Your New Year’s Resolution for Photography?

The beginning of a new year is truly a good time to set some goals for what you want to accomplish. Start off 2026 right! What is your New Year’s Resolution for Photography? We started this discussion on Facebook, it’s always great to make friends who are working towards the same goals.

Share & compare yours here: New Year’s Photography Discussion

Related: Want to accelerate your photography in the new year? PictureCorrect Premium gives you weekly practice — and to start the New Year, the first 3 months are just $1🎉

new year's resolution

What is Your New Year’s Resolution for Photography? (Click to Join the Discussion)

Find the discussion here: What is Your New Year’s Resolution for Photography?

Start the Year Right:

Every week, more photographers are joining PictureCorrect Premium to level up their craft — and with the New Year offer running, it’s the perfect moment to start. Inside, you’ll find expert-led tutorials, creative challenges, and printable exercises that make each lesson stick.

photography subscribers

Whether you’re working to master manual mode, lighting, or composition, Premium gives you the structure to make steady progress. The special $1 intro offer is ending soon, and once it’s gone, so is your chance to lock in early access.

Deal ending soon: New Year Discount Enrollment PictureCorrect Premium


from PictureCorrect https://ift.tt/UqDogez
via IFTTT

maanantai 29. joulukuuta 2025

PictureCorrect.com: Is It Ever OK to “Reserve” a Tripod Spot? Photographers Are Divided

Few things create more tension among photographers than a prime tripod spot at the right moment.

Whether it’s a solar eclipse, fireworks show, sunrise over a famous landmark, or a rare natural phenomenon, these moments attract crowds — and with them, unspoken rules about space, timing, and respect. Unfortunately, those rules aren’t always followed.

This post isn’t about calling anyone out. It’s about setting expectations, reducing frustration, and helping photographers share limited space without ruining the experience for others.

Reminder: only 1 day left for the Fireworks Photo Guide New Year’s Eve Sale🎉

tripod etiquette

The Reality of High-Demand Photo Moments

When a popular event is about to happen, three things are almost guaranteed:

  • Space is limited
  • Emotions are high
  • Everyone believes their shot matters

Add tripods into the mix, and small decisions can quickly turn into big frustrations.

Common scenarios include:

  • Tripods placed hours in advance with no photographer in sight
  • Late arrivals setting up directly in front of others
  • Gear slowly expanding into neighboring space
  • Arguments over who “was there first”

Most of these issues come down to one thing: unclear etiquette.

The Big Question: Can You “Reserve” a Tripod Spot?

Short answer: sometimes — but with limits.

Placing a tripod to mark a spot can be reasonable only if you stay nearby and return promptly. A tripod left unattended for long periods, especially in crowded public spaces, crosses from courtesy into entitlement.

A good rule of thumb:

  • If you wouldn’t feel comfortable explaining it face-to-face, it probably isn’t okay.

A tripod is not a lawn chair at a parade — and even those come with social expectations.

Arriving Late: The Blocking Problem

Another common source of tension happens when photographers arrive late and try to squeeze in.

This often looks like:

  • Setting up directly in front of seated or kneeling photographers
  • Raising a tripod higher than everyone else’s
  • Slowly edging forward “just a little” at a time

Even if the view looks open, someone behind you may already be framed and focused. Blocking another photographer’s composition — intentionally or not — can instantly sour the mood.

If you arrive late:

  • Look for gaps, not front-row takeovers
  • Ask before setting up near others
  • Accept that the best spots may already be taken

Sometimes the right move is shooting handheld, adjusting your angle, or simply enjoying the moment.

Space Creep: The Silent Offense

Tripods tend to grow.

A bag here, a second camera there, legs slowly widening — before long, one photographer occupies the space of three. In tight locations, this “space creep” is one of the most common — and least acknowledged — problems.

Be mindful of:

  • How wide your tripod legs are
  • Where your bag is placed
  • Whether others still have room to adjust

Small awareness goes a long way.

Courtesy Goes Further Than Rules

There’s no official handbook for tripod etiquette, but a few simple behaviors make a huge difference:

  • Communicate — a quick “Mind if I set up here?” prevents most issues
  • Stay present — don’t reserve space and disappear
  • Be flexible — the shot isn’t worth ruining someone else’s experience
  • Remember the crowd — photographers are part of the audience, not separate from it

Ironically, the photographers who show the most courtesy often end up with better shots — fewer distractions, better cooperation, and a calmer environment.

When You’re the One Being Blocked

Even with good etiquette, problems still happen.

If someone blocks your shot:

  • Speak up early, politely, and clearly
  • Assume ignorance before malice
  • Avoid public confrontations when possible

Most photographers don’t want to be “that person.” Often, they simply didn’t notice.

The Bottom Line

Great photos don’t just come from good light and timing — they come from good behavior.

In crowded moments, tripod etiquette matters as much as camera settings. Respecting space, staying aware of others, and being willing to adapt helps everyone walk away with better images — and fewer regrets.

Because no photograph is improved by an argument behind the camera.

For Further Training on Fireworks Photography:

Fireworks photography is indeed one of the most daunting types of photography. This in-depth tutorial eBook explains the process from start to finish, everything from gear and camera settings to composition and post-processing to achieve great results with fireworks of any kind. It is currently 55% off to help photographers prepare for the New Year’s Eve fireworks shows!

fireworks photography

The How to Photograph Fireworks eBook

A common result of photographers new to fireworks photography is capturing nothing but bright white spots instead of colorful bursts. But with the guidance of this eBook in hand, you should be fully prepared to photograph brilliant fireworks displays.

Only 1 day left: How to Photograph Fireworks Guide at 55% Off


from PictureCorrect https://ift.tt/pO6cieJ
via IFTTT

sunnuntai 28. joulukuuta 2025

PictureCorrect.com: Night Time-lapse Camera Settings

It wouldn’t be wrong to say that timelapse photography is at a halfway-mark between photography and videography. Timelapse photography is all about capturing a series of photos at specific intervals of time which you can later place in a sequence and export as a video clip. As an alternative, you could also stack them all up to come up with a single composite.

Reminder: only a few days left for the Fireworks Photo Guide New Year’s Eve Sale

Not everything around us remains stationary over an extended period of time. So, we can notice a certain level of movement in the timelapse videos. Results from a timelapse photography session feel time travel; as if you are going through time at a rapid pace. This is what makes timelapse photography so fun.

While the end results of timelapse photography are quite enjoyable to watch, shooting it requires a lot of patience and a good knowledge of what you’re doing. This becomes even more important when you’re doing timelapse photography at night as the settings you choose becomes absolutely crucial.

night timelapse

Photo captured by Daniel Ferrandiz Mont

Aperture

Your aperture controls the amount of light entering the camera. Using higher f-numbers like f/8 or higher allows only a little amount of light to enter the camera which can underexpose your image. It is thus recommended that you use wider aperture settings like f/2.8 or f/4.0 to allow greater amount of light to enter the camera. This is especially important if the subject that you’re photographing timelapse of is dimly lit – like stars.

ISO

If you’re planning to create a video clip out of your timelapse images, feel free to push your camera’s ISO to its limit. That’s because luminance noise is not so prominent in videos and should not be much of an issue. Based on your camera’s ISO performance, even something like ISO 6,400 should do fine.

But, in case you’re going to stack the images up, opt to go with a moderately high ISO so as not to underexpose your image. Something in the range of 1,600 – 3,200 should work fine depending on the make of your camera.

Shutter Speed

Decide on your shutter speed based on how quickly your subjects are moving. For instance, if you’re photographing a timelapse of the stars, you could easily shoot a single exposure of 20-30 seconds or more. But, in case you’re shooting a timelapse of the city with cars moving on the road, an exposure of a few seconds like 3-5 seconds should suffice.

If you want to lower the amount of noise in your timelapse, you could slow down the shutter speed which will allow you to lower the ISO.

Shoot Raw

JPEG files are good if you quickly want to work with all the files that you’ve shot for your timelapse. But in case you want to adjust something to your liking, raw files will have a much greater degree of freedom. And don’t worry, you don’t need to be working with all the hundreds and thousands of raw images. Software like Lightroom allows you to tweak one image and apply the adjustments to the rest of the images in the click of a button.

Focus Setting

You wouldn’t want your camera to hunt for focus after every shot. And when it’s night time, the camera will definitely struggle to lock focus due to the low light conditions. So, be sure to set your camera to manual focus mode from the very beginning. Focus on your subject, or at a distant light source, and forget about it.

If you plan on photographing timelapse at night when it’s cold outside, consider getting yourself a lens warmer. This prevents condensation from forming on the lens and allows you to keep on shooting throughout the night.

For Further Training on Fireworks Photography:

Fireworks photography is indeed one of the most daunting types of photography. This in-depth tutorial eBook explains the process from start to finish, everything from gear and camera settings to composition and post-processing to achieve great results with fireworks of any kind. It is currently 55% off to help photographers prepare for the New Year’s Eve fireworks shows!

fireworks photography

The How to Photograph Fireworks eBook

A common result of photographers new to fireworks photography is capturing nothing but bright white spots instead of colorful bursts. But with the guidance of this eBook in hand, you should be fully prepared to photograph brilliant fireworks displays.

Deal ending soon: How to Photograph Fireworks Guide at 55% Off


from PictureCorrect https://ift.tt/4bYLswe
via IFTTT

lauantai 27. joulukuuta 2025

PictureCorrect.com: New Year’s Resolutions for New Photographers

Many of us have received or bought ourselves new digital cameras for Christmas, and with this comes the zeal to create great images. Sadly, the chances of this happening are small, as most of us know that a camera doesn’t take great images, the photographer does. So what resolutions can you make that will start your photography journey in the new year on the right footing?

Related note: only a little while left for the Earn Money with Photography 🎁 Holiday Sale

new year's photography

photo by Ricardo Liberato

1. Read your camera manual

Please don’t stop reading this article because I said this. Go back to the box and get the manual out. In order to become a good photographer you need to do just that. Unless you know the basic functions—and specifically, the creative modes—you’re going to struggle to get the good images you see in books and magazines. This is important if you want to proceed to the next resolution. So, at least learn the basic functions if you aren’t up to reading the whole manual.

2. Find a basic photography course

This can be a book, an online course, or a local photography course. Whatever it is, resolve to find something that is going to lay a foundation and teach you the basics. You need to get your foundations right from the get go. If you are a self-starter then find books, magazines, and Internet-based material that you can self-study. Find something that works for you.

3. Plan photography time

Photography is not something you just decide to do when you feel like picking up your camera and taking some shots. You need to plan uninterrupted photography time into your schedule. Not reading or learning time, but finger on the shutter button time. Time dedicated to taking photographs on a daily or weekly basis is so important if you want to go anywhere in your photography journey.

4. Discover your photographic passion

What do you like doing in your life? What are your hobbies or interests? If you are a stamp collector or an extreme sports person, the chances are that you will want to take photos of your passion. This is not always the case but it will help you discover your passion. So sit down, if you don’t already know, and write down what you love doing. Then ask yourself if any of these interests are what you like to shooting. There will be equipment limitations based on your camera and lenses, so work within these restrictions.

new year goals for photographers

photo by Brook

5. Think before you shoot

Put in your mind right at the outset of your photography journey that you are going to think before you shoot. The disease of digital is indiscriminate shooting without a plan, purpose, or thought. It’s like spraying a target with machine gun fire and hoping to hit the bull’s eye. Pretend you are shooting film and only have 36 exposures in your camera. If you can think before shooting rather than hoping that out of a hundred photos a few may be good, you are on your way to becoming a great photographer.

plan your shot

photo by Nick Page

Remember that just because you own a camera it doesn’t mean you are a photographer in the same way owning a box of paints doesn’t make you an artist. Resolve to do these things as you enter a new year with a new camera, and start your new photography journey as you learn. Happy shooting!

About the Author:
Wayne Turner has been teaching photography for 25 years and has written three books on photography. He has produced 21 Steps to Perfect Photos, a program of learner-based training using outcomes based education.

For Further Training:

This in-depth eBook has helped thousands of photographers turn their passion into profit—and here it’s at its lowest price ever to end the Holiday Season🎁.

photography career

Packed with proven strategies in all types of photography and even printable contract templates you can use with clients right away, it’s your shortcut to making money with photography.

Deal ending soon: Earn Money with Photography Holiday Sale


from PictureCorrect https://ift.tt/94WBp7t
via IFTTT

perjantai 26. joulukuuta 2025

PictureCorrect.com: Top Cities for New Year’s Fireworks Photography

As the clock winds down and the old year gives way to the new, cities around the world illuminate the sky with dazzling fireworks displays. For photographers, these moments offer a chance to capture the grandeur of light, color, and celebration. In this post, we’ll explore some of the cities that have historically hosted the largest fireworks shows for New Year’s and offer tips for photographers aiming to capture these magnificent displays.

Related note: offer ending soon for the Fireworks Photo Guide New Year’s Sale

1. Sydney, Australia: A Blaze of Glory Over the Harbor

Sydney often kicks off the global New Year’s celebrations with a bang. The fireworks display over the Sydney Harbor, with the iconic Opera House and Harbour Bridge in the foreground, offers an unrivaled photographic canvas. The vibrant colors and reflections on the water create a mesmerizing scene.

sydney fireworks

Photo captured by Padraig Treanor

Photography Tip: Use a tripod and a remote shutter release to avoid camera shake during long exposures. Try to find a unique angle that includes the city skyline.

2. Dubai, UAE: A Fusion of Tradition and Modernity

Dubai is renowned for its extravagant display, often centered around the Burj Khalifa, the world’s tallest building. The synchronization of fireworks with the LED lights of the skyscraper creates a futuristic tableau.

dubai fireworks

Photo captured by Mo

Photography Tip: Experiment with different shutter speeds to either freeze the fireworks in sharp detail or capture their motion in a blur, creating an artistic effect.

3. London, England: A Historic Backdrop

London’s fireworks by the River Thames, with the backdrop of the London Eye and the Houses of Parliament, offer a blend of modern spectacle and historic grandeur. The reflections on the Thames add an extra layer of beauty to the scene.

london fireworks

Photo captured by Kevin Hackert

Photography Tip: Consider a wide-angle lens to capture the breadth of the fireworks and the iconic London skyline.

4. New York City, USA: The Big Apple’s Big Show

The annual fireworks display in New York City, typically over the East River or Central Park, is a quintessential American celebration. The city’s skyline provides a dramatic backdrop for the vibrant fireworks.

new york fireworks

Photo captured by Jack Cohen

Photography Tip: Scouting your location in advance is key. Look for spots that offer a clear view of the fireworks without obstruction.

5. Hong Kong: A Symphony of Lights

Hong Kong’s Victoria Harbour, surrounded by its famous skyline, presents a breathtaking scene for fireworks photography. The combination of the city lights and the fireworks creates a stunning visual symphony.

hong kong fireworks

Photo captured by Syuichi Shiina

Photography Tip: Play with the composition by including elements like boats in the harbor or the city’s skyscrapers to add depth to your photos.

Photographing New Year’s fireworks in these iconic cities can be a thrilling experience. Remember to check local regulations and access restrictions, especially in crowded public places. With the right preparation and creativity, you can capture the magic of these moments and start the new year with some spectacular shots.

For Further Training on Fireworks Photography:

Fireworks photography is indeed one of the most daunting types of photography. This in-depth tutorial eBook explains the process from start to finish, everything from gear and camera settings to composition and post-processing to achieve great results with fireworks of any kind. It is currently 55% off to help photographers prepare for the New Year’s Eve fireworks shows!

fireworks photography

The How to Photograph Fireworks eBook

A common result of photographers new to fireworks photography is capturing nothing but bright white spots instead of colorful bursts. But with the guidance of this eBook in hand, you should be fully prepared to photograph brilliant fireworks displays.

Deal ending soon: How to Photograph Fireworks Guide at 55% Off


from PictureCorrect https://ift.tt/yqIgkhb
via IFTTT

keskiviikko 24. joulukuuta 2025

PictureCorrect.com: How to Capture Really Sharp Photos

Relevant reminder: only a little while left for this Serious Photo Sharpener Holiday Sale

One of the most frustrating experiences for a photographer is to get home from a photo trip with some great images only to find that some of the images are not sharp. To help solve this problem, this article covers seven things that a photographer can do to create really sharp images.

taking sharp photos

Photo by Matus Kalisky

Tripod

When it comes to getting sharp images, the first place to start is with a tripod. A tripod provides a stable platform that holds the camera rigid — dramatically increasing the sharpness of the image.

Weighting the tripod

A tripod is a good start. However, a tripod can be made even more stable by using some object to weigh down the tripod. This produces even sharper images. This is so important that many tripods have some type of mechanism at the bottom of the center post that was designed for hanging objects to add weight to the tripod.

A simple way to take advantage of this feature is to carry a small net bag with your photo equipment. The bag can be filled with rocks, or other materials, and attached to the tripod. Even if a tripod doesn’t have such a mechanism, other methods can be used such as hanging a camera bag from the center column of the tripod.

Shutter release

Just because a camera is on a tripod doesn’t mean that the camera will be steady. The simple act of pressing the shutter can cause vibrations that will cause a loss of sharpness. The solution is simple. A remote switch can be used to release the shutter. A remote switch is a device that attaches to the camera through a cable, or wirelessly, and allows the photographer to release the shutter without touching the camera.

Mirror lock up

This applies if you have a DSLR camera. Even if the camera is set up on a tripod, the tripod is weighted down, and a remote switch is used, image quality can still be degraded due to vibration from the movement of the camera’s mirror when the shutter is released. This vibration is primarily a problem with shutter speeds between about 1/30s and 1s.

how to take sharp photo

Photo by sandeepachetan.com travel; ISO 100, f/7.1, 1/1250-second exposure.

This is easily solved by enabling the mirror lockup function on the camera. Once enabled, pressing the shutter button once swings the mirror out of the way. Pressing the shutter button a second time releases the shutter. This way, the mirror vibration dies out before the shutter is released.

Lens Quality:

Generally speaking, prime lenses can produce sharper results than zoom lenses. Quality of glass and manufacturing can also be a factor.

Aperture

The middle apertures (around f/8 for most lenses) produce the sharpest images. The larger apertures produce softer images due to various aberrations while the smaller apertures produce softer images due to diffraction.

Shutter Speed

While a tripod eliminates camera movement, the subject that is being photographed may be moving. Thus, a shutter speed that is high enough to freeze the subject movement should be used. This may require that a larger aperture be used in order to get the proper exposure

ISO

Increasing the ISO will allow a higher shutter speed to be used in order to stop the movement of the subject. However the higher the ISO, the more noise will appear in the image.

tips for taking sharp photography

Photo by Don Harder; ISO 3200, f/5.0, 1/1250-second exposure.

Following these techniques will put you on your way to creating some really sharp photos.

About the Author:
Ron Bigelow (www.ronbigelow.com) has created an extensive resource of articles to help develop photography skills.

For Serious Help Sharpening Your Photos:

If you’re a photographer who cares about getting the cleanest noise reduction, sharpest details, and highest quality enlargements from your images, the Topaz Labs Holiday Sale is one of the best opportunities all year to invest in powerful AI-driven image quality tools at a discount.

Whether you shoot landscapes, wildlife, portraits, or anything in-between, this sale can help you elevate your final edits with tools that have become a staple in many pro workflows.

Deal ending soon: Topaz Labs Holiday Sale


from PictureCorrect https://ift.tt/GVsf0Aj
via IFTTT

tiistai 23. joulukuuta 2025

PictureCorrect.com: Holiday Celebration Photography Tips

Related: Want to level up your photography fast? PictureCorrect Premium is designed to be an accelerator with lessons, exercises, and more — it’s only $1 to start for the Holidays🎁

The holiday season is upon us! For any of you photography enthusiasts out there, this is the perfect time to put those cameras to good use. Use photos to show and tell people about your holiday traditions, whatever you celebrate this time of year. It’s the perfect time to take advantage of the free on-camera talent that you have: your family and friends!

christmas cocktail

photo by John Morgan

Here are some tips on how to capture your next holiday celebration.

Photographs Tell Stories

The whole point of documenting an event in a powerful way is to tell a story in pictures. Like all stories, picture stories have a beginning, a middle, and an end to take people through the experience. If they weren’t there, you want them to feel as if they were. If they were there, it reminds them of the experience in intimate, loving detail.

christmas tree on car

Photo by AJ Hill.

Many people celebrate many holidays during this time of year, but let’s use Christmas as one example of a popular holiday gathering, because most people know the general events surrounding the holiday.

1. Check your gear. Make sure you have enough batteries and space on your memory card. Bringing a tripod may be cumbersome, but if you don’t mind the extra weight, it’s good to have.

2. Let people know what you’re doing. “I’m going to be taking photos for a slideshow for later,” or “I’m creating a Christmas storybook we can all enjoy.” This helps people relax and enjoy the spirit of the event when they know what you’re doing with the photos.

The Beginning, Middle, and End

All good stories have an introduction, a main event, and an ending or conclusion. For the photographer, this means shooting photos that show each of these phases.

The Beginning

When photographing your event, there are several types of photos or shots that will anchor your storytelling. These are called establishing shots and consist of portraits, detail photos, and pre-event or preparation photos. The various kinds of establishing shots tell the beginning of your story. They not only introduce the viewer to your story, they set the mood for the story.

To document an event most effectively, you have to get there early, at least an hour before it begins. Begin putting your story/day together by taking establishing shots. These will set the time and location for your photo documentation. Establishing shots put the rest of the photos that you’ll be taking in the right context for what you do with the photos later, such as creating a photo album, photo book, or slideshow.

christmas beginning

Photo by Jonathan Borba; ISO 2500, f/3.5, 1/25s, 20mm.

Examples:

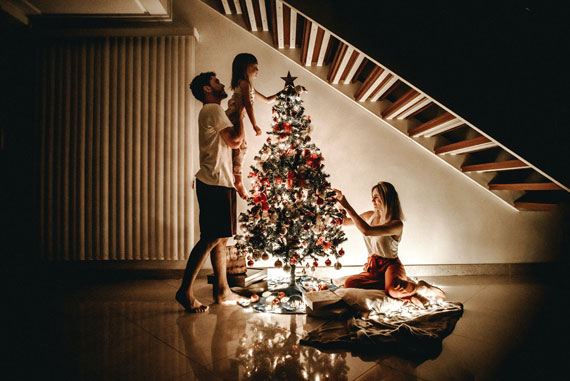
  • Decorating the Christmas tree
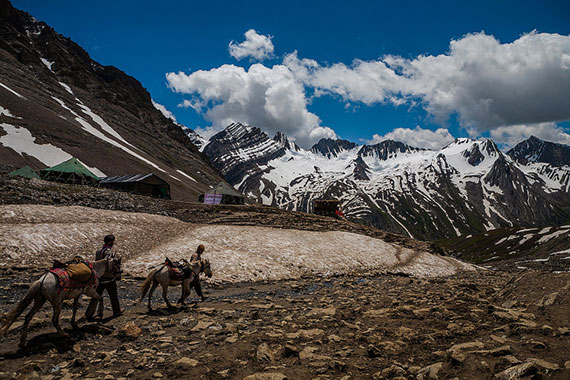
  • Wide shot of your mom’s house
  • A highway sign that says, “Welcome to Townsville”
  • A shot of your parents opening the door

Preparation Shots

When there’s a big event, there’s always preparation in the background. This is a good time to take some candid shots of people getting ready before the big event so your viewer feels the excitement and anticipation begin to build.

christmas turkey

Photo by Mike Fleming.

Examples:

  • Mom taking the turkey out of the oven
  • Kids sneaking under the Christmas tree
  • People getting dressed or ready for the big day, especially if they rarely get dressed up (teenagers, children, etc). Think fun and silly.

Detail Shots

Your photos don’t have to have people in them all the time, and it’s better if they don’t. Detail shots enhance the flow of your photos and give viewers a chance to appreciate the details of the day. Detail shots can help evoke a mood or emotion as well. You’ll shoot these throughout the day, not just in the beginning.

christmas photos

Photo by Ami Becker.

Examples:

  • Shots of decor in the house, like twinkling Christmas lights
  • Close-up of hands breaking an egg and other food shots
  • Shot of window looking out
  • A family pet sniffing presents
  • Shots establishing the weather—snow or frost on a window or ledge, leaves changing color in a tree in the yard
  • Flowers or candles
  • The centerpiece on the table or the table set and waiting for guests to arrive

Portraits

Portraits help remind everyone of who was at the event. A group shot or poised portraits are great, but candid shots are more fun and interesting for the viewer. Think natural light and candid shots as well as posed portraits. Use light coming in through windows, firelight, and lights from sources in the room more than you use flash. You’ll tend to capture some of your best portraits when people are unaware you’re there. Hard to do, but so worth it! You’ll also shoot these throughout the day as well. They can be hard to get if you wait, so shoot them as you see them.

christmas portrait

Photo by Oleg Sergeichik; ISO 1000, f/1.8, 1/100s, 50mm.

Examples:

  • Close-up of someone unwrapping a present
  • Staring thoughtfully into the fireplace or out a window/or admiring the tree
  • Portraits involving parent and child
  • Children playing or sleeping
  • Someone carving the turkey or ham

The Main Event

This is the moment of truth. As a storyteller, it is best to be an observer at this point, watching reactions and grabbing photos of the emotions you see—surprise, laughter, joy, tears, and smiles. Don’t be afraid to walk around and document what you see, but don’t be in your subject’s face. Being too obvious with your camera will take away the spontaneity, and probably their enjoyment of the event. There’s not much to photograph when people are eating, so sit down and be a part of the event.

christmas celebration

Photo by krakenimages

Examples:

  • Unwrapping or handing out of gifts
  • Family pets playing with wrappings
  • Goings on of people during event
  • The interaction of babies, toddlers, children and animals
  • Food being served or eaten
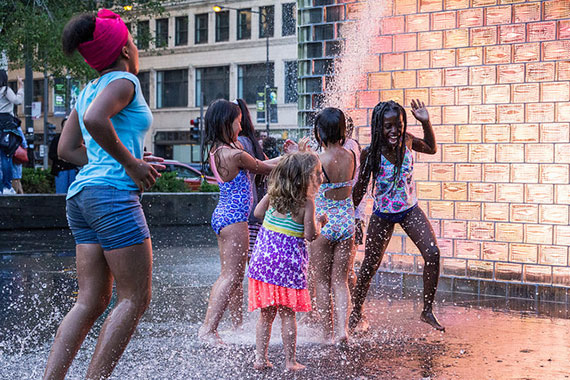
  • People playing video games, watching television, having snowball fights or playing sports in the yard
  • People interacting, cooking, cleaning up in the kitchen

The End

The end is really the event’s conclusion, winding down, or aftermath. The main event may fade into the end slowly or quickly, but keep shooting. Documenting the aftermath will be a good indication of how successful the event was. It is also a great time for photo opportunities. People are happy, engaged, and even sleepy as events wind down. The stressful part of the day—the main event, be it dinner or unwrapping presents, or decorating the Christmas tree—is over and people relax.

christmas coffee

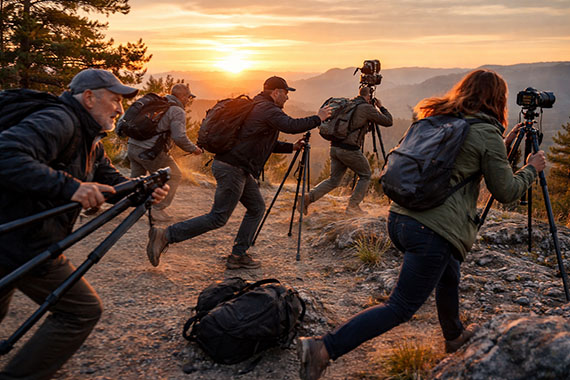
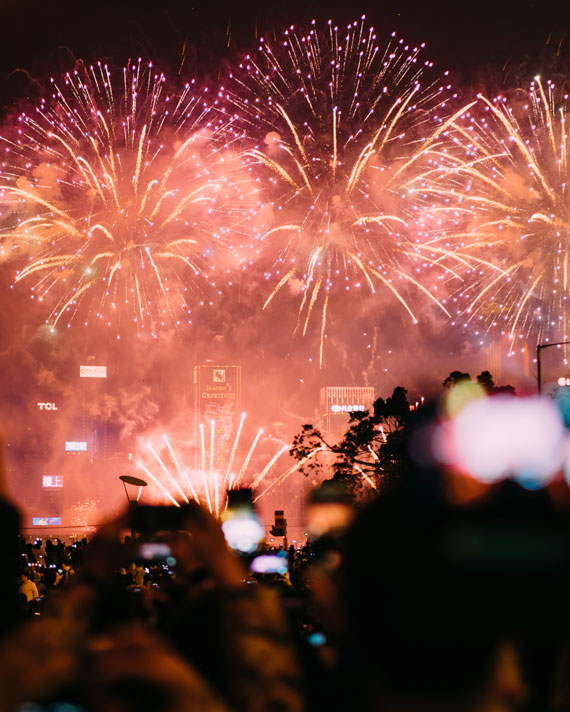
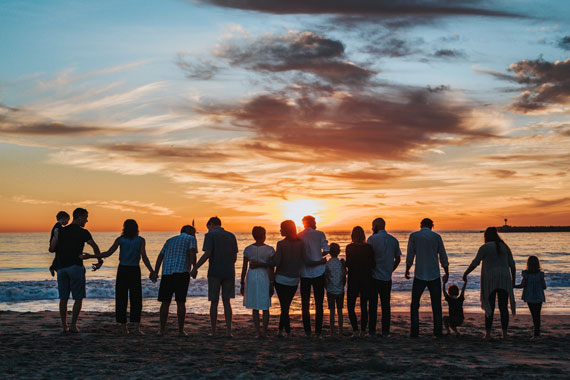
Photo by Hello Lightbulb; ISO 400, f/4.0, 1/20s, 26mm.

Examples:

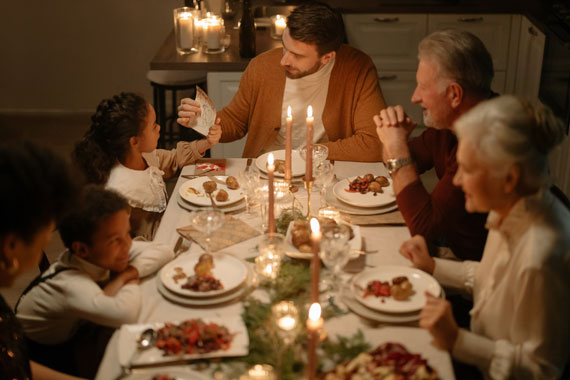
  • Photos of people leaning back at the table talking, laughing, or enjoying a cup of coffee, hot chocolate, or a hot toddy
  • Youngsters, exhausted by the day taking time to nap in unexpected places

You’ve worked hard on documenting this event and if it stays in your camera all your hard work is just put to waste. Your great story goes untold until you tell it in a book, slideshow, or album. While the moments are still fresh in your mind, take time to put them together where people can see, enjoy and share them:

  • Build a photo gallery and share them with everyone.
  • Print them as a coffee table book.
  • Make a calendar out of the best photos and give it to your relatives after the event to help them remember the fun all year long.
  • If you really want to have fun, make badges, buttons, bumper stickers or greeting cards out of your photos.

Photos tell the story of our lives and relationships better than words ever can. Photos not only help us connect our customers to our brands, but they help us connect our friends and families to our hearts and memories. May your holiday season be filled with love, memories, and photos to last a lifetime.

About the Author:
Donna Santos has been a professional photographer for over 10 years and is based in Toronto.

Early Subscribers Are Already Ahead:

Every week, more photographers are joining PictureCorrect Premium to level up their craft — and you could be next. Inside, you’ll find expert-led tutorials, creative challenges, and printable exercises that make each lesson stick.

photography subscribers

Whether you’re working to improve composition, lighting, or manual control, Premium gives you the structure to make steady progress. The special $1 intro offer is ending soon, and once it’s gone, so is your chance to lock in early access.

🎁 Try it during the Holiday Enrollment for only $1 to Start


from PictureCorrect https://ift.tt/IkaQ4Yi
via IFTTT

maanantai 22. joulukuuta 2025

PictureCorrect.com: Family Gathering Photography Tips

It’s that time of year again – time for the annual family gathering! Whether you’re gathering around the table for Thanksgiving dinner or celebrating the holidays with loved ones, these occasions are always filled with laughter, love, and of course, lots of photo opportunities. Whether you’re a seasoned photographer or just starting out, here are some tips to help you capture those special moments and create lasting memories.

Related reminder: only a little while left for this Photo Editor Holiday Sale

family dinner photo

Photo captured by cottonbro studio; ISO 2000, f/1.4, 1/1250s, 50mm.

Here are some example camera settings assuming an indoor setting with minimal lighting:

  • Aperture: Aperture controls the amount of light that enters the camera through the lens. In low light situations, you might want to use a lens with a wide aperture (e.g. f/2.8 to f/5.6) to let in more light. This can also create a shallow depth of field, which can be a nice effect for portraits.
  • Shutter speed: Shutter speed controls the amount of time that the camera’s sensor is exposed to light. In low light situations, you might want to use a slower shutter speed to allow more light to reach the sensor. Just be aware that using a slow shutter speed can cause motion blur if your subjects are moving.
  • ISO: ISO controls the sensitivity of the camera’s sensor to light. In low light situations, you might need to increase the ISO to allow the camera to capture more light. However, increasing the ISO can also introduce noise (grain) into your photos, so try to keep it as low as possible while still getting a well-exposed photo.
  • White balance: White balance helps to ensure that colors in your photos look natural. Indoor lighting can sometimes cause colors to look yellow or orange, so you might need to adjust the white balance to compensate.
  • Focus mode: In low light situations, it can be more challenging for the camera to focus accurately. You might want to consider using a focus mode that allows you to manually select the focus point, such as “single point” or “flexible spot.”
indoor lighting conditions

Photo captured by Nicole Michalou; ISO 800, f/2.8, 1/160s, 50mm.

Here are some more general tips for capturing the gathering:

  • Get everyone involved: Encourage family members of all ages to take photos, whether it’s with a traditional camera or their smartphones. This will help capture a variety of perspectives and candid moments.
  • Use natural light: Take advantage of natural light by shooting near windows or doors. This will help create soft, flattering light for your photos.
  • Experiment with different angles: Try shooting from different angles to add visual interest to your photos. This might include shooting from above, below, or at eye level.
  • Get close to your subjects: Don’t be afraid to get close to your subjects and fill the frame with their faces. This will help create intimate, emotional photos.
  • Capture candid moments: In addition to posed photos, make sure to capture candid moments as they happen. These types of photos often capture the true spirit of a family gathering.
  • Tell a story: Use your photos to tell a story of the gathering. This might include capturing the details of the decorations, the food, and the activities that took place.
  • Have fun: Above all, remember to have fun! Photography should be enjoyable, so don’t stress too much about getting the perfect shot.
family gathering

Photo captured by Tyler Nix; ISO 250, f/3.5, 1/1250s, 50mm.

With these tips in mind, you’ll be well on your way to capturing beautiful and meaningful photos at your next family gathering. So don’t be afraid to get creative, have fun, and above all, embrace the chaos! These are the moments that make life worth living and the memories that we’ll look back on and cherish for years to come.

For Help with Photo Editing:

If you’re a photographer who cares about getting the cleanest noise reduction, sharpest details, and highest quality enlargements from your images, the Topaz Labs Holiday Sale is one of the best opportunities all year to invest in powerful AI-driven image quality tools at a discount.

Whether you shoot landscapes, wildlife, portraits, or anything in-between, this sale can help you elevate your final edits with tools that have become a staple in many pro workflows.

Deal ending soon: Topaz Labs Holiday Sale


from PictureCorrect https://ift.tt/s6K0pQh
via IFTTT

lauantai 20. joulukuuta 2025

PictureCorrect.com: Christmas Lights Photography Exercise

Amazing lights are everywhere this time of year, which makes them easy to overlook. Most people photograph them as decoration — wide shots of trees, houses, and streets that feel familiar but rarely memorable. This challenge is about doing the opposite. Instead of documenting the season, you’re using Christmas lights as a creative tool to shape mood, depth, and story.

Relevant note: only a little while left for the Photography Exercises 🎁 Holiday Sale

christmas lights exercise

Photo captured by Annie Spratt

Create a mini photo series (3–5 images) that tells a holiday story using Christmas lights as the main light source—not just decoration.

This pushes you to treat lights as subjects, foregrounds, backgrounds, and mood-setters, not just pretty bokeh.

🎯 The Rules

  • Every image must include Christmas or holiday lights
  • Lights must influence the composition or mood, not just appear in the frame
  • No flash
  • Shoot over multiple days if needed

📸 The 5 Shots to Capture

1. Lights as the Subject

  • The lights are the photo
  • Focus on shape, color, pattern, or repetition
  • Avoid cliché “tree wide shots”—get closer than feels comfortable

2. Lights as Foreground

  • Shoot through lights
  • Let them frame the scene or partially obscure the subject
  • Use wide apertures or phone portrait effects sparingly

3. Lights as Background Mood

  • Subject first, lights second
  • Use distance to control bokeh size
  • Think cozy, cinematic, intimate—not busy

4. Motion + Lights

Add movement:

  • People walking
  • Cars passing
  • Camera movement (intentional blur)

One sharp anchor + moving light = magic

5. Quiet Holiday Moment

  • No obvious celebration
  • Empty street, glowing window, single ornament, late-night calm
  • This is often the strongest image

🔧 Optional “Hard Mode” Constraints

Pick one:

  • One image must be black & white
  • One image must use manual exposure or exposure lock
  • One image must be shot handheld under 1/10s
  • One image must avoid any recognizable Christmas symbols except lights

Christmas lights are easy to photograph — but difficult to photograph well. The difference is intention. When you stop treating them as decoration and start treating them as light, they become a storytelling tool rather than a seasonal cliché.

If one image from this exercise makes someone pause and think, “How did you get that?” — you succeeded. Not because of the lights themselves, but because you learned to see what they were capable of.

For Further Training:

A Holiday Sale is happening now on the PictureCorrect Photography Exercises, a practical way to build confidence in manual mode and tackle challenging shooting situations that often trip photographers up. Each exercise focuses on real-world scenarios—difficult light, motion, exposure decisions, and creative problem-solving—so you learn how to take control instead of relying on auto settings.

photographer exercises

If you want clearer direction and stronger results when conditions get tough, these exercises provide a simple, structured way to improve. Don’t miss the Holiday Sale, and use it as an opportunity to strengthen your skills and shoot with more control and confidence.

Deal ending soon: PictureCorrect Photography Exercises Holiday Sale


from PictureCorrect https://ift.tt/E9Yg2rO
via IFTTT

perjantai 19. joulukuuta 2025

PictureCorrect.com: Ideal Weather Conditions for Perfect Snowflake Photography

Embarking on the quest to photograph snowflakes is not just a photographic challenge but a journey into the heart of nature’s delicate artistry. Each snowflake is a unique masterpiece, a fleeting glimpse into the intricate wonders of the natural world. Understanding the conditions that lead to the perfect formation of these ice crystals is key to capturing their ethereal beauty. In this post, we’ll explore the ideal weather conditions for photographing well-defined snowflakes and delve into the fascinating process of how these winter wonders are formed.

Related reminder: launch sale ending soon for the Winter Photography Snap Cards

snowflake image

Photo captured by Damian McCoig

Ideal Weather Conditions for Photographing Snowflakes:

  • Temperature: Ideally, temperatures should be just below freezing, around -2°C to -5°C (28°F to 23°F). This range is perfect for preserving the snowflakes’ structure without causing them to become too brittle.
  • Humidity: Moderate to high humidity is crucial, as snowflakes form from water vapor. Too much humidity can cause them to clump together, while too little might not support their formation at all.
  • Snow Type: The best snowflakes for photography are found in light, fluffy snow, which is more likely to contain the classic, intricate shapes.
  • Wind Conditions: Calm conditions are preferable, as wind can damage the delicate structure of the snowflakes.

How Snowflakes Form:

Snowflakes begin as tiny ice crystals in the clouds, forming when water vapor condenses directly onto a particle like dust or pollen. As they fall through the cloud, they encounter more water vapor, which freezes onto the crystal, causing it to grow. The shape and complexity of a snowflake are influenced by the temperature and humidity it encounters during its descent. Temperatures just below freezing typically produce flat, six-sided shapes, while colder conditions result in more columnar forms. The sixfold symmetry of snowflakes, a result of the molecular structure of water, creates the iconic hexagonal pattern we associate with snowflakes. The journey through different atmospheric layers imparts each snowflake with its unique pattern, ensuring no two are exactly alike.

snowflake weather

Photo captured by Darius Cotoi

Photographing snowflakes is a delicate balance of science and art. By understanding the conditions under which these natural wonders form and thrive, you can capture their fleeting beauty, immortalizing a moment that nature crafts with exquisite precision but rarely preserves. Each photograph of a snowflake is a testament to the unique and transient beauty of nature.

For Further Training:

If you want help capturing better photos in snowy or low-light winter conditions, the new Winter Photography Snap Cards (currently 80% off) are worth checking out—especially while they’re still heavily discounted. These pocket-sized guides give you quick, practical tips for exposure, color, composition, and handling tricky winter light.

winter snap cards

They also walk you through common challenges like blown-out snow, blue color casts, foggy lenses, and fast-changing skies, so you can adjust your settings with confidence. Whether you’re shooting frosty landscapes, falling snow, or cozy evening scenes, these cards make it easier to get great winter shots without guesswork.

Launch sale ending soon: Winter Photography Snap Cards at 80% Off


from PictureCorrect https://ift.tt/hcFEsLZ
via IFTTT

keskiviikko 17. joulukuuta 2025

PictureCorrect.com: The Rule of Odds in Photography Composition

In the world of photography, where the quest for perfect composition is endless, there exists a simple yet profound guideline known as the “Rule of Odds”. This rule, often overlooked but incredibly impactful, can transform an ordinary snapshot into a captivating visual story. Today, let’s dive into what the Rule of Odds is and how it can enhance your photographic compositions.

Related: offer ending soon for the Composition Cheat Sheets 🎁 Holiday Sale

rule of odds

Photo captured by Giorgio Trovato

1. What is the Rule of Odds?

The Rule of Odds suggests that images are more visually appealing when they contain an odd number of elements, typically three or five. This rule is rooted in the way our brains process information. Odd numbers create a sense of harmony and balance, yet they add a touch of intrigue and complexity.

2. Why Does It Work?

Odd numbers, especially the number three, have a unique charm. They provide a central focal point and encourage the viewer’s eyes to move around the frame, creating a more dynamic and engaging experience. This happens because with even numbers, our eyes tend to pair up elements, which can lead to a static and less interesting composition.

3. Implementing the Rule of Odds in Your Photography

Implementing this rule is about more than just counting objects. It’s about understanding balance and interest in a scene. Here are some tips:

  • Seek Natural Oddities: Nature is full of odd numbers. Three flowers, five stones in a riverbed, or a single tree standing apart from others can all be effective subjects.
  • Create Your Own Composition: Arrange still life or portrait subjects in odd numbers. This can be particularly effective in food photography or in creating compelling group portraits.
  • Use Negative Space: The space around your subject counts too. A single bird in the sky with two clouds can form a trio of elements.
  • Focus on the Central Element: In a group of three, the central element often becomes the focal point, drawing the viewer’s eye and giving your image a sense of depth and interest.
still life subjects

Photo captured by Anya Chernik

4. Breaking the Rule

As with any rule in photography, the Rule of Odds is not absolute. It’s a guideline to enhance your compositions, but sometimes breaking it can lead to equally stunning results. Trust your creative instincts!

To Summarize:

The Rule of Odds is a simple yet powerful tool in the photographer’s arsenal. It nudges us towards compositions that are balanced yet intriguing, harmonious yet dynamic. Whether you’re a seasoned photographer or just starting out, experimenting with this rule can lead to surprising and delightful results. Remember, the ultimate goal of photography is to capture and convey your unique perspective of the world, and rules like these are just stepping stones along that creative journey.

For Further Training on Composition:

Are you ever tired of your photos looking dull or boring? These popular Composition Cheat Sheets have you covered. With clear, concise information on all the essential elements of composition, you’ll never be unprepared again. They are currently 81% off for a Holiday Season Sale 🎁 if you want to check them out.

composition cheat sheets

Composition Cheat Sheets (see all the elements covered)

The perfect companion for any photographer. Print one out whenever you need it. These cheat sheets consolidate crucial composition-related information, allowing you to concentrate on what truly matters – composing striking photographs.

Deal ending soon: The Composition Cheat Sheets at 81% Off


from PictureCorrect https://ift.tt/TjoY7CI
via IFTTT