Historically, one of the greatest challenges in Milky Way photography was in how to showcase the landscape, but also have the Milky Way properly exposed in the same image. But, the game has very recently changed my friends, and hallelujah! For those of you who do not have experience shooting the Milky Way, when you shoot the photo, the Milky Way will look properly exposed, but the landscape itself will look very dark or even completely black. With this new technique that we are going to discuss, this creates a quick solution, while providing fantastic results.
Related reminder: only 1 day left for the Milky Way Mastery Course Sale
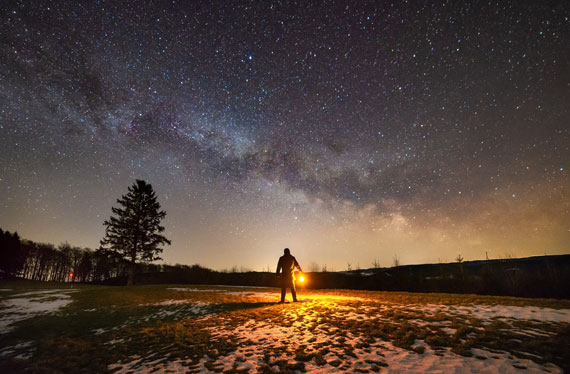
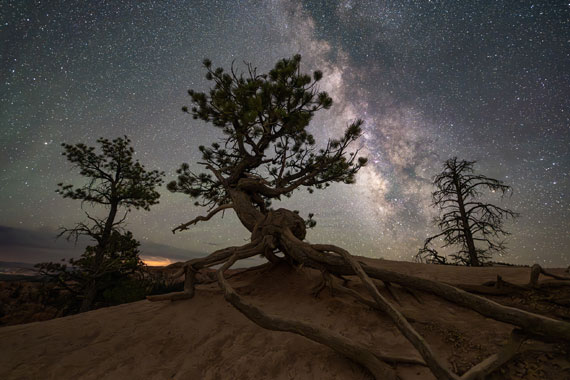
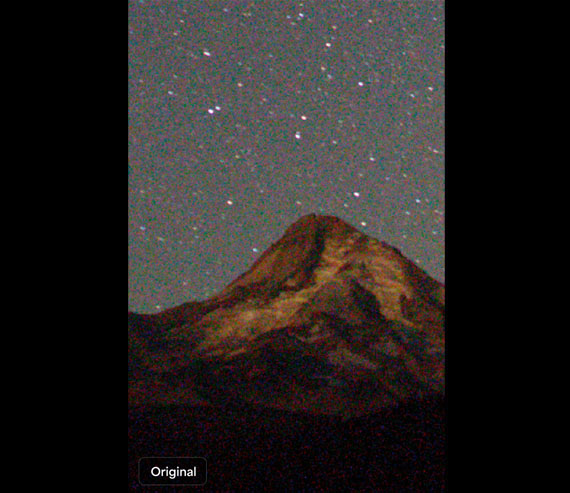
Captured by Seth Hamel; ISO 10,000, 15 seconds, f1.8, 14mm
This modern approach is due to the advancements in camera technology, combined with the powerful new AI tools that have been implemented into Lightroom and Photoshop recently. In this article we are going to discuss equipment, camera settings, considerations for specific scenes, and lastly, an intro into editing your RAW files. This is not a detailed outline of how to shoot Milky Way photos. I do have some settings in here, but this article is written for those who have a basic understanding of how to shoot night photos (i.e. how to set focus, the need for a tripod, etc).
First, we need to discuss the other techniques that are currently used to showcase the landscape and the Milky Way into a photo. The first technique would be light painting. In this approach, while exposing your photo on a long exposure, you shine a light onto your subject, or bounce that light off of something to light your subject. This can be a great technique for certain situations, mostly for individual landscape features that protrude into the night sky. However, if you are shooting a massive scene like the Bryce National Park, Zion National Park or Yosemite Valley, you would not be able to evenly light the scene due to its expansiveness. If you tried, the light would be so bright it would be quite intrusive to other visitors, it would be harsh, uneven and it wouldn’t have the aesthetic needed to do the area justice.
The second technique is doing a blue hour blend. This is where you take 2 separate images at different times of the day then blend them together, but you must keep your tripod and camera unmoved between the 2 photos. Your first image would be taken around 40 minutes after sunset during blue hour. You would be using settings like f14 and ISO 100 to create the most crisp image possible, while obtaining full depth of field. Your second image would be taken once the night sky becomes dark and the Milky Way is in the position that you like. Click. Ok, now you have your two photos. One is properly exposed for the landscape, and one is properly exposed for the night sky. From there you would need to take both photos into Photoshop and use layers to combine them. This is a laborious process, and requires you to have a pretty strong skill set in Photoshop. When I’m running workshops, the majority of guests do not have that experience level and that is likely the case for many of you reading this. Well, couldn’t you just open those in Lightroom and merge them into an HDR? Unfortunately no. The landscape, the skyline and the Milky way have to blend together seamlessly, and HDR doesn’t blend, it merges images as a full scene, not blending two portions of a photo together. Two different things.
Blue hour blends certainly create the sharpest, cleanest and most detailed photos, so I’m not saying it’s a bad approach. But the reality is that this is not the most practical or realistic approach for the vast majority of hobbyist landscape photographers. To briefly list those reasons: You need a strong skill set in Adobe Photoshop, editing is time consuming and the biggest reason for me is that it only allows for one landscape image to be created from the night. I’m a very mobile shooter. I love the adventure of running around, looking at different scenes, composing in many different ways and getting playful with photography under the stars, so the blue hour approach for me is not so appetizing.
Now… onto this new mysterious approach. The basic idea is that you are going to shoot your night landscapes including the Milky Way VERY bright! Far brighter than what you would think you want. In fact, I promise you, that when you go out and shoot this way your first time, you will look at your playback and you will think “The Milky Way is all washed out!” or… “It looks like daytime!”. No need to panic my enthusiastic photography comrades! The reason we are doing this is that we need to expose enough information in the shadows of the photo so you can showcase the wonderful landscape that you’re standing in.
Equipment:
This technique is going to benefit more modern cameras as they have better ISO technology and have the ability to push the ISO further without getting the dreaded “pink haze” (I’ll explain later).
Examples of modern setups are:
- Nikon – Z series mirrorless cameras, D850
- Canon: Mirrorless camera models, 5D Mark IV.
- Sony: a7r IV and above
Lenses are the next thing to discuss. You’ve assuredly read that an f2.8 or wider lens is best. Correct. With that being said, with this approach of trying to shoot the scene very bright, f2.8 will work, but it’s far better to use a wide angle lens that will open up wider than that (i.e. f1.4, f1.8 or f2.0).
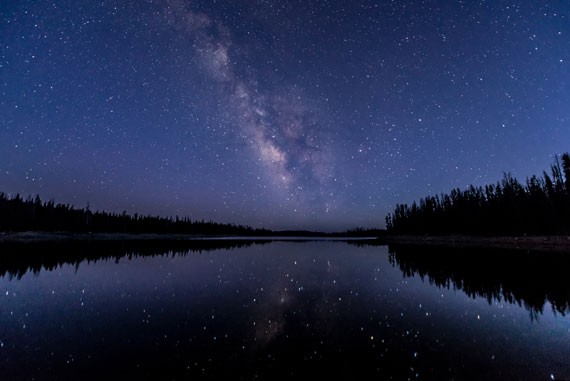
Captured by Seth Hamel; ISO 10000, f1.8, 20 seconds, 14mm And ISO 12800, f1.8, 20 seconds, 14mm
Camera Settings:
Hold onto your hats, and no heart attacks please, because we are about to go into some settings that are probably going to feel uncomfortable.
- Shutter speed determined by using the rule of 500 (do a google search if you’re unfamiliar)
- Aperture wide open
- ISO anywhere between ISO 6400 all the way up to 12,800. Why the range? Different scenes have different lighting conditions, even at night time. Here’s an example. Being a photographer in Zion National Park, if I were to go to the east side of the park, that area has a landscape that has a lot of rolling white rock domes which reflects tons of light from the star filled sky. In fact, you can see the landscape just fine with your eyes even on a moonless night on that side of the park because of that white reflective rock. For bright night landscape scenes such as these, you can shoot using a really wide aperture using ISO 6400 and the landscape would show up nicely. However, if I were to drive into the Scenic Canyon area of Zion, that is a deep canyon which has very dark rock which does not reflect light. In this situation, I would shoot at ISO 12,800 in order to pull in enough light from the shadows. If I were to shoot at ISO 6400 the shadows would not have enough information to work with in post production, hence not showing the landscape in the photo. Even if you could pull those up in post production, the scene would look quite soft, lack detail, and would actually have more graininess than if shot at 12,800. Pulling up dark areas at high ISO’s introduces more grain, so it’s best to shoot it bright.
I mentioned the term “pink haze” earlier in this article. All of our cameras have limitations in their ISO performances. At a certain point, if you keep pushing your ISO higher and higher, eventually your images will start to not only have noise from the high ISO’s, but there will actually be a visible pink or purple haze that is likely at the bottom of your image. At that point, the ISO has been pushed too far, so you should come down a little at a time until that is not visible. I would encourage you to experiment with your camera. Try the extreme high side of your ISO range and then come down more and more until you no longer see the pink haze. Then you’ll know the absolute upper limit of your camera’s ISO ability. That pink haze can be very difficult to impossible to remove in post production.
One more thing to mention, since the night sky will look so bright in the field while shooting, be sure to look at your histogram to ensure that you are not overexposing anything in the sky.
Post Production:
This is where everything comes together. When you pull up your RAW file in Lightroom, Bridge or Photoshop, the first thing that you will notice is that the sky is far too bright, and the Milky Way looks dull and without contrast. Ok, we’re gonna fix that, and we’re going to make this basic and easy.
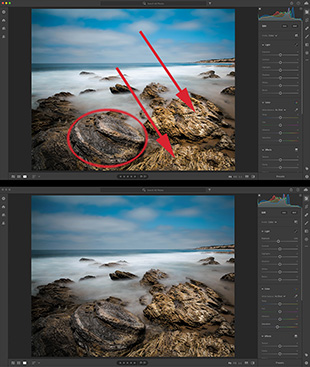
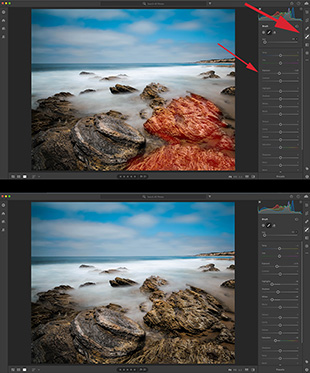
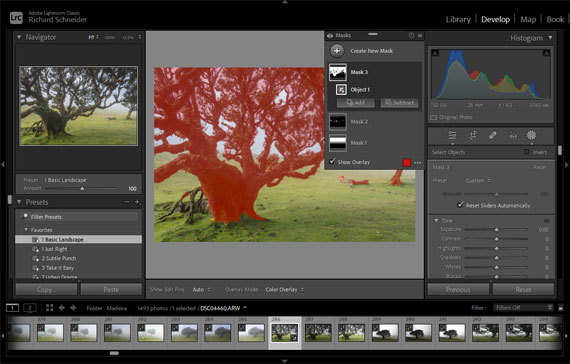
Step #1 – Use the “Select Sky” tool and edit your sky. You will likely want to pull down the exposure, add a bit of contrast, clarity and dehaze. (If you are unfamiliar with working with “select sky” I would recommend watching some Youtube videos)
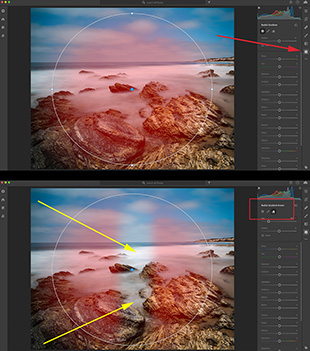
Step #2 – Use the “Select Sky” tool again, but this time hit the “invert” button so you are working on the landscape only. At this point, you will likely want to pull the exposure up or down, use the” Whites” slider to pull up some brightness and add contrast, add clarity in order to get the landscape the way you like it.
The goal in these first two steps is to get both portions of the image to look harmonious in both it’s brightness and contrast throughout the photo as a whole. Bringing the landscape brightness up, and the sky down too much will result in an unrealistic photo, so be careful with that. I find my favorite images showcase the Milky Way, and the landscape being a bit darker, subtly showcasing its features. .
Step #3 – Now that you have balanced the brightness and contrast of both parts of the scene, this is a great time to pull up your “compare” or “Y/Y” feature. Pulling up your original photo next to the edited version will give you immediate feedback on what looks wonky in your edit.
Step #4 – At this point I work on the photo as a whole using the basic tab, and color corrections to my liking.
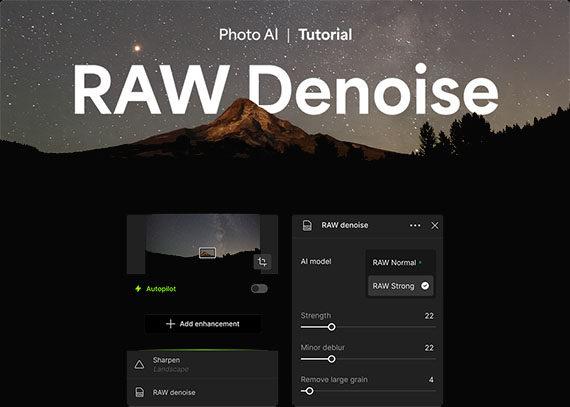
Step #5 – The game changing moment (in addition to the select sky tool :). We will now go down to the “detail” tab, and hit the” DeNoise AI” button. At this point, a dialog box will pop up and you’ll have the option to have more or less noise removed. 50 and below is best from my experience. Once you’ve done that, you can hit enter and Voilà! You will now have an edited second copy of your photo, but with the noise reduction applied. The amount of noise removal while keeping good detail is literally hard to believe. What a technological progression for photography!
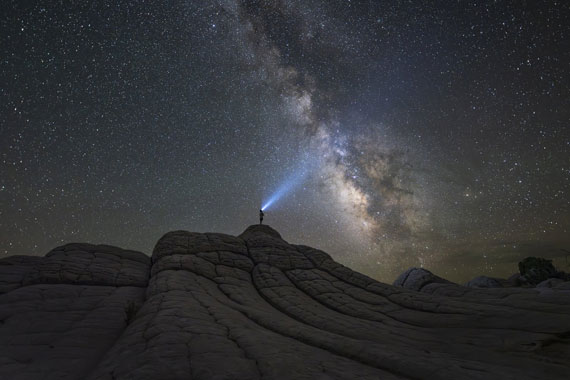
Captured by Seth Hamel; ISO 12800, f1.8, 15 seconds, 14mm
So, maybe you have some older Milky Way photos on a hard drive. I’d recommend pulling some of those into Lightroom or Bridge and try the post production techniques. Even if you didn’t shoot as bright as what I went over in this article, give those photos a new edit with these techniques and I’m confident you’ll be pleased with the results.
I’m not here to say that this is the best approach to Milky Way photography. In fact, I don’t subscribe to the term “best” in the world of photography. Our approaches, our styles, how we want to interact with photography and the landscape, who we are as people…. We are as diverse as the eternities and there can not be a one size fits all in artistic pursuits. I’m hoping that by sharing this technique with you, that you will experiment with it and that will assist you in creating images and memories of your time in the wilderness that you will love and be proud of! Happy shooting friends!
About the Author:
Seth Hamel is a professional landscape photographer based on the borders of Zion National Park. As owner of Enlighten Photography Excursions, he has been guiding and mentoring hobbyist photographers for the past decade in Southern Utah and Iceland. Seth offers single night as well as multi-night Milky Way photography workshops throughout the year in the Zion and Bryce National Parks for every level of photographer. Learn more about available guided Zion, Bryce and Iceland photography opportunities at zion-photography.com.
For Further Training:
If there was a simple way to take stunning pictures of the the Milky Way would you be interested? You do not need top-of-the-line gear for Milky Way Mastery. In fact, during this course they show you why old fashioned accessories are often better for astro photography. It is currently 67% off for 1 more day if you want to check it out.

Milky Way Mastery Night Photography Course
The “secret” to exceptional astro photography isn’t your gear… it’s how you use it. Milky Way Mastery shows you how to use average equipment to take above average pictures.
Only 1 day left: Milky Way Mastery at 67% Off
from PictureCorrect https://ift.tt/1kv6lsL
via
IFTTT


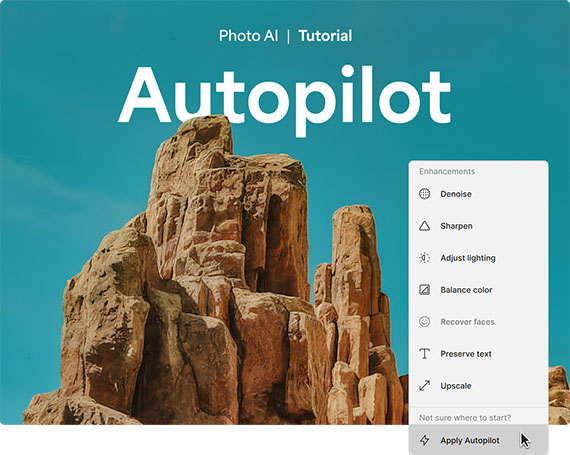
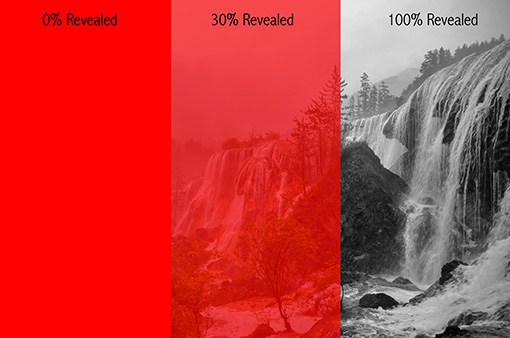


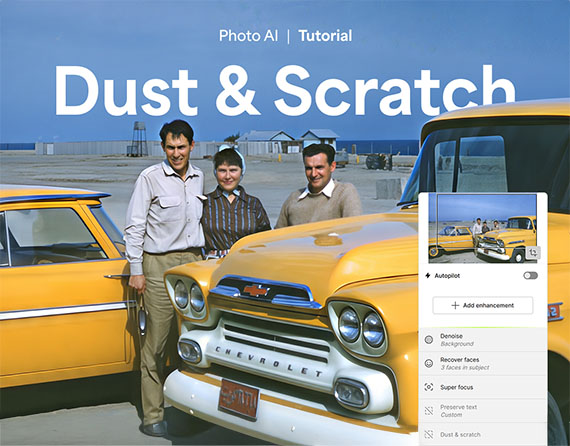
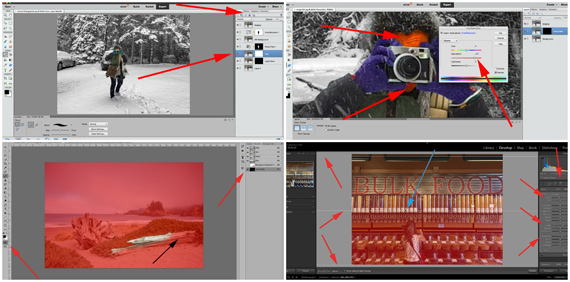
 Step-by-Step: Repairing Your Photo
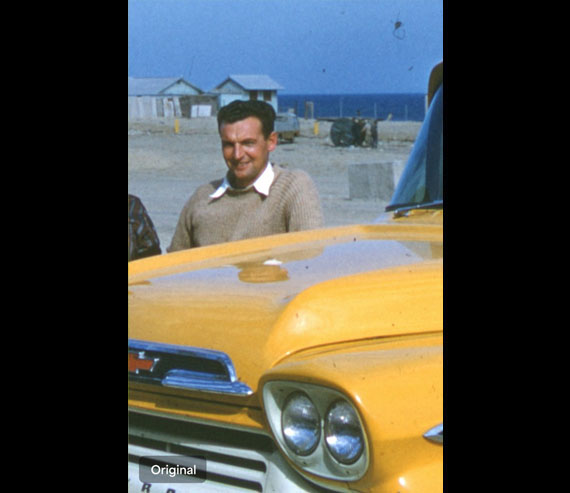
 Pro Tip: This works best as an initial global fix before zooming into finer areas.
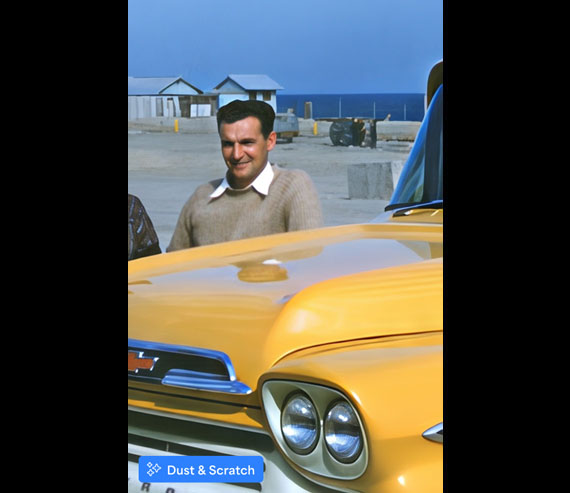
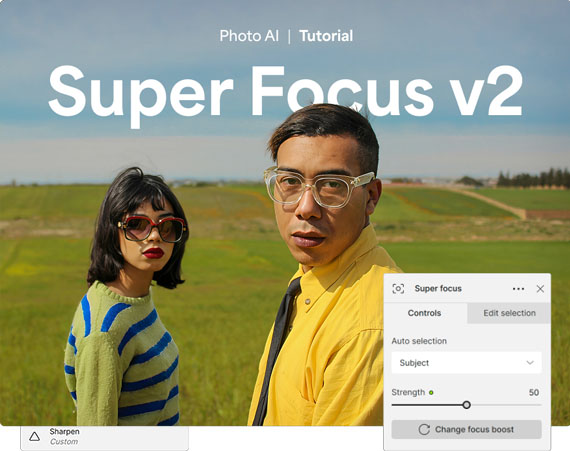
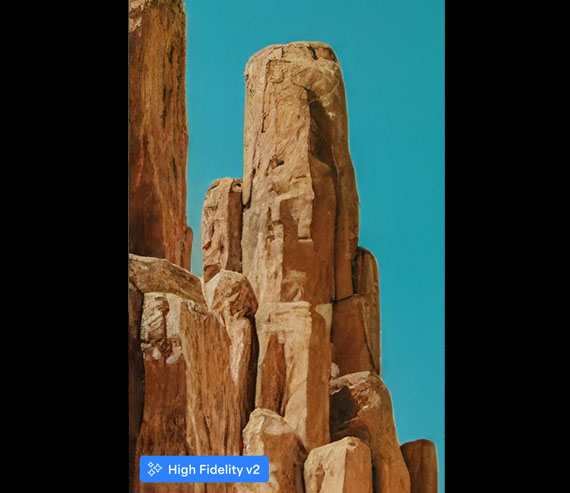
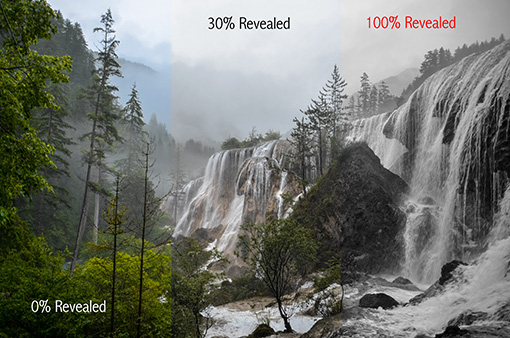
 What Is Super Focus v2?
 When to Use It
 Step-by-Step: Refocus Your Image
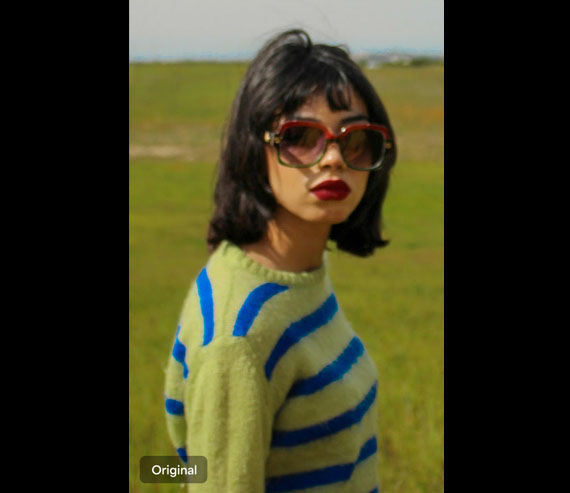
 Pro Tips