Night photography is a typical “next step” for many budding photographers.
I have had numerous photographers ask me over the years, “What do I need to get started in night photography?”
My response is always, “What type of night photography do you want to do?”
To which they inevitably say, “I don’t know. I just want to take some cool night pictures.”
Well, it’s a bit more complicated than that. However, it isn’t as complicated as it used to be. In today’s blog post we delve into the longer exposure world of night photography.
Also don’t forget that there is only 1 day left for the February sale on the The Photography Action Cards from which today’s article is based on.
Check this out!
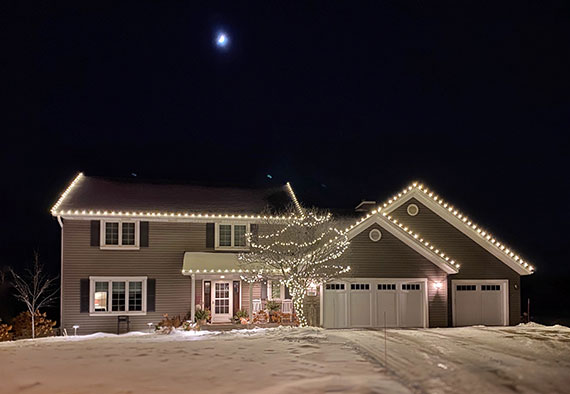
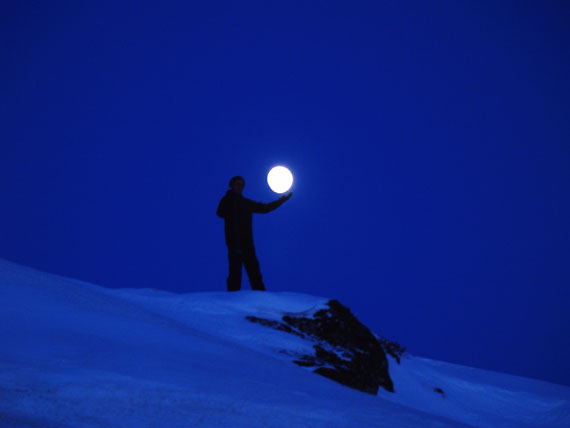
Photo by Kent DuFault
I took this photograph in absolute darkness except for the moon and the holiday lights. Plus—and this is truly amazing—I took it handheld, without a tripod.
How could this be, you ask? I used my iPhone 11 Pro. It was taken at ISO 500 at 1/10th of a second.
It’s tack-sharp, and that’s pretty impressive.
There are three basic things that you need for night photography. From there, your experiences with night photographs will get wild and crazy.
What is necessary?
- You need the dark. I’m not trying to be coy here. Many times, we think it’s dark, and it’s not that dark. Some forms of night photography need the scene to be really dark.
- You need some form of light. This necessity is where night photography gets exciting, because there are infinite ways to create light. Each one can alter your picture. Think about it. You could have natural light, artificial light, starlight, stray light, sparkling light, colored light, tiny lights, big lights—the list goes on.
- You need some way to create a sharp picture. In my example picture above, it was the technology of the iPhone that helped create a sharp image. A more traditional method is a tripod and a remote shutter release mechanism. The gist is that you must devise a way to create sharp, non-blurry pictures.
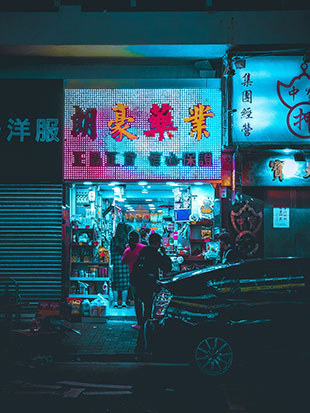
Photo by Joel Fulgencio
For this article, we will concentrate on four aspects of night photography:
- Photographing at night using strictly available light
- Using moving light sources for creative effects
- Mixing light sources
- Capturing a good image with long exposures
We will talk specifically about these scenarios:
- The nighttime cityscape
- Using road traffic for composition
- Painting with light
- The dusk mixed-light shot
I know some of you will be hoping to capture the Milky Way after reading this article. That’s not going to happen. That takes a bit more instruction than can be included in this blog post. However, I will touch upon it and present you with a few things to consider for future reference.
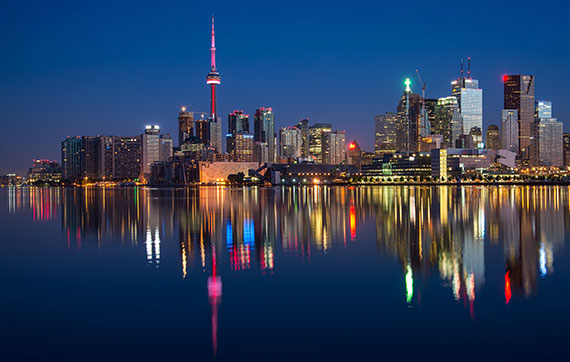
Photo by James Wheeler
Getting Started
If you’re new to night photography, the cityscape is the most accessible picture opportunity to get you started.
Unless you have a camera like my iPhone 11 Pro, you’re going to want a few specialized equipment pieces.
Equipment:
- Camera: Any camera with a “bulb” setting and/or a maximum built-in shutter speed of up to 30 seconds.
- Tripod: You’ll need something sturdy. You can also get by with placing your camera on a sturdy surface, but that will be far less flexible.
- Remote Shutter Release: You can also get by with your camera’s self-timer, if you aren’t using the bulb setting.
- Lens: Ideally, a wide-angle or moderate telephoto (14mm-100mm). Depending upon the light level, image stabilization can be helpful.
- Sandbag: You can use this to further stabilize a tripod or support your camera if you place it on a sturdy surface. There are commercially available sandbags explicitly made for photography, or you can make your own.
- Miscellaneous items: A flashlight or headlamp will help you figure out camera settings in the dark. A non-reflective 8-by-10-inch matte black card (available at any art store) will let you block light from entering the lens without having to touch the camera (more on this in a minute).
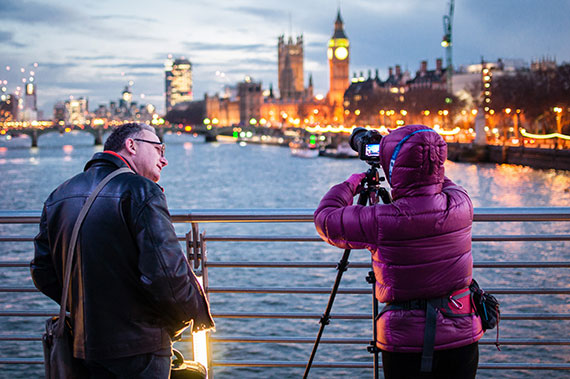
Photo by David Marcu
The Best Conditions for Starting in Cityscape Night Photography
- Pick a location that provides a beautiful view of the skyline and city lights
- If possible, include a body of water in the foreground for reflections
- Arrive at your location and get your gear prepared around 30 minutes after sunset
- Start shooting while there is still some light in the sky
- Set your camera to manual mode or aperture priority
- Set the ISO to 400, or up to 800
- Set the lens to manual focus
- Set the metering mode to center-weighted
- Compose using the rule of thirds
- If possible, include a focal point
- Begin shooting as the sky darkens, and the city lights turn on
- Monitor the shutter speed: be aware of even minor camera movement
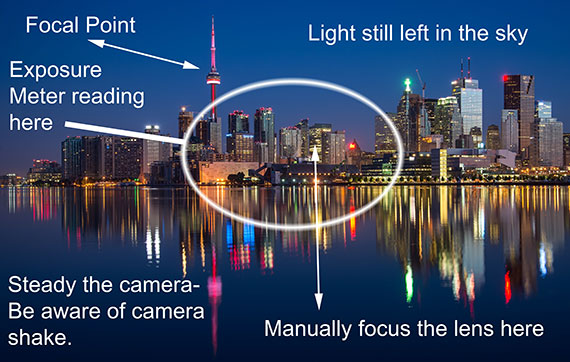
Night Cityscape
Pro Tip: Your best shots will occur when the sky is close to the same exposure value as the cityscape. As the sky darkens, you will eventually lose a lot of detail in the shadows.
Using Road Traffic for Composition and Effect
Once you have a few nighttime cityscapes under your belt, the next logical step is to combine a cityscape with road traffic for a special effect.
Remember This: I call these shots cityscapes, but they can be created anywhere there are buildings and lighting.
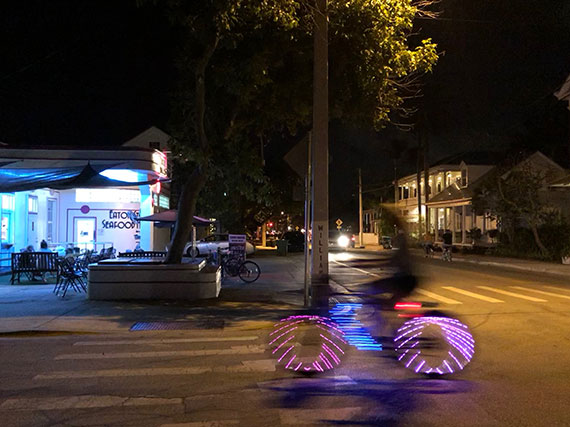
Photo by Kent DuFault
This night shot was taken in the town of Key West, Florida, using the same principles outlined above.
Pro Tip: Notice how the sky in the Key West picture has gone entirely dark. If you’re shooting this late, try composing your shot so that some bright object with lighting breaks up the black sky. You can see how I did that with the tree.
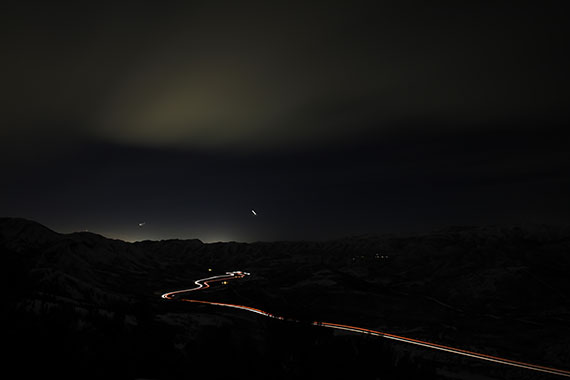
Photo by Patrick Hendry
To include road traffic in your nighttime photos, follow the previous instructions with the following additions.
- Pick a location that looks down onto the road (the higher the elevation, the better)
- Use only manual mode
- Set the aperture between f/4 and f/8 (you will need to experiment with this)
- Make sure to set your focus before it gets too dark
- Take a camera meter reading, and then reduce the exposure from one stop to four stops, depending upon the ambient light surrounding your road; for example, the first road picture in this article would be a reduction of around one stop, while the example photo above would be closer to three or four stops’ reduction
- Depending on the traffic level, your shutter speed might be anywhere from half a second to 30 seconds. Again, the first example in this article would be closer to half a second because there is a lot of traffic as a light source, while the second example would be closer to 30 seconds because only a few cars were on the road, meaning less light
Painting with Light
Painting with light can take many different forms.
Night Photo
Think of it as an artist with a blank paint canvas. They apply different paints to the canvas, and it comes to life as a complete image.
Crucial Thought: In nighttime photography, it’s dark, and the darkness creates a blank canvas within the camera. Earlier, I alluded to the importance of darkness when you attempt nighttime photography. In many places, it won’t be as dark as you initially believe it is. That’s why in the equipment section, I suggested you include a matte black card in your kit. The card helps you to block any light that you don’t want to enter the camera—without touching the camera. For example, let’s say you’re in the middle of a long-exposure cityscape shot, and a car with headlights on is approaching. You hold the card in front of the lens as the vehicle passes. When it is out of view, you remove the card and continue to expose the picture. This technique is one of the advantages of using the bulb setting instead of automated shutter speeds. You count the seconds with the shutter locked open. You can manually stop the exposure with the card if necessary.
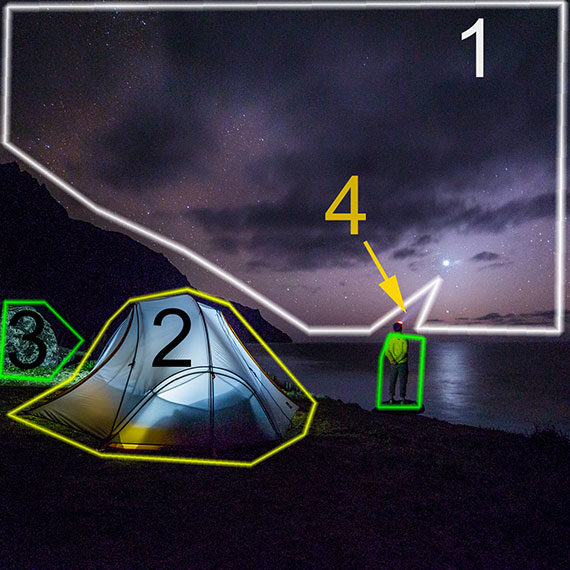
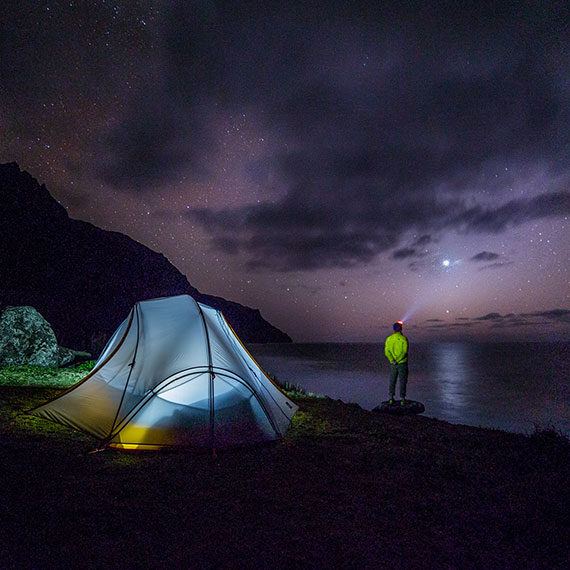
Light Sources
This photograph has four light sources that are “painting” the black canvas of darkness.
- The illumination in the sky is light source number one.
- A lantern inside the tent is light source number two.
- An electronic flash positioned to illuminate the bushes and the man standing is light source number three.
- The headlamp on the man’s head is light source number four.
Key Point: Painting with light is an advanced technique, and here is why. Each light source has a different intensity and requires a different length of time to expose inside the camera properly. This fact is where your black card comes in handy as you can cover the lens as you turn different light sources on and off.
Give it a try!
Try some light painting. Gather two or three light sources. They can be an electronic flash, a flashlight, a plug light, car headlights, etc. Keep things simple to start. Place a model in a dark area and use one light to expose the model and the additional lamps to illuminate the environment around them.
The Dusk Mixed Light Shot
I touched upon the value of having some light in the sky already, but I wanted to add two additional tips.
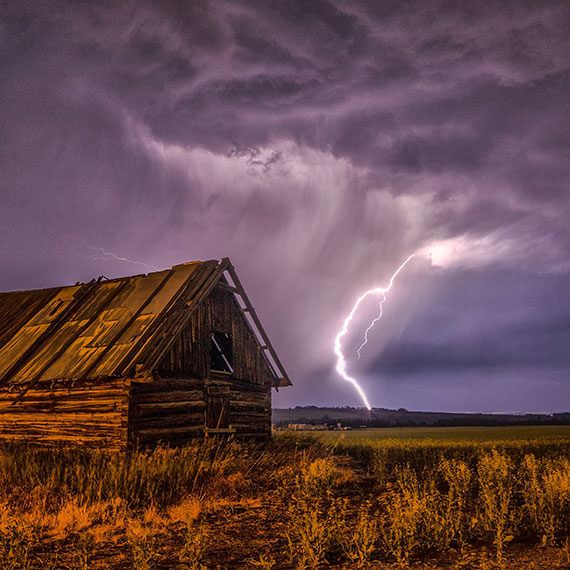
Photo by Jean Beaufort
Outside exotic light sources can create other opportunities for nighttime photography.
Lightning can quite literally illuminate an entire landscape. Make sure you are a safe distance away. Follow all of the tips listed for capturing road traffic with these additions.
- Use a wide-angle lens
- Set the aperture between f/8 and f/11
- Lock the camera shutter open using the bulb setting
- Place your black card in front of the lens
- When the lightning begins to flash, pull the card away—allow one to three flashes, depending upon how large they are
- Close the shutter
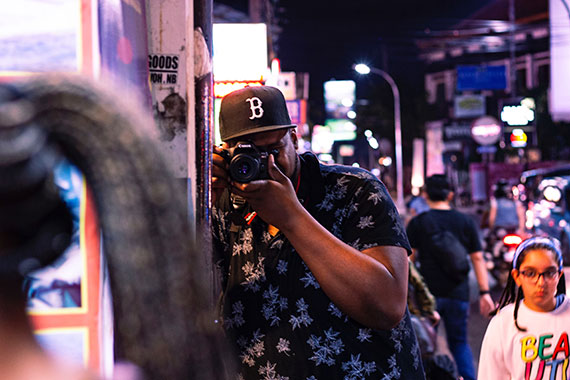
Photo by Lethu Zimu
When shooting at dusk and on into the night, there may be moments where you don’t have a tripod or cannot use one.
Pro Tip: Use the image stabilization option on your camera, if possible. Also, press your body up against a solid surface as you take the picture. This action will help you hold the camera steady at slower shutter speeds.
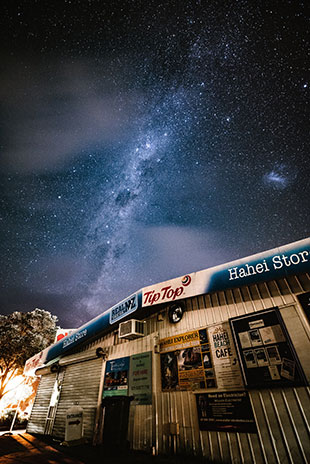
Photo by Casey Horner
I mentioned the Milky Way at the beginning of the article.
Many of the tips you’ve read here will help Milky Way photography and other astrophotography subjects.
The difference is that you must learn to locate these celestial bodies within the sky and take your search for darkness to new and higher levels—and that’s a whole other article.
About the Author:
Kent DuFault is an author and photographer with over 35 years of experience. He’s currently the director of content at the online photography school, Photzy.com.
For Further Training, Deal Ending Tomorrow:
65 beautifully designed & printable Photography Action Cards are now available that will give you over 200 photography assignments, covering everything you can imagine. They are currently 88% off until the end of the month, February 28, if you want to try them out.

New: The Photography Action Cards (Click to See How They Work)
These Action Cards discuss a photographic topic, provide you with suggested considerations, and give you specific photographic assignments.
Only 1 day left: The Photography Action Cards at 88% Off
from PictureCorrect https://ift.tt/s1UWov4
via IFTTT


 Color Transfer
 Twilight Enhancer AI
 Water Enhancer AI
 Relight AI
 HDR Batch Processing
 Anniversary Sale: Get Luminar Neo at a Special Price
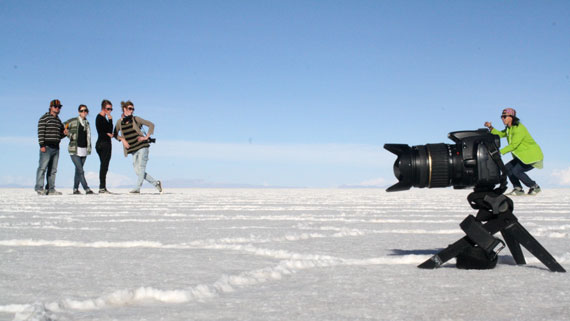
 if you want to check them out.