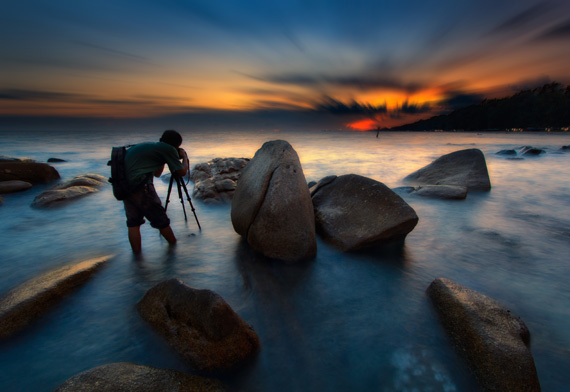
sunnuntai 27. lokakuuta 2024

PictureCorrect.com: The 10 Best Places in the World to Photograph Autumn Colors

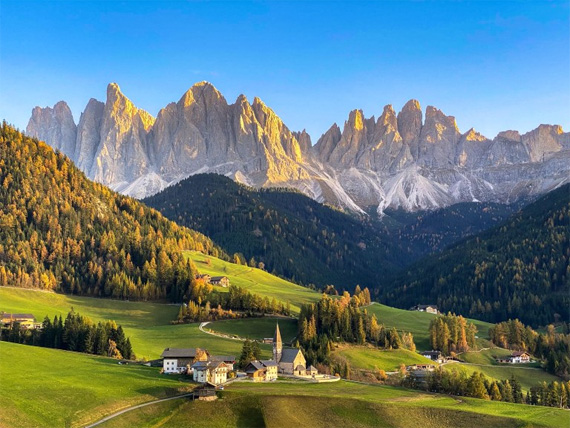
Autumn, also known as fall, is a magical time when nature paints landscapes with a mesmerizing palette of reds, oranges, yellows, and browns. For photographers, it’s a season of unparalleled beauty. Whether you’re an amateur with a smartphone or a professional with high-end gear, these locations offer breathtaking views that will make your photos stand out.

Relevant reminder: deal ending soon for the Photography eBook Autumn Sale

Here’s our list of the best places in the world to capture the essence of autumn:
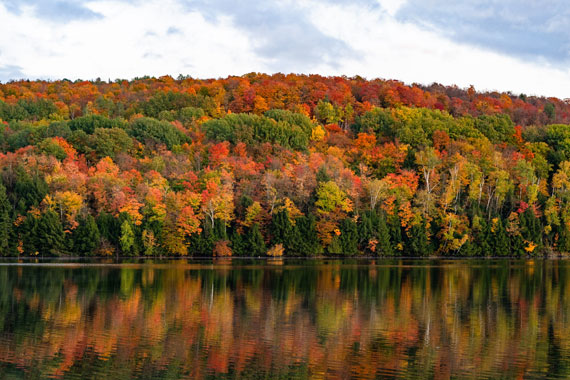
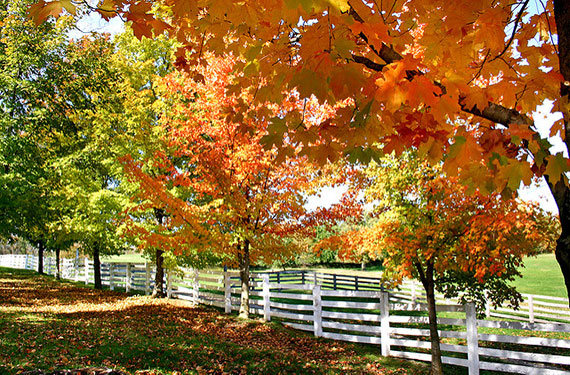
autumn colors

Photo captured by Peter James Eisenhaure in Vermont, USA

1. New England, USA

  • Why it’s special: Iconic for its fall foliage, New England’s mix of deciduous trees ensures a vibrant display of colors.
  • Best spots: The White Mountains of New Hampshire, the Green Mountains of Vermont, and Acadia National Park in Maine.
  • Tip: Plan a road trip along the scenic Kancamagus Highway in New Hampshire for varied landscapes.

2. Kyoto, Japan

  • Why it’s special: Kyoto’s historic temples and shrines framed by fiery maple trees make it a unique autumn destination.
  • Best spots: Kiyomizu Temple, Tofukuji Temple, and Eikando Temple.
  • Tip: Visit in late November when the colors are at their peak.

3. The Canadian Rockies, Canada

  • Why it’s special: Majestic snow-capped mountains contrasted with golden larch trees.
  • Best spots: Banff and Jasper National Parks.
  • Tip: Take the Icefields Parkway drive for panoramic views.

4. The Lake District, England

  • Why it’s special: Rolling hills, serene lakes, and ancient woodlands awash with autumn hues.
  • Best spots: Derwentwater, Grasmere, and Rydal Water.
  • Tip: Early morning mist can add an ethereal quality to your photos.

5. The Black Forest, Germany

  • Why it’s special: Dense woodlands that come alive with color, traditional villages, and misty mornings.
  • Best spots: Mummelsee, Triberg, and Baden-Baden.
  • Tip: Hike the Westweg trail for elevated viewpoints.

6. Transylvania, Romania

  • Why it’s special: Medieval castles set against a backdrop of colorful forests.
  • Best spots: Bran Castle, the Carpathian Mountains, and Sighișoara.
  • Tip: Capture the contrast of the red roofs of the villages against the autumn trees.

7. Loire Valley, France

  • Why it’s special: Renowned vineyards and historic châteaux surrounded by multicolored woodlands.
  • Best spots: Château de Chambord, Château de Chenonceau, and the vineyards of Sancerre.
  • Tip: A balloon ride offers a unique aerial perspective of the valley.

8. Jiuzhaigou Valley, China

  • Why it’s special: Turquoise lakes reflecting the splendid colors of fall.
  • Best spots: Five Flower Lake, Long Lake, and Panda Lake.
  • Tip: Visit during the week to avoid weekend crowds.

9. Tuscany, Italy

  • Why it’s special: Cypress-lined roads, olive groves, and vineyards turning gold.
  • Best spots: Val d’Orcia, Chianti, and Florence’s Boboli Gardens.
  • Tip: Capture the play of light during the golden hour.

10. Patagonia, Argentina and Chile

  • Why it’s special: Unique southern hemisphere fall colors in late April and May.
  • Best spots: Torres del Paine National Park, Mount Fitz Roy, and Los Glaciares National Park.
  • Tip: Be prepared for unpredictable weather.

Autumn offers photographers an opportunity to capture nature at its most vibrant. Each of these destinations offers a unique perspective on the season, so pack your camera and get ready to be amazed by the world’s autumnal beauty!

For Further Training:

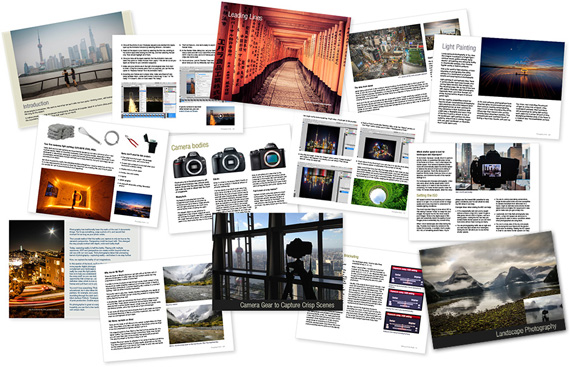
This #1 bestseller is the most in-depth eBook on how to capture amazing photography anywhere. Over 250 pages of photography tips & tricks from industry insiders. Currently 78% off today for an Autumn Sale if you want to check it out.

ebook pages

Pages from The Photography Tutorial eBook

It is the product of over a DECADE of research as an insider in the photography industry, assembled to help you learn quickly and avoid the mistakes that I made along the way.

Deal ending soon: The Photography Tutorial eBook Autumn Sale

- - - - - - - - - - - - - - - - - - - - - - - - - - - - - - - - - - - - - - - - - - - - - - - - - - - - - - - - - - - - - - - - - - - - - - - - - -

Photography, like any art or skill, thrives on consistency. The journey to becoming an adept photographer is paved with regular practice. Learn how PictureCorrect Insiders can help.

- - - - - - - - - - - - - - - - - - - - - - - - - - - - - - - - - - - - - - - - - - - - - - - - - - - - - - - - - - - - - - - - - - - - - - - - - -

This post The 10 Best Places in the World to Photograph Autumn Colors appeared on PictureCorrect.


from PictureCorrect https://ift.tt/pbfFAVO
via IFTTT

tiistai 22. lokakuuta 2024

PictureCorrect.com: Desert Photography Tips and Gear Protection

Desert photography presents a unique set of challenges, from harsh sunlight to unpredictable weather conditions. However, the breathtaking landscapes and stunning light make it a worthwhile endeavor for any photographer. In this article, we will discuss essential tips for photographing in desert conditions, including how to protect your gear and which camera settings to use for optimal results.

Relevant reminder: only a little while left for the Travel Photography Snap Cards at 93% Off

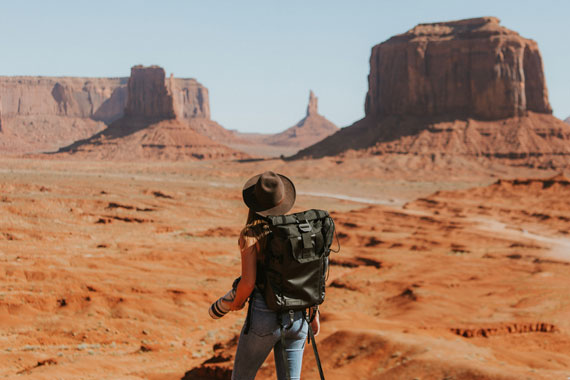
desert photography

Photo captured by Ivana Cajina

Protecting Your Gear

The desert environment can be unforgiving to your photography equipment. Here are some tips to help protect your gear:

  • Use a camera bag with ample padding and compartments to safeguard your equipment from the elements and accidental drops.
  • Bring ziplock bags or rain sleeves to protect your camera and lenses from sand, dust, and moisture.
  • Carry a rocket blower or brush to remove dust from your camera and lenses.
  • Don’t forget to pack lens hoods to shield your lenses from direct sunlight, which can cause flare and reduce image quality.
  • Keep your gear in a shaded area when not in use to avoid overheating.

Camera Setup for Desert Photography

To capture the essence of the desert, consider the following camera settings:

ISO: Use the lowest possible ISO setting (e.g., 100 or 200) to minimize noise and maximize image quality. Deserts tend to have bright, intense sunlight, so a low ISO should be sufficient for most situations.

Aperture: Choose an appropriate aperture based on your desired depth of field. For landscape shots with a deep depth of field, consider using a smaller aperture (larger f-number, e.g., f/11 or f/16). For portraits or subjects where you want to isolate the focus, use a larger aperture (smaller f-number, e.g., f/2.8 or f/4).

Shutter Speed: Adjust your shutter speed to properly expose the image based on your ISO and aperture settings. In bright sunlight, you might need a fast shutter speed to avoid overexposure (e.g., 1/500 or 1/1000). Use a tripod if you need to use a slow shutter speed for creative effects or in lower light situations.

White Balance: Desert environments can have strong color casts due to the sand and sunlight. Adjust your white balance accordingly, either by using the “Daylight” or “Sunny” preset or by manually setting the color temperature (around 5200-5500K). You can also shoot in RAW and fine-tune the white balance during post-processing.

Graduated Neutral Density (GND) Filters: In high-contrast situations, such as a bright sky and dark foreground, consider using a GND filter to balance the exposure. This can help retain detail in both the sky and the landscape.

Polarizing Filters: A circular polarizing filter can help enhance the colors, reduce glare, and improve the overall contrast in your desert photos.

Bracketing: Consider using exposure bracketing to capture a range of exposures. This can be helpful for creating HDR images or ensuring you get the best possible exposure in challenging lighting conditions.

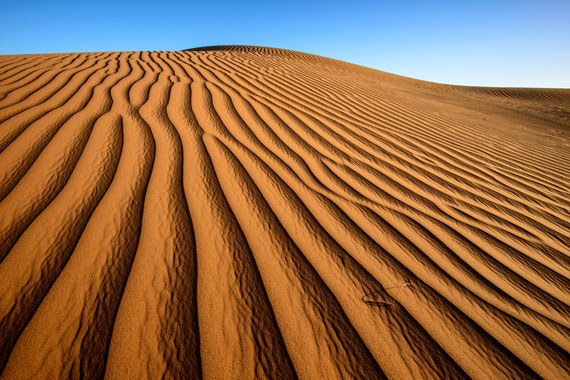
desert photo

Photo captured by Sergey Pesterev

Composition Tips

To create visually stunning desert photographs, keep these composition tips in mind:

  • Utilize leading lines, such as sand dunes, to guide the viewer’s eye through the image.
  • Look for interesting textures and patterns in the sand or rock formations.
  • Incorporate elements of scale, like a lone cactus or human figure, to emphasize the vastness of the landscape.
  • Shoot during the golden hour (shortly after sunrise or before sunset) for soft, warm light that adds depth and dimension to your images.

Dealing with Heat Haze

Heat haze, caused by rising hot air, can make distant objects appear blurry. To minimize its impact, avoid shooting during the hottest part of the day and use a telephoto lens with a polarizing filter to cut through the haze.

Stay Safe and Respect the Environment

Finally, remember to stay safe and respect the fragile desert ecosystem. Carry plenty of water, wear sun protection, and adhere to local guidelines for leaving no trace.

Conclusion

Desert photography can be challenging, but with the right approach, you can capture the beauty and wonder of these unique landscapes. By following these tips and protecting your gear, you’ll be well-prepared to document your desert adventure in stunning detail.

For Further Training, Deal Ending Soon:

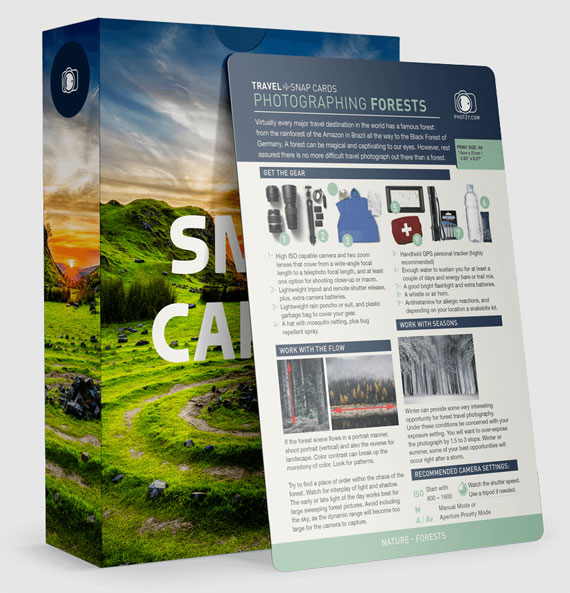
Have you ever missed that perfect travel photo because you were busy fiddling with your camera settings? These new printable Travel Photography Snap Cards are designed to make your travel photography a bit more stress-free and creative. They are currently available at 93% off today, along with bonus material.

travel photo cards

New: Travel Snap Cards (see the list of topics covered)

Whether you’re exploring deserts, forests, or mountains, these snap cards may help make your photography adventures more enjoyable. They also come with a generous 365-day, money-back guarantee so there’s no risk in trying them.

Deal ending soon: The Travel Photography Snap Cards at 93% Off

- - - - - - - - - - - - - - - - - - - - - - - - - - - - - - - - - - - - - - - - - - - - - - - - - - - - - - - - - - - - - - - - - - - - - - - - - -

Photography, like any art or skill, thrives on consistency. The journey to becoming an adept photographer is paved with regular practice. Learn how PictureCorrect Insiders can help.

- - - - - - - - - - - - - - - - - - - - - - - - - - - - - - - - - - - - - - - - - - - - - - - - - - - - - - - - - - - - - - - - - - - - - - - - - -

This post Desert Photography Tips and Gear Protection appeared on PictureCorrect.


from PictureCorrect https://ift.tt/KOnNeuQ
via IFTTT

lauantai 19. lokakuuta 2024

PictureCorrect.com: Closing Sale: iPhone Landscape Mastery

This new course takes you along with professional landscape photographer Clifford Pickett on-location in the Italian Alps. You’ll be watching over Cliff’s shoulder as he shows you every landscape photography tip and technique he’s discovered during his career. With eight hours of practical in-the-field lessons, it is designed to be similar to a private one-on-one photography workshop. It is currently 86% off with registration closing soon if you want to check it out. Found here: iPhone Landscape Mastery Closing Sale

iphone landscape mastery

New: iPhone Landscape Mastery (peek inside)

Picture this. You could be on a road trip exploring a new area. Or you could be strolling around your local park with your family. When you suddenly come across a view that’s just too good to be true.

So you grab your iPhone and take a couple of shots…

But for some reason, these photos look nothing like the view in front of your eyes.

They’re flat and lifeless. They just don’t capture the beauty you’re seeing.

I bet you’ve had this experience more than once. And you’re definitely not alone. Even the most beautiful views often result in poor landscape photos. On the surface, landscape photography looks easy, just find a stunning location, and take a few photos of what you’re seeing. But anyone who’s tried it knows how difficult it is to show that beauty in a photo.

When you’re taking a landscape photo, you compress a three-dimensional scene into a two-dimensional image. And the beauty of the scene is usually lost in that process. That’s why world-class views often result in flat images that are average at best. And it’s particularly painful if you only get one chance to visit that location. But it doesn’t have to be that way!

landscape from iphone

Shot & Edited with an iPhone (see more)

As photographers, we often fall into the trap of overcomplicating things.

We think that we need the best gear, the best apps, the best camera settings…

And while these things are helpful, they’re actually not as important as people think.

Even the best gear won’t make a difference unless you get light and composition right.

In fact, the most iconic landscape photos in the world (think Ansel Adams) were captured with gear that was far less capable than your iPhone.

How to Get a Discount Today:

iPhone Landscape Mastery is currently 86% off with registration closing soon. The deal also comes with bonus lessons on how to professionally edit landscape photos on iPhone, iPhone Landscape lessons with Rory Tucker, and a bonus eBook by Andrew Hektor. It all comes with an impressive 30 day happiness guarantee so there’s no risk in trying it.

Deal ending soon: iPhone Landscape Mastery at 86% Off

- - - - - - - - - - - - - - - - - - - - - - - - - - - - - - - - - - - - - - - - - - - - - - - - - - - - - - - - - - - - - - - - - - - - - - - - - -

Photography, like any art or skill, thrives on consistency. The journey to becoming an adept photographer is paved with regular practice. Learn how PictureCorrect Insiders can help.

- - - - - - - - - - - - - - - - - - - - - - - - - - - - - - - - - - - - - - - - - - - - - - - - - - - - - - - - - - - - - - - - - - - - - - - - - -

This post Closing Sale: iPhone Landscape Mastery appeared on PictureCorrect.


from PictureCorrect https://ift.tt/quoR5Eg
via IFTTT

keskiviikko 16. lokakuuta 2024

PictureCorrect.com: Travel Photography Planning and Tips

Travel photography offers the perfect opportunity to document your adventures, immerse yourself in new cultures, and create lasting memories. Whether you’re an amateur with a smartphone or a seasoned photographer with a full kit, thoughtful planning and execution can help you capture stunning images that tell the story of your trip. Below are some practical tips to help you prepare for your journey and make the most out of your travel photography.

Relevant reminder: only a little while left for the Travel Photography Snap Cards at 93% Off

travel photo planning

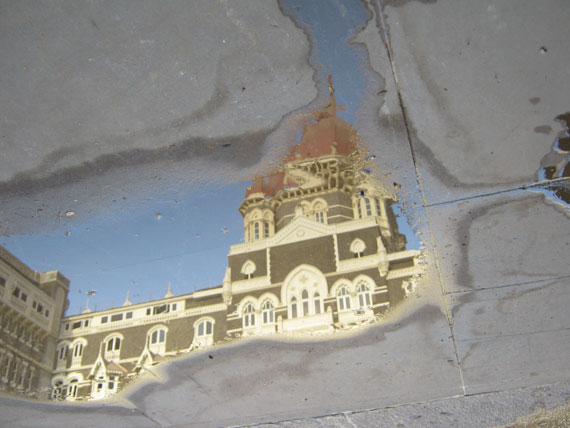
“Reflections” captured by meenakshi madhavan

1. Research Your Destination

Before you set out, it’s important to research your destination. Understanding the local culture, landscape, and lighting conditions will help you plan your shots.

  • Know the landmarks: Research iconic locations and lesser-known gems. Websites like Instagram, Google Maps, and travel blogs can provide excellent insights into popular spots and hidden treasures.
  • Learn about the weather: Weather conditions can drastically affect your photos. Check the forecast so you can plan for dramatic skies or bright sunshine, and pack accordingly.
  • Cultural awareness: Some places have specific rules about photography, especially around religious or sacred sites. Respect local customs to avoid any issues and to show cultural sensitivity.

2. Plan Your Gear

Packing light but smart is key for travel photography. The right gear will depend on your style and what kind of shots you want to capture.

  • Camera: Whether you’re using a DSLR, mirrorless, or even a smartphone, make sure it’s reliable and fits your needs. Lightweight mirrorless cameras are great for travelers who don’t want to lug around heavy equipment.
  • Lenses: Consider a versatile zoom lens (e.g., 24-70mm) for a range of shots. A wide-angle lens is perfect for landscapes and cityscapes, while a prime lens (like 50mm) can be ideal for portraits and street photography.
  • Tripod: A small, travel-friendly tripod is great for low-light conditions, long exposures, or time-lapse photography.
    Accessories: Don’t forget extra batteries, memory cards, and a lens cleaning kit. If you’re traveling to a humid location, consider packing silica gel to prevent lens fog.
street market image

Photo captured by Nicolas Lannuzel

3. Time Your Shots

One of the secrets to excellent travel photography is timing.

  • Golden hour: The period shortly after sunrise or before sunset offers the best natural light for most landscapes and portraits. The soft, diffused light during these times creates warm tones and long shadows, making your photos more dynamic.
  • Blue hour: Right after sunset or before sunrise, blue hour provides a soft, cool-toned light that’s perfect for cityscapes and nighttime shots.
  • Avoid the midday sun: Harsh sunlight can create unflattering shadows and overexposed highlights. If you must shoot at midday, try to find shaded areas or use a polarizing filter to reduce glare.

4. Embrace Candid Moments

While it’s tempting to focus solely on landscapes or landmarks, don’t forget to capture candid moments that tell the story of your journey.

  • Street photography: Wander through local markets, festivals, or side streets to capture authentic moments. Be respectful when photographing people, and always ask for permission if needed.
  • Details matter: Take close-up shots of local food, crafts, or textures to create a more immersive and detailed narrative of your experience.

5. Master Composition Techniques

Strong composition can turn a good photo into a great one.

  • Rule of thirds: Divide your frame into nine equal parts using two horizontal and two vertical lines, and place your subject at the intersection points for a more balanced and engaging shot.
  • Leading lines: Use natural lines like roads, bridges, or rivers to guide the viewer’s eye toward the main subject.
  • Framing: Use natural elements like archways, windows, or trees to create a frame within your photo, adding depth and focus to the scene.
planning a photo trip

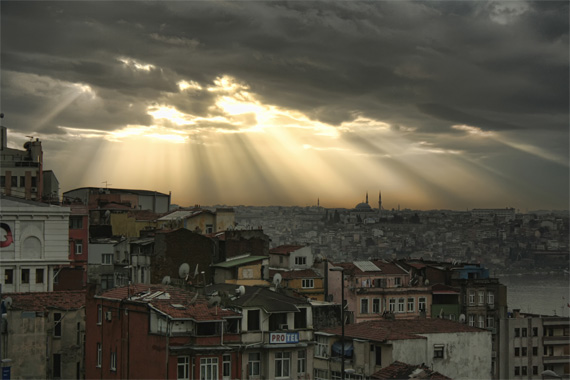
“Istanbul a moment” captured by PictureSocial member giovanna tucker

6. Be Ready for the Unexpected

Some of the best travel photos come from spontaneous moments. Keep your camera within easy reach, whether you’re hiking through mountains or wandering city streets.

  • Patience is key: If the lighting isn’t right or there are too many tourists in your shot, wait it out. Often, the scene will change, and you’ll get the perfect shot if you’re patient enough.
  • Be flexible: Weather can be unpredictable, but rainy or foggy conditions can create atmospheric and unique shots that stand out.

7. Post-Processing Tips

Editing is the final step in bringing your travel photos to life.

  • Don’t over-edit: While it’s tempting to go heavy on filters, try to keep your edits subtle and true to the scene. Aim for natural enhancements that make your photos pop without losing authenticity.
  • Backup your photos: Don’t forget to back up your images during the trip, whether through cloud storage or an external hard drive, to avoid losing your precious memories.

With a bit of planning and the right mindset, your travel photography can become more than just a way to remember your trip—it can become a visual story that captures the essence of your journey. Remember, it’s not just about the photos themselves but the experience of connecting with new places and cultures along the way. So grab your camera, explore the world, and make lasting memories with each click.

By incorporating these tips, you’ll be well on your way to capturing stunning travel photographs that stand the test of time.

For Further Training, Deal Ending Soon:

Have you ever missed that perfect travel photo because you were busy fiddling with your camera settings? These new printable Travel Photography Snap Cards are designed to make your travel photography a bit more stress-free and creative. They are currently available at 93% off today, along with bonus material.

travel photo cards

New: Travel Snap Cards (see the list of topics covered)

Whether you’re exploring deserts, forests, or mountains, these snap cards may help make your photography adventures more enjoyable. They also come with a generous 365-day, money-back guarantee so there’s no risk in trying them.

Deal ending soon: The Travel Photography Snap Cards at 93% Off

- - - - - - - - - - - - - - - - - - - - - - - - - - - - - - - - - - - - - - - - - - - - - - - - - - - - - - - - - - - - - - - - - - - - - - - - - -

Photography, like any art or skill, thrives on consistency. The journey to becoming an adept photographer is paved with regular practice. Learn how PictureCorrect Insiders can help.

- - - - - - - - - - - - - - - - - - - - - - - - - - - - - - - - - - - - - - - - - - - - - - - - - - - - - - - - - - - - - - - - - - - - - - - - - -

This post Travel Photography Planning and Tips appeared on PictureCorrect.


from PictureCorrect https://ift.tt/WbCtS2f
via IFTTT

maanantai 14. lokakuuta 2024

PictureCorrect.com: New! Travel Photography Snap Cards

Have you ever missed that perfect travel photo because you were busy fiddling with your camera settings? Or maybe you’ve struggled to remember the right techniques for capturing stunning landscapes while on the go? The Travel Photography Snap Cards might be a helpful tool to consider.

travel photo cards

New: Travel Snap Cards (see the list of topics covered)

These printable travel photography cheat sheets are designed to make your travel photography a bit more stress-free and creative. Currently available at 93% off, you can get 20 Snap Cards for $7.

What Are Snap Cards?

Travel photography is about capturing moments, the vibrant colors of nature, and the essence of different landscapes — all while staying nimble. With Snap Cards Nature Pack, you get an instant download of 20 photography cheat sheets that are easy to print and take with you anywhere. It’s like having a photography guide that you can refer to while on the move.

These cards cover everything from photographing deserts, mountains, and rivers to capturing road trip shots. Each Snap Card provides simple instructions, key points, and colorful graphics, helping you focus more on creativity. They’re beginner-friendly and suitable for photographers of all levels.

What Makes Snap Cards Stand Out?

  • Easy to Print & Use: Simply download the Snap Cards, print them at home, and keep them in your bag. There are no subscriptions or hidden costs — just instant access to photography tips.
  • Bright & Clear Graphics: Each concept is illustrated with vivid examples, making it easier to understand camera techniques at a glance.
  • Equipment & Gear Insights: Where applicable, Snap Cards provide a breakdown of recommended gear to be prepared for specific shots.
  • Key Photography Concepts at a Glance: Whether you’re capturing waterfalls or photographing wildlife, Snap Cards provide quick reference points to help you get the shot.

snapcards nature

Included Bonuses

  • 6 Travel Photography eBooks: Covering topics like vacation photo tips and packing light with photo gear, these guides could be useful companions to your Snap Cards. They offer practical advice for capturing better travel photos.
  • Creativity Catalog eBook: Contains fun photography assignments, video tutorials, and an exclusive interview.

Interested in Trying Snap Cards?

The Travel Photography Snap Cards are currently available at 93% off today, along with bonus material. Whether you’re exploring deserts, forests, or mountains, these snap cards may help make your photography adventures more enjoyable. They also come with a generous 365-day, money-back guarantee so there’s no risk in trying them.

Deal ending soon: The Travel Photography Snap Cards at 93% Off

- - - - - - - - - - - - - - - - - - - - - - - - - - - - - - - - - - - - - - - - - - - - - - - - - - - - - - - - - - - - - - - - - - - - - - - - - -

Photography, like any art or skill, thrives on consistency. The journey to becoming an adept photographer is paved with regular practice. Learn how PictureCorrect Insiders can help.

- - - - - - - - - - - - - - - - - - - - - - - - - - - - - - - - - - - - - - - - - - - - - - - - - - - - - - - - - - - - - - - - - - - - - - - - - -

This post New! Travel Photography Snap Cards appeared on PictureCorrect.


from PictureCorrect https://ift.tt/JSVyGRm
via IFTTT

lauantai 12. lokakuuta 2024

PictureCorrect.com: Fall Foliage: Tips For Taking Great Fall Photos

Relevant note: deal ending soon for the Photography eBook Autumn Sale

Here are some tips for creating great fall images:

1. Use Indirect Light

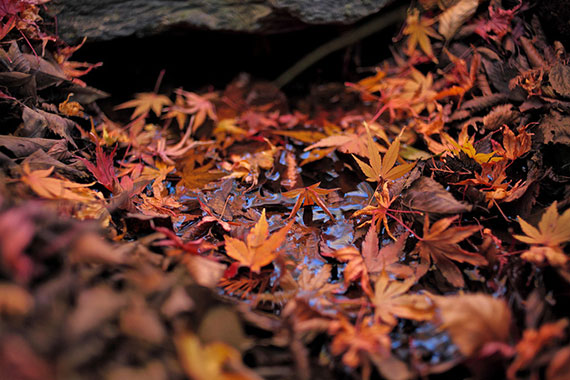
Try to avoid bright sunny days, which tend to increase the contrast and brightness of the colors. Instead, go for partial or full shade. Shooting on overcast or rainy days can emphasize the earth tones and the depth of color of fall trees and leaves. Raindrops on fresh fallen leaves deepen the colors and create great patterns of light.

best fall photo tips

Photo by Yasunari(康就) Nakamura(中村); ISO 200, f/2.4, 1/40-second exposure.

2. See Close and Far

While you may be spellbound by a mountain covered in colored leaves, your camera may not capture the full detail. Try to get some detail of individual leaves or trees in the foreground.

3. Compose for Impact

Foliage is usually an emphasis on color, but you can also capture shapes, lines, and patterns through close-ups of leaves and other items.

To keep the image dynamic, consider the rule of thirds, where your object of interest is not in the center, but placed at an intersection of imaginary vertical and horizontal lines which split the viewfinder into thirds in both directions.

4. Control the Focus

A wide open f-stop (low number, e.g. f/2) will sharpen the item in focus but will blur much of the background. This is good for close-up shots of leaves and people. Point-and-shoot camera users can choose the “portrait” setting to achieve this effect. A small f-stop (large number, e.g. f/11) will put more of the background in focus, but will also lower the shutter speed and be more susceptible to blur from camera shake or object movement. Often the “landscape” setting on a point-and-shoot will set these preferences.

5. Balance the Brightness

If you have people in your image, you may need a touch of fill flash to lessen the “raccoon eyes” and give them a bit of brightness compared to the background. Try to balance the brightness of their faces and the background foliage so that you don’t have one underexposed and the other too bright. If you place your subjects just at the edge of a wooded area, their faces will be lit more than the trees behind them, creating a focal point of interest.

autumn photo tips

Photo by Chris Murphy; ISO 100, f/7.1, 1/125-second exposure.

6. Know the White Balance

If you can’t set a custom white balance, you may want to try the “shade” setting. Often cameras will get confused with all of that color, and you may end up with skin tones that are strange.

7. Stabilize the Camera

If your camera settings result in a shutter speed less than 1/100 second, you may want to stabilize your camera. This can be as simple as setting it on a rigid surface, such as a rock or fence post, or bring a monopod or tripod. Monopods make great hiking poles! And don’t hold your point-and-shoot out at arm’s length and expect to get a crisp shot.

8. Go for High Quality

Normally I recommend higher ISO (sensitivity) for shady or darker scenes, but in this case I recommend to keep the ISO low to capture all of the detail of the colors and leaves. Higher ISO often brings with it noise, and you want to limit that. Try for ISO 100–200 if you can.

9. Don’t Forget the Fruit

This is a great time to get some shots of fall fruit stands. Baskets of apples, squash, and grapes are great studies. So are pumpkins, haystacks, and corn. Take some time to appreciate the color and fall bounty. Mums and other fall flowers are in full bloom, as well. These images make great icons of the season.

fall or autumn photography

Photo by liz west; ISO 640, f/18.0, 1/80-second exposure.

10. Finish Creatively

Even though there’s lots of color, try finishing some photos in black and white and/or sepia to emphasize lines and shape. Play around with brightness, contrast, and saturation to provide more depth and interest. Consider printing and framing some images or making up some note cards to give as gifts.

To summarize, you’ll want high quality, stable shots, good lighting and composition, creative framing, and good exposure control. Use your eyes and creative talents, and capture some great fall images!

About the Author:
John Huegel is a photographer in the Erie, Pennsylvania area who specializes in Seniors, Dance Studio, Families and other groups. He operates a blog for professional photographers at http://newphotopro.blogspot.com. He is active in many charitable and volunteer activities in the Erie area.

For Further Training:

This #1 bestseller is the most in-depth eBook on how to capture amazing photography anywhere. Over 250 pages of photography tips & tricks from industry insiders. Currently 83% off today for an Autumn Sale if you want to check it out.

ebook pages

Pages from The Photography Tutorial eBook

It is the product of over a DECADE of research as an insider in the photography industry, assembled to help you learn quickly and avoid the mistakes that I made along the way.

Deal ending soon: The Photography Tutorial eBook Autumn Sale

- - - - - - - - - - - - - - - - - - - - - - - - - - - - - - - - - - - - - - - - - - - - - - - - - - - - - - - - - - - - - - - - - - - - - - - - - -

Photography, like any art or skill, thrives on consistency. The journey to becoming an adept photographer is paved with regular practice. Learn how PictureCorrect Insiders can help.

- - - - - - - - - - - - - - - - - - - - - - - - - - - - - - - - - - - - - - - - - - - - - - - - - - - - - - - - - - - - - - - - - - - - - - - - - -

This post Fall Foliage: Tips For Taking Great Fall Photos appeared on PictureCorrect.


from PictureCorrect https://ift.tt/yXeuaQ1
via IFTTT

keskiviikko 9. lokakuuta 2024

PictureCorrect.com: Developing a Process for Your Photography

Almost gone forever! Only 1 day left: The 5 Day Photography Deal, 95% Off

I remember back when I started getting into Photography, I was just in awe at the photographers whose work I followed.

A little bit envious too (ok a lot).

photography process

Not only of the beautiful scenery that these folks were shooting, but mainly of their skills. It felt like they were so far ahead that I’d never get anywhere close.

But I’ve always been a “techie” (I remember when I was 8 years old, copying pages of code from the back of my dad’s computer magazines, typing it into our ZX Spectrum 48k (the one with the rubber keyboard!), creating silly little anagram games – and the classic PONG too if my memory serves)…

So I knew that it had to be possible to break things down into a formula, a process. Putting aside the artistic vision, compositional skill etc for one moment (which is of course a big piece of the puzzle), everything else is a set of steps and procedures, done in a particular order. From selecting the lens, focal length, shutter speeds etc, to everything that happens in Photoshop.

It’s a process.

Because if you’re not following a process, you’re guessing.

I think even the people who say they don’t follow a process actually do. They just don’t realize it. Otherwise, their images would be all over the place with no consistency from one shot to the next. If I didn’t have that analytical/technical mind and the hankering to deconstruct and figure out how stuff works, I might very well have given up trying, putting it on the “too hard” shelf.

Thing is, I didn’t have anyone else’s recipes or processes to work from… Only their end results – their photos – to look at. So, over the years the amount of trial and error I’ve been through to get my images to look one way or another, well, I couldn’t begin to quantify it! And while I’ll never stop learning, I’ve come to a point where I’ve figured out “my way” of doing things. Confident that I can achieve what I want from my post processing, freeing me up to work on the creative side.

camera setup

Photo by JeShoots

At the risk of sounding cheesy, photography is a journey. One without end. But it takes work. Hopefully it’s the kind of work you enjoy. There’s a quote I like, I don’t think the original source is known although it often gets attributed to numerous people…

“I’m a great believer in luck. The harder I work, the more of it I seem to have.”

When you’re at the start of a journey (not just photography), it’s tempting to look at successful people and think “how lucky they are” to be where they are in one way or another. Not seeing the amount of work that went into getting there. When a band, a business, an athlete gets a “lucky break” and becomes an overnight success, nobody sees the years of work it took to becoming that overnight success.

Anyway… this was all a REALLY long train of thought that started with me thinking about the fact that I got “lucky” with the little boat in the water in the shot I’m sharing at the top today! Thing is, I didn’t even notice he was there at the time because the sun was so bright in my eyes. So in that respect, I got lucky with a cool little compositional element.

On the other hand, I only had that luck because I’d been waking up an hour before sunrise to come and shoot this location (and others along this stretch of coast), time after time.

It’s only a small thing, but it demonstrates the point I’m trying to make. I got lucky because I put myself in the position to get lucky. So the message I want to leave you with today is this:

Get up, get out there, take more shots, practice more, do what you love, get “lucky” and you’ll end up with more great photos to show for it.

For Further Training, Deal Ending Soon:

The 5 Day Photography Deal is back and includes over $1000 worth of the best photography products online from dozens of world-class photographers. Tutorials, eBooks, photo editing presets, software and much more. At 95% off but only until October 11.

photography bundle

Photography Bundle 2024 (see what’s inside)

Leading photography educators & brands have been selected to contribute products to the bundle. It’s one of the best photography deals of the year so you may want to check it out.

Only 1 day left: The 5 Day Photography Deal

- - - - - - - - - - - - - - - - - - - - - - - - - - - - - - - - - - - - - - - - - - - - - - - - - - - - - - - - - - - - - - - - - - - - - - - - - -

Photography, like any art or skill, thrives on consistency. The journey to becoming an adept photographer is paved with regular practice. Learn how PictureCorrect Insiders can help.

- - - - - - - - - - - - - - - - - - - - - - - - - - - - - - - - - - - - - - - - - - - - - - - - - - - - - - - - - - - - - - - - - - - - - - - - - -

This post Developing a Process for Your Photography appeared on PictureCorrect.


from PictureCorrect https://ift.tt/Tvy0BN6
via IFTTT

perjantai 4. lokakuuta 2024

PictureCorrect.com: Cityscape Photography Tips and Tricks

Don’t miss it! Only a few days left for The Photography Deal of the Year

Cityscape photography is the art of capturing the beauty and character of a city through photographs. Whether you’re a professional photographer or an amateur with a passion for capturing the urban environment, cityscape photography offers endless possibilities for creativity and storytelling. From towering skyscrapers to winding streets and alleyways, every city has its own unique character that can be captured through the lens of a camera.

cityscape tips photography

Photo by Phil Dolby; ISO 100, f/7.1, 1/40-second exposure.

Here are some tips for taking great cityscape photos:

Find a good location: Look for a spot with a good view of the city, such as a high viewpoint or a bridge. This will give you a wider perspective and allow you to capture more of the city in your frame.

Plan your shot: Think about the composition of your photo. You might want to include interesting architecture, landmarks, or other notable features in your shot. Consider the direction of the light and try to avoid shooting into the sun, as this can create harsh shadows and blown-out highlights.

Use a tripod: Cityscape photos often require a longer exposure to capture the details in the scene. Using a tripod will help you keep your camera steady and avoid blurry photos.

Experiment with different focal lengths: A wide-angle lens will allow you to capture more of the city in your frame, while a telephoto lens can compress the perspective and create a more dramatic look.

Play with the exposure: Cityscapes can have a wide range of lighting conditions, from bright sunlit streets to dark shadows in alleys. Try using manual exposure or exposure bracketing to capture a range of light levels in your photo.

cityscape photography techniques

Photo by _T604; ISO 100, f/11.0, 20-second exposure.

Bracketing involves taking multiple photos of the same scene at different exposures. For example, you might take one photo at the recommended exposure, one photo underexposed, and one photo overexposed. This allows you to capture a range of light levels in the scene, which can be helpful when you’re dealing with high contrast lighting conditions. You can then combine the bracketed photos using software like Photoshop or Lightroom to create a single image with a wider dynamic range.

HDR (High Dynamic Range) is a technique that involves taking multiple bracketed photos and combining them to create a single image with a wider dynamic range. The resulting image has a greater range of tonal detail, with more detail visible in both the shadows and highlights. This can be particularly useful for cityscape photography, as it allows you to capture a wide range of light levels and detail in a scene with high contrast lighting.

hdr cityscape

HDR cityscape captured by Meduana

I hope these tips help you take great cityscape photos! Don’t be afraid to experiment and try different techniques to find what works best for you.

For Further Training, Deal Ending Soon:

The 5 Day Photography Deal is back and includes over $1000 worth of the best photography products online from dozens of world-class photographers. Tutorials, eBooks, photo editing presets, software and much more. At 95% off but only until October 11.

photography bundle

Photography Bundle 2024 (see what’s inside)

Leading photography educators & brands have been selected to contribute products to the bundle. It’s one of the best photography deals of the year so you may want to check it out.

Only a few days left: The 5 Day Photography Deal

- - - - - - - - - - - - - - - - - - - - - - - - - - - - - - - - - - - - - - - - - - - - - - - - - - - - - - - - - - - - - - - - - - - - - - - - - -

Photography, like any art or skill, thrives on consistency. The journey to becoming an adept photographer is paved with regular practice. Learn how PictureCorrect Insiders can help.

- - - - - - - - - - - - - - - - - - - - - - - - - - - - - - - - - - - - - - - - - - - - - - - - - - - - - - - - - - - - - - - - - - - - - - - - - -

This post Cityscape Photography Tips and Tricks appeared on PictureCorrect.


from PictureCorrect https://ift.tt/2Z6CVlB
via IFTTT

torstai 3. lokakuuta 2024

PictureCorrect.com: 2 Horizon Photo Tips For Better Landscape Photos

Relevant note: 🍂 Autumn sale ending soon for the iPhone Photo Academy (84% Off)

Landscape photographs are among the most beautiful photos you can produce. But it isn’t easy! To get decent results, you have to know, understand — and follow — tons of rules. Individually, none of them are a very big deal, but they combine to create powerful landscape photos. Today’s two photo tips are each another of those little steps to greatness.

1. Make Sure Your Horizon Is Straight

This seems so basic as to be almost unworthy of mention, but it is amazing how often the horizon line is not straight. True, when you’re shooting a mountainous scene (with hills, valleys and so on), it can sometimes be difficult to determine just where the horizon is. But you have to find it and make it level. It becomes more obvious when you’re looking at a photo of the ocean. That horizon absolutely must be level, and frequently, it isn’t. It’s a bit disconcerting to see it sloping to one side. Is the ocean pouring out of the frame?

crooked horizon

Photo captured by Laib Khaled

It only takes a second; double check and make sure your horizons are level.

2. Make Sure Your (Straight) Horizon Is Not Dead Center

You need a “star” for the viewer’s eye to settle on. This rule is easier to violate than the level horizon one — and it is violated right and left! Having the horizon in the center of the frame feels right, while having it off center is counter intuitive. But it’s a compositional must. When the horizon divides the photo in half, it’s very static and boring. There is no excitement or drama. The viewer doesn’t know what’s important and what they should focus their attention on. The sky or the ground? Where should they look?

Any contest-winning photograph needs a “star.” In this case, what is the star? Is it the sky? Did you want to show the viewer the dramatic clouds with golden light kissing the bottom? If so, lower the horizon to about the bottom third of the frame and make the sky the star.

tips for taking pictures of the horizon

Photo by Markus; ISO 800, f/7.1, 1/60-second exposure.

Is the star the ground? Did you want to draw attention to some natural feature or possibly a placid lake? Raise the horizon to about the top third of the frame and accent the ground.

tips for horizon and landscape photography

Photo by Amateur with a Camera; ISO 100, f/2.8, 1/125-second exposure.

There was something that caught your eye when you decided to take the shot. What was it? Make sure to raise or lower the horizon to make it the star, then make sure the horizon is level. These two photo tips will help you become the best landscape photographer in your area.

About the Author:
Dan Eitreim writes for OnTargetPhotoTraining. He has been a professional photographer in Southern California for over 20 years. His philosophy is that learning photography is easy if you know a few tried and true strategies.

For Further Training:

iPhone Photo Academy is an in-depth online course that will show you how to take incredible iPhone photos. With the right knowledge an iPhone can be used to take photos that are so good that most people would never even believe that they were taken with a phone. It is currently 84% off for their Autumn Sale which ends soon!

iphone photo tutorials

iPhone Photography Tricks (Click to See More Examples)

The best camera is the one that is always with you. But having the iPhone with you is only half of the equation. The other half is knowing how to use it to take outstanding photos.

Deal ending soon: The iPhone Photography Academy at 84% Off

- - - - - - - - - - - - - - - - - - - - - - - - - - - - - - - - - - - - - - - - - - - - - - - - - - - - - - - - - - - - - - - - - - - - - - - - - -

Photography, like any art or skill, thrives on consistency. The journey to becoming an adept photographer is paved with regular practice. Learn how PictureCorrect Insiders can help.

- - - - - - - - - - - - - - - - - - - - - - - - - - - - - - - - - - - - - - - - - - - - - - - - - - - - - - - - - - - - - - - - - - - - - - - - - -

This post 2 Horizon Photo Tips For Better Landscape Photos appeared on PictureCorrect.


from PictureCorrect https://ift.tt/Y6CHTsG
via IFTTT

keskiviikko 2. lokakuuta 2024

tiistai 1. lokakuuta 2024

PictureCorrect.com: New Photography Bundle at 5DayDeal for 2024

Leading photography educators & brands have been selected to contribute products to take your photography to the next level. Over $1000 of products & resources for photographers at 95% off, but it’s only available for 5 days. It’s one of the best photography deals of the year so you may want to check it out. Deal ending soon: The 5 Day Photography Deal 2024

photography bundle

Photography Bundle 2024 (see what’s inside)

The Complete Photography Bundle 2024 by 5DayDeal is a collection of industry leading training, tools, and inspiration for photographers at every level and in every or genre.

This bundle is packed full of industry-leading resources to help you be a more creative and skilled photographer. These training courses, eBooks, photo editing tutorials, presets, and more are the same ones the contributing photographers sell on their own websites. No trial versions, nothing left out.

An all-new, and exclusive collection that will only ever exist during these five days, never to return. These products have never been offered through 5DayDeal in the past and they’ll never be included in the future—this is your once-in-a-lifetime opportunity to get the training and tools you need to make your online efforts more successful.

5 Day Deal Sales Statistics:

  • Over 180,000 happy photography customers & counting
  • Over $3,000,000 donated to charity & counting

For every bundle sold, 10% of the purchase price will go to charity.

This bundle includes products to improve photography in all aspects and genres; from lighting, to portraits, to landscapes, and everything in between.

“I was looking to buy one of the products in the bundle and now I have 25 others to go with it for less than original price! What’s not to love?” -Michael M.

photography education

Advanced Photography Training

Photographers from around the world and all areas of photography are coming together to offer the ultimate package of education, tools and resources.

How to Get the 5 Day Photography Deal Before it Ends:

The entire photography training and resource bundle—valued at over $1000—is available at 95% off until noon October 11, 2024.

Deal found here: The Complete 5 Day Photography Bundle Deal

- - - - - - - - - - - - - - - - - - - - - - - - - - - - - - - - - - - - - - - - - - - - - - - - - - - - - - - - - - - - - - - - - - - - - - - - - -

Photography, like any art or skill, thrives on consistency. The journey to becoming an adept photographer is paved with regular practice. Learn how PictureCorrect Insiders can help.

- - - - - - - - - - - - - - - - - - - - - - - - - - - - - - - - - - - - - - - - - - - - - - - - - - - - - - - - - - - - - - - - - - - - - - - - - -

This post New Photography Bundle at 5DayDeal for 2024 appeared on PictureCorrect.


from PictureCorrect https://ift.tt/SFVwrB0
via IFTTT