lauantai 31. elokuuta 2024

PictureCorrect.com: 5 Common Issues Every Drone Photographer Should Know About

Drones have revolutionized the way photographers capture stunning aerial shots, offering perspectives that were once only possible with expensive equipment or aircraft. However, flying a drone isn’t without its challenges. As drone photography continues to grow in popularity, it’s important for photographers to understand the common issues that drone pilots often face. Whether you’re new to drone photography or looking to improve your skills, being aware of these challenges can help you avoid potential pitfalls and ensure your flights are safe and successful. Here are five common issues that drone pilots experience and what drone photographers should know about them.

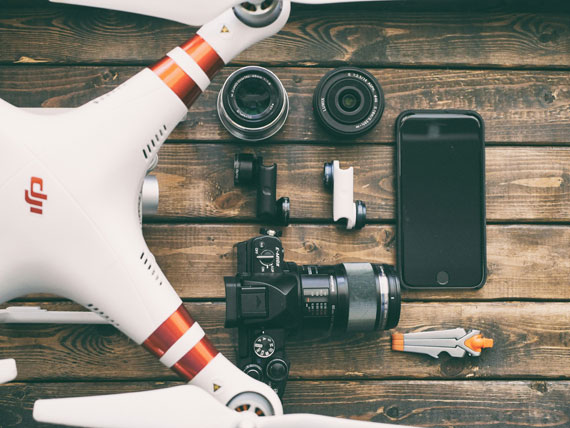
drone photography common issues

Photo captured by Aaron Burden

1. Signal Interference and Loss of GPS

One of the most common issues drone pilots face is signal interference or loss of GPS. This can happen for various reasons, such as flying near power lines, cell towers, or even in urban areas with lots of wireless signals. Signal interference can cause your drone to lose connection with the controller, leading to erratic flight behavior or, in the worst-case scenario, a flyaway where the drone drifts out of range.

What You Should Do:

Before taking off, ensure your drone’s GPS signal is strong and that you’re flying in an area with minimal interference. Avoid flying near large metal structures or in areas with heavy wireless activity. Always maintain a visual line of sight with your drone and be prepared to switch to manual mode if necessary.

2. Battery Life and Management

Battery life is a critical factor in drone photography. Most consumer drones have a flight time of 20-30 minutes, which can be significantly reduced if you’re flying in windy conditions or using the camera extensively. Running out of battery mid-flight can lead to your drone making an emergency landing, potentially causing damage to your equipment or landing in a hazardous area.

What You Should Do:

Always start your flights with fully charged batteries and keep an eye on the battery level throughout your flight. Plan your flight path in advance and be aware of how much battery life you have left to return to your takeoff point safely. Carry spare batteries and avoid flying in extreme weather conditions that can drain your battery faster.

3. Weather Conditions

Weather plays a significant role in drone photography. High winds, rain, fog, and extreme temperatures can all affect your drone’s performance and safety. Strong winds can make it difficult to control your drone, while rain can damage sensitive electronic components. Fog can limit visibility, making it hard to see obstacles, and extreme temperatures can affect battery performance and reduce flight time.

What You Should Do:

Always check the weather forecast before heading out for a drone shoot. Avoid flying in windy or rainy conditions, and be mindful of temperature extremes. If you’re unsure about the weather conditions, it’s best to postpone your flight.

4. Legal Restrictions and No-Fly Zones

With the increasing popularity of drones, many countries have implemented strict regulations regarding where and how drones can be flown. Flying in restricted areas, such as near airports, military bases, or over crowds, can result in hefty fines or even legal action. It’s essential to be aware of the laws in your area and ensure you’re compliant.

What You Should Do:

Before flying, familiarize yourself with local regulations and no-fly zones. Many drone apps provide real-time information on restricted areas. Always keep your drone within the legal altitude limit and avoid flying over people or private property without permission. Obtaining proper certification and insurance can also help protect you from potential legal issues.

5. Obstacle Avoidance Failures

While many modern drones come equipped with obstacle avoidance systems, these aren’t foolproof. Drones can still crash into obstacles like trees, buildings, or power lines, especially when flying in manual mode or in low-light conditions where sensors may not detect obstacles properly. Additionally, some drones may not have sensors on all sides, leaving them vulnerable to collisions.

What You Should Do:

Understand the limitations of your drone’s obstacle avoidance system and do not solely rely on it. Always fly with caution and maintain a visual line of sight to manually avoid obstacles. When flying in complex environments, consider using a slower flight mode that gives you more control and time to react to potential hazards.

Summary:

While drone photography offers exciting opportunities to capture unique perspectives, it’s essential to be aware of the common challenges that drone pilots face. By understanding and preparing for these issues, you can ensure that your drone flights are safe, legal, and successful. Always stay informed about your drone’s capabilities, local regulations, and environmental conditions to make the most of your drone photography adventures. Happy flying!

- - - - - - - - - - - - - - - - - - - - - - - - - - - - - - - - - - - - - - - - - - - - - - - - - - - - - - - - - - - - - - - - - - - - - - - - - -

Photography, like any art or skill, thrives on consistency. The journey to becoming an adept photographer is paved with regular practice. Learn how PictureCorrect Insiders can help.

- - - - - - - - - - - - - - - - - - - - - - - - - - - - - - - - - - - - - - - - - - - - - - - - - - - - - - - - - - - - - - - - - - - - - - - - - -

This post 5 Common Issues Every Drone Photographer Should Know About appeared on PictureCorrect.


from PictureCorrect https://ift.tt/YDV0itM
via IFTTT

perjantai 30. elokuuta 2024

PictureCorrect.com: Know Your Digital Camera’s Enemies

Final day reminder: only hours left for the Travel Photo Cheat Sheets Summer Sale

Your digital camera is a precious device that allows you to capture great memories as they happen. And since you spent your hard earned money to buy it, you need to protect it at all costs.

Having a camera bag or casing is a basic rule. But what many camera owners forget are the other enemies of their photographic gadget. These can be found just about anywhere—the reason why you need to be aware of them. It’s your responsibility, as well, to know how to avoid these elements to save the life of your camera.

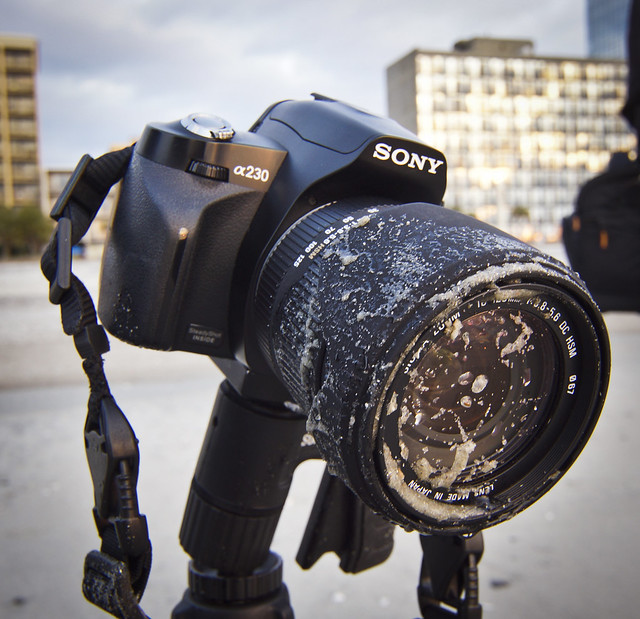
digital camera dangers

“My Sandy Sigma Lens” captured by Fran Trudeau

Oils

Did you know that your sunscreen and insect repellent can actually harm your camera? It’s true. These products are oily and can affect the delicate parts of your unit. If possible, never let the parts of your body that have these lotions touch your camera. Wash your hands before holding the camera so you can freely enjoy shooting. In case you forgot and you touched the camera, make sure to wipe the grease off right away.

Be careful as well not to put any of those items inside your camera bag. Some of you who don’t want to bring another bag when going to the beach, the pool, or the campsite may think that it’s okay to put sunscreen and other lotions in the camera bag, but if they leak, your camera is in trouble.

Sand

Keep your camera away from the sand, too. Sand has very tiny particles that can scratch and damage the delicate mechanics inside your camera. So if you need to bring your camera to the beach or the park, be sure to put your camera inside a sealable bag when not in use. You can also bring along a toothbrush or extra cloth that you can use to wipe away sand that comes in contact with your camera or lenses.

Salt

Another danger of being at the beach is the risk of exposing your camera to salt. Salt can cause corrosion. To protect your camera, wipe it clean after using. If you’re using a DSLR, use a UV filter. Remember, as well to avoid opening your camera to change batteries, lenses, or memory cards when in salty places.

Water

While you’re at the beach or pool, be mindful about water that could get into your gadget. You could be enjoying splashing around with your friends and then taking photos or worse, you could drop the camera in water. Keep in mind that moisture can damage your camera, so after you arrive home, wipe it clean and make sure that it’s dry.

Using silica gel packs will also help keep your camera dry while inside its bag. These will be helpful particularly during times when your area experiences sudden changes in temperature.

Other elements harmful to your camera that you need to avoid are dust, bumps, drops, and of course, thieves.

About the Author:
Kalyan Kumar writes for 42photo.com, New York’s legendary camera store in business for over 40 years.

For Further Training:

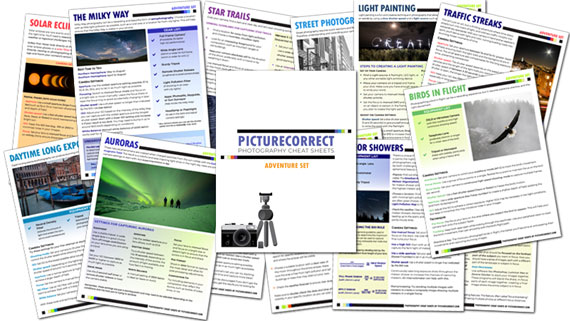
For more help on your photography travels, these popular Photography Adventure Cheat Sheets are designed to help. They are currently 80% off for a Summer Sale until the end of the month, August 31.

adventure cheat sheets

New! Cheat Sheets for Your Photography Adventures (see how they work)

The perfect companion for any photographer. Print one out whenever you need it. Whether you’re going on vacation or seeking out a specific photography adventure, these cheat sheets can provide you with the knowledge and inspiration you need to create your best work yet.

Only hours left: The Travel Photography Cheat Sheets Summer Sale

- - - - - - - - - - - - - - - - - - - - - - - - - - - - - - - - - - - - - - - - - - - - - - - - - - - - - - - - - - - - - - - - - - - - - - - - - -

Photography, like any art or skill, thrives on consistency. The journey to becoming an adept photographer is paved with regular practice. Learn how PictureCorrect Insiders can help.

- - - - - - - - - - - - - - - - - - - - - - - - - - - - - - - - - - - - - - - - - - - - - - - - - - - - - - - - - - - - - - - - - - - - - - - - - -

This post Know Your Digital Camera’s Enemies appeared on PictureCorrect.


from PictureCorrect https://ift.tt/N19Vuox
via IFTTT

torstai 29. elokuuta 2024

PictureCorrect.com: Cityscape Photography Tips

Cityscape photography, often viewed as the urban cousin of landscape photography, captures the man-made wonder of our urban environments. Whether you’re aiming to capture the grandeur of towering skyscrapers, the dance of city lights, or the daily buzz of urban life, the right techniques and tools can make a world of difference.

Also for a cityscape cheat sheet you can print out, you may want to check out this summer sale on the Travel Photography Cheat Sheets at 80% Off which ends on August 31.

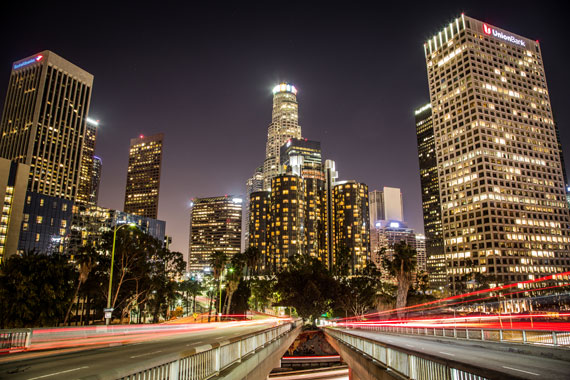
cityscape

Photo captured by Richard Schneider; f/9.0, 20 seconds, ISO 320, 24mm

Understanding Cityscape Photography

At its core, cityscape photography encapsulates the beauty, architecture, and vibrancy of urban landscapes. From the neoclassical edifices of Europe to the cutting-edge skyscrapers of Asia, cityscapes tell stories of progress, history, and human ambition.

Essential Equipment for Cityscape Photography

Lenses:

  • Wide-angle lens (10-24mm): Ideal for capturing sweeping vistas of urban jungles.
  • Telephoto lens (70-200mm): Perfect for zooming in on intricate architectural details or isolating subjects against a vast city backdrop.

Tripod: A sturdy tripod is invaluable. For shots with long exposures, like capturing the streaks of cars or the gentle flow of water, a tripod ensures your camera stays still and your images are crisp.

Helpful Filters:

  • Polarizer: Helps to reduce reflections, particularly useful for buildings with glass facades.
  • Neutral Density (ND) filter: Essential for achieving long exposure effects during bright daylight.

Optimal Camera Settings for Cityscapes

  • Mode: Opt for Manual (M) if you’re familiar with settings or Aperture Priority (Av/A) if you’d like the camera to determine the shutter speed.
  • Aperture: A range of f/8 to f/16 offers a good depth of field, ensuring both foreground and background elements are in focus.
  • Shutter Speed: This will vary based on your desired effect. For capturing light trails, you’ll need longer exposures. To freeze the bustle of the city, opt for faster speeds.
  • ISO: To keep images noise-free, aim for ISO 100-400. Only increase the ISO in situations where light is limited and using a tripod isn’t feasible.

Timing is Everything

  • Blue Hour: This magical time, either before sunrise or after sunset, provides a serene blue tint to the sky, making city lights truly pop.
  • Golden Hour: Occurring shortly after sunrise or just before sunset, this time bathes the city in a warm and soft light, perfect for capturing the city’s glow.
  • Night: As cities come alive with lights, shooting at night can showcase the city’s vibrant nocturnal personality.

Photo captured by Jason Wong

Pro Tips for Exceptional Cityscapes

  • Bracketing: This involves taking several shots of the same scene at different exposures. Later, these can be blended in post-processing to achieve a balanced and detailed image, also known as High Dynamic Range (HDR) imaging.
  • Focusing in Low Light: When the camera struggles to autofocus in dim settings, switch to manual focus. Using the Live View mode, zoom in on a well-defined part (like a building’s edge) and adjust the focus manually.
  • Depth of Field: If your scene includes a prominent foreground element, like a statue or fountain, consider focus stacking. This technique involves taking multiple shots with different focus points and merging them in post-production to achieve an image that’s sharp from front to back.

Cityscape photography, like all art forms, thrives on experimentation. While these guidelines provide a solid starting point, the true essence and vibe of a city can best be captured when photographers bring their unique perspective and creativity into play. So, head out, explore the urban wilderness, and most importantly, enjoy the process of immortalizing cityscapes. Happy shooting!

For Further Training:

For help remembering these concepts, and more cheat sheets on the Most Difficult Photography Situations, this set of Travel Photography Cheat Sheets have you covered. They are currently 80% off for a summer sale until August 31.

photography adventure

New! Cheat Sheets for Your Photography Adventures (see how they work)

The perfect companion for any photographer. Print one out whenever you need it. Whether you’re going on vacation or seeking out a specific photography adventure, these cheat sheets can provide you with the knowledge and inspiration you need to create your best work yet.

Summer sale ending soon: Travel Photography Cheat Sheets at 80% Off

- - - - - - - - - - - - - - - - - - - - - - - - - - - - - - - - - - - - - - - - - - - - - - - - - - - - - - - - - - - - - - - - - - - - - - - - - -

Photography, like any art or skill, thrives on consistency. The journey to becoming an adept photographer is paved with regular practice. Learn how PictureCorrect Insiders can help.

- - - - - - - - - - - - - - - - - - - - - - - - - - - - - - - - - - - - - - - - - - - - - - - - - - - - - - - - - - - - - - - - - - - - - - - - - -

This post Cityscape Photography Tips appeared on PictureCorrect.


from PictureCorrect https://ift.tt/8iRB5zF
via IFTTT

keskiviikko 28. elokuuta 2024

PictureCorrect.com: New! Drone Photography Mastery Course Launch Sale

Are you interested in capturing stunning aerial photos and videos with a drone? Whether you’re a complete beginner or have some experience but want to improve, the new Drone Mastery Online Course is designed to help you enhance your drone photography skills. Currently 84% off for a launch sale which ends soon. Found here: Drone Photography Mastery at 84% Off

drone mastery

What is Drone Mastery?

Drone Mastery was created to provide comprehensive training for anyone looking to improve their drone flying and photography skills. The course covers everything from basic flight operations to advanced photography techniques, making it suitable for both beginners and more experienced drone pilots.

Key Features of the Course

Safe and Effective Drone Operation:

  • Pre-flight Preparation: Learn essential checks to perform before each flight to ensure safety and avoid common issues.
  • Mid-flight Management: Understand how to handle typical mid-flight challenges and ensure safe landings.
  • Takeoff and Landing Techniques: Gain confidence in taking off and landing your drone, including advanced techniques like hand launching and landing.

Photography and Videography Skills:

  • Optimizing Camera Settings: Discover how to adjust your drone’s camera settings to capture high-quality photos and videos under various lighting conditions.
  • Cinematic Techniques: Explore 21 cinematic moves that can enhance your video footage, creating smooth and professional-looking results.
  • Editing and Post-Production: Learn the basics of video editing, including techniques for adding cuts, music, and color corrections to make your footage more engaging.

Advanced Drone Features and Techniques:

  • Automated Flight Modes: Explore automated flight modes that allow you to shoot like a professional, regardless of your experience level.
  • Tracking and Hyperlapse Techniques: Learn how to track moving subjects effortlessly and create stunning hyperlapses and slow-motion videos.
  • Specialized Features: Get familiar with advanced drone features like obstacle avoidance, manual exposure, and using ND filters for better control over your shots.

Who Can Benefit from Drone Mastery?

The Drone Mastery Online Course is ideal for:

  • Beginners: If you’re new to drone photography, the course provides a structured learning path, starting with the basics of drone operation and gradually introducing more advanced techniques.
  • Intermediate Users: For those who have some experience with drones, the course offers advanced tips and tricks to help refine skills and improve the quality of aerial photos and videos.
  • Experienced Photographers: Even seasoned photographers can benefit from learning about the unique perspectives and creative possibilities that drones offer.

drone tutorials

Learning at Your Own Pace

The Drone Mastery course is designed to be flexible, allowing you to learn at your own pace. All course materials are accessible online, so you can watch the videos and complete the lessons whenever and wherever it’s convenient for you. With lifetime access, you can revisit the content as often as needed to master the skills.

Additional Resources and Community Support

Enrolling in the Drone Mastery course also provides access to a range of additional resources, including:

  • Free Bonuses: The course comes with eight free bonuses that cover topics like drone regulations, planning successful shoots, and editing techniques.
  • Private Community: Join a private online community of drone enthusiasts to share your work, get feedback, and stay inspired.

Get Started with Drone Mastery

Drone photography offers a unique and exciting way to capture the world from above. The Drone Mastery Online Course equips you with the knowledge and skills needed to operate your drone confidently and capture stunning aerial shots.

For those interested in learning more about drone photography or improving their skills, the Drone Mastery course provides a comprehensive and convenient way to get started. With flexible learning options and extensive resources, it’s a great choice for anyone looking to explore the world of drone photography.

How to Get a Discount Today:

During its launch this weekend, the brand-new course is on sale at a deeply discounted price. It also includes a full happiness guarantee, if you are not satisfied with the course for any reason simply let them know for a full refund – so there is no risk in trying it.

Launch sale ending soon: The Drone Mastery Course at 84% Off

- - - - - - - - - - - - - - - - - - - - - - - - - - - - - - - - - - - - - - - - - - - - - - - - - - - - - - - - - - - - - - - - - - - - - - - - - -

Photography, like any art or skill, thrives on consistency. The journey to becoming an adept photographer is paved with regular practice. Learn how PictureCorrect Insiders can help.

- - - - - - - - - - - - - - - - - - - - - - - - - - - - - - - - - - - - - - - - - - - - - - - - - - - - - - - - - - - - - - - - - - - - - - - - - -

This post New! Drone Photography Mastery Course Launch Sale appeared on PictureCorrect.


from PictureCorrect https://ift.tt/OxtgnBw
via IFTTT

tiistai 27. elokuuta 2024

PictureCorrect.com: Capturing Nature’s Flash: How Lightning Triggers Work for Photography

Capturing the raw power and beauty of a lightning strike is a dream for many photographers. However, the unpredictability and speed of lightning make it a challenging subject. Enter lightning triggers: devices designed to help photographers capture these fleeting moments. In this blog post, we’ll delve deep into how lightning triggers work and provide tips for using them effectively.

Relevant note: for a lightning photography cheat sheet and more difficult rare weather situations, you may want to check out this summer sale wrapping up soon on the popular Photography Adventure Cheat Sheets at 80% Off

lightning photography

Photo captured by Dan Aragón

1. What is a Lightning Trigger?

A lightning trigger is a device that detects a lightning strike’s initial flash and instantly triggers a camera’s shutter. This allows photographers to capture lightning with precision, without relying on luck or continuous shooting.

2. How Does a Lightning Trigger Work?

a. Detection Mechanism:

Most lightning triggers use an infrared (IR) or visible light sensor. When a sudden increase in light intensity is detected (indicative of a lightning strike), the device sends a signal to the camera to take a picture.

b. Response Time:

The key to a good lightning trigger is its response time. Lightning strikes are over in a matter of milliseconds, so the trigger needs to be fast. High-quality triggers can respond in less than a millisecond.

c. Sensitivity Adjustment:

Some triggers allow users to adjust sensitivity. This is useful in varying lighting conditions. For instance, during the day, a trigger might need to be more sensitive than at night.

3. Using a Lightning Trigger Effectively

a. Mount on a Tripod:

Given the long exposure times often required for lightning photography, it’s essential to have a stable setup. A tripod ensures that your camera remains steady, preventing blurry images.

b. Manual Focus:

Autofocus can struggle in low light conditions or with distant subjects like lightning. Set your lens to manual focus and focus on a distant object to ensure clarity.

c. Camera Settings:

  • Aperture: A mid-range aperture (f/8 to f/11) is often ideal. It provides a good depth of field and sharpness.
  • Shutter Speed: If you’re not using a trigger, long exposures at night (e.g., 10-30 seconds) can work, where you are essentially trying to get lucky. With a trigger, you can use shorter exposures, like 1/4 second up to 2 seconds, since the trigger will capture the lightning instantly.
  • ISO: Keep it low (e.g., 100 or 200) to reduce noise.

d. Positioning:

Safety first! Stay inside a vehicle or a safe structure. Position your camera to have a wide view of the sky, anticipating where lightning might strike.

e. Test the Trigger:

Before the storm arrives, test your trigger to ensure it’s working and that your camera settings are correct.

photographing lightning

Photo captured by Natalya Letunova

4. Limitations and Considerations

a. Day vs. Night:

Lightning triggers can be more effective at night when a lightning strike provides a significant contrast against the dark sky. During the day, the sensitivity might need adjustment.

b. False Triggers:

Sudden changes in light, like car headlights or other flashes, can cause the trigger to activate. It’s essential to be aware of your surroundings.

c. Battery Life:

Using a lightning trigger can drain both the trigger’s and the camera’s batteries faster. Always have spare batteries on hand.

Conclusion

Lightning triggers are invaluable tools for photographers looking to capture the majesty of a storm. While they can significantly increase the chances of getting that perfect shot, it’s essential to understand their workings and limitations. With the right equipment, settings, and safety precautions, you’ll be well on your way to capturing nature’s spectacular light show.

For Further Training:

For help remembering the camera settings for difficult situations like this, a set of Photography Adventure Cheat Sheets are designed to help. They are currently 80% off for a Summer Sale which ends soon if you want to check them out.

adventure cheat sheets

New! Cheat Sheets for Your Photography Adventures (see how they work)

The perfect companion for any photographer. Print one out whenever you need it. Whether you’re going on vacation or seeking out a specific photography adventure, these cheat sheets can provide you with the knowledge and inspiration you need to create your best work yet.

Only a few days left: The Photography Adventure Cheat Sheets Summer Sale

- - - - - - - - - - - - - - - - - - - - - - - - - - - - - - - - - - - - - - - - - - - - - - - - - - - - - - - - - - - - - - - - - - - - - - - - - -

Photography, like any art or skill, thrives on consistency. The journey to becoming an adept photographer is paved with regular practice. Learn how PictureCorrect Insiders can help.

- - - - - - - - - - - - - - - - - - - - - - - - - - - - - - - - - - - - - - - - - - - - - - - - - - - - - - - - - - - - - - - - - - - - - - - - - -

This post Capturing Nature’s Flash: How Lightning Triggers Work for Photography appeared on PictureCorrect.


from PictureCorrect https://ift.tt/WMB0ihv
via IFTTT

maanantai 26. elokuuta 2024

PictureCorrect.com: Milky Way Camera Settings and Gear

When you photograph the sky during night time, you may be surprised at what you can capture with an extended shutter speed. With the correct gear and long exposure photography technique, you can collect enough light on your sensor to clearly make out the milky way in the night sky.

It’s astonishing to see how much information a camera can record. It allows us to have a glimpse of the deep sky without the use of highly sophisticated equipment. There are however certain considerations you need to make to ensure that you capture a decent looking milky way photograph. And that includes using the right gear and the right camera settings to get the job done.

Also just a quick reminder, for a “Milky Way” cheat sheet and more difficult night photography situations, you may want to check out this summer sale wrapping up soon on the new Photography Adventure Cheat Sheets at 80% Off

milky way camera settings

Photo captured by Evgeni Tcherkasski; ISO 3200, f/2.8, 14mm, 25 seconds.

Gear for Milky Way Photography

Camera: If you have an option, then go with a full frame camera as they typically have better high ISO performance. However any camera where you can set the shutter speed manually and focus manually may be able to do the trick. Many entry level cameras are able to do to this, and even some smartphones offer manual exposure settings now too.

Lens: Photographing the milky way means capturing the hundreds and thousands of stars of our galaxy in a single frame. It simply means that you’ll be working with a wide angle lens for the purpose. If you’re using a full frame camera, use something wider than 35mm, and in case of an APS-C camera, use something wider than 24mm.

Tripod: Milky way photography requires that you expose the sensor for a prolonged period of time. A good sturdy tripod is thus mandatory.

Remote shutter release or self-timer feature: Any type of shake becomes prominent in long exposure photography; even the ones caused when pressing the shutter release button. Using a remote shutter release or self-timer, you can trigger the shutter release without having to even touch the camera. This reduces camera shake and lands you sharper images.

Light pollution filters: While it is best to photograph the milky way in perfect dark conditions, finding such locations can be very difficult. If the location that you’re shooting from has some amount of light pollution from the city lights, you can use light pollution filters that help to ignore the city light and create images with better contrast.

App to locate the milky way: Photopills, Sun Surveyor, and Skyguide are popular options.

Besides these camera gears, don’t forget to pack a flashlight with you. As you’ll be working in pretty dark conditions, you will need them for moving around, and even for changing the camera settings.

milky way photograph

Photo captured by Jackson Hendry; ISO 1600, f/2.8, 14mm, 20 seconds.

Camera Settings for Milky Way Photography

Aperture: You’d want as much light entering the camera as possible owing to the low light condition. Set your lens to the widest aperture setting possible. Depending on the lens you’re using it may be f/1.8, f/2.8, f/4, f/5.6 etc or whatever your widest aperture setting is.

Focusing: Set your lens to manual focus mode and focus on a bright star manually. The live view feature on many cameras can help magnify into the scene or you can set your lens to approximately the infinity marker. Once done, leave it there. You can even tape the focus ring to avoid accidentally changing it later.

Shutter speed: Longer shutter speeds will result in greater amount of light passing to the sensor. That’s great for low light photos, right? Right, but there’s a catch. Since the earth is moving relative to the stars, very long shutter speed will result in star trails. And you don’t want that when shooting the milky way.

A general rule of thumb to determine the longest shutter speed you can use without getting star trails is to divide the number 500 with the full frame equivalent of the focal length that you’re using. So, if you’re using a 24mm lens, the longest you can go without getting star trails is:

500 / 24 = 20.8s

In this case, you’ll thus need to have the shutter speed 20 seconds or shorter to avoid star trails.

ISO: Tweak your ISO based on the intensity of the milky way you’re able to capture using the widest aperture and the longest shutter speed. While lower ISO is better for less noise, for milky way photography, you may need to bump it to around 1600-6400 depending on the conditions. Start with a lower ISO setting and if your result is too dark keep increasing it.

For Further Training:

For help remembering the camera settings for difficult situations like this, a set of Photography Adventure Cheat Sheets are designed to help. They are currently 80% off for a Summer Sale which ends soon if you want to check them out.

photography adventure

New! Cheat Sheets for Your Photography Adventures (see how they work)

The perfect companion for any photographer. Print one out whenever you need it. Whether you’re going on vacation or seeking out a specific photography adventure, these cheat sheets can provide you with the knowledge and inspiration you need to create your best work yet.

Deal ending soon: The Photography Adventure Cheat Sheets Summer Sale

- - - - - - - - - - - - - - - - - - - - - - - - - - - - - - - - - - - - - - - - - - - - - - - - - - - - - - - - - - - - - - - - - - - - - - - - - -

Photography, like any art or skill, thrives on consistency. The journey to becoming an adept photographer is paved with regular practice. Learn how PictureCorrect Insiders can help.

- - - - - - - - - - - - - - - - - - - - - - - - - - - - - - - - - - - - - - - - - - - - - - - - - - - - - - - - - - - - - - - - - - - - - - - - - -

This post Milky Way Camera Settings and Gear appeared on PictureCorrect.


from PictureCorrect https://ift.tt/KdBlFco
via IFTTT

sunnuntai 25. elokuuta 2024

PictureCorrect.com: Wildlife Photography: Eliminating Bad Backgrounds

Wildlife photography inspires professional and amateur photographers alike. The possibilities of our natural world provide an endless source of fascination.

Choosing a good subject for a wildlife photo is never difficult. The variety of characters in the animal kingdom provides a never-ending source of material. Even better, some of the best subjects can be found in the city, even in our own backyards. You don’t have to be an intrepid world traveler to enjoy a satisfying hobby as a wildlife photographer.

best background tips for wildlife photography

Photo by Ricardo’s Photography; ISO 200, f/5.6, 1/20000-second exposure.

It can be a real challenge to capture a natural looking photo in a suburban setting. If you can eliminate any man-made distractions from your photo, you can create the illusion of an image captured in a totally natural environment.

A bad background can really spoil the impact of a good wildlife subject, but how do we avoid it? Of course these days there are plenty of people who would just edit it out using a computer, but (believe it or not) most people still prefer to rely on their camera skills rather than on software.

Simple Tips to Help You Eliminate a Bad Background

Position yourself to find the best angle to take your photo.

Imagine you are trying to photograph a bird in a tree. From one angle, you might be able to see power lines or the roof of the house in the background. If you move to a better angle, you may be able to capture the green foliage of the tree as your background instead.

This may seem obvious, but one reason so many photos fail is because the photographer doesn’t bother to make this small extra effort.

how to shoot background wildlife photography

Photo by Ali Arsh; ISO 400, f/5.6, 1/00-second exposure.

Reduce the amount of background that is visible in your photo.

This can be as simple as getting as close as possible to the subject and using your largest lens. This is a very easy technique. Moving closer ensures the subject fills as much of the frame as possible. Your largest lens (or the largest zoom on your lens) narrows the field of view in a photo so that the focus in on the subject, not on the surroundings.

The extra advantage of a telephoto lens is that it has a naturally small depth of field. This means while your subject is in focus, everything in front and behind is a blur. So not only does the telephoto lens reduce the amount of background that is visible in your photo, what you can see should be completely out of focus.

Open the aperture as wide as possible.

This is simple photography theory; a wide aperture produces a narrow depth of field. So if you are already using a large lens, and you add a narrow aperture as well, you reduce your depth of field to its absolute minimum. Now you should be able to produce an almost three dimensional image, with your sharply focused subject emerging from a totally out-of-focus background.

As you can see from the simplicity of these guidelines, it is easy to reduce the distraction of an unattractive background. It doesn’t take fancy equipment or a diploma in photography. All it takes is a little extra effort, and understanding how to use the camera you have.

best wildlife photography backgrounds

Photo by hehaden; ISO 800, f/5.6, 1/1000-second exposure.

Now consider all the situations where these tips can improve your photos. When taking photos in your backyard, at the zoo, or out in the street, you can use these simple methods to create the illusion that they were taken in the wild. Even if your background is not that ugly, it can provide a distraction from the main subject. By putting the background out of focus, it becomes a soft palette of colour that makes the subject really stand out.

Best of all, these are techniques you can try today—so happy snapping!

About the Author:
Andrew Goodall writes for https://naturesimage.com.au/ and is a nature photographer based in Australia. He manages a gallery in Montville full of landscape photography from throughout Australia.

For Further Training:

For help remembering the camera settings for difficult situations like this, a set of Photography Adventure Cheat Sheets are designed to help. They are currently 80% off for a Summer Sale which ends soon if you want to check them out.

photography adventure

New! Cheat Sheets for Your Photography Adventures (see how they work)

The perfect companion for any photographer. Print one out whenever you need it. Whether you’re going on vacation or seeking out a specific photography adventure, these cheat sheets can provide you with the knowledge and inspiration you need to create your best work yet.

Deal ending soon: The Photography Adventure Cheat Sheets Summer Sale

- - - - - - - - - - - - - - - - - - - - - - - - - - - - - - - - - - - - - - - - - - - - - - - - - - - - - - - - - - - - - - - - - - - - - - - - - -

Photography, like any art or skill, thrives on consistency. The journey to becoming an adept photographer is paved with regular practice. Learn how PictureCorrect Insiders can help.

- - - - - - - - - - - - - - - - - - - - - - - - - - - - - - - - - - - - - - - - - - - - - - - - - - - - - - - - - - - - - - - - - - - - - - - - - -

This post Wildlife Photography: Eliminating Bad Backgrounds appeared on PictureCorrect.


from PictureCorrect https://ift.tt/fpuUeEm
via IFTTT

lauantai 24. elokuuta 2024

PictureCorrect.com: How to Photograph Motion

Relevant note: only 1 day left for the Long Exposure Photo Guide at 71% Off

Photographs by their very nature capture a split second in time. But often a photographer will want to suggest what comes just before or after the shot by portraying movement. There are some very obvious circumstances when you’ll need to capture motion, for example sports photography, but the same techniques can also be used in other situations to convey a feeling or a mood.

tips for capturing motion

There are several different tricks for shooting moving objects, each of which will result in a slightly different final image. Remember though, no matter how many hot tips you read, photographing motion will always be part technique, part art. Be sure to practice and independently experiment to get the look and feel you’re after.

That said, in my many years working as a professional photographer for both events and creative projects, I’ve learned some tried and tested techniques for capturing motion in photography. Here are the basics:

Freezing (All Crisp)

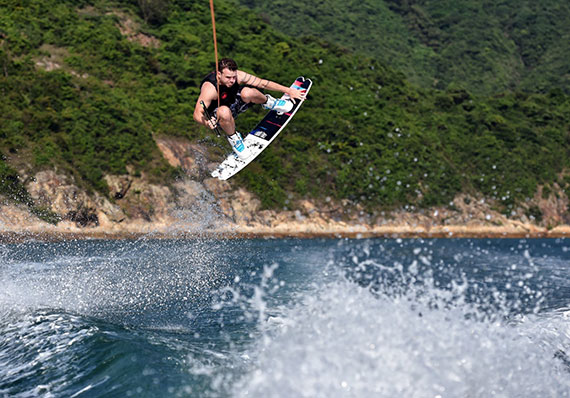
Motion photography, wake boarding, Hong Kong

One way to capture movement is to freeze the entire field of vision, just as we all imagine a photo does anyway. This works particularly well in images where both the foreground and background are moving, such as a bird flying through a rain storm. For this technique you’ll need to use a very fast shutter speed, at least 1/1000 of a second, I would say.

Nowadays most cameras allow you to capture a scene at 1/8000 of a second or faster, but the exact shutter speed you want will depend on a variety of factors, such as how fast your subject is moving, how much movement you want to convey, and how crisply you want to define your subject. Getting this balance right can result in some really awesome motion shots.

Long exposure (All Blurred)

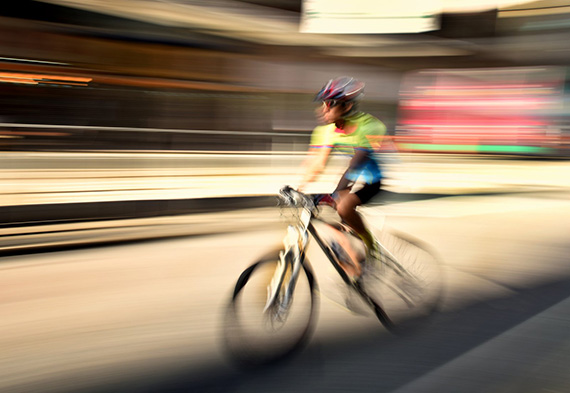
Motion photography, cyclist

On the contrary, if you want to blur everything in your scene, you’ll need to use a slow shutter speed, otherwise known as long exposure. Blurring everything is risky, but the best scenes will be those that offer bright or highly contrasting colors. Most fully blurred photos are created for artistic, rather than practical, reasons. Remember, however, that when using long exposure times, you run the risk of excess light bleaching out your photos. You can remedy this by reducing your aperture and lowering your ISO setting.

Long Exposure (Moving Subject Blurred)

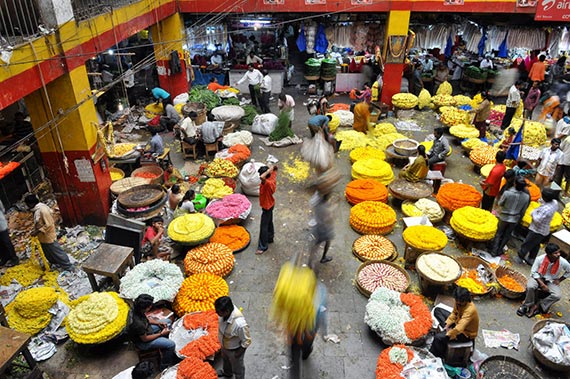
blurred subject busy market

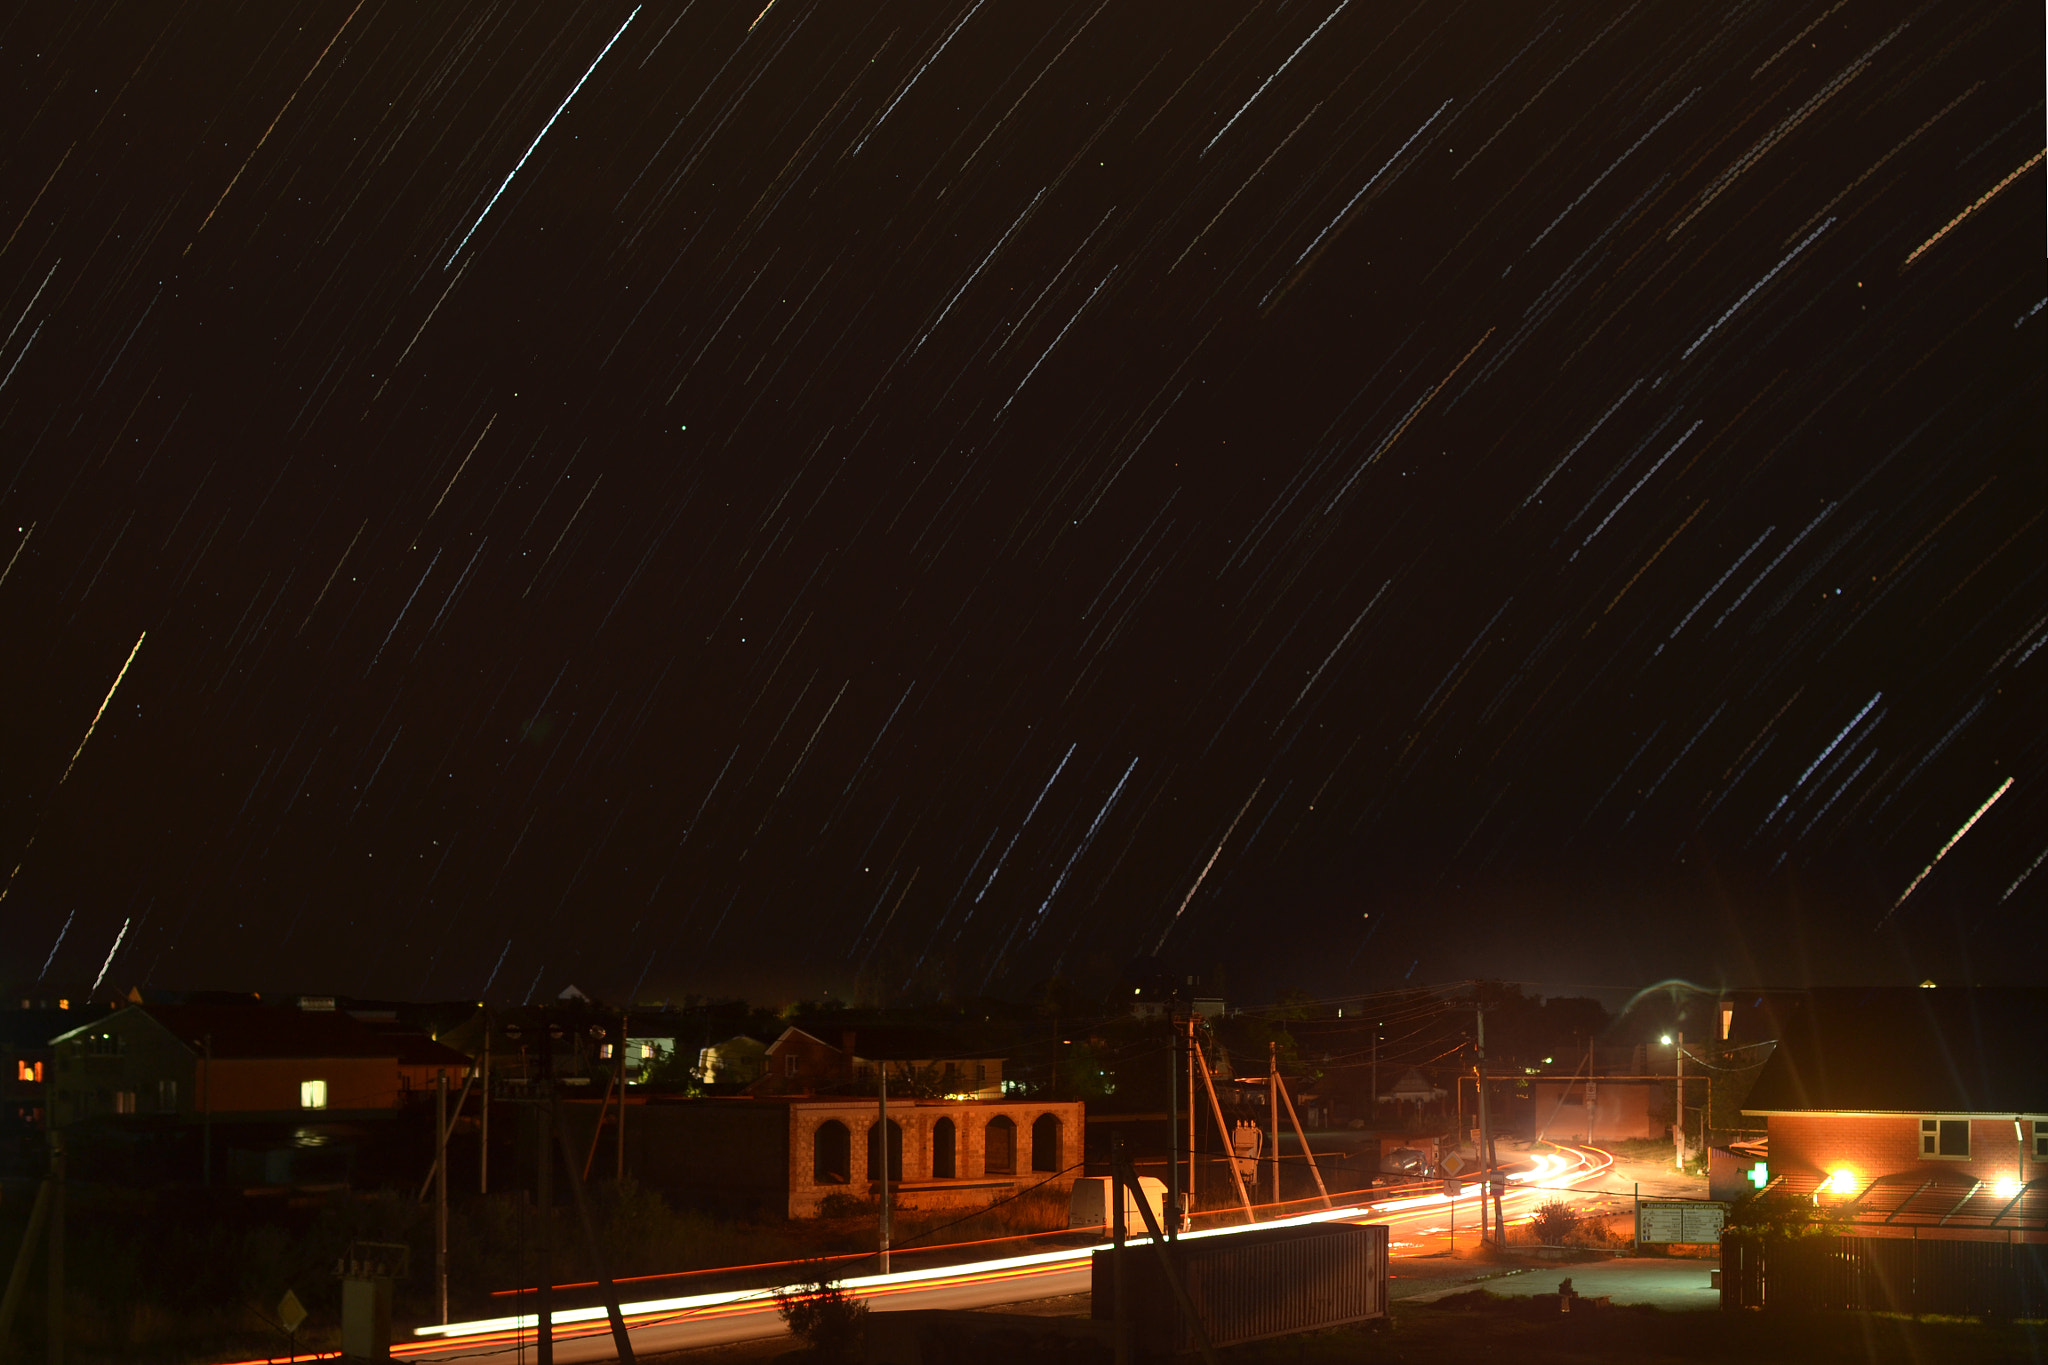
A lot of photographers use long exposure to blur just the moving subject of the photograph, thereby conveying movement and/or speed. This is often seen with star trails, car headlights and other forms of night photography, as well as busy daytime street scenes and moving water. It’s important to use a tripod for this technique so your camera remains steady. You’ll also need plenty of time to wait for the longer exposures and adjust and correct your settings during the shoot. Obviously the advent of digital photography makes this a whole lot easier!

Panning (Background Blurred)

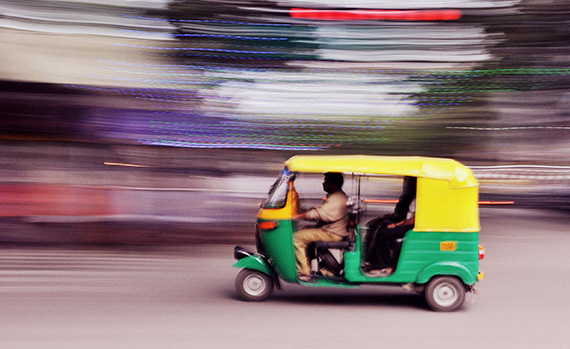
panning tuk tuk

If you want your subject to remain in focus while your background is blurred, you’ll need to employ the panning technique. Rather than using a tripod to keep your shot steady as in the above method, here you’ll want to follow your subject with the camera during the exposure time. You’ll need to match both the speed of your subject and the direction in which it’s traveling to get the clearest image.

For best results, set up with a clear view of the object approaching and plenty of room to swivel on a parallel axis as it passes by. Follow the subject as it moves through your field of vision and keep tracing their line of motion even after the shot. It takes practice, but this method can result in really cool motion images, especially if you have an unattractive or distracting background.

Zooming

zooming motion casablanca

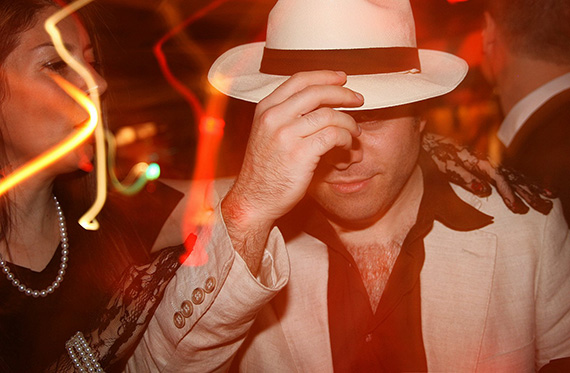
For more abstract photos of movement, try the zooming technique, whereby you manually change your focal length during a long exposure. Physically rotating the zoom lens creates some really cool effects that work particularly well with night scenes, moving neon signs, and fireworks. The same technique employed during the day can render your subject unrecognizable, but if you’re going for something more abstract, that can be a good thing.

Personally, I think a good photographer should at least be familiar with all these techniques even if they don’t use them all the time, because at the end of the day, it’s good to mix it up sometimes!

About the Author:
Ali Ghorbani (otherwise known as, Ali G) is a luxury wedding, events, corporate, and celebrity photographer based in Hong Kong. You can follow him on Facebook and Instagram.

For Further Training:

Photographer Dieter Appelt said, “A snapshot steals life that it cannot return. A long exposure creates a form that never existed.” If you’ve ever been mystified by other photographers’ tack sharp extended exposures and mind-blowing daytime long shutter speeds, then you may want to take a look at this popular in-depth eBook while it is marked down 71% off this weekend.

The Long Exposure Photography Guide (peek inside)

This guide was designed to walk you through every step of long exposure photography with a complete description and a visual reference. Each lesson is broken down into easy-to-follow steps, recommended resources, and self-check quizzes to make sure you understand each and every technique.

Only 1 day left: The Long Exposure Photography Guide at 71% Off

- - - - - - - - - - - - - - - - - - - - - - - - - - - - - - - - - - - - - - - - - - - - - - - - - - - - - - - - - - - - - - - - - - - - - - - - - -

Photography, like any art or skill, thrives on consistency. The journey to becoming an adept photographer is paved with regular practice. Learn how PictureCorrect Insiders can help.

- - - - - - - - - - - - - - - - - - - - - - - - - - - - - - - - - - - - - - - - - - - - - - - - - - - - - - - - - - - - - - - - - - - - - - - - - -

This post How to Photograph Motion appeared on PictureCorrect.


from PictureCorrect https://ift.tt/3Ax9h1P
via IFTTT

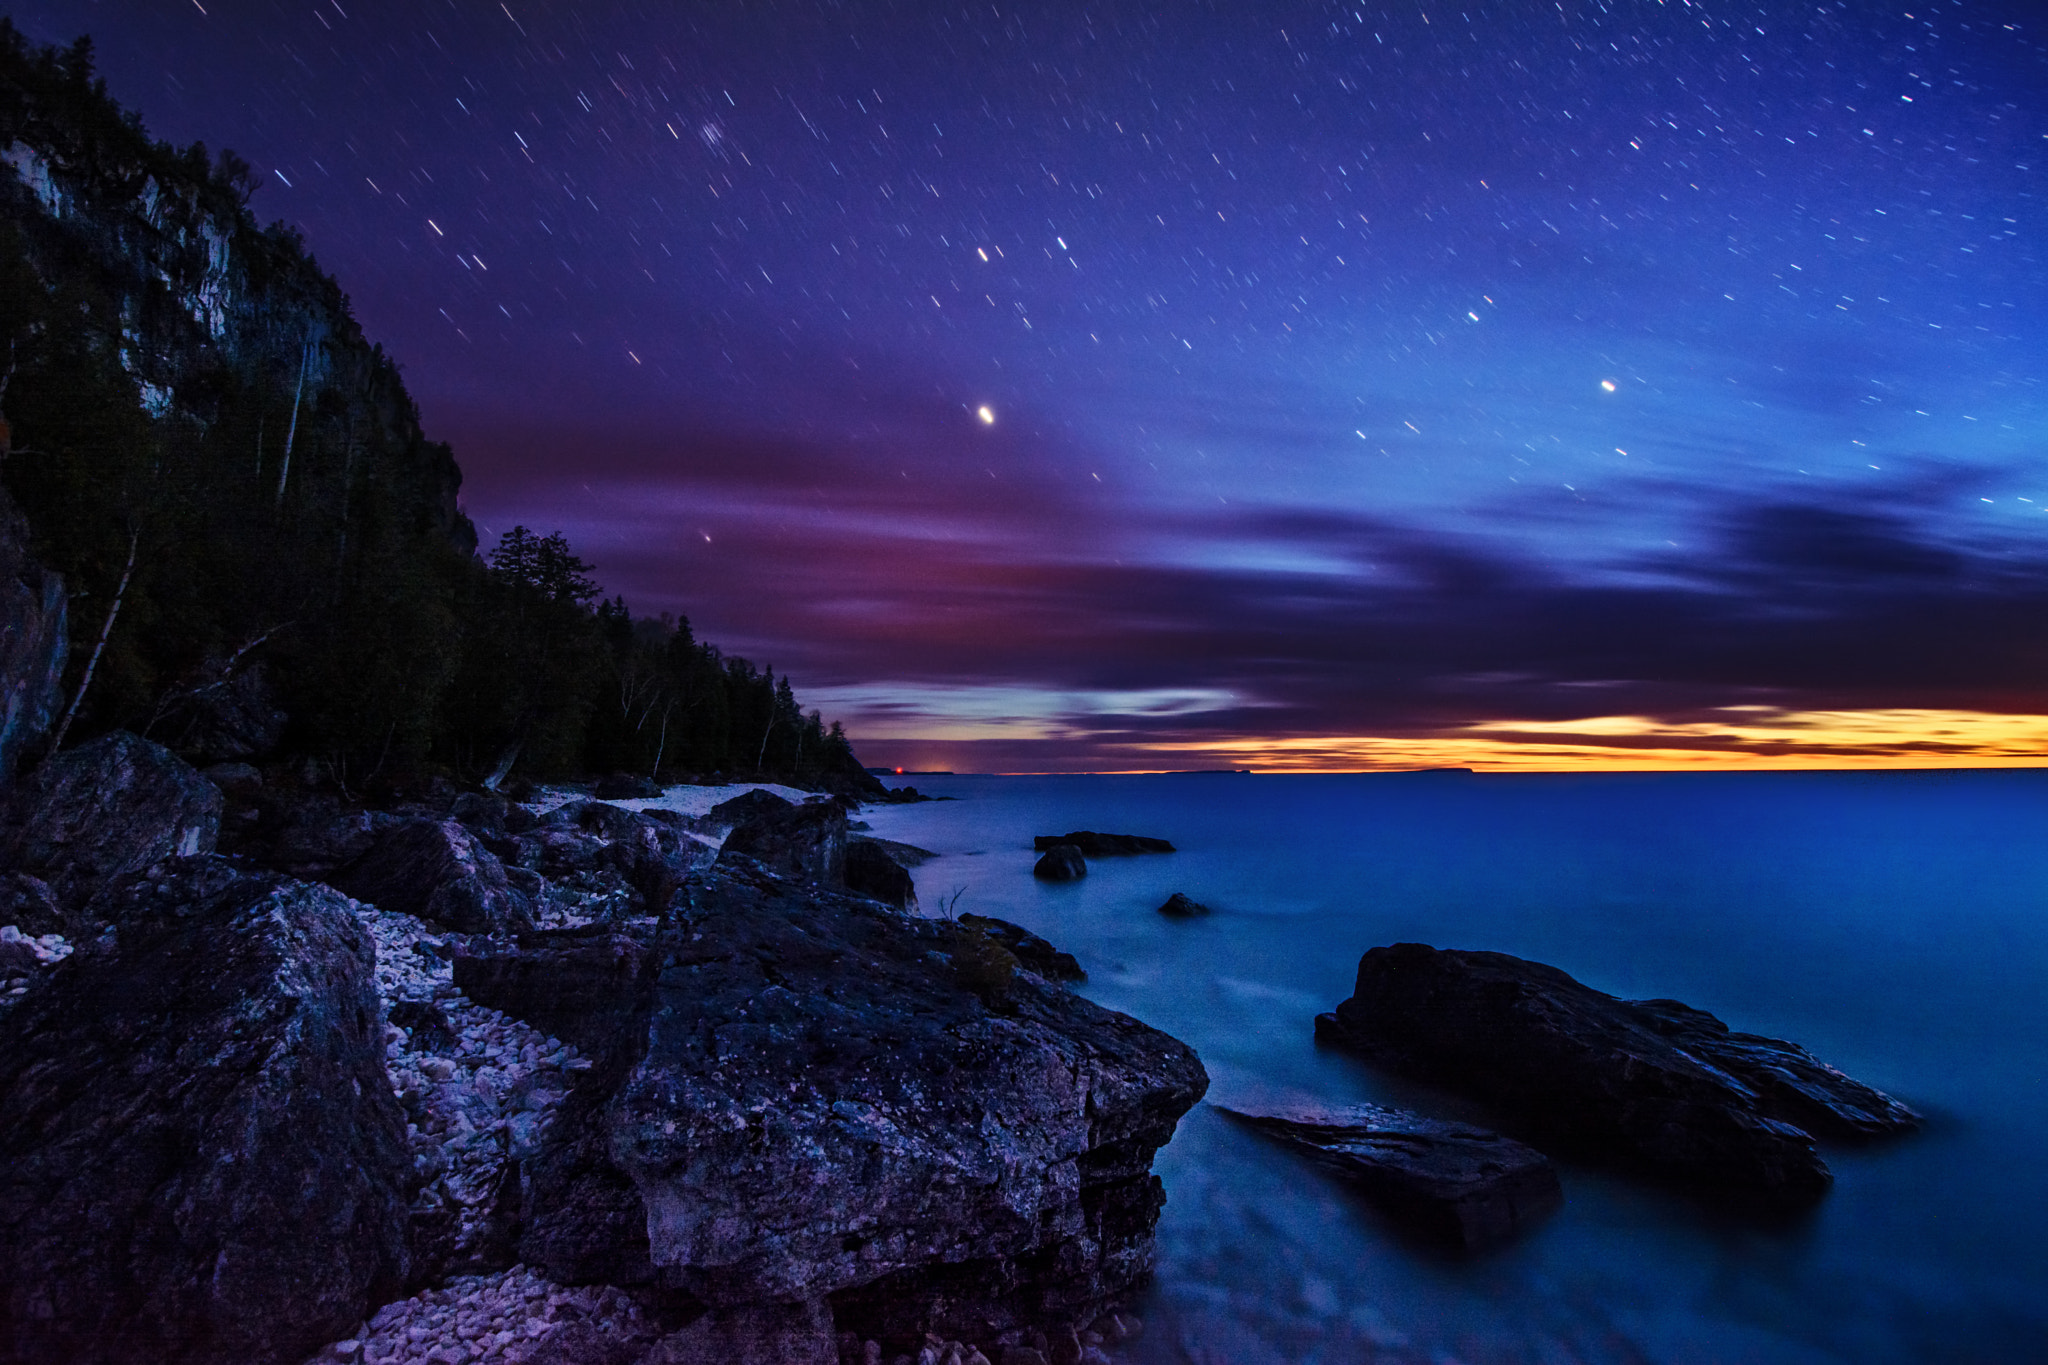
Starnight in Golubickaya by antonenkori (500px.com/antonenkori)


Starnight in Golubickaya via 500px https://ift.tt/Yl7o5QP

Sunset and Startrails by AtanuBandyopadhyay (500px.com/AtanuBandyopadhyay)


Bruce Peninsula (Backcountry) via 500px https://ift.tt/YbipnkG

perjantai 23. elokuuta 2024

PictureCorrect.com: Only 1 Day Left for Photo Editor Early Bird Offer

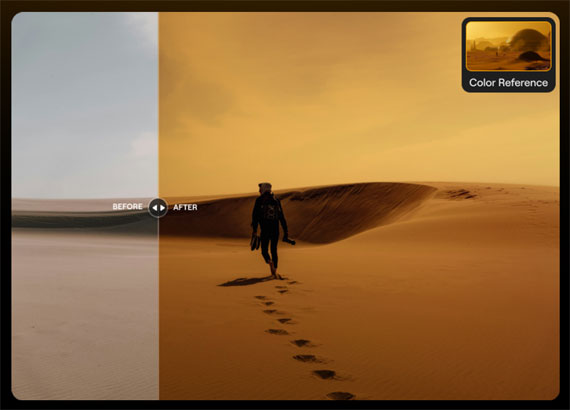
The chance to get the upcoming Luminar Neo Fall Upgrade at the lowest price ends tomorrow (Early Bird Offer Here). Includes new features like Color Masking and Smart Search, plus more tools and improvements designed to elevate your photo edits.

color reference

Key Highlights of the Update:

  • Color transfer: Transfer colors from a reference image to your own photos. Adjust results with sliders and use AI to match colors between similar objects, such as sky-to-sky or car-to-car, offering both creative flexibility and precision. You can mimic your favorite photographers’ styles, recreate colors from an inspirational shot you found online, or even one of the older photos you captured in the past.
  • Smart Search: This machine learning-based search tool enables users to find images not only by basic attributes like file name and date, but also by the type of content, such as objects and scenes (e.g., tree, stop sign, car). The tool offers an advanced search capability that makes locating specific images within your catalog much faster and easier.
  • Color Masking: Create masks based on selected colors in your images. Adjust the color range with a slider for precise control over affected areas, making targeted edits easier and more effective.
  • Improved generative tools’ performance. Thanks to the new algorithms added to GenErase, GenSwap and GenExpand, users will be able to generate more detailed and realistic images with a higher success rate.
  • The Filmstrip in the Edit tab allows users to switch quickly between images without exiting to Catalog mode. This helps maintain focus on image editing and enables quick synchronization across all images, streamlining the editing workflow and enhancing productivity.
  • Improved catalog navigation: Enhance your photo organization with the filtering options by camera model, focal length, ISO, shutter speed, aperture, rating, and other parameters to effortlessly locate the exact image you need. Additionally, sort folders and albums by various attributes for easier access, and use star ratings to further organize and manage your photos.

How to Get the New Version for a Discount Today:

To celebrate this upcoming upgrade, Skylum launched an exclusive early bird offer which provides users with the opportunity to purchase Luminar Neo or get the upgrade at the most lucrative price.

Only 1 day left: Early Bird Offer on the New Luminar Photo Editor

- - - - - - - - - - - - - - - - - - - - - - - - - - - - - - - - - - - - - - - - - - - - - - - - - - - - - - - - - - - - - - - - - - - - - - - - - -

Photography, like any art or skill, thrives on consistency. The journey to becoming an adept photographer is paved with regular practice. Learn how PictureCorrect Insiders can help.

- - - - - - - - - - - - - - - - - - - - - - - - - - - - - - - - - - - - - - - - - - - - - - - - - - - - - - - - - - - - - - - - - - - - - - - - - -

This post Only 1 Day Left for Photo Editor Early Bird Offer appeared on PictureCorrect.


from PictureCorrect https://ift.tt/Z9ySrUV
via IFTTT

torstai 22. elokuuta 2024

PictureCorrect.com: Tack Sharp Long Exposure Photography Guide

Photographer Dieter Appelt said, “A snapshot steals life that it cannot return. A long exposure creates a form that never existed.” If you’ve ever been mystified by other photographers’ tack sharp extended exposures and mind-blowing daytime long shutter speeds, then you may want to take a look at this popular in-depth eBook while it is marked down 71% off for their summer sale. We mentioned it just briefly yesterday and it received a lot of interest, so here is more information on it.

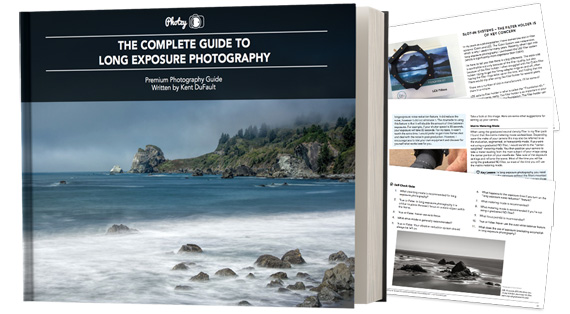
New: The Long Exposure Photography Guide (peek inside)

Kent DuFault’s premium guide to long exposures aims to transform your photography into whimsical, jaw-dropping images that just cannot be created in any other manner. Not even in Photoshop.

Some of the Topics Included (119 pages):

  • Learn about the “heart” of the Long Exposure Photography setup- ND Filters.
  • Discover how to properly use a tripod with lengthy extended exposure times.
  • Refine your knowledge- by knowing “exactly” what equipment you will need to produce these amazing long exposure shots.
  • Study up on “Recommended Camera Settings”.
  • Techniques for “spotting light” where no light exists!
daytime long exposure

How to take amazing long exposures during the daytime

  • Become an expert on “How to Choose the Proper Lens” for Long Exposures.
  • Turn yourself into a ninja at dealing with “Unfavorable Environmental Conditions”.
  • Gain knowledge on whether you should make that shot color- or monochrome- learn the secrets.
  • Discover the “Key Element of Creativity” for long exposures.
  • Learn why your choice of shutter speed could “Drastically Alter Your Composition”!
camera setup

How to setup your camera

The chapters will walk you through every step with a complete description and a visual reference. This ensures that your technical knowledge will be complete.

Also, the eBook will teach you how to analyze a scene. This will help to ensure that you set up your camera properly, and you will capture the very best composition possible.

waterfall long exposure

Transform everyday scenes into amazing images with shutter speed secrets

  • Discover the secret tricks to getting tack sharp photographs with extended exposures
  • Learn the Honest, no “bull crap”, techniques for self-evaluation of your shots: did you get it? Or not?
  • Clear and straight-forward advice on exactly how to set up the camera gear
  • Surprising Solutions to getting a great shot in unfavorable conditions (wind)
  • The dirty secret of light leaks and how to prevent them
  • Why you need to live and die by analyzing the scene before you take the picture
  • Why many photographers MISS the shot (exposure time does matter)
  • Good old-fashioned advice on what gear to buy
  • Discover the pure magic and Joy of long exposure photography
  • And much more!

This guide was designed to walk you through every step of long exposure photography with a complete description and a visual reference. Each lesson is broken down into easy-to-follow steps, recommended resources, and self-check quizzes to make sure you understand each and every technique.

shutter speed tools

Tools for long shutter speed techniques (see more pages from the guide)

The author, Kent DuFault, became a photographer in September of 1974. He operated a commercial photography studio for three decades, and while doing so, he worked for numerous Fortune 500 Companies. His images have won numerous awards, and they’ve been published in magazines and advertisements around the world.

But more importantly – Kent has helped thousands of photographers like you, with his various best-selling books. He has an incredible teaching method. It’s simple to follow, easy to understand and never boring. Imagine sitting down with an old friend for a fireside chat. That’s what learning from Kent is like.

How to Get a Discounted Copy Today (With Bonuses):

It is currently on sale for 71% off today if you want to check it out (normally $60, today just $17). It also comes with an impressive 90-day happiness guarantee so there’s no risk in trying it. Plus, you’ll get free bonus filter factor and long exposure cheat sheets.

Deal found here: The Complete Guide to Long Exposure Photography at 71% Off

- - - - - - - - - - - - - - - - - - - - - - - - - - - - - - - - - - - - - - - - - - - - - - - - - - - - - - - - - - - - - - - - - - - - - - - - - -

Photography, like any art or skill, thrives on consistency. The journey to becoming an adept photographer is paved with regular practice. Learn how PictureCorrect Insiders can help.

- - - - - - - - - - - - - - - - - - - - - - - - - - - - - - - - - - - - - - - - - - - - - - - - - - - - - - - - - - - - - - - - - - - - - - - - - -

This post Tack Sharp Long Exposure Photography Guide appeared on PictureCorrect.


from PictureCorrect https://ift.tt/KcqgWXp
via IFTTT

keskiviikko 21. elokuuta 2024

PictureCorrect.com: The Simple Long Exposure Tip Nobody Talks About

This article is based on concepts from the The Complete Guide to Long Exposure Photography which is currently 71% off if you want to dig deeper for further training.

When I first started in Long Exposure photography, I became very frustrated.

I purchased all of the right gear, and I followed the simple steps as listed with various online blogs.

Yet, at least half of the time, my photos were boring, and the long exposure effect was minimal.

I discovered something pretty important on my own that no online tutorial had covered for me.

I want to share my discovery with you today in this quick tip so that you can avoid the headaches that I endured.

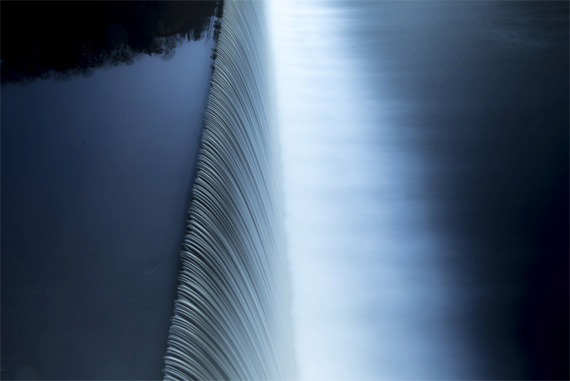
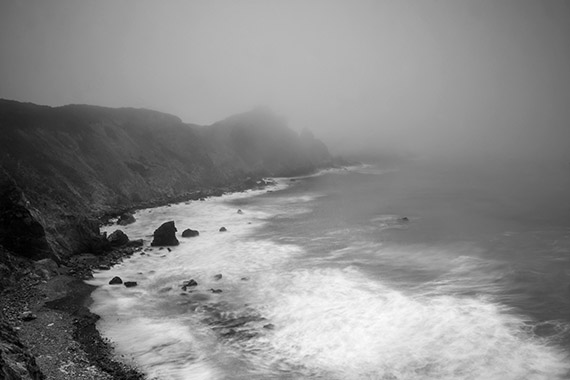
unimpressive long exposure example

Photograph #1 By Kent DuFault

Here’s one of my early attempts at Long Exposure Photography that left me scratching my head. You can barely see the long exposure effect!

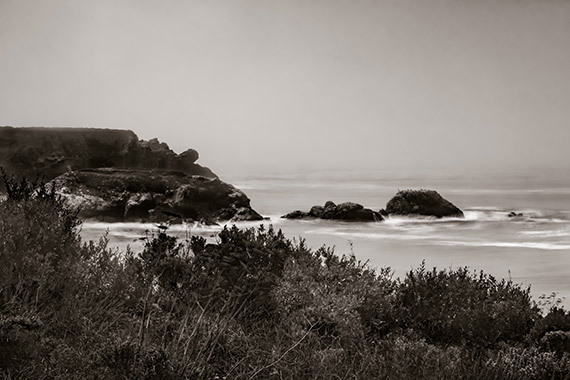
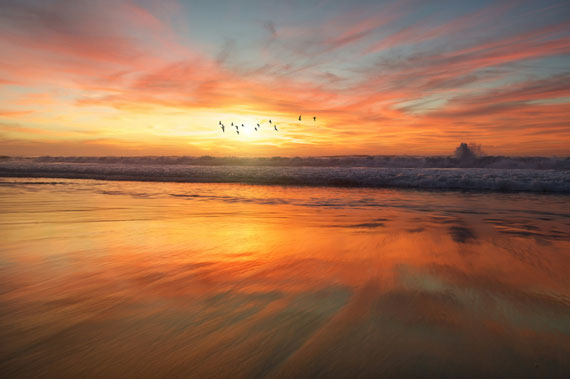
more maximized long exposure effect

Photograph #2 By Kent DuFault

Here is another attempt after I discovered my quick tip that I am going to share with you today.

The quick tip is almost embarrassingly simple, yet so important to your success.

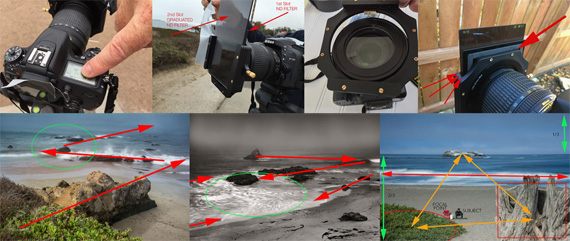
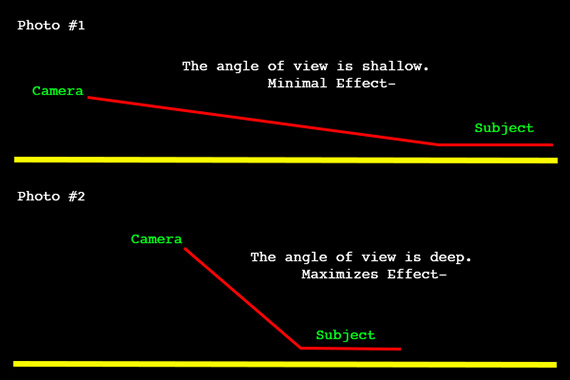
shallow vs deep angle for long exposure

Photograph #3 By Kent DuFault

Here’s your Long Exposure quick tip:

The angle of view from the camera to the subject will play a critical role when capturing the Long Exposure effect. When this angle is shallow, the effect is minimized. When this angle is deeper, the effect is maximized.

It’s also essential to take into account the angle of the subject movement as relative to the camera position and point-of-view. But that’s a discussion for another day.

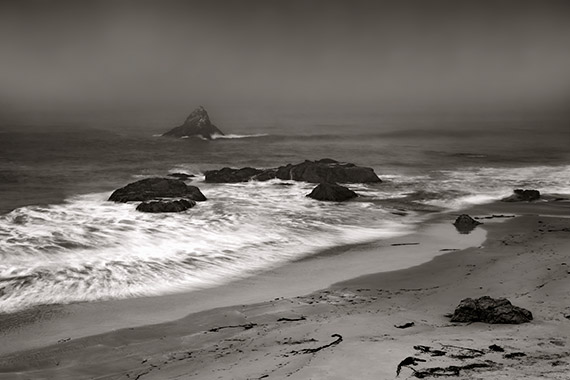
long exposure with deep angle

Photograph #4 By Kent DuFault

Remember, a deep angle equals a fantastic long exposure effect! Next time you’re out for some long exposure shots, give this tip a try and see how it works for you.

About the Author:
Kent DuFault is an author and photographer with over 35 years of experience. He’s currently the director of content at the online photography school, Photzy.

For Further Training on Long Exposure Photography:

Photographer Dieter Appelt said, “A snapshot steals life that it cannot return. A long exposure creates a form that never existed.” If you’ve ever been mystified by other photographers’ tack sharp extended exposures and mind-blowing daytime long shutter speeds, then you should take a look at the full in-depth eBook. It is currently 71% off for a limited time if you want to check it out.

New: The Long Exposure Photography Guide

This guide was designed to walk you through every step of long exposure photography with a complete description and a visual reference. Each lesson is broken down into easy-to-follow steps, recommended resources, and self-check quizzes to make sure you understand each and every technique.

Deal ending soon: The Long Exposure Photography Guide at 71% Off

- - - - - - - - - - - - - - - - - - - - - - - - - - - - - - - - - - - - - - - - - - - - - - - - - - - - - - - - - - - - - - - - - - - - - - - - - -

Photography, like any art or skill, thrives on consistency. The journey to becoming an adept photographer is paved with regular practice. Learn how PictureCorrect Insiders can help.

- - - - - - - - - - - - - - - - - - - - - - - - - - - - - - - - - - - - - - - - - - - - - - - - - - - - - - - - - - - - - - - - - - - - - - - - - -

This post The Simple Long Exposure Tip Nobody Talks About appeared on PictureCorrect.


from PictureCorrect https://ift.tt/u5Agqit
via IFTTT

tiistai 20. elokuuta 2024

PictureCorrect.com: Fall Upgrade Coming to Luminar Neo Photo Editor

This fall, Skylum is launching a major upgrade (with an early bird offer) packed with groundbreaking enhancements. These new features are designed to elevate the photo editing experience for both our current and future users. Here’s a sneak peek at what’s coming:

luminar neo upgrade

Key Highlights of the Upgrade:

  • Color Transfer Feature: Effortlessly transfer colors between images for stunning results.
  • Smart Search: Find your photos faster with intelligent search capabilities.
  • Color Masking: Gain precise control over color adjustments.
  • Filmstrip in Edit Mode: Streamline your workflow with a filmstrip feature in presets and edit mode.
  • Catalog Improvements: Enjoy enhanced organization with star labels, sorted folders and albums, virtual copies, and advanced filtering options.

How to Get the New Version for a Discount Today:

To celebrate this upcoming upgrade, Skylum launched an exclusive early bird offer which provides users with the opportunity to purchase Luminar Neo or get the upgrade at the most lucrative price.

Found here: Luminar Neo Update Early Bird Offer

- - - - - - - - - - - - - - - - - - - - - - - - - - - - - - - - - - - - - - - - - - - - - - - - - - - - - - - - - - - - - - - - - - - - - - - - - -

Photography, like any art or skill, thrives on consistency. The journey to becoming an adept photographer is paved with regular practice. Learn how PictureCorrect Insiders can help.

- - - - - - - - - - - - - - - - - - - - - - - - - - - - - - - - - - - - - - - - - - - - - - - - - - - - - - - - - - - - - - - - - - - - - - - - - -

This post Fall Upgrade Coming to Luminar Neo Photo Editor appeared on PictureCorrect.


from PictureCorrect https://ift.tt/G8gOBm3
via IFTTT

maanantai 19. elokuuta 2024

PictureCorrect.com: Coastal Photography Tips

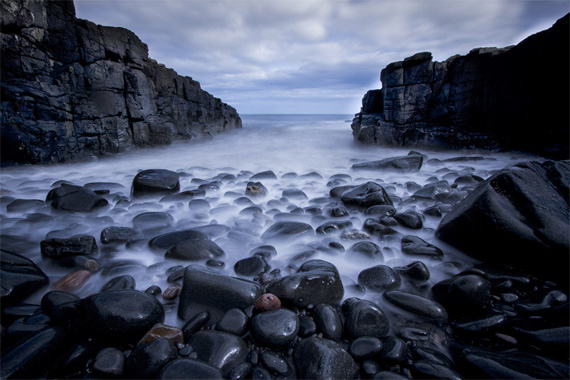
The coast offers some of the most mesmerizing and dynamic landscapes a photographer can capture. From the gentle lapping of waves to the dramatic interplay of light and clouds, beachscapes present endless opportunities for creativity. Here are some essential tips to help you elevate your coastal photography and create breathtaking images.

Relevant note: PhotoMasters currently has an in-depth course on Coastal Photography

coastal photo

Photo captured by frank mckenna

1. Timing is Everything: Golden and Blue Hours

The best time to capture beachscapes is during the golden hour (shortly after sunrise and just before sunset) and the blue hour (just before sunrise and after sunset). During these times, the light is soft and diffused, creating a magical atmosphere with warm tones or cool blues. The long shadows and vibrant colors can add depth and drama to your images.

2. Use a Tripod for Stability

Coastal environments can be windy, and the movement of the waves can create subtle vibrations that affect the sharpness of your photos. A sturdy tripod ensures stability, especially during long exposures or when using slower shutter speeds to capture silky smooth water effects.

3. Experiment with Shutter Speeds

Long exposure photography can turn the ocean into a smooth, dreamy surface or create motion blur in the clouds. Experimenting with different shutter speeds can dramatically change the mood of your image. Use a slow shutter speed (around 1-5 seconds) to capture the fluid motion of the waves or a fast shutter speed (1/500th of a second or faster) to freeze the action and capture the details of crashing waves.

4. Incorporate Leading Lines

Beaches naturally provide several leading lines, such as the shoreline, waves, or driftwood. Use these elements to guide the viewer’s eye through the image, creating a more engaging composition. Leading lines can also add a sense of depth and dimension to your beachscapes.

5. Play with Reflections

Wet sand, tidal pools, and calm water can create beautiful reflections that add symmetry and interest to your photos. Position yourself low to the ground to capture these reflections, and use them to double the impact of a stunning sunset or dramatic cloud formation.

6. Mind the Horizon

One of the most common mistakes in coastal photography is a crooked horizon. A tilted horizon can distract from the beauty of your image and throw off the balance of your composition. Use the grid lines in your camera’s viewfinder or post-process tools to ensure the horizon is perfectly straight.

7. Capture the Details

While wide-angle shots of the entire beachscape are stunning, don’t forget to zoom in and capture the smaller details. Shells, pebbles, seaweed, and footprints can tell a story and add a personal touch to your images. Macro photography can be particularly effective in showcasing these intimate aspects of the coast.

8. Watch the Weather

Coastal weather is notoriously unpredictable, but it can also be your greatest asset. Stormy skies, fog, and dramatic clouds can add mood and atmosphere to your beachscapes. Always keep an eye on the weather forecast and be prepared to adapt to changing conditions.

9. Use Filters for Control

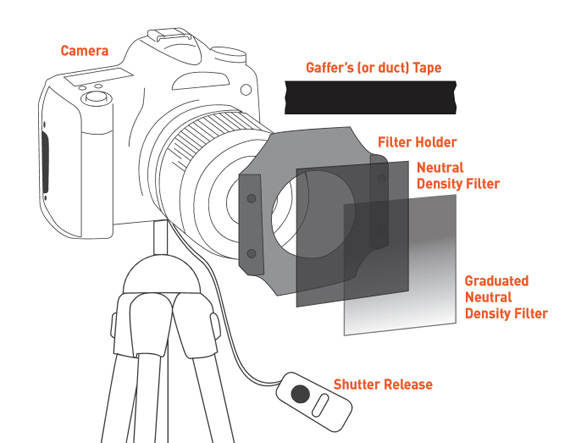
Neutral density (ND) filters are essential tools for coastal photography, allowing you to use longer exposures even in bright conditions. Graduated ND filters can help balance the exposure between the bright sky and the darker foreground, ensuring a well-exposed image. A polarizing filter is also useful for reducing glare and enhancing the colors of the sky and water.

10. Respect the Environment

Finally, always respect the natural environment. Avoid disturbing wildlife, and be mindful of where you walk, especially in fragile dune areas. Leave no trace of your visit, so others can enjoy the beauty of the coast as much as you do.

Conclusion

Coastal photography is all about capturing the unique and ever-changing beauty of the seaside. By paying attention to light, composition, and the environment, you can create stunning beachscapes that transport viewers to the coast. Whether you’re a seasoned photographer or just starting, these tips will help you make the most of your time by the sea.

For further training: How to Take Amazing Coastal Photos Course

- - - - - - - - - - - - - - - - - - - - - - - - - - - - - - - - - - - - - - - - - - - - - - - - - - - - - - - - - - - - - - - - - - - - - - - - - -

Photography, like any art or skill, thrives on consistency. The journey to becoming an adept photographer is paved with regular practice. Learn how PictureCorrect Insiders can help.

- - - - - - - - - - - - - - - - - - - - - - - - - - - - - - - - - - - - - - - - - - - - - - - - - - - - - - - - - - - - - - - - - - - - - - - - - -

This post Coastal Photography Tips appeared on PictureCorrect.


from PictureCorrect https://ift.tt/lGIYfEy
via IFTTT

sunnuntai 18. elokuuta 2024

PictureCorrect.com: Travel Photography Packing List

Travel photography is a beautiful blend of art and adventure, capturing moments and memories as you explore new terrains. But, being on the move requires a balance between being prepared for any photographic opportunity and not being weighed down by excessive gear. Here’s our recommended general packing list for travel photography, emphasizing mobility and versatility.

Also for a packing list you can print out, you may want to check out this summer sale on the popular Photography Adventure Cheat Sheets

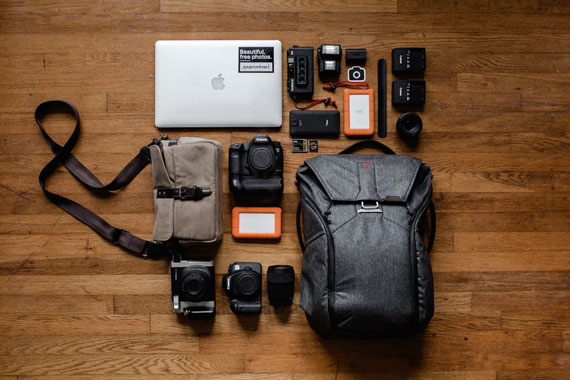
photography packing list

Photo captured by Andrew Neel

Camera Equipment

1. Camera Body: Your trusty sidekick! Whether you’re a DSLR enthusiast, a mirrorless camera aficionado, or someone else entirely, ensure it’s comfortable to carry and use for extended periods.

2. Lenses: Instead of carrying a myriad of lenses, select one or two that offer versatility. The 24-70mm f/2.8 (for full-frame cameras) stands out. It’s dubbed the “walk around” lens due to its adaptability, making it perfect for capturing wide landscapes or zooming in on intricate details.

3. Power: Nothing is worse than spotting a perfect shot and having a dead battery. Bring extra batteries, a charger, and power adapters suitable for your travel destination.

4. Storage: Multiple memory cards will ensure you don’t run out of space.

5. Accessories: Depending on the kind of shots you aim to capture, consider lens filters like polarizing, ND, and UV filters. A remote shutter release is invaluable for long exposures, ensuring sharp images without camera shake.

6. Tripod: While not always essential, a lightweight and robust tripod can be a game-changer, especially for landscape or low-light shots.

Protection and Maintenance

1. Carrying Solutions: A good camera bag or backpack not only organizes but also protects. Opt for something waterproof or with a rain cover to guard against unpredictable weather.

2. Maintenance Tools: A lens cleaning kit keeps your images sharp, and lens caps protect against scratches when not in use.

3. Weather-Proofing: Unexpected showers? Having rain protection ensures you can continue shooting without a glitch.

Backup and Storage

While you might diligently backup once home, on the go, consider a portable hard drive or SSD. Alongside, a card reader (if not integrated into your laptop or tablet) makes transferring images a breeze.

Insurance

Travel isn’t without its risks. Securing a travel insurance policy that specifically covers your photography equipment can give peace of mind, letting you focus on your art.

Remember, travel photography is as much about the journey as it is about the final image. Packing light ensures you remain agile, covering more ground and capturing more shots. Always prioritize based on the essence of your trip and your photographic goals. And as a final reminder for those jet setters, always stash your camera equipment in your carry-on luggage to safeguard against potential mishaps. Here’s to capturing the world, one frame at a time!

For Further Training:

For help remembering these concepts, and more cheat sheets on the Most Difficult Photography Situations, this popular set of Photography Adventure Cheat Sheets have you covered. They are currently 80% off for a summer sale which ends soon if you want to check them out.

photography adventure

New! Cheat Sheets for Your Photography Adventures (see how they work)

The perfect companion for any photographer. Print one out whenever you need it. Whether you’re going on vacation or seeking out a specific photography adventure, these cheat sheets can provide you with the knowledge and inspiration you need to create your best work yet.

Summer sale ending soon: The Photography Adventure Cheat Sheets at 80% Off

- - - - - - - - - - - - - - - - - - - - - - - - - - - - - - - - - - - - - - - - - - - - - - - - - - - - - - - - - - - - - - - - - - - - - - - - - -

Photography, like any art or skill, thrives on consistency. The journey to becoming an adept photographer is paved with regular practice. Learn how PictureCorrect Insiders can help.

- - - - - - - - - - - - - - - - - - - - - - - - - - - - - - - - - - - - - - - - - - - - - - - - - - - - - - - - - - - - - - - - - - - - - - - - - -

This post Travel Photography Packing List appeared on PictureCorrect.


from PictureCorrect https://ift.tt/UZOFHDm
via IFTTT

lauantai 17. elokuuta 2024

PictureCorrect.com: Wild Bird Photography Tips

Final day reminder: only hours left for the Bird Photo Snap Cards at 82% Off

Photographing great wild bird photos can be challenging at times, but with good preparation, the right equipment, and a few simple tips, it can also be quite fun and rewarding. What follows are our top tips for capturing better wild bird photos.

bird in foliage

photo by Vikramdeep Sidhu

Know Your Venue

If you’re hoping to capture some great wild bird pictures, the first thing you need to do is get to know your venue. First up, do some research and find out what species you’re likely to spot. From there you can work out when and where you’re likely to find them. Once you figure out where you’re likely to find them, find a map of that area and convert it to a sketch map so you can mark your own details on it.

When you first arrive, use your sketch map to mark out the overhead path of the sun, so you can anticipate lighting in different locations, mark different vegetation/habitat types, and where you can find good cover for yourself.

Then, as you spot different species, mark the locations (and times) on your sketch map. Soon, you will have a very handy reference guide for future shoots. When you return, you’ll know when and where you need to be to capture the bird photographs you seek.

The best bird photographers often tell me they rarely get their best shots on the first visit… the best wild bird pictures usually happen once they know the location as well as their own backyard.

Know Your Subject

This should go without saying for any sort of wildlife photography, but it’s particularly important for capturing great wild bird photographs. Birds are incredibly fast and often seem totally unpredictable, so the better you get to know them, the better your chances are of anticipating their behavior and getting the shot you want.

For starters, invest in a good bird guide and learn everything you can about the species you want to photograph. Getting to know their feeding habits, breeding, nesting, and migratory behaviors will help you make sure you are in the right place at the right time.

Knowledge of their specific behavior, from guides and observation, will help you anticipate what they’re going to do once you’ve found them. The more time you spend observing the birds, the better you’ll be able to predict their behavior. It will also give them more time to get used to you.

puffin photography

photo by Jacob Spinks

There are some bird behaviors that are fairly universal though, so you can start with these.

Most birds will take off and land into the wind. So if there’s a prevailing wind direction at your venue, be aware of it and position yourself facing towards the bird’s likely location with the sun behind you (ie. so your photos will be with the bird flying towards you and lit from the front).

Most birds ‘tense’ their feathers just before they take off. When they’re relaxed (and going nowhere) they look more ‘fluffy’. When they’re about to take flight, they almost seem to shrink for a second or two before launching themselves. If you watch for this, it can be a great trigger to start shooting.

pelican in flight

photo by C. P. Ewing

Buy the Longest, Fastest Lens You Can Afford

This tip comes with a caveat. You don’t need an exorbitantly expensive lens to get marketable bird photos, but any extra length you can afford will be helpful.

Some of the best bird photographers I know use nothing more than a standard 100mm–400mm telephoto and get incredible results. In fact, most will tell you it’s more about the preparation, research, good positioning, and patient stalking techniques, as opposed to the lens.

In a perfect world, all bird photographers would have a 600mm f/4 auto focus lens, but realistically, anything over 300mm is probably good enough if you hone your other birding skills.

You can, of course, use a teleconverter: a 1.4 teleconverter on a 400mm lens will put you in the 600mm range, but be aware you will lose a couple of f-stops in the process. In open, well-lit settings, that can be OK, but in any sort of vegetation, it’s probably going to make life difficult.

A final option a lot of dedicated birders use is called “digiscoping”. This entails attaching their camera to their spotting scope. A spotting scope with 25x magnification would be equivalent to a 1500mm lens. Even when you buy the adapter as well, it can be a very affordable way of getting close to your subjects.

Adjust Camera Settings

In most cases, you’ll want to use the fastest possible settings to deal with the speed and mobility of your subjects. When the birds are flying, you’ll usually need at least a 1/500 second shutter speed to keep it crisp. Even when they’re perched, many birds fidget and rarely keep perfectly still.

There will be times when you want to slow it down and convey the motion, and this can (should) be done deliberately. Just remember, there’s a difference between a photo deliberately captured to convey movement and one that’s just not sharp. If you’re going for movement, my suggestion would be to use panning to make sure there’s no question in the viewer’s mind that it was deliberate.

Digital ISO settings allow you to speed things up considerably, just be aware of how fast you can go before the picture quality suffers.

Always remember to constantly check your exposures. White, bright skies will trick your camera’s auto-exposure. So, for in flight shots, you’ll generally need to dial in 1–2 stops or more for exposure compensation.

Maximize Other Equipment

Usually a tripod would be considered essential equipment when using a long lens, but in bird photography, you will often find yourself in situations where setting up a full-sized tripod might be difficult. By all means use one whenever you can, especially if you’re working from a hide or semi-permanent position, but if you’re on the move, I always find a monopod more useful. In wooded areas there’s usually at least a tree to brace yourself against.

A lot of bird photographers will tell you their car makes a great hide and tripod all in one. Many birds are quite used to cars by now, so if you arrive on site and sit quietly for a few minutes, many birds will soon forget the car is there. Keep a small bean bag handy for a camera rest, and you’re in business.

Always carry extra battery power and extra storage. In the field, plastic bags are always helpful for protecting your gear from the elements (i.e. rain, fog, dust, etc.). If you’re really roughing it, a lot of pros suggest you don’t even change lenses. If you really need a choice of lens, carry it already attached to an extra camera body, to avoid any chance of getting dirt or water inside.

Be Deliberate in Your Composition

There are a few basic rules that apply to most wildlife photography, and they are particularly relevant to bird photographers as well.

owl in flight

photo by dingopup

First and foremost, focus on the eyes.

If the eyes are sharp, the rest doesn’t matter. If the eyes aren’t sharp, the rest doesn’t matter! No doubt there will be exceptions, but if you keep that firmly in mind when you’re shooting and editing, you will end up with a much stronger collection.

Another “rule” that applies to most wildlife photography is: shoot from the front. With few exceptions, there’s rarely much call for the rear end view of any creature leaving the scene.

The approaching view is much more natural, therefore making it easier for most viewers to connect with the photo. With birds, the approaching view is even more important. Birds usually present to their mates ‘head on’, which is when they display their more brilliant plumage. While the rear view is more likely to be plain or even camouflaged.

Finally, as much as possible, shoot from eye height.

eye level bird photography

photo by Linda Stanley

For ground or shore birds, this often means getting down on your belly. For high nesting birds, it means getting as high as you can yourself. Obviously you can’t always get to their level, but the more you try, the better your results. Telephoto lenses do help give the impression you’re more equal, but try not to rely on that alone.

If you’re photographing birds in flight, you need to anticipate and pan. Be extra careful not to crop too tightly. It is much better to trim things later than to find out you repeatedly clipped off a tail or a wing. And when possible, try to capture the birds flying into the frame, rather than out of it. A seemingly obvious part of flight is the wings. Always watch the wing position of the species you’re photographing and refer to your bird guide. Different species will present very distinct shapes. The ability to capture those behaviors and traits that make a creature unique is what separates the great wildlife photographers from the good ones.

Lastly, make sure you get good clear detail shots as well, so you can be totally confident in your identification of the bird. That means close up shots of the head, beak, breast, tail shape, and back. If you are planning to sell the images, accurate identification is essential. Don’t ever rely on common-names; buyers will usually want scientific names to be completely sure (i.e., If you have photos of a common Blue Jay, know that the scientific name is Cyanocitta cristata before you try to sell them).

Be Patient and Prepared to Practice

Patience is a virtue, especially in bird photography. When you arrive on site, always give the local inhabitants time to get used to you being there; you will get better images. Don’t try to force the issue by going too close too fast. At best they’ll fly away, and at worst, they’ll look visibly stressed which never makes a good photo.

Instead, after waiting and watching, work out what the comfort zone is for the species and stay just outside that. Most birds are instinctively afraid of people, but if you sit and wait quietly and patiently, you’ll find most are quite inquisitive, and many will actually approach you if you give them the opportunity.

Beyond that, shoot often and shoot heaps. Don’t expect your best shots to come on your first visit to an area. Instead, treat your first visit as a scouting trip. Work out your lines of light, wind, where your cover is, and identify as many species as you can, then you can research more fully before your next outing.

If you’re just starting out in bird photography, you might even find it useful to set up a feeder at your home, so you can practice and observe the birds in a relatively closed environment. Remember, the more time you spend getting to know your subjects, the better your photos are going to be.

Finally, spend plenty of time studying other people’s wild bird pictures. Dissect each shot and think about how it was created in terms of equipment, settings, timing, positioning, and the photographer’s understanding of the bird and its behavior.

A great wild bird picture doesn’t happen by accident. In fact, quite often, you’ll find the best bird images aren’t shot by bird photographers but by birders with photography skills. Something to keep in mind!

About the Author:
Matt Brading writes for GlobalEye Images, a site that lists wild bird pictures and stock bird photos. They represent some exceptional bird photographer specialists in their field.

For Further Help with Bird Photography:

Bird photography is active and hands-on, so your reference materials should be able to come with you anywhere. Enter these new bird photography snap cards. A simple and beautiful way to learn bird photography on-the-go. Download your snap cards – print them out – and pop them in your camera bag— You’ll never miss a shot again! They are currently 82% off until midnight tonight if you want to check them out.

bird snap cards

New: Bird Photography Cheat Sheets (see what’s included)

Not only will these Snap Cards give you a simple and beautiful way to learn bird photography on-the-go… They’ll also give you the confidence to experiment. Because now, if you get stuck with a problem, you’ll have the answer right there with you in your camera bag.

Only hours left: The Bird Photography Snap Cards at 82% Off

- - - - - - - - - - - - - - - - - - - - - - - - - - - - - - - - - - - - - - - - - - - - - - - - - - - - - - - - - - - - - - - - - - - - - - - - - -

Photography, like any art or skill, thrives on consistency. The journey to becoming an adept photographer is paved with regular practice. Learn how PictureCorrect Insiders can help.

- - - - - - - - - - - - - - - - - - - - - - - - - - - - - - - - - - - - - - - - - - - - - - - - - - - - - - - - - - - - - - - - - - - - - - - - - -

This post Wild Bird Photography Tips appeared on PictureCorrect.


from PictureCorrect https://ift.tt/sAyzmRP
via IFTTT