


Studio Light is an innovative new tool designed for portrait photographers to effortlessly recreate the striking lighting effects typically reserved for costly studio equipment. This remarkable tool rejuvenates older photos and imparts a fresh and captivating dimension to your portrait photographs. Use this tool to apply an accent of light to your portraits.
Understanding Studio Light settings
Before we start, let’s pause briefly to explore and grasp the intricacies of each Studio Light setting. Here’s a breakdown of the Studio Light settings:
- Brightness: This setting allows you to adjust the overall image’s brightness, making it brighter or darker.
- Smooth: Use this option to fine-tune the shape of the shadows cast upon the subject.
- Light Contrast: This adjustment modifies the contrast of the light applied to the entire image.
- Plus Icon: Click the plus icon to apply additional light sources to the image—Right-click on a square to hide or remove a light source.
- Amount: Adjust the Amount to apply a light source that shines on the subject.
- Hue: Alter the Hue setting to change the light source’s color, illuminating the subject.
- Saturation: Saturation determines the intensity or strength of the Hue.
- Depth: This setting allows you to make the light’s texture and pattern on the subject either softer or sharper.
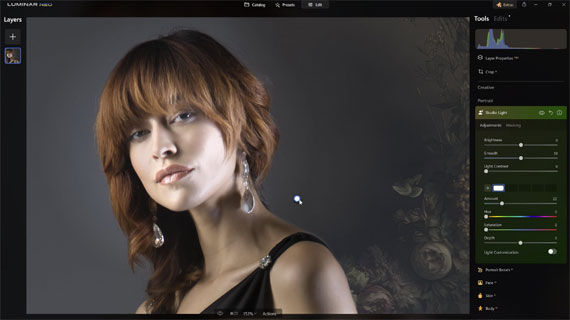
Start with a light source pin
Begin by placing a light source pin on the image. To introduce the desired illumination level onto the subject, manipulate the Amount slider. It’s worth noting that the Amount setting specifically controls the strength of the light on the subject rather than affecting the entire image. When you add a light pin to the image, you can fine-tune its placement. By moving the pin closer to or farther from the subject, you can precisely control the positioning of the light source. This action influences how the light is distributed across the subject, mimicking the behavior of studio lights or flashes.
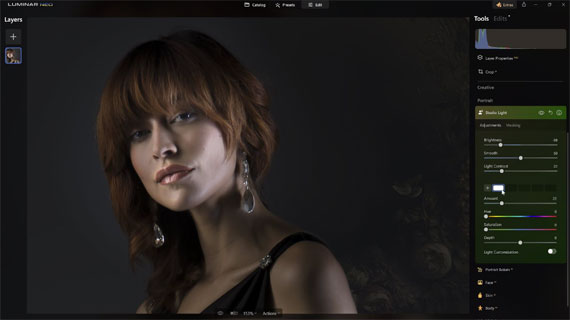
Adjust the light for the overall image
Adjust the lighting settings for the entire composition to achieve a darker and moodier image. To darken the overall image, reduce the Brightness to a negative value and raise the Light Contrast. This will result in a general darkening effect, causing the added light source on the subject to become more pronounced. Additionally, you can fine-tune the “Smooth” setting to control the shape and positioning of shadows on the subject.
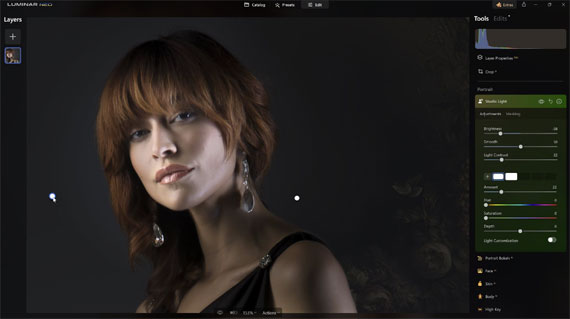
Apply a second light source
Select the plus icon and modify the “Amount” setting to introduce an extra light source into the image. Shift the pin’s position to illuminate the subject’s face, simulating the effect of incorporating an additional studio light or flash. You can independently modify the strength and power of each light source.
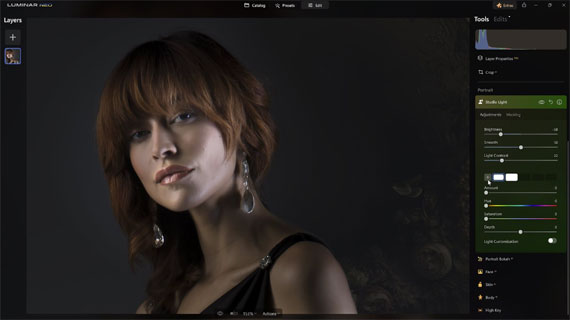
Apply a third light source and add color
Let’s incorporate a third light source and infuse some color into the scene. Like before, click on the plus icon and adjust the “Amount” setting to add a light source to the image. Position the pin to cast light on the subject’s head. For a touch of color, begin by fine-tuning the Saturation strength and then choose a Hue.

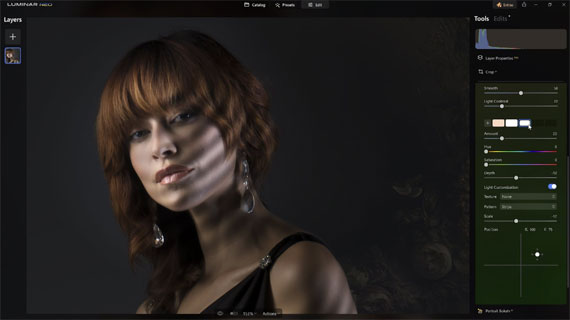
Light Customization
Each of the added light sources can be independently customized. Click the last box in the row next to the Plus Icon. The most recent light source is in the front, and the first is at the end, Now that the light source is selected, toggle on the Light Customization option. Four additional settings are available: Texture, Pattern, Scale, and Position. Let’s explore the purpose of each of these settings.
- Texture: Refers to the visual quality of light between the light source and the subject. In portrait photography, this element is often called a Gobo or Go-Between. You can choose from various textures or even incorporate your custom ones. For now, let’s keep this setting at “none.”
- Pattern: Shapes the light source on the subject. Choose between Strips or Dots.
- Scale: This enables you to amplify or diminish the pattern applied to the subject.
- Position: Allows for precise light source adjustment along the XY axis for accurate positioning.
Adding the final touches
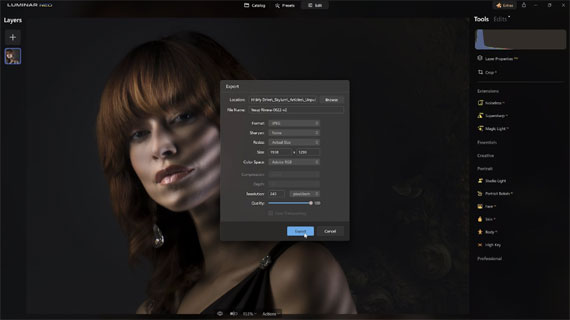
To refine the light sources, click on each one next to the Plus Icon. The adjustments you apply are specific to each light source, giving you complete control. Additionally, you can use other Luminar tools to enhance your image further. Once you’ve completed your adjustments, you can export your image for sharing on social media or safekeeping.
Key Takeaways
Studio Light provides a versatile toolkit for refining the lighting in your images. Starting with a light source pin, you can finely control the illumination on your subject by adjusting the Amount slider, emulating the behavior of studio lights or flashes to achieve your desired lighting effect.
To further enhance your composition, you can manipulate the overall image’s lighting settings by modifying Brightness, Light Contrast, and Smooth. This allows you to create moodier and more captivating images while highlighting the subject’s lighting.
Adding multiple light sources is also a straightforward process with Studio Light. By using the plus icon and adjusting the Amount setting, you can introduce extra light sources and position them precisely to illuminate different parts of your subject. This level of customization enables you to craft dynamic and visually stunning photographs.
Furthermore, Studio Light offers the flexibility to customize each light source independently. You can experiment with textures, patterns, scales, and positions, giving you the creative freedom to create unique and captivating lighting effects. Whether aiming for realism or artistic expression, Studio Light empowers you to bring your vision to life.
Try it for yourself: Studio Light in Luminar Neo
- - - - - - - - - - - - - - - - - - - - - - - - - - - - - - - - - - - - - - - - - - - - - - - - - - - - - - - - - - - - - - - - - - - - - - - - - -
Did you appreciate this newsletter? Please help us keep it going by Joining Our Patreon Supporters
What are your thoughts on this article? Join the discussion on our Facebook Page
PictureCorrect subscribers can also learn more today with our #1 bestseller: The Photography Tutorial eBook
- - - - - - - - - - - - - - - - - - - - - - - - - - - - - - - - - - - - - - - - - - - - - - - - - - - - - - - - - - - - - - - - - - - - - - - - - -
The post How to Create Studio Light Effects in Luminar Neo appeared first on PictureCorrect.
from PictureCorrect https://ift.tt/EZc1i9k
via IFTTT

0 kommenttia:
Lähetä kommentti