tiistai 30. huhtikuuta 2019

PictureCorrect.com: The Eye of a Photographer

The world looks different to a photographer than it does to everyone else. Why can a photographer capture flat images and turn them into art? The eye of a photographer sees light, details, shadows, highlights, shapes and how they interact with each other.

photographer

“37 of 365” captured by Chris Becker

The world looks different if you see it with both eyes rather than with only one eye. Close an eye and look at an object. Do you see what I mean? Well, by closing an eye before taking a shot, you will have a pretty good idea of what you can expect from your image.

Photographers explore the light and texture. Light is probably their most important tool. Photographers are intrigued by the way the nature of light affects the way things are seen. Intensity, direction, and type of light offer the photographer a potential for visual exploration. Photographers have mastered how to use the rules of composition and know when to break them. Photography is a process.

how to get a photographer's eye

Photo by Morten Skogly; ISO 32, f/2.2, 1/3200-second exposure.

Our eyes work similar to a camera. Here are some facts that you might even find amusing: Our eyes have a resolution of around 560 megapixels. They can differentiate around 10 million shades of colors. The ISO of an eye is not great; it can be measured at around 800, and in low light, our eyes do not see color. The equivalent of the aperture would be f/3.5 with a focal length of 20mm. The great thing about our eyes is that they have auto white balance, auto ISO, and a very high dynamic range.

Some photographers have the eye when they’re born, but most of us develop it after practice and training. It can take several years to begin to notice things differently.

A photographer doesn’t need expensive equipment to take great photos. The best camera gear in the world is not going to help a photographer see or be aware of his or her surroundings. It’s all about the art of seeing. With a photographer’s eye, you see things in a way that others don’t. That different way of seeing makes an impression on the people viewing your images.

techniques for a photographer eye

Photo by Rob Weiher; ISO 200, f/5.6, 1/320-second exposure.

A photographer thinks in photography concepts and sees in terms of photography. If you enjoy taking pictures, your attitude will show up in the final image.

Everything has the potential to be captured. It’s all about picturing an image in your head and making it happen. The more you do it, the better you get at it.

About the Author:
This article was written by Joaquin Duenas. PhotoBlog: theduenitas.blogspot.com. The Duenitas Digital World is based in Miami, Florida and covers South Florida, the Caribbean, Mexico and Central America.


Go to full article: The Eye of a Photographer

What are your thoughts on this article? Join the discussion on Facebook

PictureCorrect subscribers can also learn more today with our #1 bestseller: The Photography Tutorial eBook

The post The Eye of a Photographer appeared first on PictureCorrect.


from PictureCorrect http://bit.ly/2WgcwNV
via IFTTT

PictureCorrect.com: Interesting Photo of the Day: Camel Selfie

Camels have been missing out on the selfie game all this time—until now. Photographer Hossam Antikka snapped this selfie with his friends in Perkash in Giza, Egypt, not knowing that the happy ungulate took the opportunity to flash his toothy smile for the camera:

selfie with camel

“Camelfie” by Hossam Antikka (Via Imgur. Click image to see full size.)

Antikka and his friends spent some time feeding the camel and giving it affection before snapping the selfie. The camel obviously wanted to show its gratitude to the photographer and his friends. Antikka posted the photo late one night only to wake up and find that the camel selfie, or camelfie, had become an Internet success.


Go to full article: Interesting Photo of the Day: Camel Selfie

What are your thoughts on this article? Join the discussion on Facebook

PictureCorrect subscribers can also learn more today with our #1 bestseller: The Photography Tutorial eBook

The post Interesting Photo of the Day: Camel Selfie appeared first on PictureCorrect.


from PictureCorrect http://bit.ly/2mKJNQu
via IFTTT

PictureCorrect.com: 5 Lightning Photography Tips

It’s a stormy day outside with crazy rain. What do you do? Simple. Get your camera and head out to take some lightning photos! That’s the life of a photographer. But you wouldn’t want to be stuck outside in such difficult conditions struggling to take photos, would you now? To help you with lightning photography, photographer Pierre T. Lambert shares his five secret tips:

1. Use a Slow Shutter Speed

Lightning strikes pretty fast. The chance of you pressing the shutter button and the lightning striking at the exact time is minimal. So what you can do instead is use slow shutter speed. Leaving the sensor exposed for a bit longer increases your chances of photographing lightning by a lot. Use something like 1 to 4 seconds exposure to photograph lightning without depending on luck too much.

2. Underexpose Your Shot

Lightning is a source of light itself. It appears for a split second but can really brighten up the surroundings. So, when setting up your shot, be sure to underexpose.

bright lightning strike

3. Use an Intervalometer

Even using longer shutter speeds doesn’t guarantee that the lightning bolts will be captured by the camera. Who knows when the lighting will occur? To remove luck from the equation, Lambert suggests using an intervalometer. Some cameras have the intervalometer function built in. If yours doesn’t, you’ll need to purchase one separately.

“It’s simply a function that allows you to tell your camera to shoot a picture every X seconds.”

The camera will continue taking pictures automatically without you having to press the shutter button every time.

4. Stay Away From the Tripod

When capturing lightning photographs in an open place using a tripod, it’s a good idea to stay far away from the setup. Have your camera well protected using a rain cover, and stay back while keeping an eye on the setup. Get in your car maybe. A tripod can act as a lightning rod. And being struck by lightning definitely isn’t fun.

5. Enjoy the Show

Nature puts up a magnificent show when it comes to lightning. Set your camera up, have something warm and refreshing drink, and enjoy the show. The camera will capture everything for you while you take the time to see what nature has to show.

dramatic lightning

Next time there’s a thunderstorm, get out there and shoot some lightning photographs. Just be sure to take care of yourself and your gear while you’re out!


Go to full article: 5 Lightning Photography Tips

What are your thoughts on this article? Join the discussion on Facebook

PictureCorrect subscribers can also learn more today with our #1 bestseller: The Photography Tutorial eBook

The post 5 Lightning Photography Tips appeared first on PictureCorrect.


from PictureCorrect http://bit.ly/2DFdifX
via IFTTT

maanantai 29. huhtikuuta 2019

PictureCorrect.com: Useful Composition Tips for Aspiring Macro Photographers

When viewing images, do you notice that close-up shots evoke a feeling of intimacy more than those taken at a distance? It’s the fact that they were taken at close range to the photographer that creates this effect.

This is what macro photography is all about. It’s taking photos up close and personal.

A close-up shot provides more details. As such, any photographer needs to make sure that his or her camera is focused well before snapping.

Camera Settings

For those using a point and shoot camera, the first step to capturing objects in close range is to set your camera to macro mode. Surprisingly, not many digital camera owners know about this. The macro mode is normally symbolized with a little flower, and once this is set, your camera will automatically know that you want to focus on a particular subject closer to your lens. This setting will also tell your camera to choose a large aperture to ensure that the subject is more in focus than the background.

Macro Photography Composition Guidelines

Experts also point out the importance of composition. This means knowing how you’re going to compose your shot with your subject in place. You may have the most expensive digital camera, lens, and other accessories, but if you don’t know how to frame your subject, you won’t succeed in your goal of capturing quality images.

Lead Room

One aspect of composition pertains to lead room, which is vital in nature and wildlife photography. This refers to providing extra space in your frame. As an example, you need to have extra room or space in the direction in which an animal’s eyes are looking. This will help create balance in your photo. So if a frog is looking towards the left, the left side should have more space compared to the right.

photography tips for macro

Photo by Eric; ISO 400, f/7.1, 1/100-second exposure.

On the other hand, if you’re shooting an insect, the eyes of which are not that prominent, you can always base your lead room on the shape and body structure of the subject.

Rule of Thirds

Another tip for macro photographers is following the so-called rule of thirds. The goal of this is to keep the balance in your photos depending on the subject’s position. You have to determine then whether the subject is looking straight at the camera or sideways. So if a frog, for instance, is looking straight into the camera, the best way to achieve balance is to center the subject in the frame.

macro tips photo composition

Photo by erlend.

Diagonal Lines

To keep your photo more interesting, experts recommend creating diagonal lines. Parallel lines can be boring and unappealing. But if you give it some diagonals, you create a great effect such as that of action.

macro photo composition tips

Photo by Dan Kühn; ISO 100, f/8.9, 1/9-second exposure.

Compositional Weight

The compositional weight is another thing. Again, this refers to positioning your subject in a diagonal manner. For example, you make sure that a butterfly standing on a small branch is positioned so its rear body part is pointing toward one corner on the bottom, while the upper end of the branch points at another corner on the top.

macro photography tips for composition

Photo by Mirai Takahashi; ISO 800, f/7.1, 1/20-second exposure.

Macro photographers sometimes get so caught up in close-up details of their subjects that they forget the importance of composition. Follow the guidelines above to put more visual interest into your macro photography.

About the Author:
For information about digital cameras, a resource is 42photo.com, New York’s legendary camera store in business for over 40 years.


Go to full article: Useful Composition Tips for Aspiring Macro Photographers

What are your thoughts on this article? Join the discussion on Facebook

PictureCorrect subscribers can also learn more today with our #1 bestseller: The Photography Tutorial eBook

The post Useful Composition Tips for Aspiring Macro Photographers appeared first on PictureCorrect.


from PictureCorrect http://bit.ly/2xDdLtK
via IFTTT

PictureCorrect.com: Interesting Photo of the Day: Northern Lights Over Jökulsárlón

We’ve become too used to seeing vibrant images of the amazing aurora borealis. The colorful shows that the northern lights put on are simply breathtaking. Who would’ve thought that an image of a phenomenon that is best known for its colors could look equally good with the colors almost stripped away? That’s the case with this photo by Joe Clarke:

norther lights in iceland

“Northern Lights Over Jökulsárlón, Iceland” by Joe Clarke (Via Reddit. Click image to see full size.)

Clarke took the image at Jökulsárlón, a large glacial lake in southeast Iceland. The image is an 8-second exposure that he took with his Canon 5D Mark III at 16mm, f/2.8, ISO 2000.

It is amazing to see how Clarke created such a phenomenal image with a minimalist look and editing. The desaturated colors give an almost alien feel to the environment. Also, by slightly increasing the exposure on the lights, he has drawn a viewer’s attention directly to it. The lack of colors does absolutely no injustice to the aurora borealis.

“Just started by upping the exposure and shadows a touch, then the contrast and clarity before lowering the saturation almost to black and white before sliding the white balance a bit till I was happy. “


Go to full article: Interesting Photo of the Day: Northern Lights Over Jökulsárlón

What are your thoughts on this article? Join the discussion on Facebook

PictureCorrect subscribers can also learn more today with our #1 bestseller: The Photography Tutorial eBook

The post Interesting Photo of the Day: Northern Lights Over Jökulsárlón appeared first on PictureCorrect.


from PictureCorrect http://bit.ly/2WeDZPO
via IFTTT

PictureCorrect.com: 5 Ways to Use Low Angles in Photography

Most commonly, photographs are shot from eye level. This perspective helps the viewer connect with the subject. If you want to make the image less traditional and add some interest in the process, however, shooting from a lower angle is a good option. But how low is low? Photographer Jay P. Morgan demonstrates how you can use low angle shots to get an interesting perspective:

When we say low angle, it doesn’t necessarily mean that the camera has to hit the dirt. Anything below eye level is considered low angle. There are lots of ways you can make use of low angle shots to make an image more interesting.

1. Hero Shots

Low angle shots exaggerate your subject. It makes them look taller, stronger, authoritative—just like a hero. For fashion shots, a low angle accentuates the legs.

accentuated legs from low angle shot

2. Shots Inside a Box

You can also use low angle shots when the camera is placed inside an enclosed structure—a case or a bag for instance. If you need to create a feeling of someone opening up a box or a case and looking into it, low angle is probably your perspective of choice.

image shot from low angle

3. Reduce Background Clutter

If you feel that a background is distracting, you can get rid of distracting elements by getting low. Use the sky as your backdrop. You ma, however, face a challenge of lighting the subject’s face by when you get low. You can solve this by using a strobe or a reflector to light up the subject. Getting down low also gives you an opportunity to add foreground elements to your composition.

low angle portrait shot

4. Point of View (POV) Shots

By laying the camera low and asking your subjects to look down at it, you can create an interesting POV shot. Imagine someone lying on the ground or on a bed. This is also good for photographing surgeons and dentists or parents waking up their children. You get the idea.

low angle POV shot

5. Low Perspective B-Roll

You can even create B-rolls using low camera angles. Have your subject run, walk, ride a bike, drive by, walk their dog, or whatever suits the context, and you’ll get a fun B-roll for your video work.

low angle b-roll

As you see, having the camera down low can get you some unique perspective shots. But there’s a catch. If your camera doesn’t have a flip screen, you may need to plug in a monitor or use some other method to compose and keep an eye on whatever’s going on.


Go to full article: 5 Ways to Use Low Angles in Photography

What are your thoughts on this article? Join the discussion on Facebook

PictureCorrect subscribers can also learn more today with our #1 bestseller: The Photography Tutorial eBook

The post 5 Ways to Use Low Angles in Photography appeared first on PictureCorrect.


from PictureCorrect http://bit.ly/2UNtdi3
via IFTTT

PictureCorrect.com: Camera Lenses For Indoor Event Photography: Fast Glass

Related reminder: only a little while left to get Topaz DeNoise A.I. at 25% Off

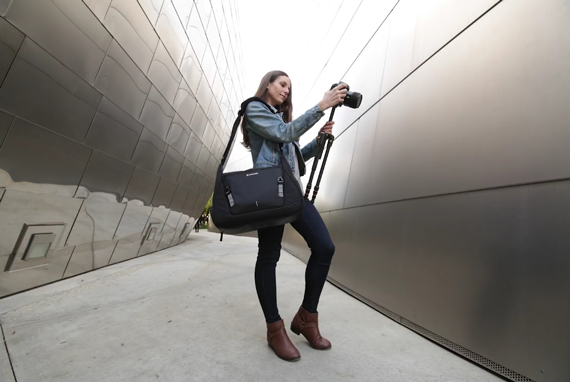
There are five lenses I believe every indoor photographer must have in their kit. It doesn’t matter whether you shoot Canon or Nikon, or whether you shoot crop or full frame. These five are must haves for capturing emotion and action in low light. If you’re still using a variable speed, package zoom lens then I implore you to consider purchasing at least one high-speed lens. Both Canon and Nikon offer an identical lineup of fast glass.

In this article I want to focus on five different lenses: three prime lenses and two zoom lenses.

event photography tips and lenses

Photo by michael song

The intent of this article is not to argue the importance of fixed verses zoom lenses, nor is it to examine the pros and cons of each. It is intended to look at how a professional chooses and uses the best lens for the situation. Event photography, especially wedding photography, incorporates a mixture of both technical and creative photographic opportunities. It doesn’t matter if you shoot traditional or journalistic you will use techniques and compositions from both schools of thought.

For any work indoors the first thing a photographer will consider is the speed of the lens. Anything under f/2.8 is too slow for professional work. Even with the advent of relatively noise free high ISO camera sensors a professional must know that they got the shoot. You do not want to be concerned with motion blur or camera shake while great photographs pass by.

Primes

Prime lenses offer increased color accuracy and intense depth of field control. Not only that, but they have a single advantage in portrait photography that zooms do not. They offer uniformity in style. In exchange for this they give up the flexibility in composition that a zoom lens offers. You will want to use the same prime lens for all or most of your traditional portrait shots. That way there will be a certain continuity of style, tone, and feeling running through them. Simply, by limiting yourself to a single focal length you will give your images a feeling that they belong together.

photo lenses tips

Photo by Stefano Montagner; ISO 360, f/2.8, 1/125-second exposure.

Both Canon and Nikon offer beautiful prime lenses in both a mid-range and professional category. Don’t let this confuse you if you are on a budget. Both categories offer superb optics and technical features. Canon offers their primes in a standard lineup and in their L-series professional lineup, while Nikon offers their primes in the standard D-series and the professional G-series lineup. The price range for the standard lines run between $300 and $500, and the professional L-series and G-series lenses run between $1200 and $2000.

Wide
At the wind end of the spectrum a 24mm f/2.8 is available in the mid range while the professional version of these lenses offers a maximum aperture of f/1.4. These lenses are great for traditional group shoots and formal interior shoots. Using a wide angle lens like this for action shots during the main event or a wedding reception will produce photos that give the viewer the feeling that they are there immersed in the surrounding of the photograph. This style lends itself well to documentary work and photojournalistic photography.

Standard
The “nifty 50” or 50mm prime lens has traditionally found itself to be the workhorse of many professional photographers. It is offered as a 50mm f/1.4 and is well suited for portraiture and documentary work. This lens gives beautiful color saturation and intense rich blurring, or bokeh, outside of its narrow depth of field. The professional series offers a maximum aperture of f/1.2. Use this lens for close portraiture, and interior detail photography. In low light situations this lens excels at stopping the action, but be aware that the small depth of field may cause focus issues in rapidly changing subjects as they move outside of its small range.

Telephoto
For most photographers an 85mm f/1.8 lens is the ideal portraiture lens. It offers great depth of field while minimizing the foreshortening effect of the shorter primes. The lens is also offered in a professional version with a maximum aperture of f/1.2. The 85mm focal length is somewhat limiting for general purpose use but makes up for this with gorgeous traditional portrait shots. This is the lens you will use most of the time when you get the lighting gear out and pose your clients for their formal shots. The wide aperture also gives you the ability to take advantage of available lighting for soft natural portraits.

Zooms

Zooms offer one thing primes cannot. They offer the ability to compose your photograph while standing relatively in the same place. For event photography this is a big plus. You cannot always get close enough to the action for the shot that you want. Zoom lenses also give you a big advantage if you’re trying to capture candid photographs. They allow you to sneak up next to the subject without them noticing you. This makes for natural looking images and removes the observer effect from your subject.

The zoom lenses offered by both Canon and Nikon are vast. There are however, only two lenses that you need to focus on. A wide angle and a telephoto zoom. The 24-70mm f/2.8 and the 70-200mm f/2.8 are both industry standards for this type of photography. They are both professional class lenses though there are lesser priced aftermarket lenses that offer comparable optical and technical features.

indoor event photography tips

Photo by Dmitry Kolesnikov; ISO 800, f/1.2, 1/250-second exposure.

Wide
The wide-angle zoom offers a range of 24-70mm and a maximum aperture of f/2.8. This lens is great for closer indoor work and detail photography. Break this one out when you will be getting close to your subjects such as a dressing room or small bar area. This also makes a great walk around lens allowing you to get moderately close for candids and yet wide enough for small shots, table and room photographs. The zoom range on this lens is within the operating specs of most on camera flash equipment making it the go-to lens for any direct flash work.

Telephoto
The telephoto zoom lens offers a range of 70-200mm and maximum aperture of f/2.8. The 70-200mm lens is offered with image stabilization (IS) Canon, or vibration reduction (VR) Nikon. This lens is also offered in a model without any anti-shake technology. The VR and IS lenses are the best choice for low light situations providing forgiveness for shake due to low shutter speed. This lens is the one you want when you need to step away from the action and blend in to capture emotion and raw candid expressions. If your style aims for a photojournalistic look and capturing the moment. This might be your all purpose lens.

About the Author:
Stephanie Smith is the owner and head photographer of omorfiPixel—Kansas City based wedding, family and newborn photography.

For Further Help, Deal Ending Soon:

Noise reduction technology has basically been the same for a decade, with only minor incremental improvements here and there. DeNoise AI may be different: the Topaz Labs team fed an algorithm millions of noisy/clear images until it actually learned what noise is and how best to remove it.

topaz denoise ai

New: Topaz Denoise A.I. (See How it Works)

It is currently 25% off for the launch sale which ends soon, plus our readers can save even more by using the coupon code picturecorrect at checkout.

Launch sale found here: Topaz DeNoise A.I. at 25% Off


Go to full article: Camera Lenses For Indoor Event Photography: Fast Glass

What are your thoughts on this article? Join the discussion on Facebook

PictureCorrect subscribers can also learn more today with our #1 bestseller: The Photography Tutorial eBook

The post Camera Lenses For Indoor Event Photography: Fast Glass appeared first on PictureCorrect.


from PictureCorrect http://bit.ly/2vh7R0B
via IFTTT

PictureCorrect.com: Interesting Photo of the Day: Golden Hour At Its Finest

Golden hour is the time of day that occurs just before sunrise and sunset. At these hours, the sun is at such an angle with the earth that it produces a soft, glowing, golden light. It is generally regarded as the ideal time to photograph outdoors. The golden hour is a fundamental aspect of lighting in photography that is, or should be, taught to photography students very early in their education:

Sunset at Evergreen Mountain Lookout (Via 500px. Click for larger size.)

In the stunning photo above, photographer Michael Matti embraced the perfect light. He took this photo of a mountainscape as the sun cast cloud-diffused golden rays of light through the trees. The result is a dramatic photograph that offers colors that wouldn’t be present during other times of the day.


Go to full article: Interesting Photo of the Day: Golden Hour At Its Finest

What are your thoughts on this article? Join the discussion on Facebook

PictureCorrect subscribers can also learn more today with our #1 bestseller: The Photography Tutorial eBook

The post Interesting Photo of the Day: Golden Hour At Its Finest appeared first on PictureCorrect.


from PictureCorrect http://bit.ly/2UNmNiT
via IFTTT

sunnuntai 28. huhtikuuta 2019

PictureCorrect.com: Quick Tips for Photographing Glass

Photographing reflective surfaces can be a nightmare, or not, depending on how you set up your lights. David Bergman demonstrates how to light glass:

Avoid firing a flash straight at the wine glass.

wine glass photography tips

Direct Flash

Direct flash results in reflections from the flash in the glass.

The solution is to place the light behind the glass.

How to Light and Photograph Wine Glasses

Place your light behind the glass.

A big softbox works well for lighting glass from behind. But you can also bounce your flash off of a white reflector or white piece of paper.

How to Light and Photograph Wine Glasses

Backlighting

With a completely white background, it’s hard to define the edges of the glass. You can use negative fill to darken the edges.

How to Light and Photograph Wine Glasses

Use black foam core to define glass edges.

To accentuate the edges of the glass, use black foam core or anything dark to surround your subject.

no negative fill

Without negative fill

black foam core for wine glass

Negative fill helps to define glass edges.

To reverse the look, place the black foam core in front of the white background so that the light slips out from the sides.

How to Light and Photograph Wine Glasses

This creates a beautiful rim lighting effect.

How to Light and Photograph Wine Glasses

What do you think of this tutorial? Share with us your thoughts in the comments below.


Go to full article: Quick Tips for Photographing Glass

What are your thoughts on this article? Join the discussion on Facebook

PictureCorrect subscribers can also learn more today with our #1 bestseller: The Photography Tutorial eBook

The post Quick Tips for Photographing Glass appeared first on PictureCorrect.


from PictureCorrect http://bit.ly/2ILcM4l
via IFTTT