keskiviikko 31. heinäkuuta 2019

PictureCorrect.com: How to Become a Music Photographer

I don’t write enough, but I wanted to address something I may actually be qualified to speak on. Here’s the deal. Music photography is a long road, and it won’t pay well in the beginning—or for that matter maybe ever. So, start out with another means of income and shoot at night when you can.

Sleigh-Bells-Gov-Ball-NYC-50mm

Deciding If It’s Worth It

The market is different in different cities. You may make money in Portland shooting music photos and not be able to make a dollar in Denver because so many people do it. There are people who make money doing it in Austin and New York City. I can guarantee that. But, they have to be extremely good and know the right people. It starts with putting the time and getting press passes.

Snoop-Dogg-Viceland-SXSW-Austin-100mm-macro

Press Passes

First, you need to build a portfolio and get some work. You can email bands, venues, labels, booking agencies. or whoever, but a general rule of thumb is you are only going to get paid by companies or bands that have/make money, who are also looking to get bigger.

A lot of people want your job. It’s not uncommon to be at a show with other photographers and none of them are getting paid to be there. You want $200? Someone else wants to do it for a free drink ticket and a spot on the guest list.

If you’re trying to get a guest pass, try every angle. The headliner, the opener, the venue, the bands manager, or whoever you can get in contact with. Keep the email brief. If you can shoot for a publication, that will increase your chances greatly. A lot of publications don’t pay as well. If they’re barely hanging on without making layoffs and they have a lot of people wanting to shoot for free, they will choose people who want to shoot for free.
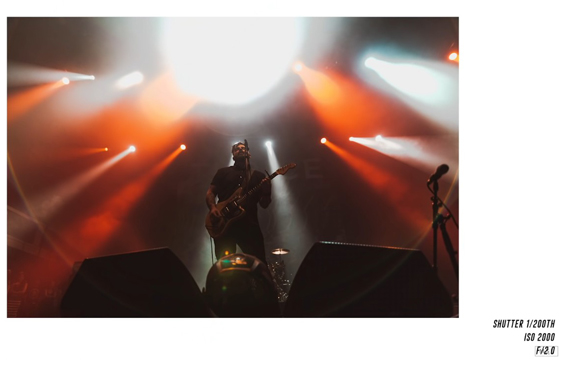
Kendrick-Lamar-Roseland-Ballroom-NYC-Canon-35mm

Getting the Shot

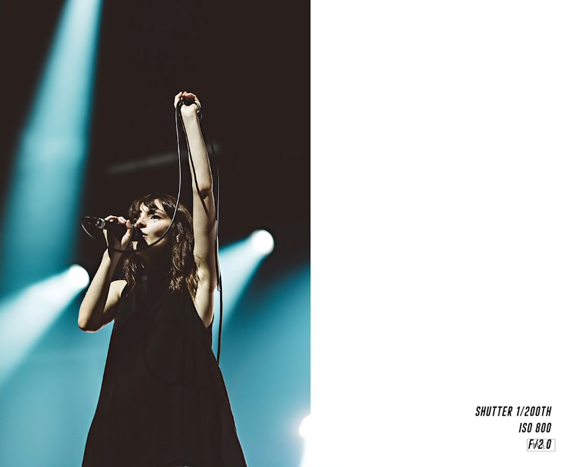
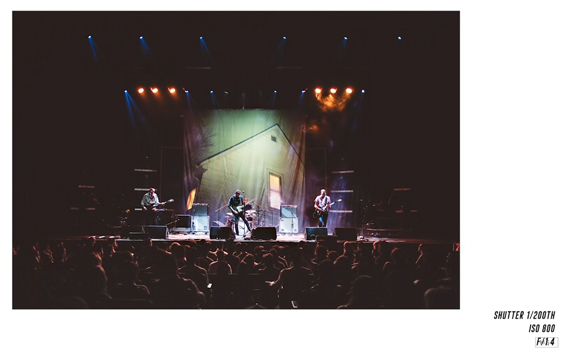
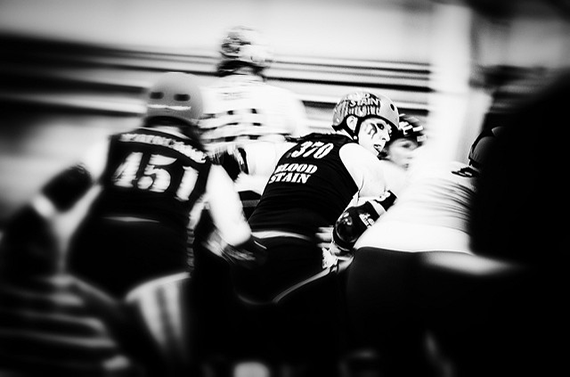
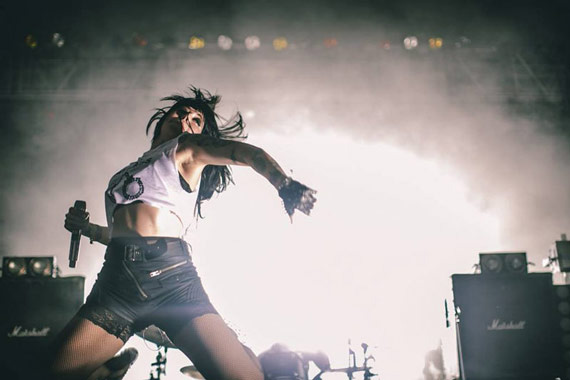
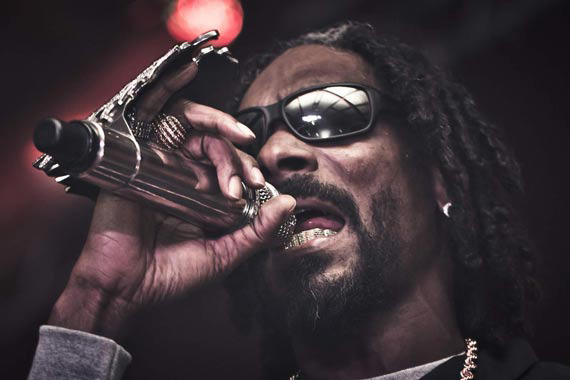
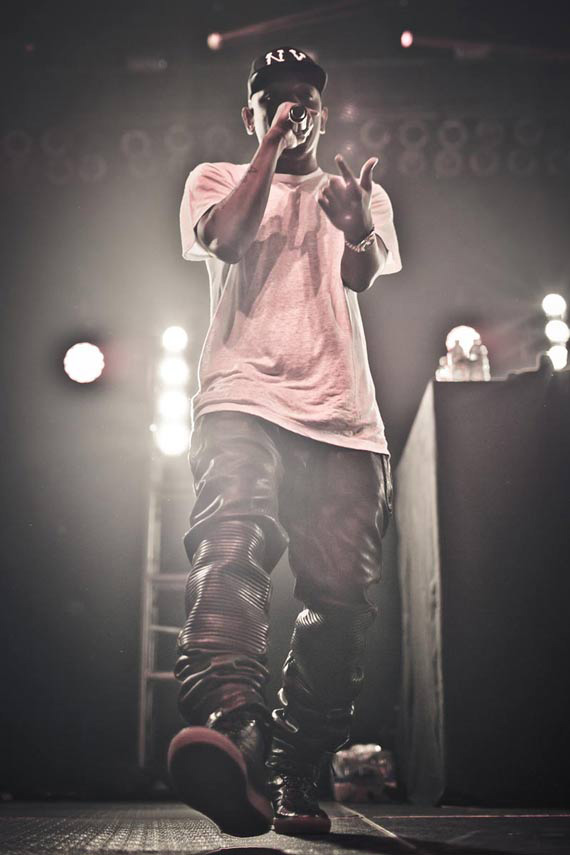
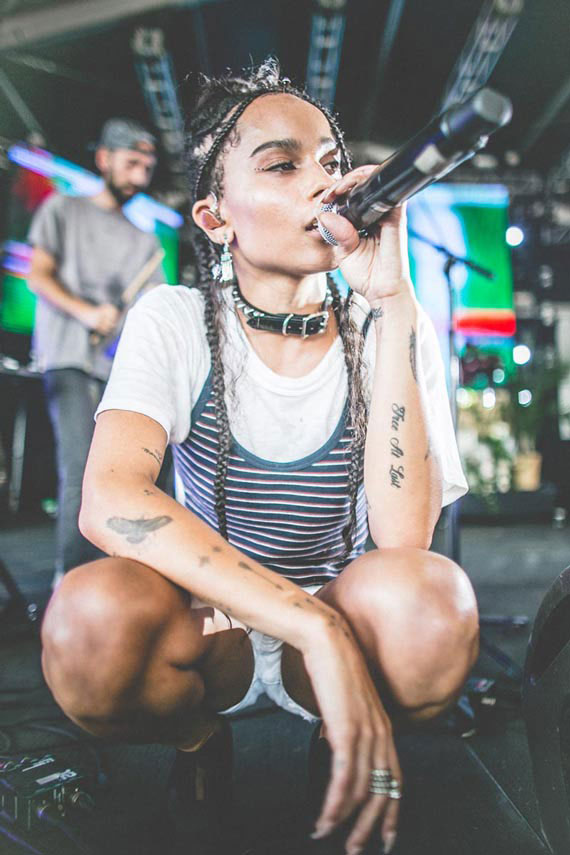
When it comes to live music I’ve noticed a theme among some of the great photographers: placement. If you get right up front you’re going to have a better chance at getting the truly great shot of the night.

You may have to get there early. Etiquette would dictate that if you can help it, don’t show up late and shove your way to the front. Get on stage if you can. Depending on the venue you may be able to hop up there unplanned once you’re confident enough. It’s not typically recommended unless it’s a smaller venue with no pit and you’re shooting for the band or venue themselves. You really need to use your judgment here, but it’s tough when you realize you could have missed the big shot.

The other part is to move around. You’re not going to have a good set if you sit in one spot the whole show and use the same focal length the entire time. Get a portrait or two, get the whole venue, get the fans, get the up-close shots, faces, and the movement. Not necessarily all in the same photo.

Portraits, Press, and Music Video

Shooting portraits/press photos is a big plus. Get a solid portfolio for live shots, but also press pics. Put all these in one place, whether it’s Instagram, Facebook, a website, or all three.

Zoe-Kravitz-Lolawolf--Full-Moon-Festival 24mm

People want to be able to look at one site and decide if they like your work. Make it easy on them. A lot of people want to shoot live shows and a lot of people start there so you’re less likely to get paid shooting concerts. The sooner you can dip into press pics and portraits the better. There is a very good chance you will need to diversify to survive in this industry. Do it early. I would also encourage you to dabble in video. Having different media will increase the chances a band will be able to afford you.

Broncho-Fun-Fun-Fun-Fest-Austin-24mm

At some point, hopefully, it keeps growing and growing and you get busy. Eventually, you’re hopefully too busy for the unpaid work. Then one day you realize, “Wow. I’m a music photographer.”

P.S. Shamelessly plug your work whenever possible or applicable.

About the Author
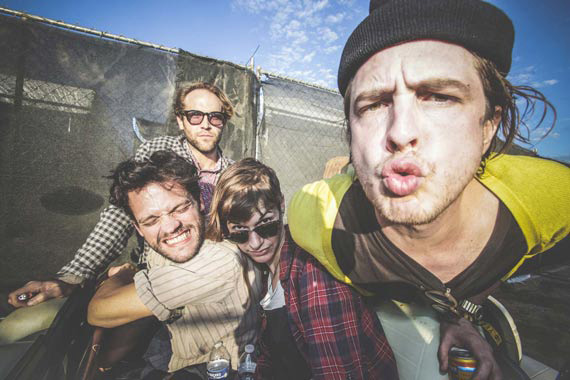
Dylan Johnson is a traveling music photographer and van vagabond. He mostly shoots dirty venues from New York City to Austin to Oklahoma to California.


Go to full article: How to Become a Music Photographer

What are your thoughts on this article? Join the discussion on Facebook

PictureCorrect subscribers can also learn more today with our #1 bestseller: The Photography Tutorial eBook

The post How to Become a Music Photographer appeared first on PictureCorrect.


from PictureCorrect https://ift.tt/2KgAjs9
via IFTTT

PictureCorrect.com: Interesting Photo of the Day: Light Painting with Fireflies

Fireflies are one of the finest examples of how nature can surprise you. The little insects with lights coming off of their backs are sure to leave anyone fascinated. To take this to the next level, photographer Tim Reaves managed to take a long exposure image of fireflies in the woods of the Great Smoky Mountains, and it truly looks magical:

fireflies long exposure

“Fireflies in Great Smoky Mountains National Park” by Tim Reaves (Via Reddit. Click image to see full size.)

The image is a stacked composite of 13 images taken at the same location with a Canon 800D and 50mm f/1.8 lens. The base was two images taken at f/1.8, ISO 400, and a 15-second exposure. Reaves then took the firefly images at f/1.8, ISO 1600, and 15 seconds and stacked and masked them to bring out the sharpest bits in each of them.

What’s interesting about this image is the length of the trails that the fireflies have left behind. Typical fireflies light up for a second or two and don’t leave such trails when photographed. However, since these fireflies were of a different kind, Reaves definitely got lucky with the shot.

“This is a particular kind of firefly (blue ghost) that stays lit for up to 30 seconds. I don’t think you’re going to get this exact kind of look without shooting blue ghosts or something similar.”


Go to full article: Interesting Photo of the Day: Light Painting with Fireflies

What are your thoughts on this article? Join the discussion on Facebook

PictureCorrect subscribers can also learn more today with our #1 bestseller: The Photography Tutorial eBook

The post Interesting Photo of the Day: Light Painting with Fireflies appeared first on PictureCorrect.


from PictureCorrect https://ift.tt/2ytI1tC
via IFTTT

PictureCorrect.com: Low Light Concert Photography Tips

Live music pumps energy into you. As a photographer, if you’re able to capture that energy level and sense of excitement, then you’ll do justice to the performers. But concert photography is no walk in the park. The low lighting and other factors can make it really challenging to take any decent images. To help you get started with concert photography, the team from Mango Street has put together this informative video:

Getting to the Gig

You will require a photo pass in order to be able to take your camera with you to a concert. To get a pass, try to become a contributor to an online music site or a news publication.


“Just email the publication and ask them to become a contributing photographer. Make sure to include a link to your portfolio.”

If you’re not a contributor, reach out to the band or their management via email. The response rate may vary but do offer them some free photos that they can use later on social media.

“Smaller and upcoming bands are usually grateful to have photos of the set so it’s a win-win kind of situation.”

However, if you’re visiting smaller venues, they might just allow anyone to bring their camera along. You can use this as a platform to practice your concert photography.

Shooting the Gig

“Concert photography is one of those instances where your gear can make or break your photos.”

We don’t say this very often but it’s true to some extent for concert photography. The action that happens amidst the ever-changing lighting conditions is a challenge. Since concerts have low available light, have a camera with you that has good low light and high ISO performance. Also, use lenses with wide apertures, as they let in more light.

wide aperture lenses for concert photography

As the performers will be moving most of the time, decide on the shutter speed to avoid motion blur. Start at around 1/250 second and adjust as required.

Also, have an understanding of your camera’s ISO performance beforehand. Knowing the upper limit at which your camera can deliver workable results will allow you to bump up the ISO without worrying much.

Since the subject will be moving around a lot, have your camera to continuously track them by using the continuous autofocus.

Varied Shots

“For shows with a photo pit, you typically get to shoot the first three songs of the band while in the pit. Use the time to shoot some wide-angle shots while close to the action which can really add some feeling and emotion to the photos.”

When in the photo pit, make sure that you move around and shoot all the members of the band from varied angles. Acknowledge the presence of other photographers and be courteous to them. Also, since the drummer is the hardest member of the band to photograph, make use of the time in the photo pit to get a good angle.

expression and mood in concert photography

After you’re out of the photo pit, capture the environment around the concert venue. Shoot from the back and photograph the stage and the crowd. With your images, try to convey the mood around the stage, and make the viewers know how it felt being there.

concert venue photograph with crowd

Editing Concert Photography

When editing your concert images, you might find it difficult to balance the colors due to the stage lights. Instead of trying too hard, go with the flow and embrace the colors that you captured on stage. This will also help you portray how it really felt being there.

colorful lighting in concert stage

“You can also use more extreme white balance adjustments if you do want to change the vibe.”

If you’re looking forward to getting started with concert photography, these tips will help you out. And if you have any other tips for concert photos, we’d love to hear from you!


Go to full article: Low Light Concert Photography Tips

What are your thoughts on this article? Join the discussion on Facebook

PictureCorrect subscribers can also learn more today with our #1 bestseller: The Photography Tutorial eBook

The post Low Light Concert Photography Tips appeared first on PictureCorrect.


from PictureCorrect https://ift.tt/2Kf6vfr
via IFTTT

tiistai 30. heinäkuuta 2019

PictureCorrect.com: How to Critique Your Own Photos

It has been said that the most difficult thing to do is to judge your creative work objectively. Be honest. Can you tell when your work seems to be missing something? More importantly, do you know what it is that’s missing? You can only improve your photos if you set a high photo standard to compare yourself against.

how to take great photos

Photo by Miwok; ISO 200, f/6.3, 1/125-second exposure.

When Time Life selected 250 photos for the Great Photographers volume of their Time Life Photography series, they chose 68 photographers out of thousands. Those editors defined “great” photographers based on three main factors.

3 Characteristics of a Great Photographer

The first factor was intent. What did the photographer have in mind when they took the photo and did they achieve it? For example, did the photographer successfully make the viewer feel empathy when taking pictures of survivors of a major natural disaster?

The second factor was technical skill. Did the photographer show a thorough understanding of composition, light, exposure, and design?

The final factor was consistency. Did the photographer have just one or two great shots, or did they produce success time and time again? One great photo—or even several—does not a great photographer make.

how to take emotional photos

Photo by Angela Larose.

Intent, skill, and consistency are the same three factors that will determine your own greatness. Study the masters like Ansel Adams, Edward Weston, Imogene Cunningham, and Diana Arbus, and you will see these three factors again and again. But the question remains, how do you get from where you are now to that level?

Have you ever heard the phrase “being your own worse critic”? Most people tend to think of that as a negative phrase when in reality, nothing could be further from the truth. To learn and grow in photography, you have to be strong enough to admit what does and does not work in your photos.

To that end, here is a strength and weakness checklist for you to use when reviewing your own photographs. It’s not complicated. Just look at your photo and mark whether it is strong or weak. There is no middle gray; your image either succeeds or it does not. Once you know your weaknesses you can work on improving in those areas.

Photo Critique Checklist

1. Intent. Could any viewer look at this photo and know what you had in mind?

2. Emotional Impact. Can this photo be described with words of emotion, like peace, calmness, anger, rage, joy, or sadness? Does your photo make an emotional statement?

how to take awesome photos

Photo by Olli Henze; ISO 100, f/5, 1/100-second exposure.

3. Center of interest. When composing your images do you successfully direct your viewer’s attention to a specific point? Would the viewer know where your center of interest is?

4. Illusion of depth. Have you used framing, balance, contrast, and other art concepts to make your image jump off the page, or does it just sit there?

5. Subject/background contrast. Shooting a portrait of someone with black hair against a black background in not usually a good idea. Does your subject stand out?

6. Personal style. Ansel Adams was known for extreme illusion of depth and all planes in very sharp focus. Jim Zuckerman is known for vibrant colors and simplified subjects within their natural setting. Henri Cartier-Bresson once said, “There is nothing in this world that does not have a decisive moment.” How will others describe your unique approach?

7. Selective focus. Do you choose where the viewer will look? If the background is just as sharp as the foreground, things can become very visually confusing.

8. Composition. Do you consistently use the rule of thirds, formal or informal balance, and leading lines? Take control of where the viewer’s eyes are most likely to fall in your image.

9. Exposure. Do you always shoot at whatever the camera says, or do you take control of the light? Can you see details in your shadows? Have you ever used a reflector or bounced a flash as opposed to straight on?

10. Storytelling. Is there a feeling of movement within your image, or does it just sit there? Does it leave anything to the imagination, or is it just a statement of what is? If your image doesn’t tell a story, there is no reason to give it a second glance. Great photos make you want to look again and again.

how to critique photos

Photo by Tim Donnelly; f/20, 1.3-second exposure.

Use this checklist to see where you are at the moment and where your work is going in the future. Having a photographic standard is like having a roadmap. It is possible to get from here to there without one but it’s a whole lot easier with one. Knowing what areas you need to improve is the first step in becoming a better photographer.

About the Author:
Award winning writer/photographer Tedric Garrison has 30 years experience in photography (better-photo-tips.blogspot.com). As a graphic art major, he has a unique perspective. His photo ebook, Your Creative Edge, proves creativity can be taught. Today, he shares his wealth of knowledge with the world through his website.


Go to full article: How to Critique Your Own Photos

What are your thoughts on this article? Join the discussion on Facebook

PictureCorrect subscribers can also learn more today with our #1 bestseller: The Photography Tutorial eBook

The post How to Critique Your Own Photos appeared first on PictureCorrect.


from PictureCorrect https://ift.tt/2OPWQRS
via IFTTT

Vortex by UmbertoFistarol (500px.com/UmbertoFistarol)


Startrail over liguria mountains, italy via 500px https://ift.tt/2OsA0jf

Moonrise by HCY (500px.com/HCY)


When the moon rise. via 500px https://ift.tt/1DDNHeu

Star Trail by AmanChotani (500px.com/AmanChotani)


Star Trail - Manali, Solang Valley, Himachal Pradesh via 500px https://ift.tt/1DJCDBU

Star Trail by AmanChotani (500px.com/AmanChotani)


Star Trail- Manali, Himachal Aman Chotani Photography Copyright © All Rights Reserved via 500px https://ift.tt/1d8SltI

PictureCorrect.com: Advantages of a Vantage Point for Street Photography

If you are uncomfortable putting a camera in front of a stranger’s face yet still want candid street photography, look for a good vantage point up over the action and shoot down. You will be amazed by the sense of freedom and the results.

street photography

“Corredor Madero” captured by iivangm.

The Setup

Down in the streets a light-weight, fast camera is essential, with image quality sacrificed in order to have more chance of capturing the moment at all. With a good vantage point it is possible to work with a bigger camera, a longer lens and perhaps a tripod. Since you will not be moving much the size and weight of your camera will not matter. Nor are you restricted by other items, so feel free to take along snacks and drinks sufficient for your intended stay aloft.

Your decision whether to use a tripod will depend upon the distance over which you are shooting, the available light (and your camera’s ability to deal with low light) and also the style of shots you are hoping to capture. In most cases, you should be able to rest on some form of support (the same support that stops you falling from your perch), and that will often be a good compromise between mobility and quality.

empty road photo

Photo by Corey Templeton; ISO 800, f/6.3, 1/80 exposure.

Auto focus is an option, though if you are working a particular spot, you may find it safer to keep a zone in manual focus—particularly if the light is poor or the contrast is bad for other reasons.

When Mobility is Less Important

When action is sparse it pays to be mobile and to be free to move around to more productive areas. However, if your vantage point overlooks a busy spot and you choose a suitable time of day, then there should be no shortage of subject matter. If it also has many aspects then all the better as the action may well move around you.

When the Action is Just Too Rough

Festival photography can be exciting and very rewarding. However, large crowds and lots of action can work against you. There have been some great shots from the Holi Festival in India and Songkran (water-splashing) in Thailand. At ground level, photographers can only take a risk for their art.

active street photography

“The Holi Festival” captured by onthego tours.

Clever gear is available, but nothing can guarantee protection for your expensive camera and lenses against all contingencies. You might have good insurance but, still, what of the rest of your trip? The other option is to get up above the action where damage is much less likely and where you would probably at least get a warning of imminent saturation—and a chance to cover up or move out of the way.

Effective for Timelapse Photography

A bit of height creates an angle between your subject and the ground-as-background. This adds an essential dimension when capturing movement in timelapse photography and really brings the resulting slideshow to life.

Vantage Points in Practice

photographing-from-above

Photo captured by Ian Ford.

The Clock Tower in Jodhpur (Rajasthan, India) has a first-floor platform which allows a 360 degree view down to the market area below. The market begins to get busy at a civilized hour, since it then stays open late at night (when other photographic opportunities arise).

In Old Delhi’s Spice Market it is possible to climb stairs up to the rooftop and capture images of the levels below. Morning time is best, before the residents head off to their respective shops or other duties.

spice-market-high-view

Photo captured by Ian Ford.

Wherever you go, look around for similar platforms. Access may not be for the general public but a polite request goes a long way. A flat roof is sufficient but, above all, do be careful. This applies especially in places not designed for regular access, where the lack of barriers and general clutter can make for a dangerous environment.

The Disadvantages

Shooting down from a vantage does have some drawbacks:

  • shooting down at people means that sometimes headwear or the person’s posture hides the face
  • shooting from a distance is also less satisfying if faces/personality are important to you. If you are looking for a shallow depth of field, that calls for a lot of precision with regard to focus
  • there are times when it is helpful to be able to engage your subject, and while being above the action allows you avoid the discomfort of being turned down by your subject, it also precludes engagement with your subject
  • if you are down on the street, you can share a shot with your subject—take the photo and then show the result on the screen on the camera—which can lead to additional shots
high-vantage-point-photography-india

Photo captured by Ian Ford.

There is no one right way to do street photography, and a different approach will simply lead to different results. Try shooting down from a vantage point and see if you like what you get. It can then be a another weapon in your arsenal for those days when other techniques are not working.

About the Author:
Ian Ford is Operations Manager for Photo Tours Abroad. He took the images above whilst representing the company at the recent Jodhpur Discovery photography workshop with guest artist Nick Rains.


Go to full article: Advantages of a Vantage Point for Street Photography

What are your thoughts on this article? Join the discussion on Facebook

PictureCorrect subscribers can also learn more today with our #1 bestseller: The Photography Tutorial eBook

The post Advantages of a Vantage Point for Street Photography appeared first on PictureCorrect.


from PictureCorrect https://ift.tt/2iVttOs
via IFTTT

maanantai 29. heinäkuuta 2019

Lion Rock's Startrail by slaedo (500px.com/slaedo)


Lion Rock's Startrail via 500px https://ift.tt/2OrLNhZ

PictureCorrect.com: Depth of Field: A Major Player in Creative Control

When you hear the phrase Depth of Field (also called DOF) you may wonder why you should care as long as your pictures are in focus. Well since DOF is generally referred to as the range of a pictures over all sharpness; and most people are instinctively drawn to the sharpest part of the picture first, I would say that it is indeed a major player in the game of creative control.

depth of field

Photo by Julien Sanine

Most articles or books you will read on this subject immediately jump into talking about f-stops. These are numbers like f-1.4 to say f-22 that represent how much light the aperture is letting into the camera. Although I will explain that more in detail in a few minutes, it is not where I want to start.

3 basic things that affect DOF:

  1. the lens aperture (f-stops)
  2. the lens focal length (the size like: 35mm vs. 200mm)
  3. the subject difference (how far it is from the camera)

Keep in mind that most digital cameras do not have f-stops as per say. In fact if you have a straight point and shoot camera with a set lens, it may feel like you have no control at all. Although it does take a little more effort there are still things you can do to enhance your Depth of Field experience.

Both the point and shoot and even many of the more advance digital cameras are based on a false premise. They assume that all people want all their pictures, all the way in focus, all the time. “Now wait a minute”, you may be saying to yourself. “Of course I want my pictures in focus, don’t I?”

When we say in focus, we are not talking about the results of a 110 year old lady who can not hold the camera steady. Depending on where you focus in any given picture; so much in front of the subject and so much behind the subject will also be in focus. Generally, more will be in focus behind the subject than in front of it. Keep this in mind when you are choosing your focus point; you may want to focus about 1/3 of the way into your scenic shot as opposed to automatically focusing ½ the way in to the scene.

when to use depth of field technique in photography

Photo by Cloudtail the Snow Leopard; ISO 400, f/5.0, 1/100-second exposure.

There are several really good reasons for wanting to choose a narrow DOF verses a wide DOF. Remember Wide DOF means everything in focus all the time. For those who are not quote “into” photography then this mode will indeed satisfy their needs 90% of the time. But for the rest of us; here are some examples of when you may NOT want to shoot that way.

A) Portraits: focus on the person and blur the background. This is helpful when there are distracting elements behind the subject.

B) At the zoo: focus on only one animal. The idea here is to obscure the fact that you actually took the picture in the zoo. You want to make it look like you took this animal in its own natural environment.

C) Flower shots: focus on one flower or better yet even just part of a flower and let the others around it become like a painted background.

using depth of field technique in photos

Photo by Thangaraj Kumaravel; ISO 200, f/8.0, 1/640-second exposure.

D) Sporting Events: focus in on the one who crossed the line first, or jumped the highest. Separate the leader from the pack by using creative DOF.

Back to the basic problem, how exactly do we control Depth of Field? Shooting an object that is 10 feet from the camera will have a much smaller DOF range than shooting an object 100 feet away. So, move in closer!!

If your camera has a zoom lens ( say 35mm -200mm) the smaller the size, the wider depth of field. Most set lens are in the range of 28mm – 38mm, so there is less to adjust, less to think about, and unfortunately less control. However, even without getting into the f-stops; if you photograph someone with using the 35mm end of the scale a lot will be in focus, but if you do the same using the 200mm length of your lens much less of the total image will in sharp focus.

If you are into doing close-up photography (flowers, insects, etc) the close-focus or macro mode of your camera will already give you a fairly narrow amount of depth of field. But you can push that even further by considering the use of filters. Most cameras, will now accept filters. But even if yours does not (set lens again); you can actually hold the filter in place and shoot. Close up filters allow you to shoot much closer than the lens will by itself. They also usually narrow the depth of field and require a little more light.

learn about depth of field in photography

Photo by Pat Kight; ISO 1600, f/4.0, 1/30-second exposure.

Many of today’s cameras have more than one auto mode. In a fully automatic camera you have not gained much if any control, but if you have the option for Aperture priority or Shutter Priority you are back in the driver’s seat. Basically put: Aperture Priority means that you control the aperture (or f-stop) and the camera picks the right shutter speed to get a proper exposure. Conversely, Shutter Priority does the exact opposite, you control the speed and it will pick the correct aperture for the given light conditions.

Now we will mention the world of f-stops. The words aperture and f-stop are referring to the same thing. I have absolutely no idea why we don’t call them A-stops, but just so I don’t confuse anybody, I will call them f-stops. The f-stop controls how much light enters the camera. Many books and magazine confuse people by referring to how big the opening is and how small the depth of field is. In my world, I like to keep things as simple as possible.

A small number (like f-1.4) means only a small amount will be in sharp focus. A large number (like f-22) means a large amount will be in sharp focus. To me, that is a whole lot easier to remember than the way many people explain it. Small number = small amount in focus, and large number = large amount.

But wait, you’re saying to yourself, “I don’t even have an aperture mode.” Maybe you do, and don’t realize it. If you’re camera has little pictures or icons on it like, many cameras do, you may have more control than you realized. The picture of the small head means portrait mode. (IE the subject will be in sharp focus but the background will not) The picture of the little mountain means landscape mode. (IE most of the picture will be in sharp focus from front to back.)

how to use depth of field in photos

Photo by Merlijn Hoek; ISO 160, f/2.8, 1/80-second exposure.

Remembering that most people are attracted to the thing that is in the sharpest focus, it becomes very hard (visually) to be attracted if the entire picture is in complete focus. There is nothing specific to draw the viewers’ attention. By using the creative possibilities that depth of field offers; no matter what kind of camera you have, your images will be much more powerful and interesting.

About the Author:
Award winning writer / photographer Tedric Garrison has 30 years experience in photography (better-photo-tips.blogspot.com). As a Graphic Art Major, he has a unique perspective. His photo eBook “Your Creative Edge” proves creativity can be taught. Today, he shares his wealth of knowledge with the world through his website.


Go to full article: Depth of Field: A Major Player in Creative Control

What are your thoughts on this article? Join the discussion on Facebook

PictureCorrect subscribers can also learn more today with our #1 bestseller: The Photography Tutorial eBook

The post Depth of Field: A Major Player in Creative Control appeared first on PictureCorrect.


from PictureCorrect https://ift.tt/2BOZTSk
via IFTTT