sunnuntai 31. toukokuuta 2020

PictureCorrect.com: Wild Bird Photography Tips

Capturing great wild bird photos can be challenging at times, but with good preparation, the right equipment, and a few simple tips, it can also be quite fun and rewarding. What follows are our top tips for capturing better stock wild bird photos.

bird in foliage

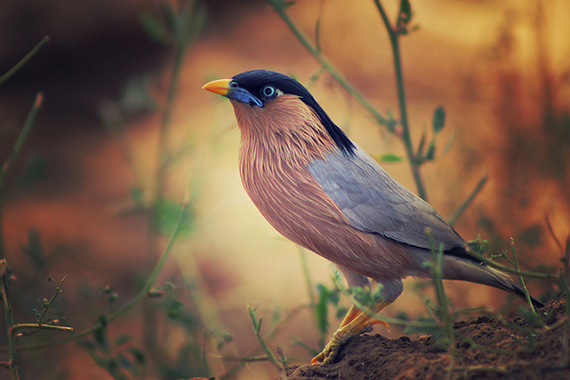
photo by Vikramdeep Sidhu

Know Your Venue

If you’re hoping to capture some great wild bird pictures, the first thing you need to do is get to know your venue. First up, do some research and find out what species you’re likely to spot. From there you can work out when and where you’re likely to find them. Once you figure out where you’re likely to find them, find a map of that area and convert it to a sketch map so you can mark your own details on it.

When you first arrive, use your sketch map to mark out the overhead path of the sun, so you can anticipate lighting in different locations, mark different vegetation/habitat types, and where you can find good cover for yourself.

Then, as you spot different species, mark the locations (and times) on your sketch map. Soon, you will have a very handy reference guide for future shoots. When you return, you’ll know when and where you need to be to capture the bird photographs you seek.

The best bird photographers often tell me they rarely get their best shots on the first visit… the best wild bird pictures usually happen once they know the location as well as their own backyard.

Know Your Subject

This should go without saying for any sort of wildlife photography, but it’s particularly important for capturing great wild bird photographs. Birds are incredibly fast and often seem totally unpredictable, so the better you get to know them, the better your chances are of anticipating their behavior and getting the shot you want.

For starters, invest in a good bird guide and learn everything you can about the species you want to photograph. Getting to know their feeding habits, breeding, nesting, and migratory behaviors will help you make sure you are in the right place at the right time.

Knowledge of their specific behavior, from guides and observation, will help you anticipate what they’re going to do once you’ve found them. The more time you spend observing the birds, the better you’ll be able to predict their behavior. It will also give them more time to get used to you.

puffin photography

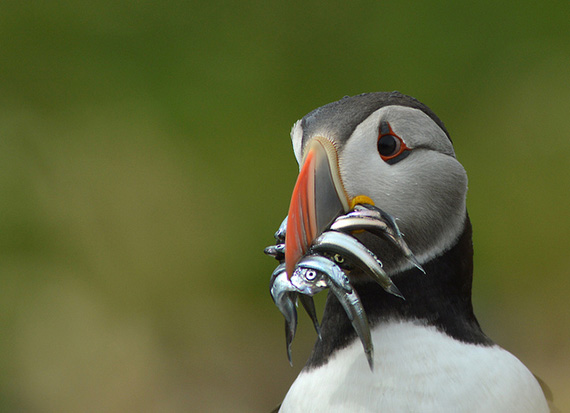
photo by Jacob Spinks

There are some bird behaviors that are fairly universal though, so you can start with these.

Most birds will take off and land into the wind. So if there’s a prevailing wind direction at your venue, be aware of it and position yourself facing towards the bird’s likely location with the sun behind you (ie. so your photos will be with the bird flying towards you and lit from the front).

Most birds ‘tense’ their feathers just before they take off. When they’re relaxed (and going nowhere) they look more ‘fluffy’. When they’re about to take flight, they almost seem to shrink for a second or two before launching themselves. If you watch for this, it can be a great trigger to start shooting.

pelican in flight

photo by C. P. Ewing

Buy the Longest, Fastest Lens You Can Afford

This tip comes with a caveat. You don’t need an exorbitantly expensive lens to get marketable bird photos, but any extra length you can afford will be helpful.

Some of the best bird photographers I know use nothing more than a standard 100mm–400mm telephoto and get incredible results. In fact, most will tell you it’s more about the preparation, research, good positioning, and patient stalking techniques, as opposed to the lens.

In a perfect world, all bird photographers would have a 600mm f/4 auto focus lens, but realistically, anything over 300mm is probably good enough if you hone your other birding skills.

bird in snow

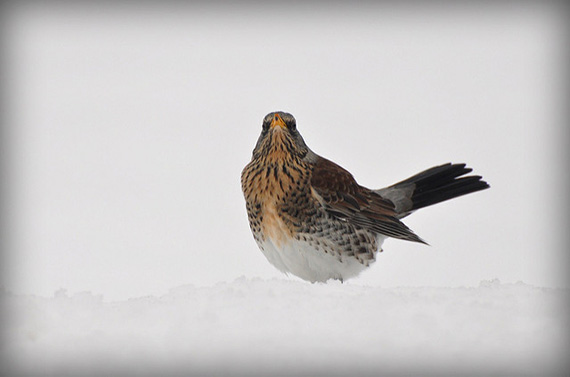
photo by Henk de Boer

You can, of course, use a teleconverter: a 1.4 teleconverter on a 400mm lens will put you in the 600mm range, but be aware you will lose a couple of f-stops in the process. In open, well-lit settings, that can be OK, but in any sort of vegetation, it’s probably going to make life difficult.

A final option a lot of dedicated birders use is called “digiscoping”. This entails attaching their camera to their spotting scope. A spotting scope with 25x magnification would be equivalent to a 1500mm lens. Even when you buy the adapter as well, it can be a very affordable way of getting close to your subjects.

Adjust Camera Settings

In most cases, you’ll want to use the fastest possible settings to deal with the speed and mobility of your subjects. When the birds are flying, you’ll usually need at least a 1/500 second shutter speed to keep it crisp. Even when they’re perched, many birds fidget and rarely keep perfectly still.

There will be times when you want to slow it down and convey the motion, and this can (should) be done deliberately. Just remember, there’s a difference between a photo deliberately captured to convey movement and one that’s just not sharp. If you’re going for movement, my suggestion would be to use panning to make sure there’s no question in the viewer’s mind that it was deliberate.

Digital ISO settings allow you to speed things up considerably, just be aware of how fast you can go before the picture quality suffers.

Always remember to constantly check your exposures. White, bright skies will trick your camera’s auto-exposure. So, for in flight shots, you’ll generally need to dial in 1–2 stops or more for exposure compensation.

Maximize Other Equipment

Usually a tripod would be considered essential equipment when using a long lens, but in bird photography, you will often find yourself in situations where setting up a full-sized tripod might be difficult. By all means use one whenever you can, especially if you’re working from a hide or semi-permanent position, but if you’re on the move, I always find a monopod more useful. In wooded areas there’s usually at least a tree to brace yourself against.

A lot of bird photographers will tell you their car makes a great hide and tripod all in one. Many birds are quite used to cars by now, so if you arrive on site and sit quietly for a few minutes, many birds will soon forget the car is there. Keep a small bean bag handy for a camera rest, and you’re in business.

Always carry extra battery power and extra storage. In the field, plastic bags are always helpful for protecting your gear from the elements (i.e. rain, fog, dust, etc.). If you’re really roughing it, a lot of pros suggest you don’t even change lenses. If you really need a choice of lens, carry it already attached to an extra camera body, to avoid any chance of getting dirt or water inside.

Be Deliberate in Your Composition

There are a few basic rules that apply to most wildlife photography, and they are particularly relevant to bird photographers as well.
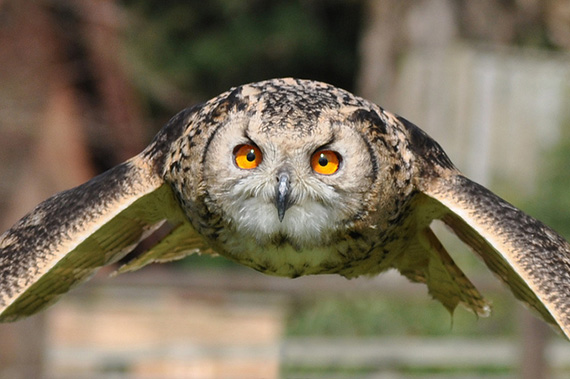
owl in flight

photo by dingopup

First and foremost, focus on the eyes.

If the eyes are sharp, the rest doesn’t matter. If the eyes aren’t sharp, the rest doesn’t matter! No doubt there will be exceptions, but if you keep that firmly in mind when you’re shooting and editing, you will end up with a much stronger collection.

Another “rule” that applies to most wildlife photography is: shoot from the front. With few exceptions, there’s rarely much call for the rear end view of any creature leaving the scene.

The approaching view is much more natural, therefore making it easier for most viewers to connect with the photo. With birds, the approaching view is even more important. Birds usually present to their mates ‘head on’, which is when they display their more brilliant plumage. While the rear view is more likely to be plain or even camouflaged.

Finally, as much as possible, shoot from eye height.

eye level bird photography

photo by Linda Stanley

For ground or shore birds, this often means getting down on your belly. For high nesting birds, it means getting as high as you can yourself. Obviously you can’t always get to their level, but the more you try, the better your results. Telephoto lenses do help give the impression you’re more equal, but try not to rely on that alone.

If you’re photographing birds in flight, you need to anticipate and pan. Be extra careful not to crop too tightly. It is much better to trim things later than to find out you repeatedly clipped off a tail or a wing. And when possible, try to capture the birds flying into the frame, rather than out of it. A seemingly obvious part of flight is the wings. Always watch the wing position of the species you’re photographing and refer to your bird guide. Different species will present very distinct shapes. The ability to capture those behaviors and traits that make a creature unique is what separates the great wildlife photographers from the good ones.

Lastly, make sure you get good clear detail shots as well, so you can be totally confident in your identification of the bird. That means close up shots of the head, beak, breast, tail shape, and back. If you are planning to sell the images, accurate identification is essential. Don’t ever rely on common-names; buyers will usually want scientific names to be completely sure (i.e., If you have photos of a common Blue Jay, know that the scientific name is Cyanocitta cristata before you try to sell them).

Be Patient and Prepared to Practice

Patience is a virtue, especially in bird photography. When you arrive on site, always give the local inhabitants time to get used to you being there; you will get better images. Don’t try to force the issue by going too close too fast. At best they’ll fly away, and at worst, they’ll look visibly stressed which never makes a good photo.

Instead, after waiting and watching, work out what the comfort zone is for the species and stay just outside that. Most birds are instinctively afraid of people, but if you sit and wait quietly and patiently, you’ll find most are quite inquisitive, and many will actually approach you if you give them the opportunity.

Beyond that, shoot often and shoot heaps. Don’t expect your best shots to come on your first visit to an area. Instead, treat your first visit as a scouting trip. Work out your lines of light, wind, where your cover is, and identify as many species as you can, then you can research more fully before your next outing.

If you’re just starting out in bird photography, you might even find it useful to set up a feeder at your home, so you can practice and observe the birds in a relatively closed environment. Remember, the more time you spend getting to know your subjects, the better your photos are going to be.

Finally, spend plenty of time studying other people’s wild bird pictures. Dissect each shot and think about how it was created in terms of equipment, settings, timing, positioning, and the photographer’s understanding of the bird and its behavior.

A great wild bird picture doesn’t happen by accident. In fact, quite often, you’ll find the best bird images aren’t shot by bird photographers but by birders with photography skills. Something to keep in mind!

About the Author:
Matt Brading writes for GlobalEye Images, a site that lists wild bird pictures and stock bird photos. They represent some exceptional bird photographer specialists in their field.


Go to full article: Wild Bird Photography Tips

What are your thoughts on this article? Join the discussion on Facebook

PictureCorrect subscribers can also learn more today with our #1 bestseller: The Photography Tutorial eBook

The post Wild Bird Photography Tips appeared first on PictureCorrect.


from PictureCorrect https://ift.tt/2KSFJYM
via IFTTT

lauantai 30. toukokuuta 2020

PictureCorrect.com: Photography Lighting Techniques

Photography is about light, and in fact, it can be defined as recording the light. Lighting is also one of the hardest things to get right in a photograph. To shoot images that stand out from the crowd, understanding the light source is critical.

photography lighting

photo by Simon R. Rowell

Photography lighting plays a major role in capturing colors as well as in revealing form and texture in an image. Examining daylight is a great way to understand certain characteristics of light: the hardness or the softness of the source, direction of light, and visible colors.

Hardness or softness of the light: Hard light (direct light) produces vivid colors that stand out, and it creates harsh shadows. Soft light (diffused light) produces more pastel tones and softens details.

Direction of light: Moving the light source around a subject or object either adds or takes away detail.

Color: Photographs tend to lead most viewers toward certain feelings. For example, softer colors often create a calmer mood. The strength and the angle of the light source determines if you will have vivid or softer colors.

Below are five tips that explore the light source and its characteristics.

1. Understand color temperature

Color temperature is the actual colors that the human eye can see. Color temperature is a characteristic of visible light. It is measured in degrees Kelvin (K). Yellow to red are called warm colors and have lower temperatures (i.e., 2,700-3,000 K). Cool colors like blue and white have higher temperatures.

2. Examine natural light

The sun is the source of all daylight. Outdoor lighting offers all kinds of light, coming from various directions. Shooting during different times of the day will allow you to capture different tones, colors, and light effects.

  • Don’t miss the early morning hours. That’s the best time of the day to capture great tones.
  • The sun brings out blue hues in the morning hours and creates a crisp effect.
  • On a cloudy day you will find softer colors and diffused light (soft light). When light is distributed evenly you get more natural colors. Neutral colors can take away some of the definition or harsh details.
  • Noon creates harsh light (hard light) and produces images with shadows.
  • Afternoon offers warmer tones with reds and yellows.
  • Around sunrise or sunset, you will often get flattering light.
  • Sunsets put out oranges or pink tones.

3. Be aware of the hardness or softness of the light source

The brightest time of the day produces a hard light source. For example, images taken around noon have strong colors that stand out. This type of light is used for contrast, as it creates more shadow.

An overcast day reflects less light and produces diffused soft light. It will spread the light evenly and does not cast strong shadows.

4. Be aware of the direction of the light

When you shoot the same subject from different angles, you either add or remove shadows on both the subject and the object. This is also true if you move your light source around your subject. Of course, it is easier to move the light source in a studio environment, but keep in mind that if you shoot at different times of the day, you will get the same effect.

ways of photography lighting

Photo by Vandan Desai; ISO 200, f/8.0, 1/30-second exposure.

5. Use flash to create interesting effects

Flash can be a great addition in any kind of light when you need to fill in shadows.

Using flash outdoors is an effective way of recording actual colors and more of the detail in a scene. For example, if you have a moving subject in front of a colorful sunset, you can set your flash mode to slow sync and get all the details.

Photography is an art that requires good technique and practice. Lighting is a major part of photography, and when you use the natural light to your advantage you definitely add to your photography.

About the Author:
Article written by Zoe Shaw from digitalphotoworks. She is a computer programmer and graphic designer.


Go to full article: Photography Lighting Techniques

What are your thoughts on this article? Join the discussion on Facebook

PictureCorrect subscribers can also learn more today with our #1 bestseller: The Photography Tutorial eBook

The post Photography Lighting Techniques appeared first on PictureCorrect.


from PictureCorrect https://ift.tt/2KdUWXT
via IFTTT

PictureCorrect.com: Interesting Photo of the Day: Ala-Kul Kyrgyzstan Landscape

If you frequently find yourself facing difficult terrain to get a great landscape photo, don’t you feel super content when all your effort pays off and you’re presented with an astounding view? Well, photographer Albert Dros’ s strenuous hike was sure worth it:

Ala-Kul Lake Kyrgyzstan

“A Beautiful Moment at Ala-Kul Lake, Kyrgyzstan” by Albert Dros (Via Reddit. Click image to see full size.)

The image is of the Ala-Kul lake in Kyrgyzstan. As Dros had to hike about six hours up a super steep mountain to get to this location at 3600 meters. And the journey was made even more difficult when he fell victim to altitude sickness. However, the lighting on the mountain tops, the reflection off the water, rich color, and Dros’s interesting composition with the flowers in the foreground make this image truly outstanding.


Go to full article: Interesting Photo of the Day: Ala-Kul Kyrgyzstan Landscape

What are your thoughts on this article? Join the discussion on Facebook

PictureCorrect subscribers can also learn more today with our #1 bestseller: The Photography Tutorial eBook

The post Interesting Photo of the Day: Ala-Kul Kyrgyzstan Landscape appeared first on PictureCorrect.


from PictureCorrect https://ift.tt/2Mt5lAQ
via IFTTT

PictureCorrect.com: Food Levitation Photography Tutorial

Most of the food photographs that we see are based on the flat lay concept. This essentially means the food items are laid flat on a surface to photograph them. It’s a tried and true method that works well in the marketplace. But what if you could add a touch of magic to food photography and make the food items float? Commercial photographer Karl Taylor takes you through the techniques of photographing flying food in this video:

The food photography market has evolved, adding a greater sense of excitement than that of traditional flat lay photography. If you think about it, you must’ve seen quite a number of levitating burgers and suspended salads yourself nowadays.

“Flying food seems to be taking over the photography market.”

Taylor addresses the potential challenges when photographing levitating food, and shares how you can tackle them. He takes you through the processes that go into ideation, preparation, lighting, and shooting.

Photographing levitating food is something that requires a serious level of devotion. You really need to plan out your shot and identify any challenges beforehand. This helps in preparing the solutions to any problems that may arise. Taylor takes this a step further and also demonstrates how he uses similar techniques to photograph other levitating subjects.

If you want to try doing some professional level levitation photography, you can’t afford to miss out on this video. Learning from a professional like Taylor can seriously take your photography to the next level.


Go to full article: Food Levitation Photography Tutorial

What are your thoughts on this article? Join the discussion on Facebook

PictureCorrect subscribers can also learn more today with our #1 bestseller: The Photography Tutorial eBook

The post Food Levitation Photography Tutorial appeared first on PictureCorrect.


from PictureCorrect https://ift.tt/2XhYbU0
via IFTTT

perjantai 29. toukokuuta 2020

PictureCorrect.com: Open Shade Lighting for Photography

There is a myth that you can only get great outdoor images either very early or very late in the day. The “sweet hour” is best just before the sun goes down or comes up. Those are spectacular times to photograph, but you can still get great images any time of the day. You just have to find that soft light. It’s easy to find, just look for open shade.

open shade portrait

photo captured by d_pham

Understanding Open Shade

Open shade is found anywhere a shadow is cast. It’s called open shade because of the low contrast and nearly no shadow in the shade. Open shade will have a bluish cast, so you will have to adjust your camera’s color setting. On the dial it’s usually beside the sun symbol and looks like the side of a building with clouds beside it. This setting will remove the colorcast.

Even at high noon, you can find this light. It could be a sliver of shade under a building’s eaves, the shadow of a car, or maybe a solid bank of trees. Just remember that with trees or other foliage you will need to watch out for speckling—this is where the harsh light sneaks through creating a hot spot. Don’t let any of that light fall on your subject. It will “burn” them out in your image.

There is deep shade up close to the source, and edge shade which is just before your subject would step into the harsh light. Always put your subject at the shade’s edge. The light is softest with some direction still. Also, by turning your subject different directions you will find the “sweet” part of the shade. You can spot this by the look of the eyes. You will catch lights–bright hot spots–in the eyes that give it shape.

portrait photography in shade

“30 days in the treehouse, day 20” captured by Stephanie Sicore

Controlling the Light

For added control of the lighting, you may want to try bouncing light onto your subject. If you have a reflector—which can be something as simple as a white sweater or sheet—try bouncing light onto your subject to brighten them up.

Here’s a trick for when you’re shooting in shade: open your exposure up. This means you slightly over-expose the image, or expose for the shadows. This will give your subject’s skin tones a wonderful glow. The image overall will be more delicate and pleasing. You might have to increase your camera’s ISO since open shade is a darker space to photograph in. With this trick you should be able to photograph anyone, at any time of day, and still get amazing images.

About the Author:
Mark Laurie is a master photographer, international speaker, author, and studio mentor. You can find information on his books, photography, and training at InnerSpiritPhoto. He is on Facebook at http://www.facebook.com/innerspiritphoto. He teaches extensively in England and Canada. Mark has published seven books.


Go to full article: Open Shade Lighting for Photography

What are your thoughts on this article? Join the discussion on Facebook

PictureCorrect subscribers can also learn more today with our #1 bestseller: The Photography Tutorial eBook

The post Open Shade Lighting for Photography appeared first on PictureCorrect.


from PictureCorrect https://ift.tt/2MckzI6
via IFTTT

PictureCorrect.com: Interesting Photo of the Day: Majestic Wolfdog

Photographing a majestic animal in golden light is a dream come true for any wildlife photographer. But not many get an opportunity to fulfill this dream in their lifetime. For photographer Thomas Bakke, however, things happened quite by chance. He was camping up in the mountains of Western Norway with his wife and two wolfdogs when he saw this moment and reached for his camera:

wolfdog at sunset

(Via Imgur. Click image to see full size.)

If you’re wondering what camera settings he used for this image, here they are:

Aperture: f/4, Shutter Speed: 1/400 of a second, ISO: 100. The photographer used a Canon EOS 6D.

Sometimes Mother Nature sets up a moment on a whim, lights it with the most beautiful light, and then looks around for a photographer to capture it. In this case, Bakke was that photographer. How else would you explain this image?


Go to full article: Interesting Photo of the Day: Majestic Wolfdog

What are your thoughts on this article? Join the discussion on Facebook

PictureCorrect subscribers can also learn more today with our #1 bestseller: The Photography Tutorial eBook

The post Interesting Photo of the Day: Majestic Wolfdog appeared first on PictureCorrect.


from PictureCorrect https://ift.tt/2NGNrHt
via IFTTT

PictureCorrect.com: Landscape Mistakes to Avoid in Lightroom

Photography can be quite overwhelming for a beginner. And as if taking good photos is not challenging enough, there’s another thing you’ve got to learn – editing. Many photographers start off with Lightroom to learn how to edit their photos and it can get pretty confusing. Naturally, many beginners end up making a lot of mistakes as a part of the learning process. In this video, landscape photographer Nigel Danson talks about 5 mistakes that beginners make in Lightroom:

Most beginner photographers tend to go overboard with their edits. So, if you happen to be just starting out with Lightroom to edit your photos, be sure to pay attention to these important factors.

To start, there’s histogram. No doubt it is important, but when editing your photos do not force yourself to limit the histogram within the axes. It’s okay if your histogram does not have any black or white points. And it’s also okay if some data is clipped. What you need to do is pay more attention to how the image looks and make sure that it looks good.

Good edits should appear seamless. If somebody can tell that an image has been edited, maybe you’ve overdone it. So, ensure that the exposure and the colors complement the scene. Everything should fit in and complement the mood of the image. That said, don’t pull the highlights all the way down off the cloud. If it’s a bright day, a bright cloud will do just right. And while we’re talking about colors, be extra careful with that saturation slider. Instead of using the saturation slider to make a global adjustment, learn to use the HSL panel. This gives you greater control over individual colors and is a much more powerful tool.

And lastly, you may not feel it, but cropping is quite a powerful editing tool. Learn to crop your images correctly. Don’t forget to patrol your edges and crop out anything that draws unwanted attention.

Have you been making any of these mistakes in Lightroom? Now that you know, at least you’re able to avoid this errors and improve your Lightroom skills.


Go to full article: Landscape Mistakes to Avoid in Lightroom

What are your thoughts on this article? Join the discussion on Facebook

PictureCorrect subscribers can also learn more today with our #1 bestseller: The Photography Tutorial eBook

The post Landscape Mistakes to Avoid in Lightroom appeared first on PictureCorrect.


from PictureCorrect https://ift.tt/2TSi1TC
via IFTTT

torstai 28. toukokuuta 2020

PictureCorrect.com: Understanding Basic Light Properties for Photography

The way light acts upon a subject depends on the physical properties each light source presents. Before taking on the challenge of creative photographic lighting it’s worth your while to understand some of these properties.

photo light properties

Photo by Greg Rosenke; ISO 100, f/3.5, 1/8-second exposure.

Light Characteristics

Light characteristics define the way surfaces are affected by specific light sources.

Hard

  • Creates harsh shadows
  • Accentuates textures
  • Easy to control and shape

Soft

  • Creates soft shadows
  • Difficult to control
  • Presents form through a range of tones

Color Quality

Color quality defines the color cast from a particular light source.

  • Known as color temperature
  • Derived from the colors emitted when heating a black object through a range of temperatures. These colors are matched to light sources we use in photography.
  • Measured in ºK (Degrees Kelvin, just referred to as Kelvin or K)

Light Sources

  • Candle light: 1200K
  • Incandescent light bulb: 2700K
  • Red Head (quartz halogen bulb): 3200K
  • Sunrise and sunset: 3200K
  • Flash light: 5600K
  • Sunlight at midday: 5000K
  • Outdoor shade: 6000K
  • Skylight: 10000K

The temperatures listed will change depending on the age or wattage of the source light.

The color cast is referred to warm at the lower color temperatures and cool at the higher temperatures, changing from orange-yellow at the bottom to blue-white at the top. This is why the camera has comprehensive white balance, or color balance control functions that remove the color casts from the different sources and render white as white.

Natural Light

  • Natural light is from the sun, which can still present indoors by shining through windows, doors and skylights. These illuminations are a source which can be used to creatively light a subject. At certain times of the day the light is very even and is often diffused through a sun filter in a window.
  • Another sources of natural light is fire (candle, campfire)
light properties explained for photographers

Photo by Daniel Montemayor; ISO 100, f/1.8, 1/320-second exposure.

Artificial

  • Light powered by electricity is artificial light.
  • The most common are listed under Light Sources above.
  • A flash closely matches the light quality from the sun, but is still artificially generated.

Continuous

Continuous light is defined by a light source that is always there when switched on (light bulb or fluorescent) or a source such as sunlight.

  • The effect of a continuous light on a subject is always there to see (intensity and shadow positions) making adjustments real time and therefore easier.
  • Using a continuous light source also affects the way exposure is controlled regarding shutter speed in relation to aperture diameter.
  • The exposure is affected by a fast or a slow shutter speed using a continuous light source.

Flash

The flash offers a burst of instantaneous light and requires different lighting techniques to that of continuous lighting.

  • The shutter is synchronized to the flash
  • At certain shutter speeds the flash light will not register on the film or imaging device.
  • A model light or continuous light is often used to judge shadows on the subject before the flash is fired.
  • Blurring is less of a problem because the flash freezes a moment in time.
  • There are in effect two exposures when firing a flash. The camera exposes the ambient light while the shutter is released for a short time to allow the burst of flash into the camera. This duration that the shutter is open is often not enough time for the ambient light to make any difference to the exposure.
understand light properties in photography

Photo by Sam Javanrouh; ISO 800, f/5.0, 1/160-second exposure.

Application

Understanding light characteristics, natural or artificial, will help elevate you to the next level of photography. There is a plethora of lighting equipment on the market that you can acquire once you have found your preferred genre or niche in photography (weddings, portraiture, landscape, glamour). Photo lights have been designed based on the above properties and come in many shapes and sizes to meet specific photographic lighting applications.

About the Author:
Rob Gray (factmedia dot co dot za) teaches television production as well as photography bringing over forty years of experience.


Go to full article: Understanding Basic Light Properties for Photography

What are your thoughts on this article? Join the discussion on Facebook

PictureCorrect subscribers can also learn more today with our #1 bestseller: The Photography Tutorial eBook

The post Understanding Basic Light Properties for Photography appeared first on PictureCorrect.


from PictureCorrect https://ift.tt/2sMG6xR
via IFTTT

PictureCorrect.com: Interesting Photo of the Day: Abandoned President Heads

When businesses are conceived, nobody can guarantee their success. That’s equally true even when presidents are involved. We’re talking about the Presidents Park in Williamsburg, Virginia that closed down in 2010 when the recession hit. When a new business was given the approval to start in the park’s location, Howard Hankins rescued the 43 enormous busts and put them up near his farm. Sadly, they’ve started to slowly crumble. Photographer Katie took the following photo when she visited the venue and it’s pretty spooky to say the least:

“Abandoned President Heads” by Katie (Via Reddit. Click image to see full size.)

It’s really sad to see something this deteriorated when they used to be spotless and well maintained at some point. In a way, it also makes a point that everything is vulnerable to the effects of time. And the cracked layers on busts are a testament to this.

The condition in which Katie has taken the image adds to the sense of abandonment. Judging by the surrounding areas and the shadows, it seems like she chose to take the image at night under the moonlight. And with the clouds mimicking the flat brown colors of the ground, the image has a very pale yet spooky mood.

Would you dare to visit this place alone at night?


Go to full article: Interesting Photo of the Day: Abandoned President Heads

What are your thoughts on this article? Join the discussion on Facebook

PictureCorrect subscribers can also learn more today with our #1 bestseller: The Photography Tutorial eBook

The post Interesting Photo of the Day: Abandoned President Heads appeared first on PictureCorrect.


from PictureCorrect https://ift.tt/2ZNXrHO
via IFTTT

PictureCorrect.com: How to Shoot with Both Eyes Open for Wildlife Photography

It’s quite natural that we use one of our eyes dominantly, relying on it more often than the other. In the context of photography, this is why we use either the left or the right eye when using the viewfinder. And you might have noticed, we usually close the other eye. Even though it’s such a small and instinctual thing, this habit can pose huge disadvantage in certain types of photography. It limits our field of view to just what’s within the viewfinder. Thus, we may have no idea of what’s going on beyond the frame. Wildlife photographer Janine Krayer from Pangolin Photo Safaris explains why you’d be better off shooting with both eyes open especially when photographing wildlife:

If you have a habit of closing the free eye, chances are that you will miss out on the events that might be unfolding outside the frame. This is specially true in wildlife photography because as you know it’s a wild world out there. Anything can happen at any moment. So, using the other eye to monitor what’s happening around the shot is always a good idea. Doing so will help you anticipate better photos and prepare yourself for your next step. Krayer explains this concept beautifully and demonstrates how this can be applied when photographing a Kingfisher.

“It takes quite a lot of concentration and effort, but allows you to gauge the situation right.”

If you’ve been missing out on capturing key actions, it could be because of your closed eye. Try out this technique and hopefully you’ll see a spike in your photo successes.


Go to full article: How to Shoot with Both Eyes Open for Wildlife Photography

What are your thoughts on this article? Join the discussion on Facebook

PictureCorrect subscribers can also learn more today with our #1 bestseller: The Photography Tutorial eBook

The post How to Shoot with Both Eyes Open for Wildlife Photography appeared first on PictureCorrect.


from PictureCorrect https://ift.tt/3gu6nIm
via IFTTT

keskiviikko 27. toukokuuta 2020

PictureCorrect.com: Adapting to Weather and Time of Day as a Photographer

Have you ever been in the position where your shutter finger is just itching to take some photos? You look outside and the weather is overcast and the sun is nowhere to be found. Take heart; you don’t always need the sun. Here’s why.

rainy day photography

photo by Tuncay

I was always lead to believe that if there was no sun, then there wasn’t an opportunity for good photography. So during the winter months and overcast summer or spring days I had to find another hobby, or so I thought. That’s not true and I’ll show you why.

1. Shooting outdoors on overcast days

If you’ve never tried it, then go out and do it. You’ll be surprised at the photos you take. Why? Because the clouds act as one big filter resulting in a soft and even light. The harsh shadows you sometimes see in your sunny day images are just not there. There’s no glare in the subject’s eyes and it can look as if the photo has been taken by a professional.

cloudy portrait

photo by Cristian Bortes

Check that your white balance is set to cloudy if you aren’t shooting on automatic. Although you get really good photos on a cloudy day, it is more suited for smaller scenes, close-ups and portraits. Landscapes don’t do that well on cloudy days.

2. Sunny days

Bright sunny days are not always the best time to take good photos. Too much bright light can be a bad thing so you need to know what time of day is best. When it’s sunny you’d probably find that around midday is not the best time to shoot any images. The lighting is directly from above and very harsh.

Shadows fall below the eyes in a portrait and can result in an ugly image. Unless you’re looking for very specific lighting effects for buildings and similar subjects, don’t shoot between 11am and 1pm.

golden hour flowers

photo by Catrin Austin

Early to mid-morning and late afternoon are the best times for shooting on sunny days. Lighting is from the side, the contrast is great, and the atmosphere created by light that is more golden is amazing.

Besides shooting sunsets and sunrises, virtually any type of image will look great. A key here is to use bright shade for portraits and other people shots. It gives the same effect as a cloudy day.

3. Shooting indoors

There is no bad time when shooting indoors, as you always have control of the light when using flash or strobes. But flash isn’t the greatest light to shoot by even if you do have total control. Using available natural light will always give you a great image. So what’s the best way? Find a place inside with a large window that allows a good amount of light to enter the room.

Place your subject in the area where most of this light falls. If you find that the opposite side of the subject is too dark, use a reflector which, can be a large piece of card, a white board, or a bed sheet draped just outside the view of the camera lens. Experiment to find the best subject placement. Sometimes the darker side of the image will make the overall image really stunning.

lavender cupcakes window light

photo by Eric Hossinger

So, there’s always a time to take an image, and key to this is make the best possible use of available light. You may not be able to shoot the image you have in mind but you’ll still be able to create an image that’s stunning. You won’t necessarily get it right the first time; be prepared to experiment and try different placements and angles, and I can assure you that you’ll come up with something great.

About the Author:
Wayne Turner has been teaching photography for 25 years. Passionate about photography, radio and video, he is a Radio CCFm producer and presenter in Cape Town.


Go to full article: Adapting to Weather and Time of Day as a Photographer

What are your thoughts on this article? Join the discussion on Facebook

PictureCorrect subscribers can also learn more today with our #1 bestseller: The Photography Tutorial eBook

The post Adapting to Weather and Time of Day as a Photographer appeared first on PictureCorrect.


from PictureCorrect https://ift.tt/2XAnXBU
via IFTTT