keskiviikko 31. toukokuuta 2023

PictureCorrect.com: Shutter Drag Seascape Photography Tips

Ever wondered how to capture movement in a still photograph? Shutter drag photography may just be the answer, allowing you to shoot it without compromising the clarity of your subject. Few subjects are as unpredictable and tempestuous as the ocean. In this video, Pye Jirsa, a pro photographer, shares his top shutter drag photography tips for oceanic landscapes.

Tip 1: Use a Wide-Angle Lens

Pye uses his Sony Alpha a7 IV camera for this shoot. However, which lens you use for shutter drag photography depends on your subject. In the case of landscape shots, Pye recommends a wide-angle lens. He uses a SIGMA 16-28mm lens, which increases the depth of field and width of his shots.

Tip 2: Keep Safe

A tripod is another must-have to maximize angles and keep your camera safe from the water. Before shooting, attach your camera to the tripod first, then look for the ideal vantage point. Preferably somewhere safe where a strong wave or rising water won’t hit, potentially damaging your gear or resulting in a painful fall.

Tip 3: Think About Composition

Composition is key, not only for getting that perfect shot but also capturing the movement of the water. Pye advises you to select a vantage point in the action that also maximizes the movement of the waves. Instead of aiming your camera out to the shore, head-on to incoming waves, aim for somewhere that’ll exaggerate sweeping motion. Ideally, place yourself on a rock further out. Then train your camera towards the shoreline to frame that left to right or right to left movement.

Tip 4: Maximize Effects With Shutter Speed

Shutter speed is the camera setting that’ll be doing the majority of the work when it comes to shutter drag photography. That’s why Pye recommends selecting a shutter speed first, then adjusting your aperture and ISO accordingly. Each different shutter speed will create its own effect, so choose depending on your preference. You can play around with different shutter speeds by doing some test photos. Then decide. Pye prefers a 1- to 2-second shutter speed unless he’s aiming for a “misty” or “foggy” water look.

There is no right or wrong, just choose the shutter speed that matches the look that you want to go for…

shutter drag

Tip 5: Minimize Camera Shake

As shutter drag photography is captured at slower shutter speeds, it’s vital you reduce camera shake. You can manually trigger a shot with a timer or use a shutter trigger app on your paired mobile device. Varying your frame rate also helps, allowing you to capture multiple photos in one go, which you can sort through later.

Conclusion

Creating magical effects in photos isn’t just possible during post-production editing. You can capture movement and more by just playing around with a few manual settings on your camera. Pye has plenty of pointers to share regarding shutter drag photography. Plus, other fun types of photography effects you can incorporate into your work.

- - - - - - - - - - - - - - - - - - - - - - - - - - - - - - - - - - - - - - - - - - - - - - - - - - - - - - - - - - - - - - - - - - - - - - - - - -

Did you appreciate this newsletter? Please help us keep it going by Joining Our Patreon Supporters

What are your thoughts on this article? Join the discussion on our Facebook Page

PictureCorrect subscribers can also learn more today with our #1 bestseller: The Photography Tutorial eBook

- - - - - - - - - - - - - - - - - - - - - - - - - - - - - - - - - - - - - - - - - - - - - - - - - - - - - - - - - - - - - - - - - - - - - - - - - -

The post Shutter Drag Seascape Photography Tips appeared first on PictureCorrect.


from PictureCorrect https://ift.tt/DLhb902
via IFTTT

tiistai 30. toukokuuta 2023

PictureCorrect.com: How to Use Generative Fill in Macro Photography

Macro photography expert, Stewart Wood, recently shared his experiences of Adobe’s latest piece of AI software in Photoshop, Generative Fill. It is currently in its beta version and is only available within the beta versions of Photoshop. In this article, we’ll dissect the key takeaways from Stewart’s insights about this revolutionary tool and its potential impact on the world of macro photography:

Generative Fill is a new AI tool that uses Adobe’s powerful cloud computing capabilities to perform a multitude of tasks. Rather than getting into the technicalities, Stewart focused on how he has incorporated this tool into his macro photography workflow.

One primary use of Generative Fill, as per Stewart, is to create full-screen crops for Instagram posts. The AI software accomplishes this by extending the background of an image while keeping the main subject intact. This helps to ensure that the entire subject is visible in the post, without having to resort to unsightly cropping methods.

How It Works

Once you have an image ready for cropping, Generative Fill requires you to make selections on the areas to fill. After clicking on ‘Generative Fill’, the software sends the image to the Adobe Cloud, where it gets analyzed. The cloud then generates a suitable background based on the analysis, and sends it back to your computer.

The result is a far more aesthetically pleasing version of your image compared to other methods, such as the ‘stretching’ approach or using a single, solid color as a background.

A Note on Limitations

Stewart points out that the tool, while amazing, has some limitations. For example, if your image is particularly noisy, the Generative Fill may not match the noise level, which can cause a slight difference in the texture between the original and generated areas.

macro generative fill

Generative Fill vs Content Aware Fill

In contrast with Adobe’s Content Aware Fill, which works great for minor adjustments, Generative Fill goes the extra mile by not just filling in space, but also creating elements. For instance, it can continue the blurred out part of a leaf that was cut off in the original image, making the result seem more natural.

Ethical Considerations

Stewart raises an important point about the ethical implications of Generative Fill. While some photographers might consider its use as altering the authenticity of an image, Stewart sees it as a tool that enhances his workflow and saves time. Instead of spending precious minutes on cloning and duplication, he now fixes issues within seconds.

However, he urges photographers to maintain their integrity, being clear about whether an image is a composite or not. While he doesn’t consider correcting minor issues as changing the nature of a photograph, adding elements such as textures or additional items does, in his view, turn it into a composite.

Adobe’s Generative Fill is indeed a game changer in the realm of photography editing. It simplifies the process of creating full-screen images for social media, while also offering solutions for fixing issues in stacked images. Its introduction invites photographers to have important discussions about where the line should be drawn between editing and composite creation.

- - - - - - - - - - - - - - - - - - - - - - - - - - - - - - - - - - - - - - - - - - - - - - - - - - - - - - - - - - - - - - - - - - - - - - - - - -

Did you appreciate this newsletter? Please help us keep it going by Joining Our Patreon Supporters

What are your thoughts on this article? Join the discussion on our Facebook Page

PictureCorrect subscribers can also learn more today with our #1 bestseller: The Photography Tutorial eBook

- - - - - - - - - - - - - - - - - - - - - - - - - - - - - - - - - - - - - - - - - - - - - - - - - - - - - - - - - - - - - - - - - - - - - - - - - -

The post How to Use Generative Fill in Macro Photography appeared first on PictureCorrect.


from PictureCorrect https://ift.tt/WNdul3Y
via IFTTT

maanantai 29. toukokuuta 2023

PictureCorrect.com: Interesting Photo of the Day: Sunset from Above the Clouds

You’ve probably often heard landscape photographers talking about how sunset and sunrise are good times to be out taking photos. There’s a pretty good reason as to why those moments are hyped so much. They present us with magical light that truly transforms the scene around us completely. Have a look at the following image that photographer Ross Schram von Haupt took of Mt. Rainier during sunset. It almost looks like a scene out of some video game:

sunset from Mt. Rainier

“Sunset from Above the Clouds” by Ross Schram von Haupt (Via Reddit. Click image to see full size.)

Haupt took the image with his Nikon D610 and Nikon 16-35 f/4 lens at 16mm, f/11, 1/50-second exposure, and ISO 100. And to ensure that the image was tack sharp from front to back, he also did some focus stacking.

The most striking feature of this image has to be the explosion of colors in the sky. The golden light from the setting sun is seen beautifully dominating the western sky. And it’s not only the clouds in the sky that have been kissed by the golden light. The blanket of clouds in the midground glowing with the golden light adds an ethereal look to the image.

“Getting this shot was wayyyyy harder than it had to be. The low clouds were changing height constantly. They would rise 100ft then drop down 200, just to rise back up 300. While it created some of the best atmosphere I’ve ever been lucky enough to shoot, it also meant I was scrambling around trying to find compositions.”

- - - - - - - - - - - - - - - - - - - - - - - - - - - - - - - - - - - - - - - - - - - - - - - - - - - - - - - - - - - - - - - - - - - - - - - - - -

Did you appreciate this newsletter? Please help us keep it going by Joining Our Patreon Supporters

What are your thoughts on this article? Join the discussion on our Facebook Page

PictureCorrect subscribers can also learn more today with our #1 bestseller: The Photography Tutorial eBook

- - - - - - - - - - - - - - - - - - - - - - - - - - - - - - - - - - - - - - - - - - - - - - - - - - - - - - - - - - - - - - - - - - - - - - - - - -

The post Interesting Photo of the Day: Sunset from Above the Clouds appeared first on PictureCorrect.


from PictureCorrect https://ift.tt/FIATHRh
via IFTTT

PictureCorrect.com: Creative Pet Photo Tips When Time is of the Essence

Taking compelling pictures of our four legged friends is usually easier said than done. Animals have minds of their own, and often times can’t just be posed into place like a bowl of fruit in a studio still life. But, with a few techniques in tow, it’s possible to transform the task from taxing challenge into dynamic photo session. Marcin Lewandowski from Adorama explains what he does when he has a cat, dog, or other pet standing in front of his lens:

During this one hour photo shoot, Lewandowski puts his own advice to the test, and the results prove to be phenomenal. Here are some of the basic methods he demonstrates and suggests:

Listen to cues. Animals may not be able to verbally express their thoughts and feelings, but they can certainly communicate through their behavior and body language. Pay attention to your subjects, the way you would with any human model. Try your best to accommodate their needs whenever necessary.

Have a few treats on hand. Let’s face it—we’re a lot more invested in photographing our animals than they are of actually having their picture taken. Food is one of the easiest ways to grab their attention. Use this to your advantage when setting up a composition or trying to capture an animal’s gaze.

Bring along a familiar face. If a photo shoot is the very first time you’re interacting with an animal, they understandably may be on edge. One of the easiest ways to make them comfortable is to have a familiar human companion close at hand. Aside from reassuring them that they’re safe, having a person who knows the animal first hand may be able to help you get the shot that you need.

animal with handler

Build a connection. Juxtaposing human and animal features often creates a relatable and interesting results. Alternatively, different animal subjects paired together can make for a fun photograph (provided that all the parties in play are willing to cooperate!).

Get on their level. Animals don’t see the world from our eyes. Physically go down to the ground. You’ll almost always get a better shot when you try to understand your subject’s perspective.

dog portraiture

Go wide. Unless you’re making an intimate portrait, try using a wider lens. Doing so will capture more of their environment and allow more opportunity for movement and action.

Come in with an open mind. There’s not a whole lot of prep that you can do before a photo shoot with an animal. It’s much more effective to dive into the situation and feel out each individual’s boundaries. Just walk in with a list of potential shots and see what works; eventually, you’ll wind up with something great.

dog outdoors

“Animals are great companions to photograph, so long as we treat them well and give them their dignity—accompanied by a few tasty treats.”

- - - - - - - - - - - - - - - - - - - - - - - - - - - - - - - - - - - - - - - - - - - - - - - - - - - - - - - - - - - - - - - - - - - - - - - - - -

Did you appreciate this newsletter? Please help us keep it going by Joining Our Patreon Supporters

What are your thoughts on this article? Join the discussion on our Facebook Page

PictureCorrect subscribers can also learn more today with our #1 bestseller: The Photography Tutorial eBook

- - - - - - - - - - - - - - - - - - - - - - - - - - - - - - - - - - - - - - - - - - - - - - - - - - - - - - - - - - - - - - - - - - - - - - - - - -

The post Creative Pet Photo Tips When Time is of the Essence appeared first on PictureCorrect.


from PictureCorrect https://ift.tt/3rJ4Eg0
via IFTTT

sunnuntai 28. toukokuuta 2023

PictureCorrect.com: Interesting Photo of the Day: Chicago Long Exposure

Long exposure photography is amazing. It has the potential to capture an image in a way that a human eye cannot see naturally. Combine the technique with an amazing composition and you have the recipe for an engaging and fantastic image:

illinois train long exposure

“Long Exposure Photo of a Train in Illinois” (Via Reddit. Click image to see full size.)

Captured by mmeyers76 with a Sony Alpha a7 II, the photograph is of the brown line between the Chicago and Merchandise Mart stops. Besides the blurred out train, what makes this image interesting is how the beautiful S-curve leads the viewer’s eye from the darker part of the image toward the brighter part. The sun is low on the horizon, and the lighting on the sky and the train is just captivating.

Judging by the composition, the timing, and the technique used by the photographer, it really seems like a lot of planning went into it!

- - - - - - - - - - - - - - - - - - - - - - - - - - - - - - - - - - - - - - - - - - - - - - - - - - - - - - - - - - - - - - - - - - - - - - - - - -

Did you appreciate this newsletter? Please help us keep it going by Joining Our Patreon Supporters

What are your thoughts on this article? Join the discussion on our Facebook Page

PictureCorrect subscribers can also learn more today with our #1 bestseller: The Photography Tutorial eBook

- - - - - - - - - - - - - - - - - - - - - - - - - - - - - - - - - - - - - - - - - - - - - - - - - - - - - - - - - - - - - - - - - - - - - - - - - -

The post Interesting Photo of the Day: Chicago Long Exposure appeared first on PictureCorrect.


from PictureCorrect https://ift.tt/V1rCoBz
via IFTTT

PictureCorrect.com: Focus Stacking at Night Tutorial

In astrophotography, it is common to work with wide apertures. This lets the camera draw in more light in less time. However, doing so also reduces the depth of field drastically. The foreground elements thus appear out of focus. This is why astrophotographers need to focus stack quite a lot. In today’s video, astrophotographer Alyn Wallace shows you how you can maximize your depth of field and focus stack during the night:

If you believe in getting most of the things right in your camera, it is worth understanding the concept of hyperfocal distance.

With the lens focused at the right distance at a certain aperture and focal length, you can maximize your depth of field. The resulting image is thus sharp from front to back. Wallace, in the video, beautifully explains how you can do just that.

An alternative is to use the focus-stacking technique. When focus stacking, you take multiple images, focusing each image at different planes and later blending those into a single image using photo-editing software. The results are sharp.

When shooting in the dark, it can be quite tricky to judge whether or not things are in focus. Wallace shares a couple of tips you can use to overcome this challenge.

Also in the video, Wallace shares how you can use Photoshop to merge the different layers for a clear picture. He also shows you how you can work with layer masks to get the best results.

If you’re an astrophotographer struggling to get a sharp foreground, we highly recommend that you watch the video. The tips and techniques that Wallace shares will help you a lot.

- - - - - - - - - - - - - - - - - - - - - - - - - - - - - - - - - - - - - - - - - - - - - - - - - - - - - - - - - - - - - - - - - - - - - - - - - -

Did you appreciate this newsletter? Please help us keep it going by Joining Our Patreon Supporters

What are your thoughts on this article? Join the discussion on our Facebook Page

PictureCorrect subscribers can also learn more today with our #1 bestseller: The Photography Tutorial eBook

- - - - - - - - - - - - - - - - - - - - - - - - - - - - - - - - - - - - - - - - - - - - - - - - - - - - - - - - - - - - - - - - - - - - - - - - - -

The post Focus Stacking at Night Tutorial appeared first on PictureCorrect.


from PictureCorrect https://ift.tt/dFtnU3B
via IFTTT

lauantai 27. toukokuuta 2023

PictureCorrect.com: Interesting Photo of the Day: Rainy Morning in Yosemite

Rainy days can really be a blessing in disguise for photography. The gloomy sky with the grey clouds can help uplift an image by adding a moody feel to it. So it makes perfect sense to head out sometimes during such “unfavorable” lighting and try your hand at landscape photography. Photographer Casey Horner faced a bit of a rainy day challenge when he was in Yosemite. But he didn’t give up, tried a different perspective, and came up with this brilliant work of art:

rainy yosemite landscape photo

“Rainy Morning in Yosemite” by Casey Horner (Via Reddit. Click image to see full size.)

Horner took the image with his Sony A7III and Tamron 28-75mm lens at 30mm, 1/1000s, and ISO 400.

The dark clouds over the mountains and the low hanging clouds over the forest help in adding atmosphere. What’s also brilliant is the way the white snow contrasts with the dark mountain in the foreground. And the fall in the middle is the perfect icing on the cake. Just brilliant.

It’s also interesting to see how the yellow on the meadow perfectly complements the overall blue tone of the image. That’s a really thoughtful composition and edit by the photographer.

This isn’t an image of Yosemite that you get to see on a regular basis. Horner has done an excellent job with his experiment.

“I shoot there a lot. So, I try to get different compositions when I can.”

- - - - - - - - - - - - - - - - - - - - - - - - - - - - - - - - - - - - - - - - - - - - - - - - - - - - - - - - - - - - - - - - - - - - - - - - - -

Did you appreciate this newsletter? Please help us keep it going by Joining Our Patreon Supporters

What are your thoughts on this article? Join the discussion on our Facebook Page

PictureCorrect subscribers can also learn more today with our #1 bestseller: The Photography Tutorial eBook

- - - - - - - - - - - - - - - - - - - - - - - - - - - - - - - - - - - - - - - - - - - - - - - - - - - - - - - - - - - - - - - - - - - - - - - - - -

The post Interesting Photo of the Day: Rainy Morning in Yosemite appeared first on PictureCorrect.


from PictureCorrect https://ift.tt/iM6JIKb
via IFTTT

PictureCorrect.com: How to Use the Remove Tool in Photoshop

In this recent video, pro photographer Matt Kloskowski covered the latest updates to Adobe Photoshop. Here are some of the most important takeaways from his in-depth exploration of the new features:

Arguably the highlight of this recent update, the new Remove tool has quickly become a favorite for Kloskowski. Grouped with the Spot Healing Brush and the Healing Brush, this new tool helps in removing unwanted elements from the photo.

The Remove Tool

The Remove tool is quite straightforward to use with its brush size that can be altered using the right and left bracket keys. There are options such as ‘Sample All Layers’, useful when working on a multi-layer document, and ‘Remove after each stroke’. The latter option, when turned off, allows you to paint more precisely without the tool immediately acting after each stroke, which can be helpful in achieving more precise results.

remove tool

Addition with the Remove Tool

Despite its name, the Remove tool can also be used to add elements to an image. For example, if a certain part of the photo seems empty, you can use this tool to paint over that area. Photoshop then analyzes the surrounding areas to determine what to add, providing a great way to add more symmetry or balance to a photo.

Context Sensitive Bar

This feature provides options based on the layer you are working on. For instance, when you’re on a background layer, you can do ‘Select Subject’ or ‘Remove Background’. Once a selection is made, a pop-up bar appears with various selection-related tasks. Although these tasks have been available for some time, having them at your fingertips saves time.

Visual Presets

The recent update now includes visual presets located in the adjustments panel. Once you find one that suits your needs, you can simply click on it, and it will create a layer group with layers inside of it, giving you an adjustable preset for your image.

Interactive Handles for Gradients

For those who use gradients, the update brings more interactive handles. Depending on the gradient chosen, you will see multiple handles that help control the fall off between different colors. This feature can be especially useful for designers and photographers who frequently use gradients.

Final Thoughts

While this update focused on Photoshop, Kloskowski mentions that Adobe Lightroom also received updates the previous month, and encourages viewers to check them out. As always, the beauty of these updates lies in the fact that they increase the potential for creativity, making the tools even more versatile and powerful for users.

It’s important to note that, despite the impressive capabilities of these tools, they may not always achieve perfect results straight out of the box. As Kloskowski says, they might get you 70% of the way there, and you do the rest of the work. This is an important reminder of the vital role of personal touch and expertise in photo editing, which even the most advanced tools can’t replace.

For further training: Matt’s Photoshop System at 44% Off

- - - - - - - - - - - - - - - - - - - - - - - - - - - - - - - - - - - - - - - - - - - - - - - - - - - - - - - - - - - - - - - - - - - - - - - - - -

Did you appreciate this newsletter? Please help us keep it going by Joining Our Patreon Supporters

What are your thoughts on this article? Join the discussion on our Facebook Page

PictureCorrect subscribers can also learn more today with our #1 bestseller: The Photography Tutorial eBook

- - - - - - - - - - - - - - - - - - - - - - - - - - - - - - - - - - - - - - - - - - - - - - - - - - - - - - - - - - - - - - - - - - - - - - - - - -

The post How to Use the Remove Tool in Photoshop appeared first on PictureCorrect.


from PictureCorrect https://ift.tt/4yUYdmW
via IFTTT

perjantai 26. toukokuuta 2023

PictureCorrect.com: Interesting Photo of the Day: Ala-Kul Kyrgyzstan Landscape

If you frequently find yourself facing difficult terrain to get a great landscape photo, don’t you feel super content when all your effort pays off and you’re presented with an astounding view? Well, photographer Albert Dros’ s strenuous hike was sure worth it:

Ala-Kul Lake Kyrgyzstan

“A Beautiful Moment at Ala-Kul Lake, Kyrgyzstan” by Albert Dros (Via Reddit. Click image to see full size.)

The image is of the Ala-Kul lake in Kyrgyzstan. As Dros had to hike about six hours up a super steep mountain to get to this location at 3600 meters. And the journey was made even more difficult when he fell victim to altitude sickness. However, the lighting on the mountain tops, the reflection off the water, rich color, and Dros’s interesting composition with the flowers in the foreground make this image truly outstanding.

- - - - - - - - - - - - - - - - - - - - - - - - - - - - - - - - - - - - - - - - - - - - - - - - - - - - - - - - - - - - - - - - - - - - - - - - - -

Did you appreciate this newsletter? Please help us keep it going by Joining Our Patreon Supporters

What are your thoughts on this article? Join the discussion on our Facebook Page

PictureCorrect subscribers can also learn more today with our #1 bestseller: The Photography Tutorial eBook

- - - - - - - - - - - - - - - - - - - - - - - - - - - - - - - - - - - - - - - - - - - - - - - - - - - - - - - - - - - - - - - - - - - - - - - - - -

The post Interesting Photo of the Day: Ala-Kul Kyrgyzstan Landscape appeared first on PictureCorrect.


from PictureCorrect https://ift.tt/bJ8XfWC
via IFTTT

PictureCorrect.com: Photoshop Generative Fill Reaction & Walkthrough

Photoshop, the ubiquitous tool of photographers and graphic designers, has unveiled a groundbreaking feature called ‘Generative Fill’. If you’ve ever thought about an AI tool that could seamlessly insert objects into your images, expand your borders, or replace your background, then Generative Fill is the ultimate game-changer. Patrick Hall from Fstoppers took it for a spin, offering an insightful walkthrough of its capabilities:

Hall stumbled upon this new feature, which had him tossing and turning all night. This innovative addition to Photoshop could either be a photographer’s ultimate dream or the downfall of traditional photography as we know it.

To utilize this feature, users need to download the latest version of Photoshop, currently 24.5, as well as the new Photoshop Beta from the Creative Cloud. Afterward, the Generative Fill feature will be accessible.

The results of Hall’s trial were astonishing, starting with a self-portrait headshot. Using the marquee tool, he selected all the white spaces and used Generative Fill to replace the pixels he’d deleted. The results were stunning, perfectly maintaining the shallow depth of field. He compared the before and after images, and it was near impossible to distinguish between them.

Hall proceeded to apply the Generative Fill feature to a dried-up riverbed photograph he had taken in Curacao. By feathering the selection and running the generative fill, the result was just as convincing as the original image.

In a remarkable display of the AI’s capabilities, Hall selected a model in one of his photographs and instructed the AI to add a gray turtleneck sweater. The results were stunningly realistic, even altering the arm position to match the clothing’s fitting.

Taking a step further into the realm of complexity, Hall tackled an architectural photograph of New York City, attempting to extend Central Park at the bottom of the image and expand the left side. The results were varied, with some sections requiring additional adjustments. Nevertheless, it produced reasonably convincing results, providing an intriguing tool for graphic designers.

generative fill

In another test, Hall used Generative Fill to restore an old photograph of his wife. He managed to eliminate glare from a shirt while preserving the clothing’s natural look. The AI provided multiple variations, and the final result was shockingly accurate.

When testing the feature on a landscape shot of his neighborhood, Hall was able to remove an unwanted rooftop from the image and even insert a small yacht into the scene. Again, the AI delivered impressively realistic results.

Finally, Hall used Generative Fill on a piece of fine art photography – a series by Mike Kelly featuring planes in flight, arranged in a wallpaper motif. The AI attempted to replicate Kelly’s work by creating a similar pattern. While some planes appeared distorted, the AI’s attempt at creating hybrid artwork was fascinating.

As Hall’s walkthrough demonstrates, Generative Fill is potentially revolutionary for the world of digital art and photography. It’s an incredible leap forward in AI image manipulation, offering limitless possibilities for artists, photographers, and graphic designers.

However, as exciting as these advancements are, they also open up a new realm of ethical questions. As AI tools become more adept at creating convincing manipulations, it’s crucial to remember the importance of authenticity in the world of photography and art. But, as Patrick Hall demonstrated, it’s hard not to be enthralled by the magic of Generative Fill.

- - - - - - - - - - - - - - - - - - - - - - - - - - - - - - - - - - - - - - - - - - - - - - - - - - - - - - - - - - - - - - - - - - - - - - - - - -

Did you appreciate this newsletter? Please help us keep it going by Joining Our Patreon Supporters

What are your thoughts on this article? Join the discussion on our Facebook Page

PictureCorrect subscribers can also learn more today with our #1 bestseller: The Photography Tutorial eBook

- - - - - - - - - - - - - - - - - - - - - - - - - - - - - - - - - - - - - - - - - - - - - - - - - - - - - - - - - - - - - - - - - - - - - - - - - -

The post Photoshop Generative Fill Reaction & Walkthrough appeared first on PictureCorrect.


from PictureCorrect https://ift.tt/OGzgZKx
via IFTTT

torstai 25. toukokuuta 2023

PictureCorrect.com: Perfect Focus in Photography: A Comprehensive Guide

Photography, at its core, is an art form driven by detail and precision. One vital element that often differentiates a good photo from a great one is the focus. Achieving perfect focus can transform a snapshot into a captivating image that draws the viewer in and holds their attention.

focus guide

Importance of Focus in Photography

Focus is the sharpness or clarity of an image. It’s the element that directs the viewer’s eye to the subject of the photograph, creating a strong connection between the viewer and the image. When the focus is off, it can cause the entire photo to lose its impact.

Focus can be used to bring a subject to life, give structure to an image, and imbue it with depth and realism.

Overview of the Article’s Purpose

This comprehensive guide aims to provide you with essential tips for photography focus, helping you capture images with unrivaled clarity and precision.

Understanding Focus in Photography

Definition of Focus

In photographic terms, focus refers to the point, subject, or area in an image that appears sharp and clear.

Types of Focus (Manual vs. Autofocus)

There are two main types of focus in photography: manual focus, where the photographer adjusts the focus ring on the lens to bring the subject into sharpness, and autofocus, where the camera does the focusing automatically.

Factors Affecting Focus Accuracy

Several factors can affect the accuracy of focus in a photograph:

Lens Quality

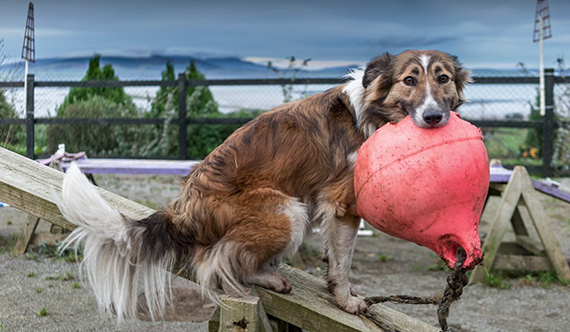
The quality of your lens plays a significant role in focus accuracy. Higher-quality lenses generally provide sharper, clearer images.

lens quality

Photo captured by Hunter Moranville
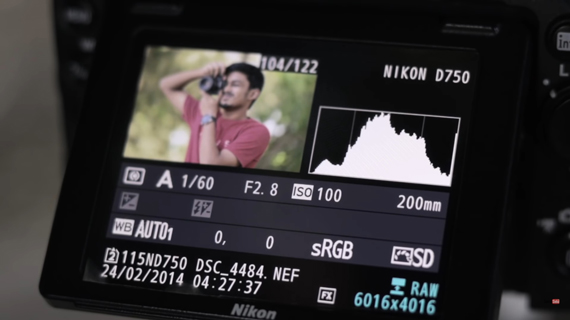
Camera Settings

Camera settings, such as aperture size and shutter speed, can affect depth of field and motion blur, respectively, which in turn can impact focus.

Lighting Conditions

In low-light conditions, achieving sharp focus can be challenging because cameras generally need light to focus accurately.

Subject Movement

If your subject is moving, it can be challenging to maintain focus on them, especially if they’re moving quickly or unpredictably.

Mastering Autofocus Techniques

Modern cameras come equipped with a variety of autofocus (AF) modes and settings to help photographers achieve sharp focus quickly and efficiently.
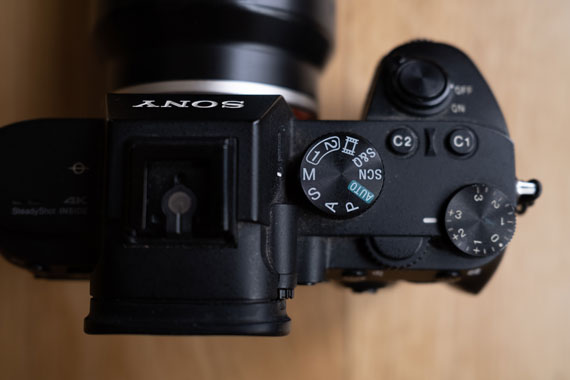
Autofocus Modes

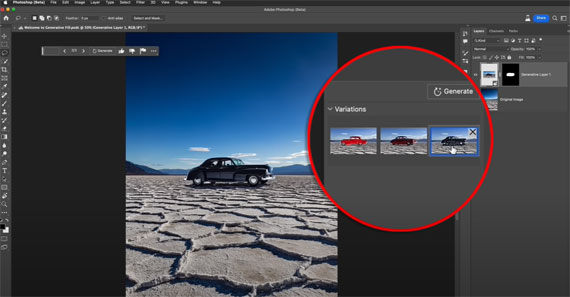
There are three main types of autofocus modes: single-shot AF, continuous AF, and automatic AF point selection.

autofocus modes

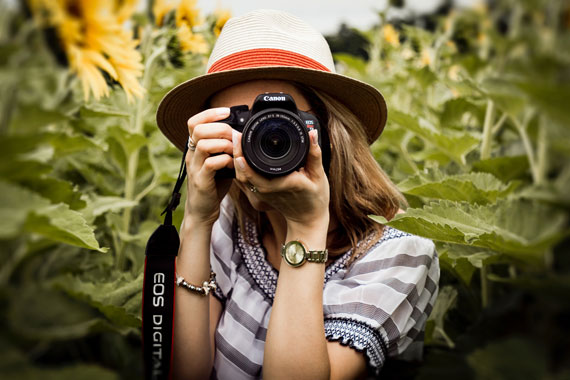
Photo captured by Andre Furtado

Single-shot AF

Single-shot AF, also known as AF-S or One Shot, is ideal for stationary subjects. The camera focuses once and then locks the focus.

Continuous AF

Continuous AF, also known as AF-C or AI Servo, is designed for moving subjects. The camera continuously adjusts the focus as the subject moves.

Automatic AF Point Selection

With automatic AF point selection, the camera chooses the focus point for you. This is useful when you want to focus on the subject quickly without having to select a focus point manually.

Selecting the Right Autofocus Mode for Different Scenarios

Choosing the right autofocus mode depends on your subject and situation. For example, if you’re shooting a stationary subject like a landscape or a portrait, single-shot AF is often the best choice. For moving subjects, like athletes or wildlife, continuous AF can be more effective.

By contrast, automatic AF point selection is commonly used in street photography, candid moments, or situations where the subject is not necessarily centered in the frame.

focus scenario

Utilizing Focus Tracking for Moving Subjects

Focus tracking allows the camera to maintain focus on a moving subject. This is particularly useful in sports or wildlife photography.

Fine-Tuning Autofocus Settings

Just as important as understanding the different autofocus modes is knowing how to fine-tune your autofocus settings. This includes:

AF Point Selection: This allows you to pick a specific autofocus point or allow the camera to choose automatically. It’s crucial for precise focusing.

AF Area Modes: These modes decide the number of AF points used for focusing. Single-point uses one, dynamic-area uses multiple, and auto-area lets the camera decide.

Customizing Autofocus Options: Many cameras allow you to customize specific aspects of the autofocus system to better suit your shooting style or conditions. This can include settings like AF tracking sensitivity and time delay.

Perfecting Manual Focus

While autofocus is an incredibly useful tool, there are situations where manual focus can be more effective.

manual mode

Advantages of Manual Focus

Manual focus gives you complete control over the focus point, which can be particularly beneficial when shooting macro photography, portraits, or in low-light conditions where autofocus may struggle.

Techniques for Achieving Accurate Manual Focus

Achieving accurate manual focus requires practice and patience. Here are some techniques that can help:

Using Focus Peaking

Focus peaking is a feature found in many modern digital cameras that highlights the areas of the image that are in sharp focus, making it easier to manually focus accurately.

It works by detecting edges and displaying them as colored lines or highlights on the camera’s LCD screen or electronic viewfinder.

Zooming in for Precision

Most digital cameras allow you to zoom in on your image in the viewfinder or on the LCD screen, providing a closer look at your focus point for more precise focusing.

Utilizing Depth of Field Preview

The depth of field preview button on a camera allows you to see what your image will look like at the chosen aperture, giving you a better idea of what will be in focus.
This can help you better control the background blur or capture a specific area in sharp focus.

Situations Where Manual Focus is Preferable

Manual focus is often preferable when shooting subjects that are not moving quickly, such as landscapes, portraits, and macro shots. It can also be helpful in low-light situations where autofocus may struggle.

Achieving Sharpness: Beyond Focus

While achieving perfect focus is essential, other factors also contribute to the sharpness of your images.

Importance of Stability

Camera shake can lead to blurry images. Maintaining stability, either through holding the camera steadily or using a support system, is crucial for sharp photos.

Using Tripods and Monopods

Tripods and monopods can provide stability, especially in situations where slow shutter speeds are necessary.

tripod for stability

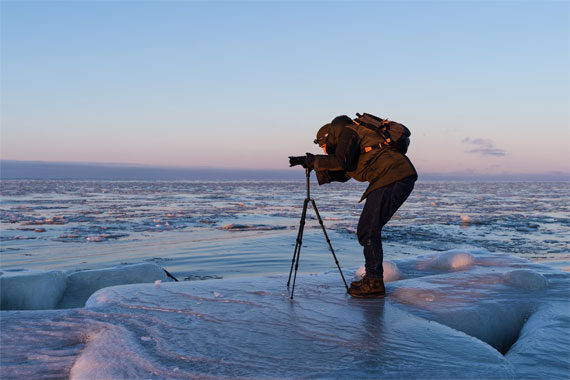
Image Stabilization Techniques

Many modern cameras and lenses come with image stabilization features.

These techniques include Optical Image Stabilization (OIS), where the lens or sensor physically moves to compensate for hand shake; Electronic Image Stabilization (EIS), which uses software algorithms to adjust the image by cropping and shifting it; and In-body Image Stabilization (IBIS), where the image sensor itself moves to counteract the shake. Additionally, proper camera handling and breath control can contribute to image stability.

Shutter Speed and Its Impact on Sharpness

A slower shutter speed can result in motion blur, while a faster shutter speed can freeze motion, leading to sharper images.

Lens Choice and Its Effect on Image Sharpness

High-quality lenses with good optics typically provide sharper images. Prime lenses, with a fixed focal length, usually offer sharper images than zoom lenses due to their simpler design. The lens’s focus accuracy and the presence of aberrations can impact image sharpness.

Always remember to clean your lenses properly as dirt and smudges can also affect sharpness.

Overcoming Common Focus Challenges

Photographers often face a range of focus challenges, from low-light conditions to moving subjects.

Dealing with Low-Light Conditions

In low light, cameras can struggle to achieve focus. In such situations, using manual focus or a flashlight to assist your camera’s autofocus can be helpful.

low light photograph

Addressing Back-Focus and Front-Focus Issues

Back-focus and front-focus issues occur when the camera focuses behind or in front of the subject. Fine-tuning your autofocus settings or using manual focus can help address these issues.

Note: Adjusting the autofocus for individual lenses is called AF Microadjustment for Canon and AF Fine Tune for Nikon, and it involves manually adjusting the focus until it’s correct.

Strategies for Capturing Moving Subjects

Capturing moving subjects can be challenging. Using continuous autofocus with focus tracking and choosing a fast shutter speed can help maintain focus on your subject.

Focus Tips for Various Photography Genres

Different genres of photography may require different focus strategies. For example, landscape photography typically requires a deep depth of field, while portrait photography often uses a shallow depth of field to blur the background.

Post-Processing for Enhanced Focus

Even after you’ve captured your image, there are steps you can take in post-processing to enhance the focus.

Understanding Sharpening Techniques

Sharpening in post-processing can enhance the detail in your images. However, it should be used sparingly, as too much sharpening can lead to unnatural-looking images.

Utilizing Selective Sharpening

Selective sharpening allows you to sharpen only specific areas of an image. This can be particularly beneficial when you want to draw attention to a specific subject.

Masking and Feathering for Precise Sharpening

Masking and feathering are techniques used in photo editing software that allows for precise sharpening. Masking lets you select the specific areas of the image you want to sharpen while feathering softens the edges of your selection to create a more natural look.

masking and feathering

Avoiding Over-Sharpening Artifacts

While sharpening can enhance your images, over-sharpening can create artifacts and make the image appear unnatural. It’s essential to use this tool judiciously and monitor your image closely as you sharpen.

Conclusion

Achieving perfect focus in photography requires a blend of technical knowledge, practical skills, and artistic vision. From understanding the fundamentals of focus to mastering autofocus and manual focus techniques, every step is an opportunity to improve and refine your craft.

Keep exploring photography tips and various resources to expand your knowledge and skills. Happy shooting!

About the Author:
Aleksandrs Karevs runs a photography blog called OhMyCamera. He is a full-stack digital marketer passionate about digital photography. In his free time, he enjoy taking photos with his everyday companion – Fujifilm X100V.

- - - - - - - - - - - - - - - - - - - - - - - - - - - - - - - - - - - - - - - - - - - - - - - - - - - - - - - - - - - - - - - - - - - - - - - - - -

Did you appreciate this newsletter? Please help us keep it going by Joining Our Patreon Supporters

What are your thoughts on this article? Join the discussion on our Facebook Page

PictureCorrect subscribers can also learn more today with our #1 bestseller: The Photography Tutorial eBook

- - - - - - - - - - - - - - - - - - - - - - - - - - - - - - - - - - - - - - - - - - - - - - - - - - - - - - - - - - - - - - - - - - - - - - - - - -

The post Perfect Focus in Photography: A Comprehensive Guide appeared first on PictureCorrect.


from PictureCorrect https://ift.tt/UG96wtO
via IFTTT

PictureCorrect.com: How to Use Generative AI Fill in Photoshop

Are you ready to elevate your Photoshop game to the next level? This video introduces Adobe Firefly, a ground-breaking generative AI technology now natively integrated into Photoshop. Brought to you by Adobe’s Photoshop guru, Russell Preston Brown, Firefly is a powerful, non-destructive feature that works by taking text prompts and transforming an existing photograph into something truly unique and exciting:

In this blog post, we’re going to guide you through the exciting process of using Adobe Firefly in Photoshop.

Starting With the Basics

Firefly is user-friendly and straightforward to navigate. You begin with your base image – in this instance, a simple, single-layer image of the Salt Flats. With Firefly, you have the flexibility to pin your toolbar at any location on your screen. This is a handy feature when working with multiple tools.

The generative fill bar contains several accessible tools for an effortless workflow. Once you’ve made a selection on your base image, you can start with a generative fill.

How Adobe Firefly Works

Let’s consider you wish to add a classic car from the 50s to your base image. Simply type this text into Firefly and select ‘Generate.’ Firefly will then create several examples of 50s cars, from which you can choose the one that fits your artistic vision.

What’s particularly fascinating is how Firefly incorporates a car into your image. It doesn’t just place the car onto the photograph; it adds a shadow and adjusts the car’s position to make it look natural within the scene. This level of attention to detail makes Firefly an invaluable asset for realistic image manipulation.

Going Above and Beyond with Adobe Firefly

Adobe Firefly’s power is not limited to adding objects to a scene. It can also alter the environment based on your prompts. For instance, let’s say you’d like to add a reflection pool filled with blue water to the Salt Flats image. Once again, type your description into Firefly, and it will create a pool that fits seamlessly into the existing image. The program also adds reflections and shadows, enhancing the realism of the edited photograph.

generative ai

Creating Skies with Adobe Firefly

Another exceptional feature of Adobe Firefly is its ability to generate skies. By making a selection in the sky area of your image, you can prompt Firefly to add clouds to your photograph. The AI tool creates a new layer for this purpose, keeping your edits non-destructive.

Expanding Your Canvas

The real showstopper, however, is Firefly’s capability to expand your canvas and fill in the extra space intelligently. After stretching out your image to create a panoramic view, you can select the expanded work area and leave Firefly to determine what fits best in the new space. In this case, it impressively calculates and adds the sun to the newly created sky, enhancing the photograph’s overall aesthetic.

Adobe Firefly revolutionizes Photoshop’s editing capabilities, providing users with an intuitive and innovative tool for transforming ordinary images into extraordinary works of art. With its public beta now available, we encourage all digital artists and photographers to explore this advanced AI technology and discover the magic of generative fill.

- - - - - - - - - - - - - - - - - - - - - - - - - - - - - - - - - - - - - - - - - - - - - - - - - - - - - - - - - - - - - - - - - - - - - - - - - -

Did you appreciate this newsletter? Please help us keep it going by Joining Our Patreon Supporters

What are your thoughts on this article? Join the discussion on our Facebook Page

PictureCorrect subscribers can also learn more today with our #1 bestseller: The Photography Tutorial eBook

- - - - - - - - - - - - - - - - - - - - - - - - - - - - - - - - - - - - - - - - - - - - - - - - - - - - - - - - - - - - - - - - - - - - - - - - - -

The post How to Use Generative AI Fill in Photoshop appeared first on PictureCorrect.


from PictureCorrect https://ift.tt/DQlvGcM
via IFTTT

keskiviikko 24. toukokuuta 2023

PictureCorrect.com: The Photographer’s Secret Weapon: Creating Mood

A mood is created in a photograph when it allows the viewer to place themselves in the moment, or it causes them to remember a moment that stirs up an emotional reaction. It’s a complicated subject, but it’s imperative for photographers to understand how to express different moods in their images.

Getting the Right Mood Across to a Viewer

how to set mood in photos

Photo by Atikh Bana

Warm colors, including yellow, often evoke feelings of happiness, optimism and energy, which is in direct opposition to the woman’s pose in the photo above. Her expression and the choice of camera angle emit a more somber and thoughtful mood.

Critical Thought: When you’re trying to establish a mood in your photos, make sure you don’t send mixed signals to your viewer. Pay special attention to the lighting, background, pose, props and expression to ensure that they all project the mood you wish to convey.

Discovering How Color Affects Mood

Color weighs heavily upon the mood of a photo. Color theory is an entire industry. It influences everything from the paint you’ll find at local hardware stores to how a grocery store organizes their fruits and vegetables.

Photo by Emma Francis

Remember this: Here’s a shortlist that describes the psychological effect (the mood) of different colors.

  • Blue: trust, cool, cold, calm, stable, powerful, strength, reliable
  • Yellow: friendly, warm, enlightening, optimism, energetic
  • Green: natural, fresh, wealth, soothing, balance, restful
  • Red: loving, passion, danger, hunger, urgency, daring
  • Pink: compassion, faithful, beauty, love, sensitive

What mood does the landscape photo above create in your mind? Do you think the color of this photo was chosen to set a mood?

Below is the same photo with the color corrected back to what the scene really looked like. Notice how it does effectively ruin the mood.

setting mood in photos with color

By skewing the color balance toward blue, the photographer created a mood of cold, isolated beauty.

Your Turn

Pick a color from the shortlist above. Plan out a photo session where you will set the mood by incorporating your chosen color. You can accomplish this with light, background, props, camera settings and even in your post-production processing.

A photograph will hold a viewer’s attention longer and set a mood when it touches as many of the senses as possible, including sight, sound, taste, smell and feel. When a photo touches these senses, what we are talking about is the concept of mood.

Photo by Tina Hand

In the motel signage photo above, we can easily see the desolate landscape. Can you also imagine running your hand down that pole and feeling the rusty scratches? Can you hear the wind whistling across the landscape? Perhaps some of the sand hits you in the face, cuts across your lips, and you taste the earth’s saltiness.

What do you smell? When I look at this photo, I smell old grease from a diner and a faint whisper of aging pool chlorine.

This photo sets a very distinct mood, and a big part of that is in the post-processing. The tones were left flat, and the colors unsaturated to create an atmosphere of deserted isolation.

Here’s an exercise to stretch your thinking when it comes to creating a mood in photography.

Select a photograph from your portfolio that you believe has a distinctive mood. Now, using post-processing, change the feeling of the image to something completely different. When completed, share both versions with family and friends. Ask them to describe how they feel when viewing your two different versions of the same picture.

how to take moody portrait photos

Photo by Juan Ordonez

Key Thought: When photographing people, the most influential elements to establish mood are facial expression and body language.

A critical component of mood in photography is your choice of the camera angle. The right camera angle can set a mood or ruin a feeling that you’re trying to create.

Remember This: When photographing people, a camera angle that looks up at the subject sets a mood of power and control. Looking down at a subject sets a feeling of submissiveness and approachability.

Numerous mood-setting factors are working in the portrait of the young man above. They include the lighting, the chosen colors, facial expression and body language—but most importantly, the slightly lower camera angle is looking up toward the model’s eyes.

If everything were the same, except the camera angle was high and looking down on him. It would completely change the mood of the photograph.

Try this: Grab a willing subject and shoot pictures for a couple of hours. Place your model in various locations and, in each area, change the camera position to create different moods.

Weather

moody weather photography

Clockwise from top left: Photos by Hassan Ishan, Sebin Thomas and Rory Björkman

No matter what genre of photography you’re creating outdoors, weather plays a critical factor in establishing mood.

moody winter photo

Photo by Josh Hild

Critical Thought: When the weather is beautiful, it’s easy to think about getting outside and taking pictures. However, it’s bad weather that brings drama and mood to almost any scene!

Lighting & Shadow

lighting shadow mood photo

Clockwise from top left: Photos by Dollar Gill, Peri Stojnic and jplenio

These three example photos evoke an intense mood—from inviting to somber to almost scary. By carefully selecting your lighting and shadow placement, you can send a strong message to a viewer.

Don’t forget that you can alter the lighting of a scene. In the example photo of the building with the cross, the photographer placed a light source inside the structure to create an eerie mood.

Idea: In the television, movie and music industries, professional lighting directors carefully select the lighting to display a mood. By paying extra attention to these example resources, you can develop your light and shadow ideas.

Space, Aspect Ratio, & Crop

The use of space is an art term that describes the arrangement of objects within your final composition.

How you use the space in your photo plays a crucial role in setting a mood.

An image with a large area of negative space could indicate a mood of open airiness and happiness. A tight crop of a photo might make a viewer feel cramped and claustrophobic. Cropping off important elements, such as a face, can create tension. Squishing a picture in or dragging out in post-production can radically set a mood.

Space Experiment: Get into your photo files and select a photo that you love—but be sure to choose one that also has some negative space surrounding the subject. It doesn’t have to be a lot of space, as indicated in the cowboy portrait below.

space experiment in photos

Now, try cropping your picture into a variety of images. Use different aspect ratios. Divide up your use of space differently. Get super-creative and do what you would typically consider an oddball crop.

When you’ve created six versions, look at them side-by-side. Does the mood change? Could you also alter the color or tone of your picture for even more mood effect?

Critical Thought: Creating a mood with your photograph involves many different aspects of the process. However, one that you may overlook is the final presentation. This advice includes your use of space, aspect ratio, lens choice and cropping.

Creating Mood with Motion

mood with motion in photos

Photo by Vince Fleming

Activity, a motion of any kind, can add a definite mood to a shot. Sports or school activities are fantastic arenas to practice this form of capturing a mood.

how to set mood using motion in photos

From top: Photos by Marcis Berzins and Erik Dungan

Here are two photographs involving motion that are almost identical in terms of subject matter—and yet they each convey a very different mood.

Critical Thought: When putting mood into your photographs, rarely will one suggested technique work well. It typically requires several techniques to drive your point home. The above photos both use motion. However, they differ in color, light, shadow and the use of space.

happy mood photo

Photo by Harry Quan

When trying to establish a mood, don’t be afraid to direct some motion specific to your need!

Conclusions

  • A mood is created when a viewer of your photo feels something and places themselves at the moment.
  • Color plays a significant role in setting a mood. So much so that entire industries are devoted to the study of color theory!
  • When trying to establish a mood, don’t send mixed signals. Every aspect of your shot should push toward your chosen atmosphere.
  • A photo will grab attention and signal a feeling when it touches as many of the viewer’s senses as possible: sight, sound, taste, smell and feel.
  • When photographing people, pay attention to both the facial expression and the body language when setting up a mood.
  • Your camera angle is important. Think about whether you’re looking up or down on the subject.
  • Weather is a fantastic mood-setter. Go outside when the weather is acting up!
  • When considering your use of lighting and shadow, ask, “What would a movie director do with this?”
  • Lens compression or expansion along with format ratio and cropping can drastically change the mood of a photo.
  • Motion almost always generates the potential for atmosphere. However, it must often be used in conjunction with other techniques to work fully.

It’s time to grab your camera and capture some mood!

About the Author:
Kent DuFault is an author and photographer with over 35 years of experience. He’s currently the director of content at the online photography school, Photzy.com

For Further Training:

It’s a photographer’s secret weapon! Color photography can actually change the emotional state of a person viewing a particular photograph. In this in-depth eBook, you’ll uncover the true ‘story’ behind memorable, fascinating, & impressive color photography. It is currently 71% off.

color photo guide

New Educational Photography eBook (Take a Peek Inside)

Properly executed – color photography can influence a viewer in a subconscious, ingenious, and an undeniably amazing way. It’s fun to learn by doing. This 165 pages practical guide is packed with Assignments, Key Lessons, and Self-Check Quizzes.

Ending soon: The Rich & Vibrant Color Photography Guide at 71% Off

- - - - - - - - - - - - - - - - - - - - - - - - - - - - - - - - - - - - - - - - - - - - - - - - - - - - - - - - - - - - - - - - - - - - - - - - - -

Did you appreciate this newsletter? Please help us keep it going by Joining Our Patreon Supporters

What are your thoughts on this article? Join the discussion on our Facebook Page

PictureCorrect subscribers can also learn more today with our #1 bestseller: The Photography Tutorial eBook

- - - - - - - - - - - - - - - - - - - - - - - - - - - - - - - - - - - - - - - - - - - - - - - - - - - - - - - - - - - - - - - - - - - - - - - - - -

The post The Photographer’s Secret Weapon: Creating Mood appeared first on PictureCorrect.


from PictureCorrect https://ift.tt/LIyjP2U
via IFTTT

PictureCorrect.com: Interesting Photo of the Day: Cruising Through Antarctica

Most of us can only dream of going to Antarctica on a luxury cruise. Even the idea of a cruise to Antarctica, of all places, sounds crazy—right? However, if you’ve got the resources and are willing to take the challenge, you can go to Antarctica for a bit of vacation. To give you a glimpse of what you can experience, here’s an image captured by StartPuzzleheaded673, who was a crew member of a ship going through Antarctica:

“Antarctica from a Luxury Cruise” by StartPuzzleheaded673 (Via Reddit. Click image to see full size.)

It can be frightening to look around and see only ice in every direction. It even has an alien-planet vibe to it—except that there’s a ton of snowy ice everywhere instead of desolate rocks.

Looking at the conditions, it makes one wonder about the reasons why anyone would want to spend their time visiting the barren isolation. But like with any adventure, the memories are worth it—especially when captured in a photograph.

- - - - - - - - - - - - - - - - - - - - - - - - - - - - - - - - - - - - - - - - - - - - - - - - - - - - - - - - - - - - - - - - - - - - - - - - - -

Did you appreciate this newsletter? Please help us keep it going by Joining Our Patreon Supporters

What are your thoughts on this article? Join the discussion on our Facebook Page

PictureCorrect subscribers can also learn more today with our #1 bestseller: The Photography Tutorial eBook

- - - - - - - - - - - - - - - - - - - - - - - - - - - - - - - - - - - - - - - - - - - - - - - - - - - - - - - - - - - - - - - - - - - - - - - - - -

The post Interesting Photo of the Day: Cruising Through Antarctica appeared first on PictureCorrect.


from PictureCorrect https://ift.tt/DC0gNT7
via IFTTT

PictureCorrect.com: Camera Metering Modes Tutorial

It’s frustrating when an image turns out bright or darker than you would have liked. To better understand how to get correct exposures, you need to understand the different ways a camera meters light. Photographer Saurav Sinha shares his insight on three basic metering modes:

To form an image, cameras need to focus the light being reflected from the subject. The camera’s light meter evaluates this reflected light to estimate a proper exposure. Basically, there are three metering modes that you can use to expose the subjects properly.

Evaluative/Matrix Metering

This is the most commonly used metering mode and is also set as the default option in many cameras. In this mode, the camera divides the entire scene into various zones and calculates an average exposure for the entire frame. However, a slightly greater weight is given to the zone with your focus point.

matrix or evaluative metering mode

Greater priority is given to zone 3 as the subject is in that zone

This mode works great when the lighting is uniform. For most photographers, this is the “set it and forget it” metering mode. So unless the lighting is very challenging, you can get away with using this mode.

Center-Weighted Metering

The name says it all. In this mode, the center of the frame is given the highest priority. When metering in this mode, the portion of the frame that lies at the center will be properly exposed.

You can still use this metering mode if the subject isn’t in the middle of the frame. Simply set the subject to the center of the frame once to take the exposure reading, lock the exposure, recompose with the subject placed where you want them, and take the shot.

center weighted metering mode

You can use this metering mode when the subject is backlit or in other challenging lighting situations where evaluative/matrix metering cannot function properly.

Spot Metering

If you need to meter precisely for a very small area of the frame, spot metering is the mode to go for. This mode is more accurate than the center-weighted metering mode. Also, while center-weighted metering mode is restricted to the center of the frame, spot metering is linked with the focus point. The camera will thus ignore the rest of the scene except for the focus point.

matrix metering

The leaves are overexposed when shot in matrix/evaluative metering mode.

spot metering mode

The leaves are exposed properly when shot in spot metering mode.

As with center-weighted metering mode, use the spot metering mode when the lighting is complex, and when the subject occupies a tiny area of the frame.

No matter what metering mode you prefer to use, always refer to the histogram. The histogram tells you exactly if the shot is properly exposed or not.

check histogram of exposure

Which metering mode do you prefer?

- - - - - - - - - - - - - - - - - - - - - - - - - - - - - - - - - - - - - - - - - - - - - - - - - - - - - - - - - - - - - - - - - - - - - - - - - -

Did you appreciate this newsletter? Please help us keep it going by Joining Our Patreon Supporters

What are your thoughts on this article? Join the discussion on our Facebook Page

PictureCorrect subscribers can also learn more today with our #1 bestseller: The Photography Tutorial eBook

- - - - - - - - - - - - - - - - - - - - - - - - - - - - - - - - - - - - - - - - - - - - - - - - - - - - - - - - - - - - - - - - - - - - - - - - - -

The post Camera Metering Modes Tutorial appeared first on PictureCorrect.


from PictureCorrect https://ift.tt/9ArMVkc
via IFTTT

tiistai 23. toukokuuta 2023

PictureCorrect.com: Interesting Photo of the Day: Tower Through the Sun

Planning is one of the greatest key elements of successful photography. When you want to get a particular shot, you must plan for it well ahead of time and have the perseverance as well. An image that lacks planning after all is a mere snapshot. Photographer Tyler McKay for instance, had to go back to the same place for twenty-five times within one and a half months to capture the sun perfectly aligned with the CN tower in Toronto, Canada:

tower through sun

“Sun Aligned with the CN Tower” by Tyler McKay (Via Reddit. Click image to see full size.)

McKay took the image with his Sony A7RIII and 100-400mm lens at 340mm, f/9, 1/250s, and ISO 100.

It’s a good thing McKay didn’t give up, and instead kept on trying until the 29th attempt. Although he used different applications and online resources to determine the perfect alignment between the sun and the CN tower, they’d be off by some bit every time. He finally got lucky on the 29th attempt. The fact that the alignment lasts only about 1-2 seconds makes this shoot even more challenging. Just imagine how prepared you’ve got to be in order to take such an image.

Besides the perfect alignment, there are other factors that make the image praiseworthy. The silhouette of the cityscape that surround the tower is equally fascinating. The unique cloud pattern in the background adds another point of interest to the image. And how can anyone miss the flock of birds near the water body. The birds flying so close to the water surface perfectly complete the image. They make the image so much more aesthetically pleasing.

“1000’s of birds starting flying across the water making the weirdest/coolest sounds I’ve ever heard. It was such an incredible thing to witness. It was a beautiful warm summers morning when I finally captured this image how I imagined and planned it. Practice patience and enjoy the moment.”

This is a great proof that photography isn’t just luck, it’s discipline as well.

- - - - - - - - - - - - - - - - - - - - - - - - - - - - - - - - - - - - - - - - - - - - - - - - - - - - - - - - - - - - - - - - - - - - - - - - - -

Did you appreciate this newsletter? Please help us keep it going by Joining Our Patreon Supporters

What are your thoughts on this article? Join the discussion on our Facebook Page

PictureCorrect subscribers can also learn more today with our #1 bestseller: The Photography Tutorial eBook

- - - - - - - - - - - - - - - - - - - - - - - - - - - - - - - - - - - - - - - - - - - - - - - - - - - - - - - - - - - - - - - - - - - - - - - - - -

The post Interesting Photo of the Day: Tower Through the Sun appeared first on PictureCorrect.


from PictureCorrect https://ift.tt/dE1h7lA
via IFTTT

PictureCorrect.com: Street Photographer Shares 5 Tips from His Career

After spending over five years diving into the world of photography, Roman Fox shares a collection of five high-level, holistic tips in his recent video. These are not your typical technical advice, like the use of the rule of thirds or understanding exposure triangle. Instead, these are tips that touch upon the ethos of being a photographer, the mindset, and the approach one needs to adopt to grow and evolve in the craft of photography. Here are the key takeaways:

In the beginning, Roman dreamed of shooting in exotic locations, just like many other budding photographers. However, he soon realized that he was wasting his time dreaming and not actually doing any photography. The solution was simple: He picked up his camera and started taking photos in and around London, where he lived.

1. Shoot Around You

The message here is to use what you have and shoot in your environment. If you are in the countryside, capture the countryside life. If you are in a city, document the urban landscape. The point is to start shooting and practicing your craft.

2. Remember Your Why

Roman highlights the importance of remembering why you started photography. His personal reason was simply to enjoy the craft and escape his day-to-day life. But as photographers progress and gain popularity, it is easy to lose sight of the initial motivation behind picking up a camera. Whether it is collaborations, commercial projects, or building an online audience, ensure that these opportunities do not overshadow your love for photography. It’s crucial to always reassess your path and protect your “why.”

3. Photography Fitness

An interesting metaphor Roman uses is comparing photography to physical fitness. Just as consistency is key in maintaining good physical shape, so is it in developing your photography skills. He recommends taking your camera everywhere with you and shooting one or two photos a day to make slow but steady progress. This habit helps you improve your skills gradually rather than rushing to take tons of photos in one go and then neglecting photography for weeks.

street photographer

4. Understand Your Creative Cycle

Roman shares that he noticed a repeating pattern in his creative journey: a cycle of experimenting, working, and resting. At times, he would experiment with new techniques, subjects, or styles. Other times, he would work on improving these new discoveries, and then there would be periods of rest when he took a break from shooting. Recognizing these cycles can help you make the most of each phase and manage creative burnout.

5. Keep It Simple

The last tip Roman shares is the importance of simplicity. This applies to everything from gear to learning and even to the photography approach. Starting with too much equipment or trying to learn everything at once can be overwhelming and often counterproductive. Instead, start with one good camera and one lens. Focus on learning one aspect of photography at a time.

- - - - - - - - - - - - - - - - - - - - - - - - - - - - - - - - - - - - - - - - - - - - - - - - - - - - - - - - - - - - - - - - - - - - - - - - - -

Did you appreciate this newsletter? Please help us keep it going by Joining Our Patreon Supporters

What are your thoughts on this article? Join the discussion on our Facebook Page

PictureCorrect subscribers can also learn more today with our #1 bestseller: The Photography Tutorial eBook

- - - - - - - - - - - - - - - - - - - - - - - - - - - - - - - - - - - - - - - - - - - - - - - - - - - - - - - - - - - - - - - - - - - - - - - - - -

The post Street Photographer Shares 5 Tips from His Career appeared first on PictureCorrect.


from PictureCorrect https://ift.tt/WpIJEs6
via IFTTT

PictureCorrect.com: Interesting Photo of the Day: Meteor Shower Exposure Stacking

Alandizzle visited Yosemite National Park during the Perseid Meteor showers in all their glory. While there, he captured this great shot on Sentinel Dome using multiple exposures. He replicated some of the meteors in the shot in post processing to give more context as to what it actually felt like watching them:

Meteor shower at Yosemite

Parade of lights at Yosemite National Park (Via Reddit. Click image to see full size.)

Alandizzle shot this on a Nikon D810, with a 14–28mm lens at f/2.8 focused to infinity. His camera was set to go off every 33 seconds using an intervalometer. He set it to 33 seconds, as each 30 second exposure takes roughly 2 seconds to process. He stacked the exposures in post processing using Starry Landscape Stacker for Mac. To add the extra meteors to the shot, alandizzle used Free Transform in Photoshop. He carefully chose to have them fall over a central area, and used a layer mask to ‘paint’ them back in. He then merged the layers with the main layer.

You need patience to create great shots like this, but once you’ve got your camera set up, you can just sit back and enjoy the light show for a few hours, as alandizzle did. It was certainly worth it!

- - - - - - - - - - - - - - - - - - - - - - - - - - - - - - - - - - - - - - - - - - - - - - - - - - - - - - - - - - - - - - - - - - - - - - - - - -

Did you appreciate this newsletter? Please help us keep it going by Joining Our Patreon Supporters

What are your thoughts on this article? Join the discussion on our Facebook Page

PictureCorrect subscribers can also learn more today with our #1 bestseller: The Photography Tutorial eBook

- - - - - - - - - - - - - - - - - - - - - - - - - - - - - - - - - - - - - - - - - - - - - - - - - - - - - - - - - - - - - - - - - - - - - - - - - -

The post Interesting Photo of the Day: Meteor Shower Exposure Stacking appeared first on PictureCorrect.


from PictureCorrect https://ift.tt/zXbWhRE
via IFTTT