


If you’ve recently been experimenting with the Luminar Neo software, you might have stumbled upon the ‘layers’ feature. The acclaimed photographer, Darlene Hildebrandt, provided an insightful walkthrough on using layers in Luminar Neo in a recent video. Today, we’re recapping the essential takeaways to help you bring out the best in your images:
Why Use Layers in Luminar Neo?
Layers add a tremendous amount of versatility and creativity to your photo editing process. Darlene illustrates this with her tutorial on adding a texture overlay to an image, a task not possible in previous versions of Luminar without using the specific texture tool. The capability to add textures as a layer in Luminar Neo, although it means learning a few new things, offers more flexibility in terms of texture application and editing.
Adding and Manipulating a New Layer
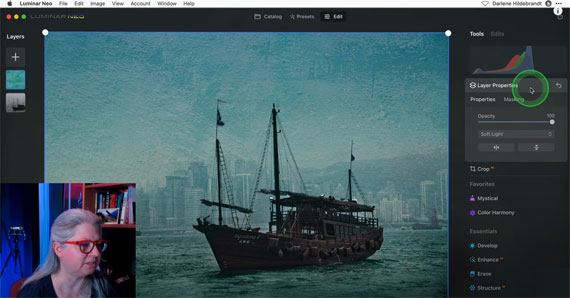
First, select your image and click on the ‘plus’ sign on the left-hand side to add a layer. You can choose from the pre-existing options in Luminar Neo, or you can add your own textures and images. Once you’ve chosen your texture, adjust its opacity to control its transparency. A lower opacity allows more of the underlying image to show through, while a higher opacity renders the texture more visible.
Blend Modes: A Key to Layer Interaction
The ‘Blend Mode’ option dictates how your newly added layer interacts with the original image. Each choice under the Blend Mode menu (such as darken, multiply, lighten, screen, etc.) creates unique effects. For texture overlays, Darlene suggests the ‘Screen’ or ‘Overlay’ modes as excellent starting points.
Layer Orientation and Masking
Luminar Neo allows you to flip, rotate, and stretch your new layer. This capability helps match the texture layer better with the original image. Masking enables you to control where the texture appears on your photo. Remember, though, the AI mask analyzes the texture layer and not the original image. Therefore, manual masking might sometimes be necessary.
Editing the Layer
In Luminar Neo, each layer is editable independently. You can adjust the color, structure, and contrast of the texture layer without affecting the original image. For example, you can enhance or blur your texture using the ‘Structure’ tool or add more contrast using the ‘Curve’ tool. The final outcome can be quite artistic!
Adding Multiple Layers
With Luminar Neo, you can add multiple layers to your image. For instance, you could include a grunge frame or edge as a second layer. However, be aware that when you mask a layer and then flip it, the mask follows. Therefore, it’s recommended to position your image or layer before doing any masking.
Layer Possibilities
Darlene’s tutorial showcases the immense possibilities that layers offer. You can add a hot air balloon to your image, even reflecting it in the water by simply adding another layer and adjusting its opacity. You can even switch black and white colors using the ‘Curves’ tool and apply a white frame to your image using the ‘Lighten’ blend mode.
The use of layers adds a new dimension to photo editing in Luminar Neo. By using layers, you can create images with unique textures, add interesting elements, and adjust different parts of your image independently. This new feature is bound to bring more creativity to your photography. Happy editing!
Note: Darlene offers a comprehensive course on Luminar Neo which includes lessons on layers, along with other essential tools. It is currently 30% off for a limited time if you want to check it out.
Final day: The Luminar Neo Photo Editing Course at 30% Off
- - - - - - - - - - - - - - - - - - - - - - - - - - - - - - - - - - - - - - - - - - - - - - - - - - - - - - - - - - - - - - - - - - - - - - - - - -
Did you appreciate this newsletter? Please help us keep it going by Joining Our Patreon Supporters
What are your thoughts on this article? Join the discussion on our Facebook Page
PictureCorrect subscribers can also learn more today with our #1 bestseller: The Photography Tutorial eBook
- - - - - - - - - - - - - - - - - - - - - - - - - - - - - - - - - - - - - - - - - - - - - - - - - - - - - - - - - - - - - - - - - - - - - - - - - -
The post Layers Tutorial in Luminar Neo appeared first on PictureCorrect.
from PictureCorrect https://ift.tt/lvR5DIT
via IFTTT

0 kommenttia:
Lähetä kommentti