perjantai 30. kesäkuuta 2023

PictureCorrect.com: The Black Card Technique: Your Secret Weapon for Stunning Fireworks Photography

The black card technique is used in long exposure photography and can be particularly effective for shooting fireworks. The goal is to prevent overexposure and to capture multiple bursts of fireworks in a single frame.

fireworks photography

Photo captured by Mio Ito

Here is how you can use this technique:

Equipment Needed:

  1. A Camera that allows for manual control of aperture, shutter speed, and ISO
  2. A Tripod
  3. Remote Shutter Release (to avoid camera shake)
  4. A Black Card – It should be large enough to cover your camera lens.

Procedure:

Setting up: First, set up your camera on a tripod. The location should be in a spot where you have a good view of the sky where the fireworks will explode.

Focus: Before the fireworks start, set the focus. If you’re mainly interested in the fireworks, you can manually focus your camera at a distance where you expect the fireworks to burst. Switch off auto-focus to ensure your camera doesn’t try to refocus every time you take a picture.

Camera Settings: Set your camera to a low ISO (like ISO 100 or 200) to reduce noise. Set your aperture to a mid-range value (like f/8 or f/11) for optimal sharpness. Since fireworks are bright, these settings should provide enough light for the shot.

Shutter Speed: Since we are aiming for long exposure to capture multiple bursts, you need to set your camera in Bulb mode. This mode allows you to keep the shutter open for as long as you press the shutter release button.

The Black Card: Hold the black card in front of your camera lens. You’ll want it close enough to cover the lens but not so close that you risk bumping the camera.

black card

Photo captured by Giorgio Trovato

Shooting the Fireworks: As the fireworks show starts, press and hold the shutter release button to open the shutter. Keep the black card in front of the lens. When a firework burst that you want to capture happens, remove the black card from in front of the lens, exposing it to the light from the firework. Once the burst fades, replace the card. Repeat this each time there is a burst you want to capture. When you’re done capturing all the bursts you want in a single frame, release the shutter button to close the shutter and complete the exposure.

Experiment: This technique requires a bit of practice and experimentation. Don’t be discouraged if your initial shots are not what you expected. Play around with the timing of when you remove and replace the card, as well as the settings on your camera, until you get results that you are happy with.

Remember to review your shots and adjust your settings as needed. Factors such as the brightness of the fireworks, ambient light, and the desired effect may necessitate adjustment of your aperture, ISO, or how long you keep the shutter open.

For Further Training on Fireworks Photography:

With 4th of July Independence Day celebrations quickly approaching, we have been receiving requests for more training on how to photograph fireworks. Fireworks photography is indeed one of the most daunting types of photography. This in-depth tutorial eBook explains the process from start to finish, everything from gear and camera settings to composition and post-processing to achieve great results with fireworks of any kind. Currently 55% off to help photographers prepare for the July 4th!

fireworks photography

The How to Photograph Fireworks eBook

A common result of photographers new to fireworks photography is capturing nothing but bright white spots instead of colorful bursts. But with the guidance of this eBook in hand, you should be fully prepared to photograph brilliant fireworks displays.

Deal ending soon: How to Photograph Fireworks Guide at 55% Off

- - - - - - - - - - - - - - - - - - - - - - - - - - - - - - - - - - - - - - - - - - - - - - - - - - - - - - - - - - - - - - - - - - - - - - - - - -

Did you appreciate this newsletter? Please help us keep it going by Joining Our Patreon Supporters

What are your thoughts on this article? Join the discussion on our Facebook Page

PictureCorrect subscribers can also learn more today with our #1 bestseller: The Photography Tutorial eBook

- - - - - - - - - - - - - - - - - - - - - - - - - - - - - - - - - - - - - - - - - - - - - - - - - - - - - - - - - - - - - - - - - - - - - - - - - -

The post The Black Card Technique: Your Secret Weapon for Stunning Fireworks Photography appeared first on PictureCorrect.


from PictureCorrect https://ift.tt/vpFyoMC
via IFTTT

PictureCorrect.com: Interesting Photo of the Day: Fresh Afternoon in the French Alps

Nature can be unpredictable. Things can be wild one moment and become stunning in an instant. This is exactly what happened when photographer Tomas van der Weijden was backpacking in the French Alps, in the area of Mont Thabor. One moment he was freezing in a snowy mess; a second later, he was able to capture this beautiful springlike image:

river in French Alps

“A Fresh Afternoon in the French Alps” by Tomas van der Weijden (Via Reddit. Click image to see full size.)

The artist shot the image at 19mm, f/10, 0.8s, and ISO 250. Since he had to use a longer exposure during daylight, he also used a six-stop neutral density (ND) filter.

What’s beautiful about this shot is how lush and fresh everything appears. It’s hard to imagine it was shot after a snowstorm. The sky has opened up beautifully and the grass along the stream’s banks appears green and fresh.

“Having faced a snowstorm earlier, conditions changed dramatically and this was a calm afternoon with comfortable conditions.”

And thanks to the slow shutter that van der Weijden used, the water in the stream appears really dynamic and adds to the life of the image—plus it works as a natural leading line, drawing us right into the beautiful scenery.

- - - - - - - - - - - - - - - - - - - - - - - - - - - - - - - - - - - - - - - - - - - - - - - - - - - - - - - - - - - - - - - - - - - - - - - - - -

Did you appreciate this newsletter? Please help us keep it going by Joining Our Patreon Supporters

What are your thoughts on this article? Join the discussion on our Facebook Page

PictureCorrect subscribers can also learn more today with our #1 bestseller: The Photography Tutorial eBook

- - - - - - - - - - - - - - - - - - - - - - - - - - - - - - - - - - - - - - - - - - - - - - - - - - - - - - - - - - - - - - - - - - - - - - - - - -

The post Interesting Photo of the Day: Fresh Afternoon in the French Alps appeared first on PictureCorrect.


from PictureCorrect https://ift.tt/BSJIMEw
via IFTTT

PictureCorrect.com: Breathing Life into Architectural Photography: The Human Element

The profound impact that a human presence can bring to architectural photography is often overlooked. By placing the emphasis on a solitary figure within a vast structure, photographers can breathe life into an otherwise static setting. Clifford Pickett, an established photographer from the Urban iPhone Photography Course, highlighted this unique concept in a recent video where he delved into the importance of integrating the human element, the advantages of backlighting, and the significance of the field of view in architectural photography:

A human figure within an architectural photograph offers an immediate sense of scale, making it easier for the viewers to comprehend the magnitude of the structure. As Clifford emphasized, it isn’t the detailed features of the person that matter – it’s their size and form. By introducing a human being into the frame, viewers gain an intuitive understanding of the size of the structure, which can be especially impactful in larger buildings.

The Magic of Backlighting

The role of backlighting in photography is critical, particularly when capturing the human form within architecture. Pickett demonstrated this concept while photographing The Oculus during the blue hour, the short period after sunset when the interior lights begin to illuminate the structure. He illustrated how using a silhouette – created by positioning the light source behind the subject – can produce a cleaner and more compelling image. The silhouette emphasizes the form and scale of the person, without the distractions of facial detail or clothing texture.

Considerations for Field of View

Adjusting the field of view in your lens is another important technique in architectural photography. By decreasing the field of view, less of the surroundings are captured, reducing the chances of unwanted figures entering the frame. Pickett demonstrated this principle by walking closer to his subject, thereby excluding more of the surrounding crowd. This adjustment allowed him to focus more intently on his chosen focal point: a single individual using their phone.

architecture with human

The Perfect Shot

In the final stages, Pickett highlights the need for patience when lining up the perfect shot. After framing his subject, he waited for the opportune moment when no other people were in the frame. He also positioned his camera to shoot upwards, placing his subject in the lower left corner of the image. This composition allowed him to emphasize the scale of The Oculus while retaining the human element that added life to the structure. The final image showcased the powerful dynamic between the lone figure and the expansive architecture, embodying the essence of his approach to architectural photography.

By incorporating the human element, skillfully utilizing backlighting, and manipulating the field of view, photographers can evoke a deeper understanding of the relationship between people and the architectural spaces they inhabit. The solitary figure within the grandeur of the structure evokes a sense of awe and fascination, reinforcing the potency of the human element in architectural photography.

Launch sale ending soon: The Urban iPhone Photography Course at 80% Off

- - - - - - - - - - - - - - - - - - - - - - - - - - - - - - - - - - - - - - - - - - - - - - - - - - - - - - - - - - - - - - - - - - - - - - - - - -

Did you appreciate this newsletter? Please help us keep it going by Joining Our Patreon Supporters

What are your thoughts on this article? Join the discussion on our Facebook Page

PictureCorrect subscribers can also learn more today with our #1 bestseller: The Photography Tutorial eBook

- - - - - - - - - - - - - - - - - - - - - - - - - - - - - - - - - - - - - - - - - - - - - - - - - - - - - - - - - - - - - - - - - - - - - - - - - -

The post Breathing Life into Architectural Photography: The Human Element appeared first on PictureCorrect.


from PictureCorrect https://ift.tt/DNWvCxO
via IFTTT

torstai 29. kesäkuuta 2023

PictureCorrect.com: Interesting Photo of the Day: Aurora in Godafoss Iceland

Godafoss in Icelandic translates to “waterfall of the gods.” It’s a waterfall that drops from a height of 12 meters. When something is associated with the gods, you expect something magical to happen. The area is thus quite popular among aurora hunters. Take for instance the following image taken by photographer Kaspars Dzenis for a glimpse of what to expect:

aurora on Godafoss waterfall on a moonless night

“Godafoss on a moonless night” by Kaspars Dzenis (Via Reddit. Click image to see full size.)

Dzenis captured this image on a moonless night with his Nikon D810 and Irix 11mm lens.

The lack of moonlight caused the aurora’s green color to dominate the scene. However, Dzenis does point out that it was a challenge to capture any other details besides the aurora.

“It’s little tricky to capture any details besides aurora, but not impossible. Lots of fun though.”

- - - - - - - - - - - - - - - - - - - - - - - - - - - - - - - - - - - - - - - - - - - - - - - - - - - - - - - - - - - - - - - - - - - - - - - - - -

Did you appreciate this newsletter? Please help us keep it going by Joining Our Patreon Supporters

What are your thoughts on this article? Join the discussion on our Facebook Page

PictureCorrect subscribers can also learn more today with our #1 bestseller: The Photography Tutorial eBook

- - - - - - - - - - - - - - - - - - - - - - - - - - - - - - - - - - - - - - - - - - - - - - - - - - - - - - - - - - - - - - - - - - - - - - - - - -

The post Interesting Photo of the Day: Aurora in Godafoss, Iceland appeared first on PictureCorrect.


from PictureCorrect https://ift.tt/7CUewsp
via IFTTT

PictureCorrect.com: Urban Illumination: Capturing Light Trails with an iPhone

Noted photographer Clifford Pickett from Urban iPhone Photography invites us on a visual journey into the world of long exposure photography and light trails in his latest video tutorial. Unleashing the photographic potential of the urban cityscape of New York City’s Grand Central Terminal, Pickett demonstrates how to use the hustle and bustle of city traffic to create striking light trail images, while using nothing more than a smartphone:

Timing is essential when it comes to capturing the perfect light trails, and Pickett recommends shooting during the blue hour – the period shortly after sunset or just before sunrise. The darker ambient light naturally allows for longer exposures, while still providing sufficient light to illuminate the city’s skyline. This balance of natural and artificial light gives a soft, blue hue to the sky, making for the best blue hour shots.

The Need for a Steady Shot

In long exposure photography, stability is key. To ensure the sharpness of static elements in your frame, you’ll need a tripod or a similar device to keep your smartphone steady. Vibrations or movements can introduce unwanted blurriness, so Pickett recommends using a Bluetooth remote control to trigger the camera shutter, thereby minimizing disturbance.

Leveraging Native Camera Features

Pickett begins his light trail endeavor by using the native Camera app’s live photo feature on an iPhone. This feature records 1.5 seconds of video before and after the photo, creating a semblance of a long exposure shot. However, this method doesn’t produce the desired light trails effect, as the app merely blurs the moving objects, making them barely visible.

Turning to ProCam 8 for Light Trails

To create vibrant light trails, Pickett introduces ProCam 8, a professional camera app. By switching to long exposure mode and selecting the light trails option, he sets the exposure time to eight seconds – sufficient for capturing the motion of the slow-moving New York City traffic.

urban light trails

Fine-tuning the exposure settings is crucial in long exposure photography. Pickett adjusts the exposure to slightly underexposed, ensuring the color integrity of the light trails while preventing overexposure from the long shutter duration.

Experimenting with Composition and Perspective

Pickett emphasizes the value of exploration and experimentation in photography. He adjusts his composition, opting for a horizontal frame to capture the wide cityscape, and repositions his setup to get closer to the traffic, adding depth to his image.

A critical aspect of light trail photography lies in the unpredictable nature of traffic movement. As each vehicle, from yellow taxis to red taillights, moves at different speeds and directions, they create unique patterns and colors, resulting in a diverse array of images.

Launch sale ending soon: The Urban iPhone Photography Course at 80% Off

- - - - - - - - - - - - - - - - - - - - - - - - - - - - - - - - - - - - - - - - - - - - - - - - - - - - - - - - - - - - - - - - - - - - - - - - - -

Did you appreciate this newsletter? Please help us keep it going by Joining Our Patreon Supporters

What are your thoughts on this article? Join the discussion on our Facebook Page

PictureCorrect subscribers can also learn more today with our #1 bestseller: The Photography Tutorial eBook

- - - - - - - - - - - - - - - - - - - - - - - - - - - - - - - - - - - - - - - - - - - - - - - - - - - - - - - - - - - - - - - - - - - - - - - - - -

The post Urban Illumination: Capturing Light Trails with an iPhone appeared first on PictureCorrect.


from PictureCorrect https://ift.tt/Mwe6GED
via IFTTT

keskiviikko 28. kesäkuuta 2023

PictureCorrect.com: Urban Portrait Photography Tips & Techniques

Imagine yourself, camera in hand, walking through a busy metropolis. The sights, the sounds, and the smells of a bustling city overwhelm your senses. People all around you are scurrying to and from work. Others are sitting in outdoor cafes enjoying lunch. You can see worn out shoppers, their hands filled with packages, moving from store to store. The city is alive with activity.

As you survey the scene, you spot an elderly man across the street sitting alone in a wheelchair. He holds a small cup out and thoughtfully watches the activity. You’re amazed at how seemingly invisible he is. No one gives him a second glance. In fact people seem to be going out of their way to avoid him. As you look further you notice that this poor man has no legs and is missing part of his left hand. You can also see that he has been wearing the same clothes for quite some time.

Have you ever considered approaching someone like this for an urban portrait? If not, why not?

It’s easy to fall into a rut of photographing the same kind of stuff day in and day out. If you’re a landscape or wildlife photographer, you may get up early for the sunrise and hike out to beautiful locations. Wedding photographers are all business on a bride’s big day making sure to capture all the memorable moments. Sports photographers create compositions that help tell the story of how a game was won or lost. It’s easy to get locked into one or two specific subsets of photography (especially if you’re a professional photographer). Most of us began with a simple passion for photography. When I seriously started taking pictures (using an old hand-me-down Canon SLR), I photographed everything in sight! My girlfriend at the time (now my wife) had to put up with me stopping every couple of minutes to take photographs. I know it drove her nuts (although she would never say so). I had no idea what I was doing, but I was passionate so I shot everything I laid my eyes on.

urban-portraits5Shooting urban portraits is a great way to shake things up and break out of the passionless photography rut we sometimes find ourselves in. In this guide, I a’ going to share how to create high impact urban portraits of perfect strangers. My experience centers on photographing homeless and destitute people; however, I encourage you to read with an open mind as you can apply many of the same principles photographing virtually any stranger (homeless or not) in an urban setting.

Remember Your Safety

We can’t have a discussion about approaching strangers in a city environment without first talking a bit about safety. Safety is an important part of taking urban portraits so please stick with me. Approaching strangers for portraits can come with a bit of risk,  especially if you decide to photograph individuals living on the streets. Lugging expensive camera gear around in not-so-great parts of town paints a target on your back for robbery. People who are high or intoxicated and those with mental health issues can react unpredictably. There isn’t a photograph in the world worth getting hurt over.

Keep in mind that crooks are typically looking for easy targets—people not paying attention to their environment. The best thing you can do to reduce the risk of getting hurt is to take someone with you. Your field of view narrows as you begin engaging people for urban portraits. It’s very easy to lose track of what’s happening around you. It is impossible to look through the viewfinder and pay attention to your environment. A second person can step back, watch the overall scene and ensure that nobody surprises you from behind. If things start going sideways during a contact on the street, your partner can call the police, run for help, or make noise to draw attention to what’s happening. Your partner can also help watch your equipment.

urban-portraits6More on Safety

Avoid venturing into extremely isolated areas and consider taking a cellphone with you so that you can quickly call for help. It’s also a great idea to bring a whistle along so that you can easily draw attention to yourself if necessary.

Body language speaks volumes. More than 80 percent of communication is non-verbal. I always try to pay attention to what people are saying with their body language. People with their head down or who refuse to look at you generally don’t want to be approached. Respect that and move on. I usually avoid contacting people with extreme mental health issues (e.g., talking to self, screaming at the air, etc.) and heavily intoxicated individuals. A good rule of thumb is to remember that intoxication = unpredictability. I am not suggesting that you never approach someone who has had a bit to drink; just be cautious of approaching people who are extremely blotto.

I ignored this rule one day when I noticed a man sitting alone in the middle of a secluded alley (see the images below and above). He was just finishing a 40-ounce beer and was clearly intoxicated. Ignoring the red flags, I walked down the alley and contacted him. Within a few moments of conversation, he suddenly stood up and came within a short distance of my face. First he demanded to know if I was a cop and then asked for money. Next he reached out and firmly grabbed my right arm. I was totally alone in the alley with this guy. At one point I actually wondered if he was going to hit me with the nearly empty beer bottle he was still holding. I was able to calm him down and avoided getting hurt; however, this situation could have turned very ugly. This guy was obviously very intoxicated. He was situated in a very secluded alley (where help was not readily available) and I was working alone. I should have never approached him under these circumstances.

urban-portraits12Safety in the field is important enough that I have condensed it into the following points:

  1. Take a partner. Remember there is safety in numbers.
  2. Consider taking a cellular phone so that you call for help.
  3. Consider taking a whistle so that you can draw attention to yourself if necessary.
  4. Avoid going into extremely isolated areas.
  5. Avoid contacting extremely intoxicated subjects and those with extreme mental health problems.
  6. Pay attention to body language. Don’t approach people who have their head down and those who seem to be going out of their way to avoid making eye contact with you.
  7. Be careful not to invade personal space during your contacts. A good rule of thumb is to stay three to five feet away from people.
  8. Stand bladed at 45 degrees with your feet planted shoulder width apart and your knees slightly bent. This should help keep you balanced on your feet and afford you some stability if you need to react quickly or escape.
  9. Make brief eye contact with the people around you (but don’t stare). Let people know that you see them.
  10. Be aware of your surroundings.
  11. Listen to your intuition and move out of the area if you start feeling uncomfortable.

Street Portrait Equipment

I travel very light while working in an urban environment. I usually only bring a single DSLR and lens. Currently I am shooting most of my urban portraits with a Canon 5D and a 24–105mm lens. I pack it in a Lowe Pro shoulder bag (slung crossways around my body). Traveling light allows for quick access to my gear and makes it a snap to walk many city blocks without tiring out. Occasionally I bring a monopod if the weather is dark and gloomy (e.g., cloudy winter weather). I like to shoot tightly cropped portraits. A medium length zoom lens comes in handy for capturing close up portraits without getting right in the person’s face. Another benefit of traveling light is that it won’t be necessary to put your gear down while you shoot.

Generally I avoid using a flash while shooting urban portraits. This is contrary to the traditional rule of thumb of using fill flash for environmental portraits. In an urban environment a flash is usually very distracting to the person you are trying to photograph and it is possible to get high quality results using natural light. I will discuss lighting in more detail further along.

urban-portraits8Attire

Does your clothing matter? You bet it does. Blending into your environment is crucial. On more than one occasion I have had a street person comment on my jacket: “Is that a North Face? That sure looks nice.” It makes sense to do whatever you can to reduce class differences if you’re planning to photograph the homeless and less fortunate. Walking up to a homeless person dressed in expensive clothing only serves to remind that person that they are poor. Questions and comments about your clothing make it much more difficult to establish the initial rapport that is so important. Consider dressing down a bit before going out. Instead of wearing an expensive leather coat, throw on an old work jacket. Ditch the $200 sneakers and wear old shoes. I am not suggesting that you wear uncomfortable clothes, just pay attention to what you put on.

Shutter, Aperture, and ISO

The first thing I do before I start pounding the pavement is to set my camera to Aperture Priority mode and adjust my exposure for the available light. I generally choose a wide aperture such as f/4 or f/5.6 and try to keep my shutter speed at 1/125 of a second or higher. Having a slightly faster shutter speed helps reduce camera shake (since I shoot most of my images hand held) and it helps freeze the portrait. I have found that almost all of my “urban clients” look around nervously while I’m shooting. If your shutter speed slips down to 1/80 or lower, you may find that a lot of your images are blurred from the movement (especially if you’re using a longer focal length). Pay close attention to the lighting as it can change dramatically depending on whether you are in an alley or a more open street environment. Using a lens with a built in stabilizer or anti-shake option is a plus.

The key to getting the right aperture/shutter speed combination is setting the ISO appropriately. Don’t be afraid to raise your camera’s ISO to 800 or higher. A bit of digital noise usually enhances the overall feel of street portraits anyway. It is much better to have to deal with some digital noise than to have a series of great shots completely ruined because they are blurred (as a result of using a slow shutter speed). On more than one occasion I have deliberately under exposed a string of images by a stop or two when the ambient light has been low. This buys me extra shutter speed. Since I shoot everything in RAW format, it’s a cinch to regain the exposure later on in Photoshop or Lightroom.

urban-portraits9The histogram is a great way to keep tabs on how well exposed your images are. I shoot just about everything with the histogram preview option selected. I know that if I can keep the majority of the histogram curve between the two sidewalls, I will have most of the highlight and shadow detail to play with later on in Photoshop and Lightroom. Being able to quickly glance at the histogram and know that my exposure is correct also frees me to focus on the composition. If the dynamic range is too great, I lean toward exposing for the highlights and try to capture as much of the dark values as possible (without blowing out the shot). Plugged up shadows usually introduce extra noise and conceals crucial detail.

Where to Start

I’ve captured many of my urban portraits within a five-block radius of downtown shelters. I also have a lot of luck making contacts with panhandlers in dense shopping districts. Panhandlers take up positions in areas where heavy pedestrian traffic passes by. Every city is unique. Jump on the Internet and discover where the shelters, food banks, and city services are located. This should help get you pointed in the right direction.

The Approach

There are some that advocate taking urban photographs of people from a distance or shooting off the hip in an attempt to conceal the fact that you’re taking a picture of them. Some even suggest that you should just walk up to people and take the photographs you want without asking (paparazzi style). I think this extremely rude—not to mention dangerous. Admittedly there are times when a unique situation involving strangers unfolds and it makes sense to photograph it. These situations are usually observed from a distance and qualify more as a kind of photojournalism than portrait photography. For urban portrait work, I almost always get permission first.

Connecting with the person you’re photographing usually translates into much better images anyway. I try to create micro-relationships with each individual I photograph (just like you would with a regular portrait client). I want to put the person at ease and capture their portrait when they are feeling the most comfortable with me taking the photographs. This is not always easy to do; however when you’re successful connecting with the person, you end up with much better shots.

I have found there are two main ways to make contact with people on the street. The easiest kind of contact is one where the individual approaches you. The second type of contact is a cold approach where you identify an individual and make contact with them. This is the hardest kind of contact and requires a bit of work. I regularly use both strategies. I will start by explaining the first approach.

urban-portraits2They Approach You

The simplest way to start taking urban portraits is to deliberately position yourself in places where you will be solicited by panhandlers. This is a great way to get started if you are afraid of making cold contacts with people. I can walk through several blocks of a shopping district in Seattle and get solicited for spare change multiple times. Instead of ignoring these folks, look at it as an opening.

Here is how a typical exchange might go:

Panhandler: “Can you spare some change?”
You: “Sure… (drop some change in the cup) What’s your name?”
Panhandler: “Todd”
You: “Todd, I am Steve.” “Are you from Seattle, Todd?”
Panhandler: “I am originally from Chicago…”
You: “Oh really, what part?”

Obviously there are quite a few different ways a conversation like this can unfold. If you’re successful, within a few minutes you will have created a rapport with the panhandler. The key to starting a conversation is having an opener. As the conversation moves along it is not too uncommon for the panhandler to ask where you are from and what you are doing. This is a great opener for telling them you’re a photographer, which then leads to asking to take their photograph. Oftentimes I carry my camera in hand so that they can easily see that I am a photographer. On more than one occasion I have had panhandlers ask if I was a photographer.

Read this next paragraph carefully if you want to be successful taking urban portraits.

urban-portraits4You have to actually care about these people! You can’t look at each person you contact as another potential photographic notch on your belt. The key to making this work is showing empathy and true concern for the person and what they are saying. You will get turned down nearly every time if you simply walk up, throw change in their cup and ask to take their picture. People want to be treated with respect and know that you care. They don’t want to feel like a sideshow. Keep in mind that most homeless folks are probably already feeling pretty low. It doesn’t matter if you are rich or poor. Feeling cared for and respected is a universal need everyone has. You have to approach each contact with the mindset of creating a mini relationship and showing true respect. If you are successful, the photographs will come naturally.

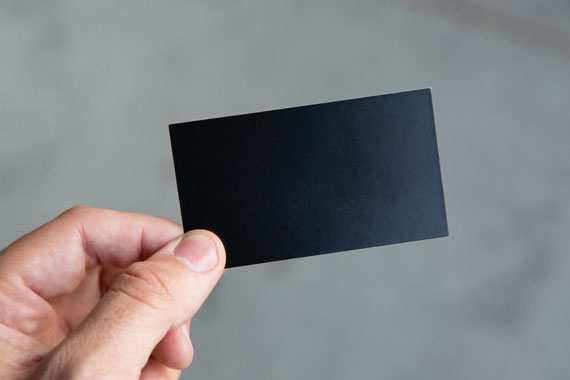
Once you feel comfortable and have established a rapport then it’s appropriate to ask if you can take a few photographs. Sometimes I mention that I’m a portrait photographer and offer them my business card. If they ask why I want to take their photograph, I simply explain that I enjoy taking pictures of the people I meet. Depending on the situation I might ask if they have an email address and offer to send them a few images (many homeless folks have an email address that they can check at the local library).

The Cold Contact

The second approach involves making cold contacts with people on the street. This kind of contact requires more creativity. You may decide to make a cold contact when you see someone who catches your eye for some reason. This could be an elderly person in a wheel chair, a man with an extremely wrinkled face sitting on a curb or a woman sitting alone on a park bench.

urban-portraits7I’m always drawn to people who have lots of character and emotion in their eyes and face. Whether it is happiness, sadness, despair, or fear, I love photographing people who wear their emotions on their sleeve. Once you spot someone you want to photograph, walk over and make contact with him or her. As I have already mentioned, you can’t just walk up and ask to take pictures. Generally people are already going to be very suspicious of you (and why you are talking to them out of the blue). My main opener is usually to approach and ask for directions. This usually reduces their suspicion and is a great conversation starter. Here’s how it might go:

You: “Hello…do you know where Washington Avenue is?”
Street Person: “Hmmm…I think it’s two blocks that way.”
You: “Thanks (looking around). Are you from around here?”
Street Person: “Why?”
You: “Oh…I am just a little turned around.”
Street Person: “I am originally from Chicago”
You: “Have you been living in Seattle long?”

Despite it being deceptive on my part to ask for directions, I have found this is the best kind of opener for a cold contact. If you have a problem with this approach, the alternative is to simply walk up and introduce yourself. This approach tends to be much less successful. People are usually very suspicious of the, “Hi, where are you from…” or “Hi, I am Steve Paxton, what’s your name…” question that seemingly comes out of nowhere. You have to ease into it. I recommend trying out a couple of different openers to see what works best for you.

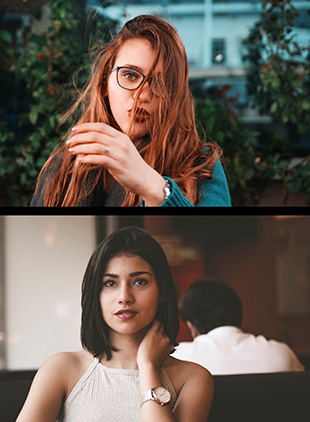
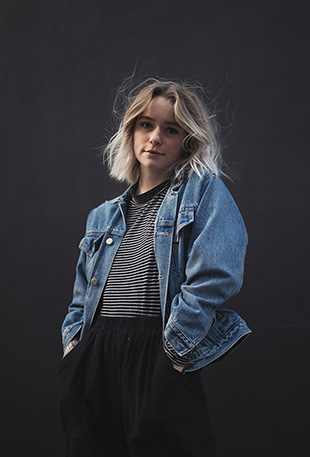
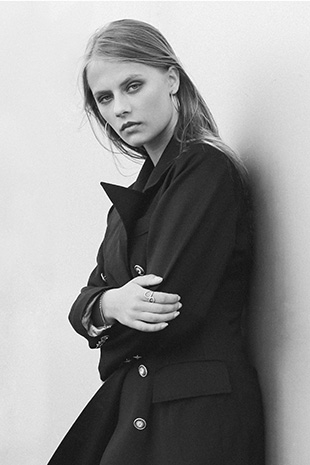
Composition and Lighting

I have talked about the two main ways I make contact with people on the street. You have to tailor your approaches so that they work for you (and that you are comfortable with). Once you get permission to take the portrait, it’s time to break out the camera and start taking photographs. Your time is going to be very limited (several minutes at the most). As I am talking to the subject, I slowly sidestep in a circle until the best light is landing on my client. As you move and talk, the person will naturally track you with their head and body. This puts you in complete control of the lighting and background. Tall buildings act as natural reflectors and often create wonderful fill lighting. Move around as you talk until you find the most ideal lighting.

Along with lighting I also pay close attention to the background. For example, I try to minimize horizontal lines cutting through the person’s head and neck and other distracting elements. If the background is just too busy or distracting, bend down and shoot your portrait upward at a 45-degree angle. Remember to keep talking!

urban-portraits11Keep Talking

I’m always asking questions as I shoot my photographs. This helps the client relax and forget that I am photographing them. I usually ask questions like how long they have been in the city, where they grew up and how they ended up living on the streets. I take a lot of photographs. I may take 50+ shots of a single person I contact in just a few minutes. I do this because I am capturing tiny little moments of that person’s life as they answer my questions. I am trying to capture the micro expressions that surface a fraction of a second at a time. These micro expressions are what separate mediocre urban portraits from good ones. Taking a lot of photographs is also an insurance policy against the blink factor (capturing shots of the person blinking) and blurred shots from movement.

If they seem interested, I may show them a couple of the images (by letting them see the LCD on the back of my camera). This can break the ice even further and allow you to shoot longer. Most people will only put up with a few minutes of you pointing a camera in their face. Don’t forget to move around and shoot from different vantage points. I always shoot tightly cropped photographs; however, I may back up and shoot a wider view especially when there are objects nearby that help tell the story.

Money

Sometimes I hand out a dollar or two near the end of a contact. Sometimes I don’t offer money and simply thank the client and move on. Every person is different. I really don’t like turning my urban contacts into a quid pro quo situation where I am paying a homeless person to photograph them.

You certainly need to take some money with you. I usually take ten dollar bills and a handful of quarters. I keep the bulk of the money in my right pocket and a single dollar bill and few quarters in my left pocket. Since I shoot with my right hand, I can quickly reach in my left pocket and scoop out a dollar bill and a few quarters. Separating the money keeps me from pulling out too many bills at once and making it appear as if I have a lot of money on me. I almost always say, “This is all I’ve got…” as I hand them the dollar out of my left pocket. The money part of this goes right to the heart of safety. It’s not a smart idea to advertise that you’re carrying gobs of money with you. I am very low key about giving away money and try not to make it a big deal. You might be surprised how many people who will allow you to photograph them without asking for money.

urban-portraits10Tell the Story

I like to be able to document a little bit about each person I photograph on the street. Being able to tell a little bit of their life story makes your images stronger and more interesting. It also helps your viewers connect with the person on a deeper level. All the questions you have been asking during the build up and while taking the photographs is the story. Don’t let the information go in one ear and out the other. Remember their name and some of the basic details about their life. I have a terrible memory so I try to write out some basic notes immediately after each contact. It is not a bad idea to have a pen and small notepad in your camera bag (however don’t take notes during the contact).

Processing Your Images

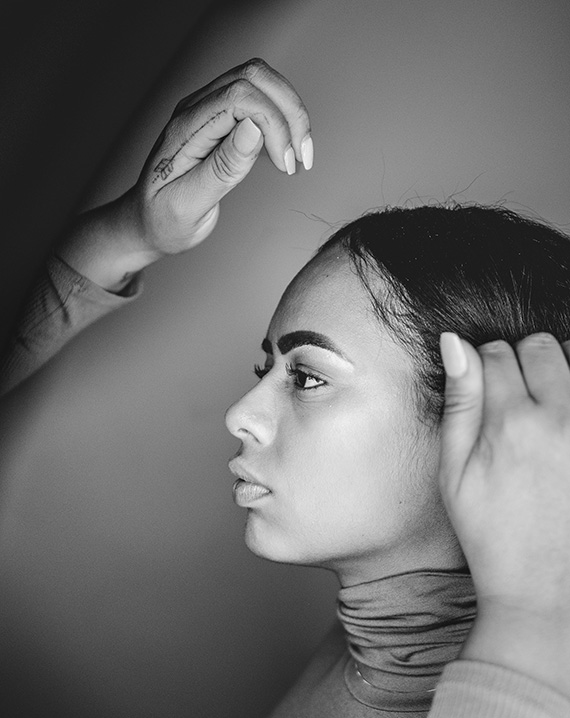
Capturing urban portraits is only half the fun! Once you have captured a few shots, the next step is process the images. This is where individual style and taste really come into play. I like to desaturate my urban images and give them a gritty feel. There are lots of ways to achieve the look you are after. I encourage to you play around and experiment.

During processing you can also fine tune the lighting through basic dodging and burning. My typical workflow includes lightening the eyes, lightening shadows on the face, desaturating the color and significantly darkening the background (to make the portrait stand out a bit).

urban-portraits3Urban portrait photography is as challenging as it is rewarding. Photographing strangers is sure to stretch most people outside their comfort zone. You will learn a lot about the people you contact, but you are certain to learn even more about yourself. Load up your camera bag and hit the streets!

About the “Least of These” Series
The “Least of These” series is an urban portrait project with the central theme based on Matthew 25:34-40. Each image uniquely captures a person who is homeless, destitute or precariously in need. My goal has always been to capture the best in each person I photograph. This series has been no exception.

Matthew 25:34-40
34 “Then the King will say to those on his right, ‘Come, you who are blessed by my Father; take your inheritance, the kingdom prepared for you since the creation of the world. 35 For I was hungry and you gave me something to eat, I was thirsty and you gave me something to drink, I was a stranger and you invited me in, 36 I needed clothes and you clothed me, I was sick and you looked after me, I was in prison and you came to visit me.’

37 “Then the righteous will answer him, ‘Lord, when did we see you hungry and feed you, or thirsty and give you something to drink? 38 When did we see you a stranger and invite you in, or needing clothes and clothe you? 39 When did we see you sick or in prison and go to visit you?’

40 “The King will reply, ‘I tell you the truth, whatever you did for one of the least of these brothers of mine, you did for me.’

About the Author:
Steve Paxton currently lives with his wife and two children in the Seattle area. Steve has been a photographer for over ten years and has spent most of that time shooting with a variety of Canon 35mm cameras. His experience ranges from wedding and portrait work to crime scene photography; although he particularly enjoys the solitude of shooting landscapes.

- - - - - - - - - - - - - - - - - - - - - - - - - - - - - - - - - - - - - - - - - - - - - - - - - - - - - - - - - - - - - - - - - - - - - - - - - -

Did you appreciate this newsletter? Please help us keep it going by Joining Our Patreon Supporters

What are your thoughts on this article? Join the discussion on our Facebook Page

PictureCorrect subscribers can also learn more today with our #1 bestseller: The Photography Tutorial eBook

- - - - - - - - - - - - - - - - - - - - - - - - - - - - - - - - - - - - - - - - - - - - - - - - - - - - - - - - - - - - - - - - - - - - - - - - - -

The post Urban Portrait Photography Tips & Techniques appeared first on PictureCorrect.


from PictureCorrect https://ift.tt/k1zQWGY
via IFTTT

PictureCorrect.com: Interesting Photo of the Day: Breaking Wave at the Perfect Moment

Through the strategic use of color, low powered flash, and slightly slow shutter speeds, water photographer Matt Clark‘s stunning photographs of breaking waves and surfers communicate his deep love affair with the sea and evoke powerful emotions in viewers. Gaze long enough, in fact, and Clark’s work might just wreck any negative preconceptions that you might hold about the sea:

wave photo

“Polychrome Wave” by Matt Clark (Via Imgur. Click image to see full size.)

Clark created the image at 1/2500 of a second and f/2.8 using his Canon 5DS camera, 70-200mm f/2.8 telephoto zoom lens, and a low powered flash—all of which he protected from water damage with a custom-designed SPL Waterhousings camera unit.

Like all great art, creating “Polychrome Wave” required much of Clark. In total, his gear weighs more than 10 pounds, and since he shoots from the water and not from atop a board, he threw his back as he swam through the breaking surf. Additionally, Clark said it took him “months of attempts” to finally get the perfect raw shot.

wave raw

Raw Version (Via Imgur. Click image to see full size.)

He then processed the photograph in Adobe Lightroom and Photoshop CC until it fit his ultimate vision for the project.

“I have an intimate relationship with the surf,” Clark wrote via Reddit. “It’s absolutely incredible and totally satisfying. I’ve been surfing for almost 20 years here in New York and people often ask, ‘How can you shoot photos when the waves are so good?’ The answer to that is that I’ve been an artist of sorts since I was a kid. So [I’m an] Artist first, surfer second… I [try to] capture the detail of a breaking wave and play with light and shutter speeds to create movement.”

- - - - - - - - - - - - - - - - - - - - - - - - - - - - - - - - - - - - - - - - - - - - - - - - - - - - - - - - - - - - - - - - - - - - - - - - - -

Did you appreciate this newsletter? Please help us keep it going by Joining Our Patreon Supporters

What are your thoughts on this article? Join the discussion on our Facebook Page

PictureCorrect subscribers can also learn more today with our #1 bestseller: The Photography Tutorial eBook

- - - - - - - - - - - - - - - - - - - - - - - - - - - - - - - - - - - - - - - - - - - - - - - - - - - - - - - - - - - - - - - - - - - - - - - - - -

The post Interesting Photo of the Day: Breaking Wave at the Perfect Moment appeared first on PictureCorrect.


from PictureCorrect https://ift.tt/dtQImkg
via IFTTT

PictureCorrect.com: Pattern Interrupted: A Unique Take on Architectural Photos

In a recent, enlightening video, photographer Clifford Pickett from Urban iPhone Photography delves into the intricacies of architectural photography. Exploring the immense significance of patterns and their interruption, he opens up a new perspective for photographers aiming to capture the majestic beauty of architecture:

In the realm of architectural photography, patterns play a vital role. The repetition found in lines and structural formations naturally present in buildings forms the basis of architectural aesthetics. Pickett emphasizes that with the right composition and positioning, these repetitive elements can be leveraged to create compelling photos. The key lies in understanding the interplay between these patterns and framing them effectively.

Simplifying with Black and White

To further spotlight the geometric lines and shapes formed by the architecture, Pickett suggests switching to black and white mode. Stripping away the color reduces distraction, allowing both the photographer and the viewer to concentrate on the fundamental geometry. This technique is further enhanced by underexposing the image, which Pickett finds can help accentuate the intermingling of patterns, light, and the architectural lines.

Accentuating with Zoom

As Pickett demonstrates, a simple zoom can work wonders in removing the context of an image, allowing the focus to remain solely on the lines and patterns. This technique can be especially beneficial when capturing upward shots of buildings. In such instances, there is a natural distortion that can be followed, creating intriguingly warped perspectives that highlight the architectural design’s unique characteristics.

The Charm of Pattern Interruption

Perhaps the most captivating insight from Pickett’s video is the concept of “pattern interruption”. As mesmerizing as a pattern can be, the break in the repetition often becomes the center of attention. An open window amidst a wall of closed ones, or a lit lamp in a sea of darkened windows, can become the perfect focal point. These interruptions not only add intrigue but can also effectively draw the viewer’s attention.

building pattern

Pickett’s expert tip is to align these interruptions strategically according to the rule of thirds. By positioning these breaks off-center, photographers can include more of the pattern in the shot, creating a more dynamic composition. Zooming in can simplify the frame, further emphasizing the break in the pattern.

Conclusion

The captivating power of architectural photography lies in the patterns it presents, and the unexpected interruptions of these patterns. Both are critical in capturing unique and eye-catching shots of architecture. As Pickett encourages us, the potential lies in the details, the small elements that differentiate one pattern from the next. Keep an open mind and a keen eye. The opportunities are indeed all around us.

It’s these little details that breathe life into a photo, making it more than just an image. It’s what gives the photo a story, a personality, and an emotion. Architectural photography is not just about buildings; it’s about capturing the soul of the structure, one pattern and interruption at a time.

As photographers, the challenge is to see the world differently, to see the patterns and their breaks, and to capture them in a way that tells a compelling story. With Pickett’s tips, we are one step closer to achieving this goal.

Launch sale ending soon: The Urban iPhone Photography Course at 80% Off

- - - - - - - - - - - - - - - - - - - - - - - - - - - - - - - - - - - - - - - - - - - - - - - - - - - - - - - - - - - - - - - - - - - - - - - - - -

Did you appreciate this newsletter? Please help us keep it going by Joining Our Patreon Supporters

What are your thoughts on this article? Join the discussion on our Facebook Page

PictureCorrect subscribers can also learn more today with our #1 bestseller: The Photography Tutorial eBook

- - - - - - - - - - - - - - - - - - - - - - - - - - - - - - - - - - - - - - - - - - - - - - - - - - - - - - - - - - - - - - - - - - - - - - - - - -

The post Pattern Interrupted: A Unique Take on Architectural Photos appeared first on PictureCorrect.


from PictureCorrect https://ift.tt/FxYC1Nr
via IFTTT

tiistai 27. kesäkuuta 2023

PictureCorrect.com: Fireworks Photography Settings

Taking photos of fireworks can be tricky, but with the right camera settings, you can capture some beautiful images. Here are some starting settings you can use and adjust as per your needs:

fireworks settings

Photo captured by Kevin Davison

Mode: Manual (M).

Aperture (f-stop): Depending on your lens, an aperture of around f/8 to f/16 should work well. Fireworks are bright, so you don’t need a very wide aperture. If you find that your shots are too dark, you can adjust this to a lower number. However, remember that wider apertures (lower numbers) also result in a shallower depth of field.

Shutter Speed: Because fireworks move and you want to capture the trail of light, you’ll need a slow shutter speed. Start with a shutter speed of about 1 second and then experiment with longer ones (up to 30 seconds), depending on the effect you’re looking for. You can even use the “Bulb” mode if your camera has this, which allows you to keep the shutter open as long as you hold down the button.

ISO: Start with a low ISO, like 100 or 200. You can increase it if your photos are too dark, but keep in mind that higher ISOs can result in more noise in your photos.

Focus: Auto-focus might struggle in the dark, so it’s usually better to switch your lens to manual focus. If you can, set the focus at infinity.

White Balance: Try starting with Auto White Balance (AWB). You can adjust this later if the colors don’t look right.

Image Format: If possible, shoot in RAW. This will give you more flexibility when you edit the photos later.

Stability: Because you’re using slow shutter speeds, any movement of the camera will result in blur. Use a tripod to keep the camera stable, and consider using a remote shutter release or the camera’s self-timer function to avoid shaking the camera when you press the button.

Remember that these are only starting points. Firework displays can vary in their brightness and color, and you might also want to capture other elements, like the crowd or the landscape. Don’t be afraid to experiment with different settings to get the photo you want!

For Further Training on Fireworks Photography:

With 4th of July Independence Day celebrations quickly approaching, we have been receiving requests for more training on how to photograph fireworks. Fireworks photography is indeed one of the most daunting types of photography. This in-depth tutorial eBook explains the process from start to finish, everything from gear and camera settings to composition and post-processing to achieve great results with fireworks of any kind. Currently 55% off to help photographers prepare for the July 4th!

fireworks photography

The How to Photograph Fireworks eBook

A common result of photographers new to fireworks photography is capturing nothing but bright white spots instead of colorful bursts. But with the guidance of this eBook in hand, you should be fully prepared to photograph brilliant fireworks displays.

Deal ending soon: How to Photograph Fireworks Guide at 55% Off

- - - - - - - - - - - - - - - - - - - - - - - - - - - - - - - - - - - - - - - - - - - - - - - - - - - - - - - - - - - - - - - - - - - - - - - - - -

Did you appreciate this newsletter? Please help us keep it going by Joining Our Patreon Supporters

What are your thoughts on this article? Join the discussion on our Facebook Page

PictureCorrect subscribers can also learn more today with our #1 bestseller: The Photography Tutorial eBook

- - - - - - - - - - - - - - - - - - - - - - - - - - - - - - - - - - - - - - - - - - - - - - - - - - - - - - - - - - - - - - - - - - - - - - - - - -

The post Fireworks Photography Settings appeared first on PictureCorrect.


from PictureCorrect https://ift.tt/UmG5ljq
via IFTTT

PictureCorrect.com: Interesting Photo of the Day: Twisted Trees in Vancouver

Have you ever come across an image that makes you question reality? With beautiful landscapes and the right conditions, good photographers with impressive editing skills often come up with brilliant images that leave us astonished. The following image by photographer Joel is one such example. You really need to have a close look at it before you can conclude if it’s a real place, digital art, or a painting:

and ethereal forest in Vancouver Island

“An Ethereal Forest in Vancouver Island, Canada” by Joel (Via Reddit. Click image to see full size.)

Joel shot the image in the woods of Vancouver Island in Canada. There are a lot of factors that play into making the image feel unreal. But rest assured that the place is real, and the photographer’s skills are to be applauded for capturing the ethereal look of the woods.

To start, the twisted trees are something that we’re not used to seeing. And the way those twisted trees line up to create a natural frame is another interesting aspect of the image. The natural frame beautifully draws us in, right into the center of the image, where the glowing mist is putting up another magical show.

This place looks so ethereal in an image, but just imagine how walking through it would feel? Going for a hike here could be a spiritual experience in itself. And this photo brilliantly captures the feeling of being there.

Doesn’t this image make you feel like sitting on a branch and contemplating life?

- - - - - - - - - - - - - - - - - - - - - - - - - - - - - - - - - - - - - - - - - - - - - - - - - - - - - - - - - - - - - - - - - - - - - - - - - -

Did you appreciate this newsletter? Please help us keep it going by Joining Our Patreon Supporters

What are your thoughts on this article? Join the discussion on our Facebook Page

PictureCorrect subscribers can also learn more today with our #1 bestseller: The Photography Tutorial eBook

- - - - - - - - - - - - - - - - - - - - - - - - - - - - - - - - - - - - - - - - - - - - - - - - - - - - - - - - - - - - - - - - - - - - - - - - - -

The post Interesting Photo of the Day: Twisted Trees in Vancouver appeared first on PictureCorrect.


from PictureCorrect https://ift.tt/Rg4wqWB
via IFTTT

PictureCorrect.com: Fishing in Times Square: A Street Photography Tutorial

Photography in bustling, vibrant urban spaces presents unique opportunities and challenges. The art of capturing compelling street photography involves a combination of technique, patience, and embracing serendipity, as highlighted by renowned photographer Clifford Pickett from Urban iPhone Photography in his recent video tutorial filmed in the heart of New York City:

Times Square, a place bustling with energy and diversity, proved an ideal setting for Pickett to demonstrate ‘fishing’ – a technique in street photography where the photographer chooses a potential backdrop and waits for the perfect subject to ‘walk into’ the frame. Here, the backdrop chosen was a brightly lit billboard of an American flag. A beautiful blend of symbolism and illumination, it created a canvas ready for silhouetted figures to add life and narrative.

Technique and Adaptability

Pickett emphasized the need to adjust camera settings to accommodate the specific lighting conditions. The billboard, being much brighter than its surroundings, necessitated underexposing the shot to create desired silhouettes against the flag.

An unforeseen element, rain, added another dimension to the shoot. With the cityscape slick and shiny, Pickett exploited this opportunity to create dynamic and visually striking reflection shots. By inverting his camera and finding puddles of water, he introduced a unique perspective to the scene, with the American flag mirrored on the wet ground.

The Power of Patience

A major takeaway from Pickett’s tutorial is the importance of patience. Photography is a game of moments, and waiting for the right one is an art in itself. The ‘fishing’ technique requires time and endurance, but the reward is worth the wait, as demonstrated when Pickett captured a perfectly timed shot of a passerby walking into his frame.

street fishing photo

Interacting with Subjects

Towards the end, Pickett introduced a more proactive approach, engaging with potential subjects who had been standing in front of the flag for the entire shoot. This highlighted the value of photographer-subject interaction in street photography, transforming random bystanders into deliberate subjects and enriching the narrative of the image.

For further training: The Urban iPhone Photography Course Launch Sale

- - - - - - - - - - - - - - - - - - - - - - - - - - - - - - - - - - - - - - - - - - - - - - - - - - - - - - - - - - - - - - - - - - - - - - - - - -

Did you appreciate this newsletter? Please help us keep it going by Joining Our Patreon Supporters

What are your thoughts on this article? Join the discussion on our Facebook Page

PictureCorrect subscribers can also learn more today with our #1 bestseller: The Photography Tutorial eBook

- - - - - - - - - - - - - - - - - - - - - - - - - - - - - - - - - - - - - - - - - - - - - - - - - - - - - - - - - - - - - - - - - - - - - - - - - -

The post Fishing in Times Square: A Street Photography Tutorial appeared first on PictureCorrect.


from PictureCorrect https://ift.tt/UCI74JR
via IFTTT

maanantai 26. kesäkuuta 2023

PictureCorrect.com: Interesting Photo of the Day: Uncoordinated Dress Code

Do all photos need to tell a complete story? What do you think? Actually, it can be really interesting if your image leaves the viewers wondering about what’s going on in the image. This plays an important role in keeping viewers engaged. Photographer Anna Ulman took the following beautiful image that draws us in. Can you guess why that is?

“Uncoordinated Dress Code” by Anna Ulman (Via Reddit. Click image to see full size.)

Ulman shot the image on a Sony A7III with the Canon 135mm f/2.0 lens at f/2.0, 1/500-second exposure, and ISO 1000 using just the natural light.

It’s great how she has managed to find the perfect spot to photograph this image. The lighting is quite ideal here with the model being evenly illuminated while the other elements are in shadow. This helps in directing all the attention to the model while getting rid of distractions.

Although her stance is pretty and graceful, her choice of clothing may leave many viewers wondering. To be honest, the mix of ballet shoes, thigh-highs, a sweater, and a floppy hat doesn’t really make sense. But maybe, that’s the point. Maybe there was some purpose for the selection of this wardrobe. The fact that it’s slightly odd makes the photo more in our opinion. Apart from that, the way the color palette blends so well with the surroundings is equally pleasant and gives this image a certain charm.

- - - - - - - - - - - - - - - - - - - - - - - - - - - - - - - - - - - - - - - - - - - - - - - - - - - - - - - - - - - - - - - - - - - - - - - - - -

Did you appreciate this newsletter? Please help us keep it going by Joining Our Patreon Supporters

What are your thoughts on this article? Join the discussion on our Facebook Page

PictureCorrect subscribers can also learn more today with our #1 bestseller: The Photography Tutorial eBook

- - - - - - - - - - - - - - - - - - - - - - - - - - - - - - - - - - - - - - - - - - - - - - - - - - - - - - - - - - - - - - - - - - - - - - - - - -

The post Interesting Photo of the Day: Uncoordinated Dress Code appeared first on PictureCorrect.


from PictureCorrect https://ift.tt/80QVRjL
via IFTTT

PictureCorrect.com: Urban Photography During the Golden Hour

In a recent video, photographer Clifford Pickett from Urban iPhone Photography takes us on a stunning journey through one of the city’s most iconic locations – the Brooklyn Bridge – at the crack of dawn. With the backdrop of a golden sunrise, Pickett discusses and demonstrates the art and technique of capturing photos during the ‘Golden Hour,’ a photographer’s holy grail:

Golden hour refers to the brief period after sunrise or before sunset, where the daylight is softer and warmer, leading to distinctive and stunning photographs. Why is this specific timeframe so coveted by photographers? Pickett lists a few compelling reasons:

  • Color: The warm golden hues during this time are unparalleled, lending an ethereal feel to the pictures.
  • Light Angle: The low-angle light creates unique and engaging shadow patterns, adding depth and texture to the images.
  • Fewer Distractions: If you’re shooting at sunrise, the chances are that there will be fewer people around, resulting in cleaner and more focused shots.
  • Soft Light: Golden hour light is less harsh, reducing the chances of stark contrasts and shadows that may mar the photograph.

Techniques to Capture the Perfect Golden Hour Photos

Armed with these insights, Pickett then takes us through his process of capturing various shots of the Brooklyn Bridge, offering useful techniques along the way:

  • Contextual Framing: Pickett suggests standing a bit farther back to encapsulate the entirety of the magnificent scene in front of you. He illustrates this by capturing a panoramic image of the sunrise-lit cityscape from the bridge.
  • Interesting Compositions: Moving along the bridge, Pickett advises us to include interesting and prominent elements, such as the bridge’s cables, in the compositions. He also stresses the importance of shooting in the most engaging part of the skyline.
  • Creative Cropping: For compositions where unwanted elements creep into the frame, Pickett shows us how to use cropping creatively, transforming a horizontal shot into an almost panoramic image by cropping out the less exciting lower half of the picture.
  • Close-up Details: Pickett shifts focus from the wide cityscape to the top arches of the Brooklyn Bridge, highlighting the use of zoom to capture intricate details illuminated by the golden glow.
  • Shadow Play: As the low-angled sun casts long shadows, Pickett advises us to use these as unique elements in the composition, emphasizing the use of symmetry in such instances.
  • Experimentation with Perspectives: Pickett urges photographers to experiment with different lenses and orientations. He showcases the dramatic difference a .5X lens can make in emphasizing the geometric patterns formed by the cables.
  • Waiting for the Right Moment: Lastly, Pickett talks about patience and timing in photography. Sometimes, waiting for the people to move out of the frame or for the light to hit the subject just right can result in a perfect photograph.

urban golden hour

The video by Clifford Pickett not only demonstrates the power and beauty of golden hour photography but also provides practical tips to elevate our photography skills. As he beautifully sums up, “Amazing light, beautiful golden warm tones, that low angle light… All those things add up to allow us to create amazing images. And that only happens at golden hour.” So, let’s wake up early or stay out a little later and make the most of the golden hour. Your photographs will thank you for it!

For further training: The Urban iPhone Photography Course at 80% Off

- - - - - - - - - - - - - - - - - - - - - - - - - - - - - - - - - - - - - - - - - - - - - - - - - - - - - - - - - - - - - - - - - - - - - - - - - -

Did you appreciate this newsletter? Please help us keep it going by Joining Our Patreon Supporters

What are your thoughts on this article? Join the discussion on our Facebook Page

PictureCorrect subscribers can also learn more today with our #1 bestseller: The Photography Tutorial eBook

- - - - - - - - - - - - - - - - - - - - - - - - - - - - - - - - - - - - - - - - - - - - - - - - - - - - - - - - - - - - - - - - - - - - - - - - - -

The post Urban Photography During the Golden Hour appeared first on PictureCorrect.


from PictureCorrect https://ift.tt/1KStcVP
via IFTTT

PictureCorrect.com: Staged Street Portraiture Tips (Video Tutorial)

In a recent tutorial video, photographer Clifford Pickett from Urban iPhone Photography takes us on an insightful journey into the world of ‘staged street portraiture’. A shift from the common candid moments often associated with street photography, Pickett emphasizes the value of engaging with subjects to create powerful, unique images:

(for those of you reading this by email, the video tutorial can be viewed here)

According to Pickett, there is something profoundly beautiful about slowing down, introducing oneself to a stranger, and co-creating an image. Engaging with subjects allows photographers to get unique shots that might be missed when focusing solely on candid moments. By stepping out of their comfort zone and establishing a connection with the subject, photographers can co-create extraordinary images that wouldn’t otherwise exist.

Meeting Characters on the Streets

Walking around a city, Pickett encourages us to look for ‘characters’ – interesting individuals who encapsulate the essence of the city. The character of the subject, Pickett argues, is far more critical than the background. This is illustrated in his interactions with several unique individuals – Edi, Ranny, and King David – each of whom brings their own flavor to their portrait.

Framing and Posing

As Pickett moves through the city, he provides valuable insights into how he selects and manipulates his shots. He focuses on clean backgrounds that complement his subjects and highlights the importance of an uncluttered frame. Pickett also employs techniques such as switching to portrait mode or adjusting his position to get a better shot.

street portraiture

Despite this, Pickett advises against over-posing subjects. Instead, he suggests guiding them gently to achieve a natural look, capturing their personality authentically.

Not Just Photos – Connections

As Pickett concludes his video, he stresses that staged street portraiture is about more than just photos; it’s about making a connection with people. The joy of this style of photography isn’t just about capturing stunning images but also the experience of engaging with subjects and the connections formed during the process.

Stepping out of one’s comfort zone, engaging with subjects, and focusing on clean, uncluttered frames can lead to exceptional results. Street photography, after all, isn’t just about the image; it’s about the story behind it.

For further training: The Urban iPhone Photography Course at 80% Off

- - - - - - - - - - - - - - - - - - - - - - - - - - - - - - - - - - - - - - - - - - - - - - - - - - - - - - - - - - - - - - - - - - - - - - - - - -

Did you appreciate this newsletter? Please help us keep it going by Joining Our Patreon Supporters

What are your thoughts on this article? Join the discussion on our Facebook Page

PictureCorrect subscribers can also learn more today with our #1 bestseller: The Photography Tutorial eBook

- - - - - - - - - - - - - - - - - - - - - - - - - - - - - - - - - - - - - - - - - - - - - - - - - - - - - - - - - - - - - - - - - - - - - - - - - -

The post Staged Street Portraiture Tips (Video Tutorial) appeared first on PictureCorrect.


from PictureCorrect https://ift.tt/0IXdZmF
via IFTTT

sunnuntai 25. kesäkuuta 2023

PictureCorrect.com: Interesting Photo of the Day: Milky Way Over Lindis Pass

New Zealand has been blessed with beautiful landscapes. Pair that with the amazing view of the Milky Way, and what better combo could you ask for? Astro photographer Paul Wilson captured the following image of the Milky Way over Lindas Pass in New Zealand:

lindis pass milky way

Lindis Pass, New Zealand by Paul Wilson (Via Reddit. Click image to see full size.)

Wilson took multiple images with his Canon 5D Mark IV and stitched them together to create this magnificent photo. The foreground is a panorama that he got by stitching 80 shots, which he shot using his 200mm lens. The sky, on the other hand, is a result of stitching 35 shots that he took with his 50mm lens, each shot being a 60-second exposure at f/2.8, and ISO 1600. Since each sky photo was exposed for 60 seconds, he used an astro tracker to avoid any star trails.

Considering the way Wilson has taken the images, it is clear that he has put in a lot of effort. And his effort has clearly paid off. The brighter portion of the foreground beautifully leads the viewers to the bright spot on the mountains. And the gigantic and beautiful Milky Way makes for a beautiful backdrop for this brilliant image.

- - - - - - - - - - - - - - - - - - - - - - - - - - - - - - - - - - - - - - - - - - - - - - - - - - - - - - - - - - - - - - - - - - - - - - - - - -

Did you appreciate this newsletter? Please help us keep it going by Joining Our Patreon Supporters

What are your thoughts on this article? Join the discussion on our Facebook Page

PictureCorrect subscribers can also learn more today with our #1 bestseller: The Photography Tutorial eBook

- - - - - - - - - - - - - - - - - - - - - - - - - - - - - - - - - - - - - - - - - - - - - - - - - - - - - - - - - - - - - - - - - - - - - - - - - -

The post Interesting Photo of the Day: Milky Way Over Lindis Pass appeared first on PictureCorrect.


from PictureCorrect https://ift.tt/LtQbBZ2
via IFTTT

PictureCorrect.com: Headshot Photography Studio Equipment Setup

How do I start? What type of equipment do I need? Do I have to spend a ton of money? These are some of the questions that plague us when we think about setting up a photography studio for the first time. Wouldn’t it be great if someone just told you what you need exactly? Well, here you go. If you’re thinking about setting up your own studio, Vanessa Joy offers some great tips on what you need to get started:

Joy takes us into her headshot photography studio and gives us the complete tour of equipment she uses. Since her studio is only about six months old, this is the perfect example of what’s needed.

Strobes

A couple powerful and consistent strobe lights are first on the list. Joy suggests the Profoto D1 or D2 lights so the light quality and color stay consistent.

Backdrop

You can simply use a paper backdrop or a complete wall, your choice. It just depends on what you need and how you need to light your set, as the backdrop can change how the background light comes through and the color.

Softboxes

Softboxes are a must in the studio. They can produce the same soft, directional lighting that you would get from natural window light. Joy uses two 3×4 Profoto softboxes for a Butterfly setup, and to cover a greater area and produce a beautiful, well-defined shadow in the background. She also recommends the 1×3 softboxes if you want to do a hair light, or rim light.

studio lighting

Studio Camera

A camera designed specifically for studio work is great, but not very versatile if you’re on the go. Since Joy is primarily a wedding photographer, she goes for the more portable Canon 1DX, which is nice and fast.

Tripod

A very important piece of equipment for any photographer. Joy recommends a MeFOTO tripod. Having a tripod will give you the flexibility of setting up your camera and leaving it in one spot as you move freely around the studio. You can weigh it down for increased stability with sandbags or other weights.

tripod stand weights

Minimum of Three Lights

One of the secrets of a breathtaking photo is the lighting. Without good lighting in a studio, you won’t be able to create a sharp and clear picture. Different lights create different effects, so it’s good to be prepared and have options. A minimum of three lights—one background light and two main lights—will ensure you always get good quality of the color and awesomely lit images.

And last but not least…

A comb! This will save you a lot of trouble if you have to change a model’s hair; you won’t have to worry about the oil from your hands making the hair look greasy in the final image if you’ve had to use your hands to keep restyling throughout the shoot.

These are just the basic necessities of a new studio. Of course, you can add to this arsenal or remove a couple things depending on what kind of photography you’re shooting. Let us know in the comments below if you have any other suggestions for someone building a new studio.

- - - - - - - - - - - - - - - - - - - - - - - - - - - - - - - - - - - - - - - - - - - - - - - - - - - - - - - - - - - - - - - - - - - - - - - - - -

Did you appreciate this newsletter? Please help us keep it going by Joining Our Patreon Supporters

What are your thoughts on this article? Join the discussion on our Facebook Page

PictureCorrect subscribers can also learn more today with our #1 bestseller: The Photography Tutorial eBook

- - - - - - - - - - - - - - - - - - - - - - - - - - - - - - - - - - - - - - - - - - - - - - - - - - - - - - - - - - - - - - - - - - - - - - - - - -

The post Headshot Photography Studio Equipment Setup appeared first on PictureCorrect.


from PictureCorrect https://ift.tt/7UIhnzS
via IFTTT

lauantai 24. kesäkuuta 2023

PictureCorrect.com: Where to Put Hands in Photos

This article is based on concepts from The Art of Portrait Photography if you want to dig deeper for further training.

There are three modes of non-verbal communication in humans.

The first and most apparent is facial expression, including using our eyes and mouths.

The second is body language—how we position ourselves.

The third is our hands.

Immanuel Kant, the 18th-century German philosopher, has an excellent quote about hands. “The hand is the visible part of the brain,” he said. This phrase should be on the mind of every photographer who takes pictures of people.

Pay Attention to the Hands

Photographers tend to pay a lot of attention to the face, but sometimes pay little attention to body language, and even less toward their subject’s hands.

Here are some photography tips for shooting people in such a way that incorporates their hands, including do’s and don’ts.

Don’t place a subject’s hand close to the face, unless it frames the face or provides context to the expression.

In the example photo above, the subject’s hand attracts as much visual attention as the face itself, if not more. This may have been a jewelry shoot to showcase her rings, but if the prominence of her hands was not intentional, then the effect is often distracting.

how to place hands in photos

Photo by David Alvarado

When appropriately positioned, and with good lighting, hands can accentuate a face. They can provide an eye-catching frame that forces a viewer’s eyes right toward the subject of the portrait.

hand in photos examples

From top: Photos by Hichem Dahmani and Allef Vinicius

Keep the hands close to, or parallel to, the body. Placing one or both hands closer to the camera than the rest of the body rarely works out—unless you’re going for a unique effect.

hands in pockets photos good or bad

Photo by Michael Afonso

It is equally important not to let your subject push their hands all the way into their pockets—they will simply disappear.

An old trick used by wedding photographers is to have a subject hook just their thumbs into their pockets, while leaving the rest of their hands hanging on the outside of their pants. Another option is to have the subject slide the last three fingers into the pocket while keeping the thumb and forefinger exposed.

You may be wondering, why place their hands in their pockets at all?

The reason is simple and mostly psychological: when photographing subjects who are uneasy or not used to being in front of the camera, giving them something to do with their hands will often relax them.

how to pose subjects hands in photos

Photo by Nick Karvounis

When posing the hands, you must also take into account the framing of your picture. Is it a headshot? Is it a half body shot? Maybe it is a full-figure shot? The placement of the hands will change based upon the amount of body you include in your picture.

This last example photo is a perfect use of hands in a portrait. Here’s why:

  1. They don’t distract from the subject’s face.
  2. The hand placement provides a balance to the composition by giving some shape and contrast against the dark coat in the lower part of the frame.
  3. The body language of the arms and hands matches the expression of the subject’s face.
  4. Her ring becomes a small focal point, helping to tell a story about the subject’s sense of style and perhaps her personality.

About the Author:
Kent DuFault is an author and photographer with over 35 years of experience. He’s currently the director of content at the online photography school, Photzy.com

For Further Training:

Do you know what subject generally scares the daylights out of new photographers? Photographing people! This eBook is designed to help you become a master of portraits with insider secrets used by professionals and more. It contains 214 pages of in-depth easy learning packed with illustrations, case-studies and assignments to verify your knowledge. It is currently 82% off which ends soon if you want to check it out.

portrait photography

The Art of Portrait Photography at 80% Off (Learn more)

Do you have lots of photographs of barns, fences, plates of food, and landscapes? But portraits – not so much? Don’t worry. We’ve all been in that same boat. Author, and professional photographer, Kent DuFault, has put over three decades of experience into this eBook. If it’s happened in a portrait session, it’s happened to him. His pain is your gain.

Deal found here: The Art of Portrait Photography at 82% Off

- - - - - - - - - - - - - - - - - - - - - - - - - - - - - - - - - - - - - - - - - - - - - - - - - - - - - - - - - - - - - - - - - - - - - - - - - -

Did you appreciate this newsletter? Please help us keep it going by Joining Our Patreon Supporters

What are your thoughts on this article? Join the discussion on our Facebook Page

PictureCorrect subscribers can also learn more today with our #1 bestseller: The Photography Tutorial eBook

- - - - - - - - - - - - - - - - - - - - - - - - - - - - - - - - - - - - - - - - - - - - - - - - - - - - - - - - - - - - - - - - - - - - - - - - - -

The post Where to Put Hands in Photos appeared first on PictureCorrect.


from PictureCorrect https://ift.tt/CjnUuo6
via IFTTT