torstai 28. helmikuuta 2019

PictureCorrect.com: The Pros and Cons of Watermarking Your Photos

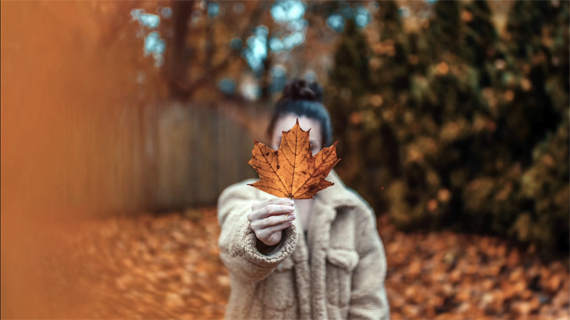
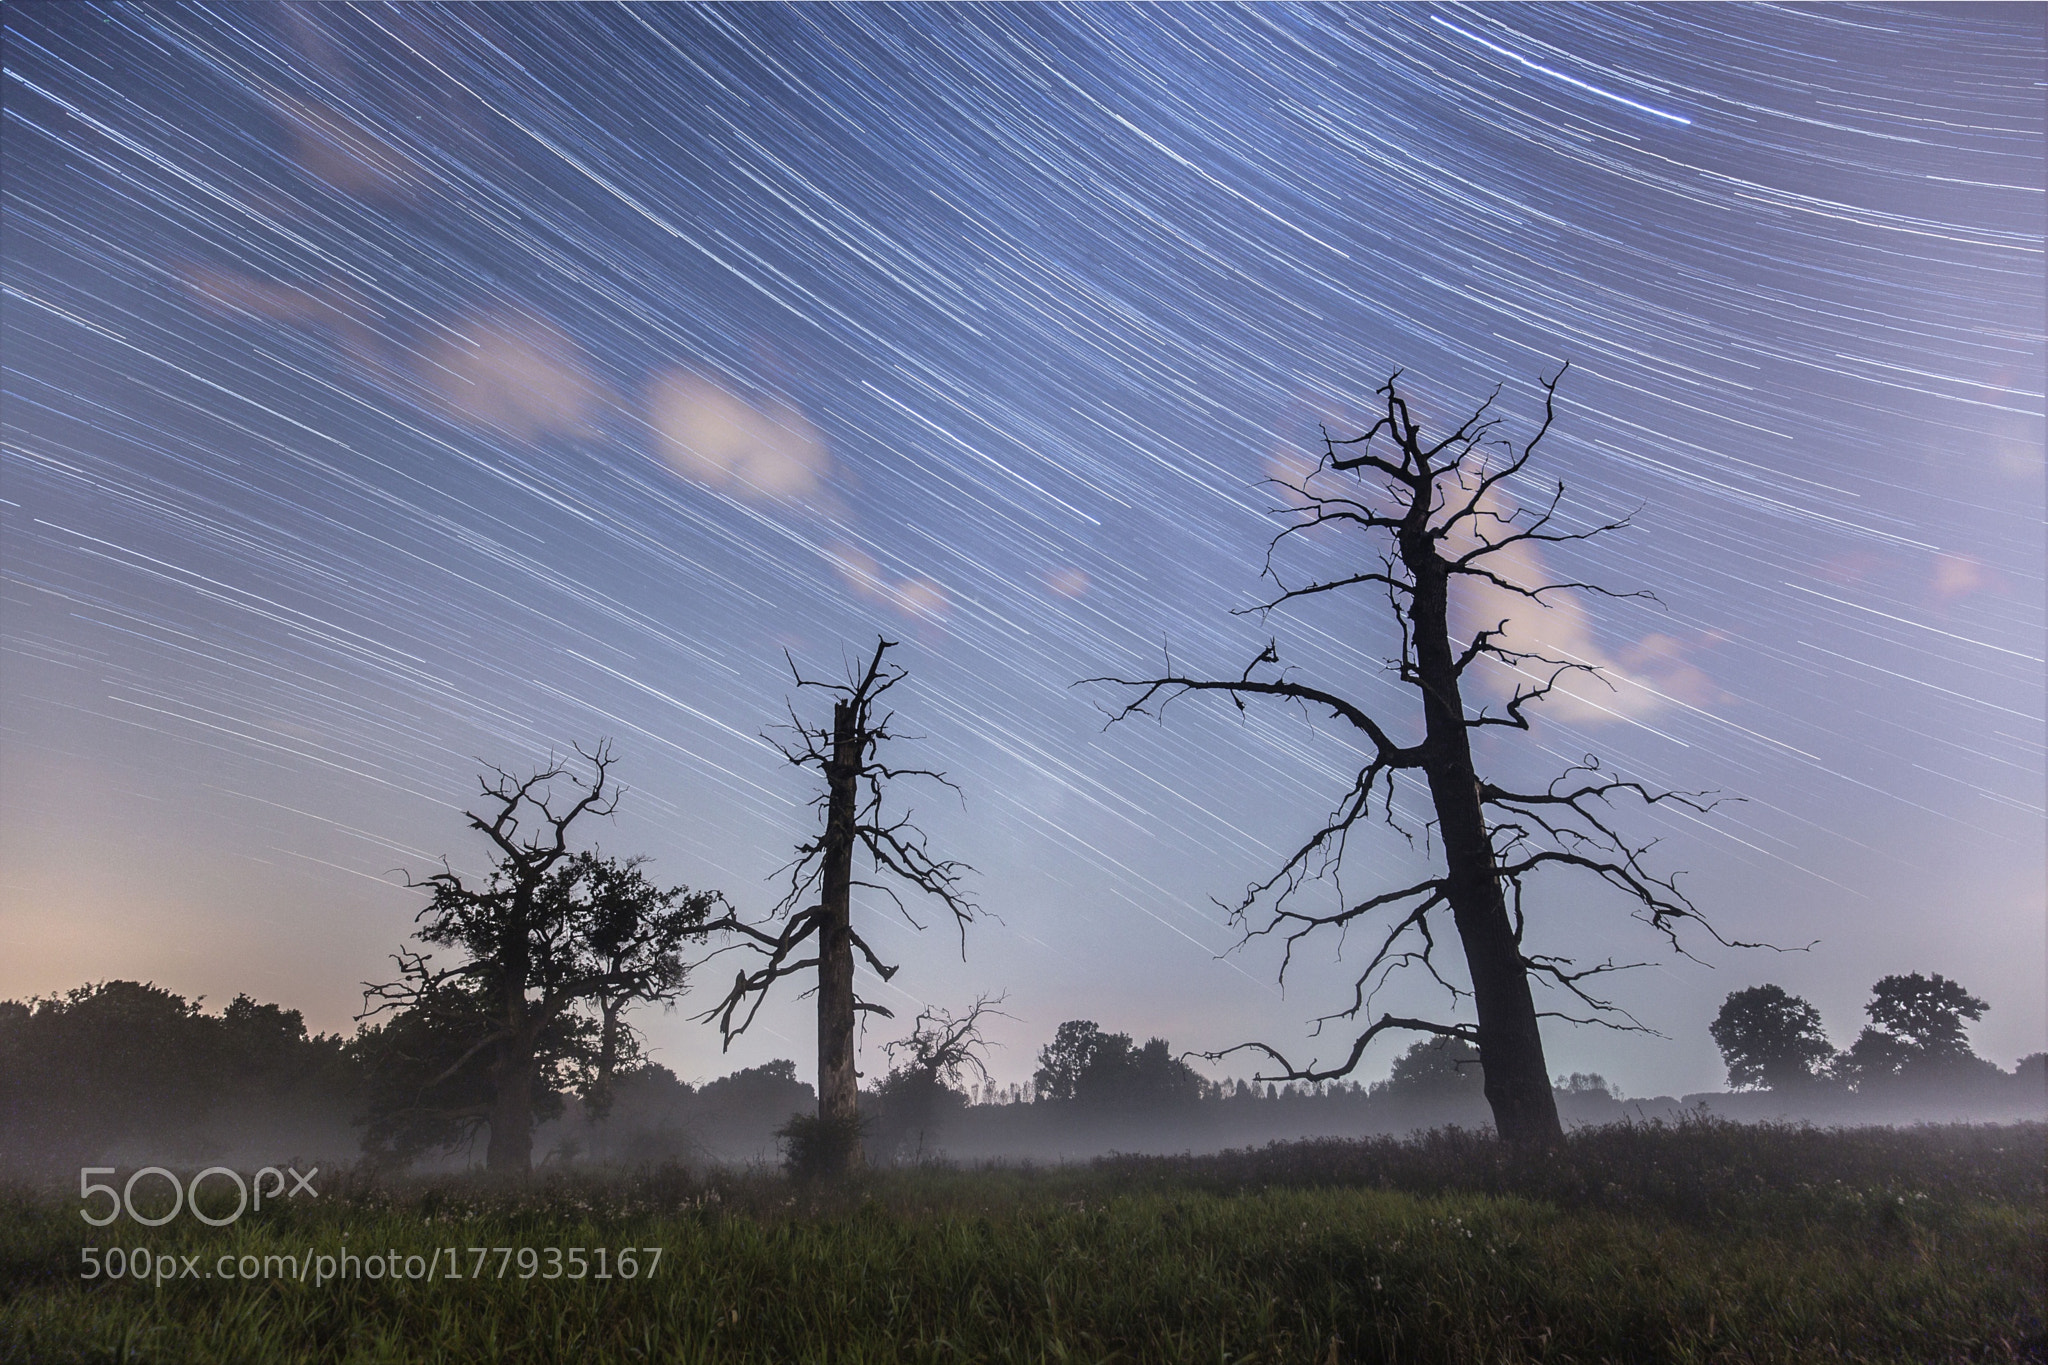
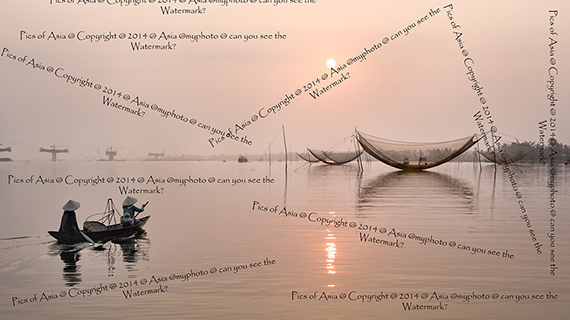
While doing some research to write this post, I went looking for some of my photos on the web, and it was just…wow! Using the Google reverse image search engine, I could locate where some photos of mine were being used. I only spent time looking for three photos (some that I knew were popular) and I found about 50 websites using them—most of them travel companies offering tours in Southeast Asia. The companies, of course, took them without even asking. No, I won’t name names; there are way too many of them! Let’s not even talk about Chinese websites gathering any kind of photos from anywhere on the same page. I just don’t get it. But this is my most stolen photo, and, my, what some websites did to it!

why watermark your photos

Seriously guys? Pink font?

You will note that due to some bad cropping, I do have a lot of space to add a massive watermark! (That was a joke to myself, I will laugh in my sleep.)

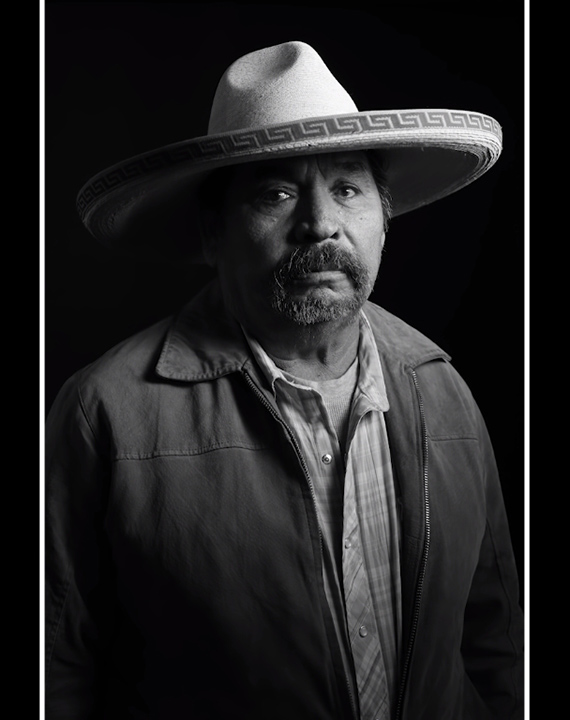
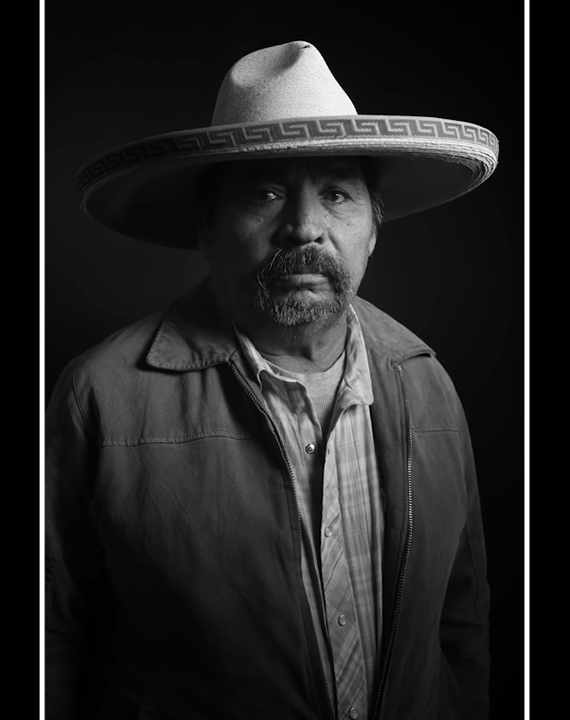
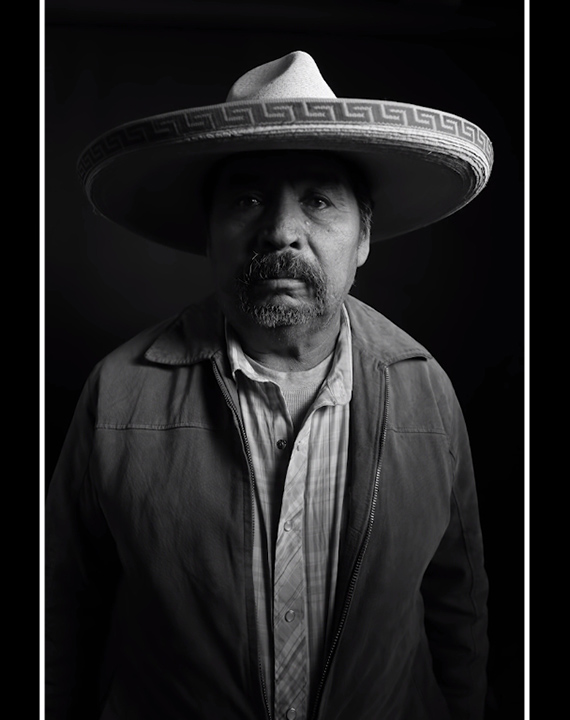
Now I know that some of my photos are being used for some “inspirational bullshit quotes,” you know? The photo that is surrounded by some quote by Gandhi or Buddha or something like that? Yes, plenty of that crap around the web! Like this one, a photo I took in Ha Giang two years ago:

pros and cons of photo watermarks

Gracias for stealing my work! I had to lay down in mud for that one!

The search made me realize how watermarking our images is a very important topic that I only briefly discussed with some of my (amazing) students last week in Laos. So I am also quite new to the subject. But now let’s look at the pros and cons.

Pros

  • Watermarking gives you exposure when photos are shared. As your name is on the image, people will know about you. Logical isn’t it?
  • Watermarking protects your work. People won’t be able to steal your work, as your name is on it. And surely people do not know how to remove your watermark, right?

I guess that’s it for the list of pros. Now let’s look at the cons!

Cons

  • Adding a watermark to your photo distracts the viewer from the main subject. (As Trey Ratcliff says, it “gets in the way of art.”) I just want to temper this one. While this can be obvious for a photographer who looks at images a different way, I do not believe it is a problem for the average viewer.
  • Watermarks can look ugly. Even with a nice looking font. Yes, believe me, they’re ugly. I will not hide the fact that I used to add a watermark to my photos in Papyrus font some years ago. Yes, Papyrus font. You read me right. We all have our dark secrets!
  • Also, do people even bother reading the watermark? When it is small in a corner, I am sure less than 5 percent of people actually read it. So what exposure, again?
  • I do find it a little pretentious to add a watermark, like the photographer is more important than the subject. I discussed this point with my students last week. If you are a photographer creating something quite unique, being able to reach locations that no one else does, or having access to super duper backstage, then you may want to protect your work. But that’s what? One percent of photographers? I do not want to sound patronizing here, but who are you to protect your work? Someone creating awesome art or posting photos we have seen a million times before? I mean, a sunset is just a sunset. An orange ball in the sky. You want to protect that?

Some services can help you track your images. Google reverse image search will help you find who has used your photos. That’s one way to protect yourself without adding anything distracting on the photos. It takes a little longer though, believe me! But it’s an awesome tool; I suggest you have a try. I did spend all day yesterday on it—it was quite fun, actually.

Finally, and this probably the most obvious, watermarking your images will not protect them from thieves. Two minutes of photoshopping and it is gone. Unless your watermark takes half of the photo, in which case I do not think this article is for you. Close your web browser. That’s it. Thanks.

should-you-watermark-your-photos

Watermarking will not protect your photos from thieves.

If you really want to protect your images, each country has its own copyright laws. There are some international copyright offices you can sign up and subscribe to and put photos in their registry so they are “protected.” I’m not sure how they work though… Plus, that takes time and money. It may be useful for your “money shots”—the ones you’re selling by the hundreds and generating a real revenue.

Conclusion

I do not believe there is an answer for this topic. Everyone is working in different fields of photography and will have different needs in term of protecting their work. I personally do not like watermarks, as I find them distracting. After all, I am first a photography instructor and often doing photo critics, where every detail on the picture counts.

I do tend to trust people (this is a mistake I have been told), and I believe photos will be stolen by fake photographers or unethical corporations, not commercial business with ethics. This is not really relevant to me as I live in Asia, and local businesses need to be educated concerning copyright laws, but for you reader, that might be relevant.

But hey, maybe all these websites would not have stolen my photos if I had a watermark on them?

You know what? If that was the case, they would have found other similar pictures and stolen them. The only difference is that the person they would have stolen from would not have done the research and would not know about it. So I will keep not watermarking my photos, let awful businesses steal them, and then chase them down with the help of my lawyer! This might help educate the Asian corporate world. I like challenges, you see!

Of course, I am now restricting the locations where I publish my photos. I used to try and be on several stock photography websites, plus social media, Flickr, etc… I am now only (daily) posting on my Facebook page and Google+, and I do resize the photos quite small for that. The big size photos only go to my website, on which people cannot take them (from what I know). If you are a hacker, please forget this last sentence.

As I said, I’m new to the topic, so I’m looking forward to reading your comments below.

About the Author:
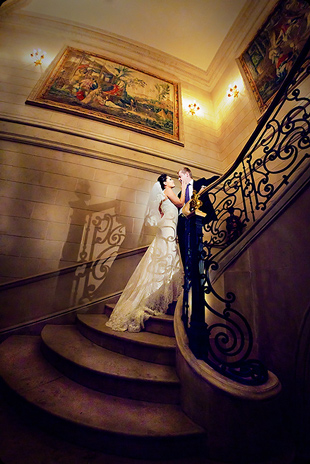
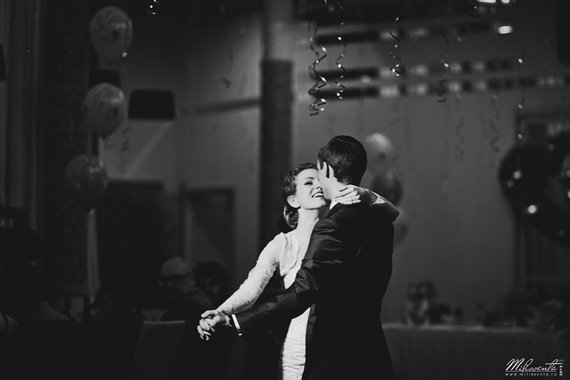
I am Etienne Bossot and I am delighted to take you on an amazing journey through stunning locations in Southeast Asia while sharing my passion for photography. For the past four years I have been teaching thousands of people at all photographic levels. I am also a commercial and wedding photographer in Southeast Asia.


Go to full article: The Pros and Cons of Watermarking Your Photos

What are your thoughts on this article? Join the discussion on Facebook

PictureCorrect subscribers can also learn more today with our #1 bestseller: The Photography Tutorial eBook

The post The Pros and Cons of Watermarking Your Photos appeared first on PictureCorrect.


from PictureCorrect https://ift.tt/2T8xTD2
via IFTTT

PictureCorrect.com: Interesting Photo of the Day: Blood Moon Rising

Blood moon is the name given to a total lunar eclipse due to the reddish tinge it takes on when fully eclipsed. The latest occurrence of this phenomenon occurred on January 20, 2019. Landscape photographer Jacob Klassen was prepared to capture it:

blood moon rising

“Blood Moon Rising Over Rathtrevor Beach” by Jacob Klassen (Via Reddit. Click image to see full size.)

Klassen took this amazing photograph at Rathtrevor Beach on Vancouver Island. Realizing that he wouldn’t be able to get a shot of the exact landscape that the moon was rising behind, he took one as close to the right of it as he could. Through the night, he also took a shot of the moon with its reflection in the tide pool every nine minutes. The resulting image is a composite of all of his efforts, and it looks fantastic.

“It’s night[s] like these where you realize how small and insignificant we are, yet lucky enough to live in a time and place in the universe where sights like this are somewhat common.”


Go to full article: Interesting Photo of the Day: Blood Moon Rising

What are your thoughts on this article? Join the discussion on Facebook

PictureCorrect subscribers can also learn more today with our #1 bestseller: The Photography Tutorial eBook

The post Interesting Photo of the Day: Blood Moon Rising appeared first on PictureCorrect.


from PictureCorrect https://ift.tt/2IXkhWX
via IFTTT

PictureCorrect.com: How to Choose a Portrait Lens

If you’ve ever been in the market for a new lens, you know the struggle. There are just too many options to choose from. The choice of lenses depends on the intended purpose. Photographer Jay P. Morgan experiments with different focal lengths to give you an idea of which one suits your taste for portrait photography:

Lighting Setup & Camera Settings

For demonstration purposes, Morgan has a single light setup in place. He uses an Aputure Light Dome Mini II with a grid in order to create a hard light for a high contrast image. For a dark background, he uses a non-reflective black fabric. And to open up the shadows on the subject’s face, he has a reflector opposite the light source.

lighting setup for one light portrait

He has his camera set at 1/200 second, f/8, and ISO 200.

45-50mm

Lenses in this range are considered to have a normal focal length. These lenses allow the camera to see the way a human eye sees.

“It doesn’t flatten the figure out, and it doesn’t distort the figure. It just looks very normal to what we see with our eyes.”

Morgan uses a Tamrom 45mm f/1.8 lens to demonstrate how a portrait comes out in this focal length range.

portrait taken with 45mm lens

45mm

As expected, there’s no weird compression or flattening going around. It’s like something a human eye would see.

35mm

A 35mm focal length gives you a wider field of view, allowing you to add environmental context to your portraits. You can also get much closer to the subject for an intimate feel. However, keep in mind that getting close to the subject distorts their facial features. Here’s an image that Morgan took using his Tamron 35mm f/1.8 lens:

portrait taken with 35mm lens

35mm

24mm

Going much wider, a 24mm focal length requires you to get really close to the subject. To give you an idea, here’s an image that Morgan took using a Tamron 24mm f/2.5 lens:

portrait taken with 24mm lens

24mm

The face seems larger and the shoulders seem smaller as they move away from the camera.

85mm

Also known as the portrait lens, the 85mm lens has earned a reputation among portrait photographers. They are known for the nice background compression that they produce, and for making the subjects look flattering. Using his Tamron 85mm f/1.8 lens, here’s what Morgan was able to get:

portrait taken with 85mm lens

85mm

“Contrary to what you might believe, the 85 makes people look a little heavier, a little more bulky because it’s compressing everything so everything is a little larger.”

135mm and 200mm

Moving on to the telephoto end, Morgan uses a Tamron 70-200mm f/2.8 lens at 135mm and 200mm. Many photographers prefer to shoot portraits at the telephoto end as it lets them isolate the subject from the background. The bokeh becomes more prominent and its soft look makes the image very pleasing to look at.

portrait taken at 135mm and 200mm focal length

As in the case of the 85mm, the 135mm and the 200mm focal lengths compress the background bringing things in the distance much closer to the camera. This makes the subject’s face appear flatter and their shoulders wider.

Which Portrait Lens Should You Get?

portraits taken with different focal lengths

Well, there is no concrete answer to this. Have a look at the nature of the images that Morgan has captured, and decide for yourself. Which lens you should be using also depends on the context in which you’ll be using it. You might love the look of a 200mm lens, but if you need to use it indoors, the space might not be sufficient. So, do some thinking before you make your choice.


Go to full article: How to Choose a Portrait Lens

What are your thoughts on this article? Join the discussion on Facebook

PictureCorrect subscribers can also learn more today with our #1 bestseller: The Photography Tutorial eBook

The post How to Choose a Portrait Lens appeared first on PictureCorrect.


from PictureCorrect https://ift.tt/2tJIIMW
via IFTTT

keskiviikko 27. helmikuuta 2019

PictureCorrect.com: 4 Tips for Using Camera Flash

Flash can either make or break your photos, but using it correctly will always give you great images. Don’t feel intimidated by your flash; it’s there to help you shoot great images in low light situations. Here are some great tips to help you shoot better images.

1. Fill in flash

One of the simplest ways to shoot great images when you’re outdoors and there are shadows falling across your subject or the faces of people you are shooting is to use fill flash. It’s self explanatory, but what it does is brighten the areas of shadow by filling in those parts with a little flash. Just switch on your flash when outside and allow the camera to do the rest. The first time you use it you will be amazed at how it improves your images dramatically. Never again will you have those dark shadows across your subjects. If you aren’t sure how to use it just check out you manual as most cameras allow you to control your flash. Some even allow you to control the power of the flash when filling in.

fill flash

“Dreams” captured by PictureSocial member Yousef

2. Use a diffuser

What a diffuser does is to cut down the harshness of the flash. It softens the light on the subject and gives a far more pleasant image. All externally mounted flash units will accept a diffuser and most DSLRs allow a diffuser to be mounted on the pop-up flash. It may take a bit of time to find one for your compact camera but they are available. They are cheap and give great results. I made my own by cutting out a piece of white milk carton and attached it to the flash with an elastic band. Most camera accessory websites will sell you a diffuser at a good price. Once you start shooting with one you won’t look back.

diffuser

“Alena and Serge” captured by PictureSocial member Tatiana Garanina

3. Bouncing your flash

If you are using and externally mounted flash unit you will also find that the harsh light of flash degrades your images. The way to resolve this problem is quite simple. Most external flashes have swivel heads allowing you to alter the angle of the flash head. By pointing up towards the ceiling and bouncing the light off ceiling it also diffuses the harshness of the flash. There is one little issue that may hinder this technique and that is the color of the ceiling. If the ceiling is not white the flash will tend to tint the scene below with the color of the ceiling. So try it out first before shooting to see whether it will work for you. A wooden ceiling sometimes adds warmth to the image which is quite pleasing.

bounce flash

“Shawl & Wall” captured by PictureSocial member DailyTravelPhotos

4. Off camera flash

This is the only way to shoot great flash images if you aren’t using a diffuser or bouncing the flash. An off camera cable is reasonably priced and really helps improve your images. By mounting your flash in the cable hotshoe and holding it slightly off to the left or right of your camera it helps prevent the harsh lighting of on camera flash. You can mount it on a tripod next to the camera or buy a mounting bracket that fits underneath your camera and mounts the flash off the camera.

off camera flash

Portrait captured by PictureSocial member Rogue Robot

When shooting images using flash you will need to experiment until you are comfortable with the different techniques. Learn how your on camera flash works and how to change its settings as well as your external flash settings. Once you are familiar with them you will add a another dynamic dimension to your low light images.

About the Author:
Wayne Turner has been teaching photography for 25 years. Passionate about photography, radio and video, he is a Radio CCFm producer and presenter in Cape Town.


Go to full article: 4 Tips for Using Camera Flash

What are your thoughts on this article? Join the discussion on Facebook

PictureCorrect subscribers can also learn more today with our #1 bestseller: The Photography Tutorial eBook

The post 4 Tips for Using Camera Flash appeared first on PictureCorrect.


from PictureCorrect https://ift.tt/2Xtrcu7
via IFTTT

PictureCorrect.com: Photography Ideas to Recharge Your Creativity

Are your portraits starting to all look the same? Maybe you’ve been using the same portrait styles for a little too long and want to try something new? New York-based photographer Brandon Woelfel might just have an idea that can get your creative juices flowing again:

It doesn’t take a lot of fancy equipment to take creative photos. It just takes a bit of imagination and a willingness to experiment.

1. Create a mirror image

Using a smartphone to create a mirror image

Somehow Woelfel figured out that if you hold your smartphone up to your camera lens at an angle, you get a mirror image. Of course, if your phone is your primary camera you may be out of luck. But if you do have a dedicated camera, the effect is quite impressive.

2. Think like an editor

thinking like your editor

This isn’t actually a physical technique. Rather it’s more how you look at a shot before you get to post. Think about your editing style and the way you’d like the final image to come out before pressing the shutter.

3. Be your own model

Using yourself as your model

If you thought that you were the only one taking self-portraits because you had no model around, think again. But this tip isn’t just about using the self-timer. You can create interesting photos with just a hand or a foot or…?

4. Bounce light in unusual ways

The direct light hack

Light’s an amazing tool that can be used in many ways. Here Woelfel bounces it off a sequined pillow and shoots it through other textures to create unusual patterns of light.

5. Use an object to create depth

Adding a magical effect

With this hack, Woelfel chooses an object that matches the theme of his shot and hold it in front of his lens to create a sense of depth.

These are all pretty simple tips, each of which you can do in your own home or in areas nearby. In fact, you may have been using some already. (Though I’ll be impressed if you’re already doing number 1.) The best thing about these, though, is the creative thinking behind them. A little bit of out-of-the-box thinking can go a long way.


Go to full article: Photography Ideas to Recharge Your Creativity

What are your thoughts on this article? Join the discussion on Facebook

PictureCorrect subscribers can also learn more today with our #1 bestseller: The Photography Tutorial eBook

The post Photography Ideas to Recharge Your Creativity appeared first on PictureCorrect.


from PictureCorrect https://ift.tt/2Vp2F7G
via IFTTT

PictureCorrect.com: Setting Up a Home Photo Studio on a Budget

Having a home studio is amazingly convenient. But not everyone has enough space in their home. And even though you may have an extra room to spare, you’ll need to pay attention to certain factors to get it ready. In the following video, photographer Jay P. Morgan points out things you should consider when setting up a home studio and provides some inexpensive DIY solutions:

Things to Consider When Setting Up a Home Studio

Paint side walls white using flat white paint. Light bouncing off the walls can create a color cast on the subject. By painting the walls white, the problem is easily solved. The flat white wall can even be used as a reflector during photo shoots to fill in harsh shadows.

Use black curtains on the walls. Sometimes the light bouncing from the side walls is too much and can get your light ratios all wrong. A simple solution is to use black curtains over the walls to control the bounce.

You can opt not to paint the back wall. You will need to use a seamless background anyway, so you can leave the back wall as it is.

Pay attention to the floor. The carpet on the floor can make working with seamless backgrounds difficult. When subjects walk on the seamless background, the carpet can cause it to crunch. So if you have carpet, make it work by laying down some layers of plywood.

home studio setup

Plywood over carpets to avoid the seamless from being crunched

Be mindful of the camera’s angle of view. The camera’s angle of view is like a triangle. It sees more things farther away, while it has a narrow field of view up close. You can make use of this “blind spot” on the sides by placing light stands, reflectors, and other gear to make the most out of the available space.

diy home studio

Make use of the space where the camera cannot see to optimize your space usage

Make use of the door. If the room is too small to take a full body shot, make use of the door. You can compose your shot by stepping outside the door, which will add some more width to the room.

how to set up a photography studio

Compose from outside the door if the studio is not big enough for a full body shot

Lighting for Your Home Studio

If you’re just starting off with lighting in your photography work, Morgan suggests working with LEDs. They give off continuous light and let you know exactly how the light will affect your photo.

But if you’re comfortable with strobes, go ahead with them. To begin with, a single strobe mounted on a light stand and covered with a soft box should get the job done. This basic light setup can get you some soft light and help you shoot moody portraits.

one light portrait in home studio

Advice on Making a Living with Photography

Now that you have your home studio set up and ready, you might want some advice on making it work. Morgan shares two simple things that you need to focus on:

  1. Think about what subject is most interesting to you. You need to find something that you’re interested in photographing that people are willing to pay you for.  Think of things like head shots, senior portraits, children’s portraits, animal portraits, or whatever. Find something that you like and are comfortable with and focus on building your business model on it. Build your portfolio on what you choose to shoot and also make use of regular social media posts to spread the word.
  2. Once you get going and start posting regularly on social media, you will come across two kinds of people: those who feel indifferent toward your work and those who feel that your work is great and start noticing you. Reach out to those who notice you.

Finally, when you’re confident enough with your work and feel that you are ready, start charging for your work. You can start off with lower rates while making sure that you’re not devaluing yourself and the industry. And slowly as you make your way up, increase the rates. Get to understand the industry rates in your area and charge accordingly.

I really hope that you found this article helpful, especially if you were planning to get a home studio for yourself and starting your photography business.

For further training: The Electronic Flash Photography Guide at 52% Off


Go to full article: Setting Up a Home Photo Studio on a Budget

What are your thoughts on this article? Join the discussion on Facebook

PictureCorrect subscribers can also learn more today with our #1 bestseller: The Photography Tutorial eBook

The post Setting Up a Home Photo Studio on a Budget appeared first on PictureCorrect.


from PictureCorrect https://ift.tt/2BVAvtk
via IFTTT

tiistai 26. helmikuuta 2019

PictureCorrect.com: Wedding Photography: How to Maintain Ambient Background Light by Bouncing Your Flash

Weddings, by their nature, have beautiful background scenery. This scenery is carefully planned and set up hours before the big day. For these reasons, you want to include it in your photos–that is, not just have the subject of the photos lit up by your flash, but everything behind in shadows, too. This is referred to as the miner’s light.

indoor wedding photography

“Untitled” captured by PictureSocial member Grigoryev Sergey

You also don’t want to be just shooting with extremely high ISOs for the whole wedding with no flash. This is a good technique for certain photos, but many times this makes the pictures appear as if they were cropped from bigger pictures. Another reason you don’t want to use this technique for all of your photos is that sometimes there is fast action that you need to catch, and you probably don’t want the subject’s face out of focus.

So how do you shoot in low light situations, have the backgrounds visible, and have your subjects properly exposed, but include no harsh shadows and stay in sharp focus? The answer is bouncing your flash.

To properly expose the couple and not have your flash producing harsh shadows on their faces, you need a bigger light source. Remember, the bigger the light source, the softer the shadows. That’s why, when you use an umbrella, the shadows are so nice and soft. The umbrella is the source of light, and it is a lot bigger than your flash. This is the way it is, and there is no way around it.

Those little cups that you put over your flash don’t make the shadows softer; they only even out the light so that there aren’t any hot spots. Other light modifiers you see do increase the size of your light source. Examples of these may be the big Tupperware-looking things you see, or else a large bounce card.

But wouldn’t the shadows be even softer with a bigger light source? How about one the size of a wall or ceiling? This is what bouncing your flash is: turning the head of your flash so that the light first bounces off a wall, ceiling, etc., before hitting your subjects. This increases the size of your light source.

I like to bounce my flash off corners, if possible. The corners where the walls meet the ceiling produce some very nice results. If you have an assistant, make sure they are bouncing the light for you. Now you just have to worry about your camera communicating with your assistant’s lights. If you’re going wireless, or you are connected through a cable, no problem. If you’re going through Nikon’s or Canon’s incorporated system, you just need to make sure your flashes can see each other.

When bouncing your flash to work in low light situations, I recommend you have your ISO bumped up to 1600. This is a big difference from 3200 and higher, and with cameras nowadays, the grain at 1600 isn’t too noticeable. Also, I advise that you shoot at an aperture of f/2.8 to get the ambient light. The big bonus of bouncing your flash, besides having softer shadows, is that the background is exposed based on your ambient light. Adjust your camera settings so that you are underexposing the ambient light two to three stops for good results. This way, the flash properly exposes your subjects, as they are the dominant element of the photo. The background is also exposed, but it’s a little bit dimmer and not competing for attention. Don’t worry about your shutter speed being below 1/60 of a second, because the flash will freeze the action.

If the couple is dancing fast and you have the flash bouncing to expose their faces, you will see that the flash freezes the action on their faces and that they in sharp focus. The people in the background may be blurred since they’re being exposed with the ambient light. This makes for some interesting and creative photos. On the dance floor, my setting might be ISO 1600, f/2.8, and a 1/10 or 1/20 second shutter speed.

wedding dance flash photography

“First Dance” captured by PictureSocial member Natalie Milissenta Shmeleva

Try bouncing your flash at the next wedding you shoot and see if you like the results.

About the Author
Kevin Heslin is a wedding photographer in Costa Rica. He’s a Boston native who has been living in the Manuel Antonio area for almost a decade. Presently, he shoots weddings in Costa Rica twelve months a year—from small intimate elopements to extravagant all-out celebrations.


Go to full article: Wedding Photography: How to Maintain Ambient Background Light by Bouncing Your Flash

What are your thoughts on this article? Join the discussion on Facebook

PictureCorrect subscribers can also learn more today with our #1 bestseller: The Photography Tutorial eBook

The post Wedding Photography: How to Maintain Ambient Background Light by Bouncing Your Flash appeared first on PictureCorrect.


from PictureCorrect https://ift.tt/2tGne3C
via IFTTT

PictureCorrect.com: Guide to Taking Dramatic Backlit Portraits

When the light source is behind your subject, it can become challenging to take a photograph. However, with the right technique, you can make the most of the challenge and create an amazing portrait. Daniel Norton with Adorama demonstrates how you can take dramatic backlit portraits using a single light setup:

Before taking any shots in his studio, Norton ensures that the ambient light doesn’t affect his photo. He wants to make sure that the flash is the only light that determines the look of his photo. You can do this by adjusting your aperture, shutter speed, and ISO so you get a black frame when you take a shot. However, be sure not to raise the shutter speed higher than the flash sync speed.

Moving on to the setup, Daniel uses a Profoto B1X to replicate the sun and an old black V-flat as the background. The subject stands in between two black cards, which adds some contrast on her face. Since the light is behind the subject, Norton anticipates some lens flare. And instead of fighting it, he’s prepared to use it creatively.

Because the light behind the subject, we need some way to reflect the light onto the subject’s face. Norton clamps a big white board on the light stand so that the reflected light fills in the subject’s face.

backlit portrait with single reflector

1/250 second, f/4.5, ISO 100

To make the most of the light, Norton adds a second reflector under the subject’s face and shoots through the small window.

backlit portrait setup

He also increases the flash power for a correct exposure. This adds in some more light on the subject’s face and makes the image brighter.

Moving his camera around a little bit, Norton experiments with a variety of lens flares. If you don’t like lens flare, try moving around and find an angle that minimizes it.

portrait lighting tutorial

The basic concept here is to use reflectors when your subject is backlit. And if you’re in a studio, feel free to experiment with multiple light sources and different types of reflectors.


Go to full article: Guide to Taking Dramatic Backlit Portraits

What are your thoughts on this article? Join the discussion on Facebook

PictureCorrect subscribers can also learn more today with our #1 bestseller: The Photography Tutorial eBook

The post Guide to Taking Dramatic Backlit Portraits appeared first on PictureCorrect.


from PictureCorrect https://ift.tt/2XtFJ8O
via IFTTT