


The power of Photoshop to transform an image is undeniable. In this video, Aaron Nace demonstrates a simple technique for adding sun rays to your images. Please note, this technique will only work if your image has the sun visible in it:
How to Add Sun Rays with Photoshop
- Import the image into Photoshop and create a New Layer.
- Select the Brush tool. Next, sample a color that is close to white but not quite completely white. The color you pick should ideally be sampled from close to where the sun is—a color that is bright yellow bordering on white.
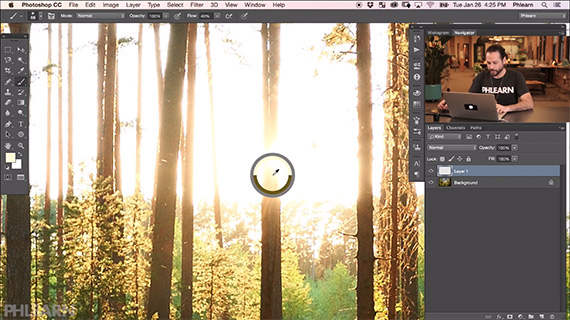
Sample a color that’s close to the sun.
- Create a number of small dots across the image by clicking on Window > Brush to open the Brush tool dialog box. Check Shape Dynamics. Bring the Size Jitter all the way up to 100 percent. Then bring the Minimum Diameter down to 0 percent. This ensures that you have a really wide range of dot sizes.

Adjust the brush shape dynamics and scattering options.
- Next click on Scattering. Check Both Axes. Bring the slider all the way up to 1000 percent to create a large scatter of the dots.
- Start painting with your Brush tool. Paint a wide area of the image but concentrate a majority of the dots around where the sun would be. The goal is to make the final image look as natural as possible. You can drag the Spacing under the Brush dialog box to increase the space (scatter the dots even more) between the dots.
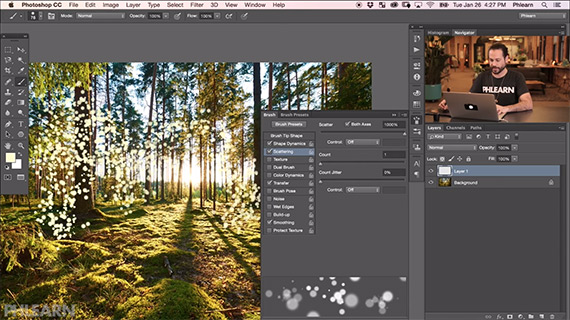
Paint with the brush tool to create a scattered array of dots.
- This is where the random scattered dots become rays of light presumably emanating from the sun. To achieve this effect. Go to Filter > Blur > Radial Blur.
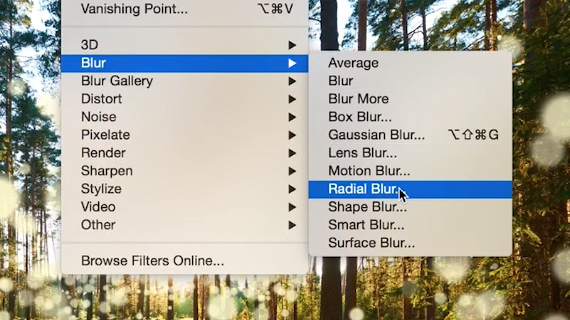
Apply Radial Blur.
- The option you need to select under Radial Blur is Zoom.

Select the Zoom option under Radial Blur.
Once Zoom is applied, Nace’s image looks like this:
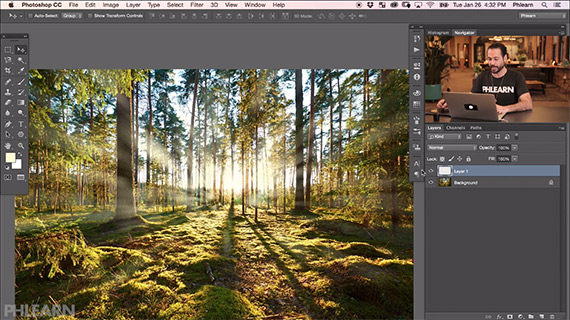
Image After Applying Radial Blur
You can experiment further by creating a second layer, this time using smaller dots to create thinner lines and then blend the two layers together to produce a slightly more realistic effect. The final touch is to transform the layer that has the light rays and align the converging point with where the sun is in the background layer.
Go to full article: How to Add Light Rays to Your Photos in Photoshop
What are your thoughts on this article? Join the discussion on Facebook
PictureCorrect subscribers can also learn more today with our #1 bestseller: The Photography Tutorial eBook
The post How to Add Light Rays to Your Photos in Photoshop appeared first on PictureCorrect.
from PictureCorrect https://ift.tt/2q4iGCi
via IFTTT


0 kommenttia:
Lähetä kommentti