


Have you ever noticed halos appearing around objects in your photos when blending exposures or masking an adjustment in Photoshop?
Like in this example…
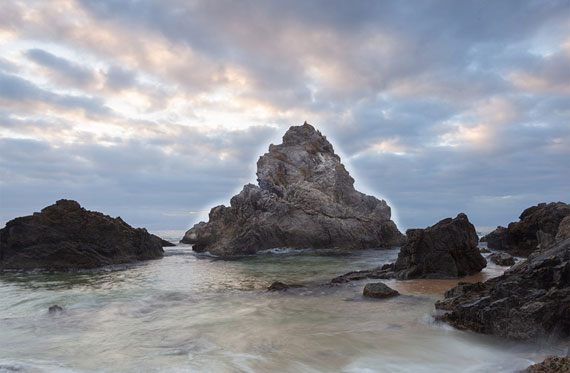
I’ve exaggerated the effect to make it easier to see.
It’s the result of painting over the lines in your layer mask.
Let’s say you’ve added a curves adjustment that darkens the image above, but you don’t want it to darken the rocks.
So you take a black brush to the curves’ layer mask to conceal its effect from the rocks.
However, the rock has really jagged edges and you can’t seem to brush right up to the edge without spilling over into the sky…
That’s exactly what would create the halo in the above example.
The bright glowing edge along the outside of the main rock.
In theory you could zoom in to 200-300% on your image and apply the brush to the layer mask on a pixel by pixel basis for accuracy.
Whilst theoretically possible, it would take an incredible amount of time to do very well.
And that would be just for one layer or adjustment.
If you want to avoid halos and not spend a lifetime processing and blending each image, there is a better way.
Luminosity masking is a perfect combination of accuracy and efficiency.
By loading a luminosity selection that restricts your brush strokes so that they only affect the dark parts of the image, you can happily brush right up to the edges of that rock and be confident the lighter sky behind it won’t be affected if you paint over the lines.
To see this in action, skip forward to the 10 minute mark in this video where I demonstrate the process using my luminosity masking panel.
Luminosity Masking Panel for Photoshop:
I created the Luminosity Masking Panel to make the complicated process of learning and using luminosity masking techniques quicker and easier than ever before!
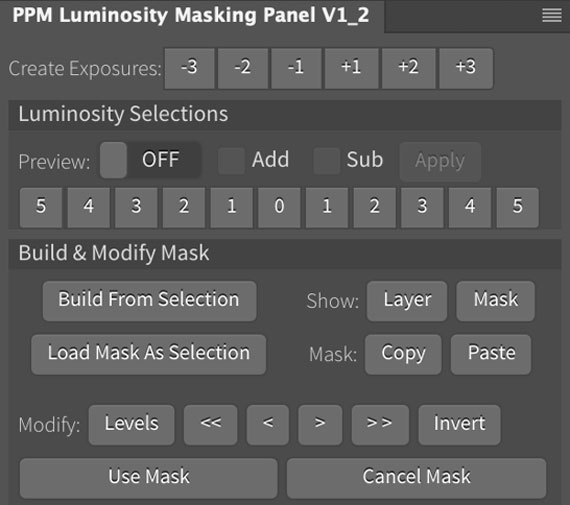
Luminosity Masking Panel
With the panel, luminosity masking is as easy as just a couple of clicks of a button, meaning you can spend less time trying to remember HOW to use the techniques, and more time just making it work for you.
Deal ending soon: The Luminosity Masking Panel at 50% Off
- - - - - - - - - - - - - - - - - - - - - - - - - - - - - - - - - - - - - - - - - - - - - - - - - - - - - - - - - - - - - - - - - - - - - - - - - -
Did you appreciate this newsletter? Please help us keep it going by Joining Our Patreon Supporters
What are your thoughts on this article? Join the discussion on our Facebook Page
PictureCorrect subscribers can also learn more today with our #1 bestseller: The Photography Tutorial eBook
Want to learn on-the-go? Throw these Snap Cards in Your Camera Bag
- - - - - - - - - - - - - - - - - - - - - - - - - - - - - - - - - - - - - - - - - - - - - - - - - - - - - - - - - - - - - - - - - - - - - - - - - -
The post How to Eliminate Layer Masking Halos in Photoshop appeared first on PictureCorrect.
from PictureCorrect https://ift.tt/uaT6dLh
via IFTTT

0 kommenttia:
Lähetä kommentti