


Next to the great shots of lions, tigers and elephants bird photography fascinates many amateur photographers. Maybe it’s the ability to get in close to a world within a world of color and delicate feathers. This is such a huge subject so only a few key tips can be discussed.
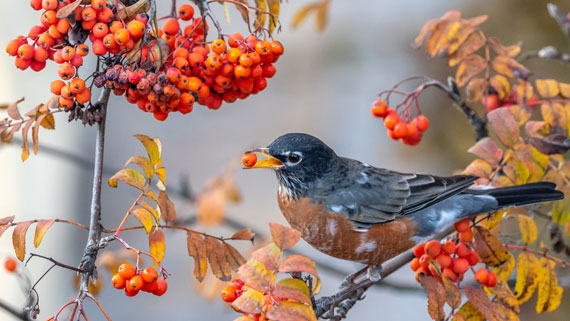
Photo captured by Patrice Bouchard; ISO 1250, f/4.0, 1/500s, 300mm.
The reason birds are such a challenge, is that they don’t like humans getting too close. You have to constantly work at outwitting them, either by staying far away and shooting with a long lens, or getting up close and hiding so they don’t know you are there. Both ways are a challenge, although one way is a bit more so because of the financial constraints, lenses.
Let’s take a look at some tips.
1. Know your subject
There are so many different species of birds, each with their own set of characteristics. Unless you know which birds you’re going to shoot, their habitat and feeding habits, you won’t be at all successful. What time of day, what time of year to shoot or not to shoot because of breeding, is vital to capturing a good image. Learn the best way to shoot them from books or other photographers.
2. Know where to go
Of course the best way to find out more is to join a local ornithological society. Go on outings with other club members and you’ll learn all you need to know. There are probably members who are also photographers, so you’ll learn even more. They’ll know the best locations for the type of bird you want to capture. Location is everything when photographing birds.
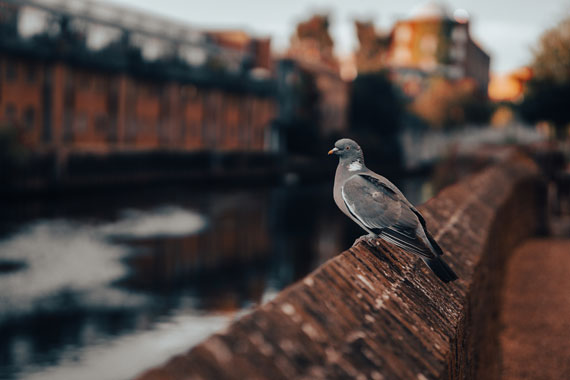
Photo captured by Adam Rhodes; ISO 100, f/1.6, 1/1600s, 56mm.
3. Know where to start
You may know all the best places around your town or city, but the best place for beginners is in the back yard. By placing a few feeders, the birds you’ve chosen to shoot will be attracted to them. Before placing feeders, create a hide where you can set up your tripod and camera. This means that you can use lenses of a shorter focal length and even your compact camera to take great shots.
4. Know how to shoot
The most important question that is asked by all potential bird photographers is “what lens do I buy for my camera?” There are two answers to this question. One, how much can you afford and two, what is the minimum that you can use. A good lens like the Canon 100-400mm is worth its weight in gold. If you’re going to be photographing geese at your local park, or eagles at the local bird sanctuary, then 200-300mm will do. If you’re shooting waterfowl from a hide, 300-500mm should suffice. Anything further would require something in the region of 600mm but you’d probably need to win the lottery to afford that. Don’t forget converters. A good 1.4 or 1.7x converter increases the focal length considerably and of course there is the focal length multiplication factor with digital SLRs. The most important accessory though is the humble tripod, which is essential as you increase your focal length.
So, the big question is, where do you start your bird photography? All this information is great, but how and where do you start. Let’s try something. It’s called armchair photography and it’s literally shooting birds from your armchair. It’s quite simple. Follow this process.
- Choose a room in your house where you can set up your camera on a tripod. It should look on to a quiet area of your garden where there is minimal disturbance.
- Go to your local pet store or garden center and buy yourself a bird feeder that will attract the type of bird you’re interested in.
- Hang the feeder or feeders outside the window within the focal distance of your camera. Don’t mount it permanently until you’re sure it’s in the right place. Make sure it’s in an area that has good lighting.
- Place the right food in the feeder and you’re ready to start shooting.
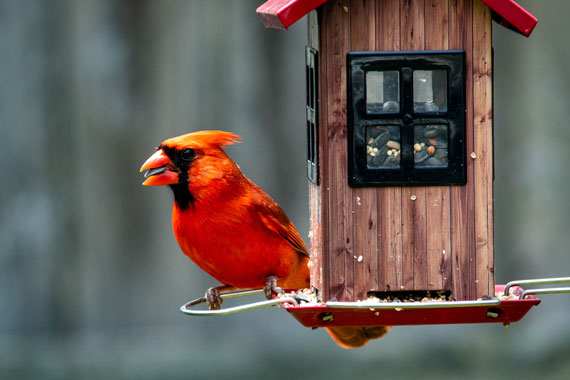
Photo captured by Joshua J. Cotten; ISO 400, f/7.1, 1/400s, 600mm.
Again, the key here again is to experiment. You may find that the type of feeder doesn’t allow you to get good shots, or that the background isn’t suitable for the bird you’re shooting. I can guarantee that if you’re serious about this setup, you’ll get some beautiful bird shots.
About the Author:
Wayne Turner has been teaching photography for 25 years and has written three books on photography. He has produced 21 Steps to Perfect Photos; a program of learner-based training using outcomes based education.
- - - - - - - - - - - - - - - - - - - - - - - - - - - - - - - - - - - - - - - - - - - - - - - - - - - - - - - - - - - - - - - - - - - - - - - - - -
Did you appreciate this newsletter? Please help us keep it going by Joining Our Patreon Supporters
What are your thoughts on this article? Join the discussion on our Facebook Page
PictureCorrect subscribers can also learn more today with our #1 bestseller: The Photography Tutorial eBook
Become a photography VIP with the All Access Pass to Photography Training
- - - - - - - - - - - - - - - - - - - - - - - - - - - - - - - - - - - - - - - - - - - - - - - - - - - - - - - - - - - - - - - - - - - - - - - - - -
The post 🐦 Beginner Tips for Photographing Birds appeared first on PictureCorrect.
from PictureCorrect https://ift.tt/OUPlVci
via IFTTT

0 kommenttia:
Lähetä kommentti