


Lightroom is quite a powerful piece of software, and that’s why it makes perfect sense for photographers to learn how to use it. But because it’s so feature-rich, it’s easy for new users to get lost or use it inefficiently. Keeping this in mind, Pye Jirsa from SLR Lounge, shares six workflow tips to help you edit faster in Lightroom:
1. Shoot in Manual Mode
Well, this has nothing to do with Lightroom directly, but think of this step as the preparation for a faster editing workflow. When you shoot in manual mode, you can give a similar look and feel to all of your images. And when shots are similar, you can process them all at once via batch processing.
The same principle applies to flash. Set the output manually so that the flash doesn’t keep changing the brightness of the image shot after shot.
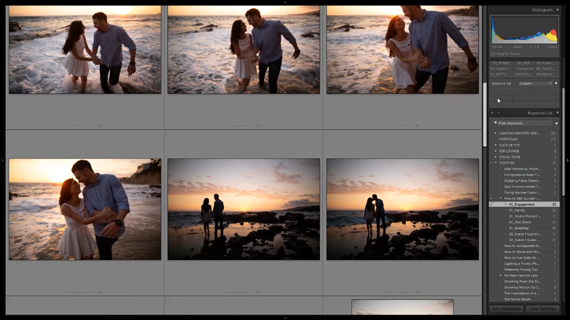
However, if the lighting conditions change, adjust your camera and flash settings accordingly. This way you can batch process those photos that were shot in identical lighting conditions.
2. Process by Scene or Lighting Conditions
Using this method, you can make adjustments to one image and copy the adjustments to other images that were shot in the same lighting conditions. You can do so by simply following these steps:
- Choose a photo and process it to your taste.
- Select all the images shot in the exact lighting conditions.
- Press Ctrl/Cmd+ Shift + S to bring up the Sync panel.
- Choose the settings that you want to synchronize across all the selected images.
- Hit OK.
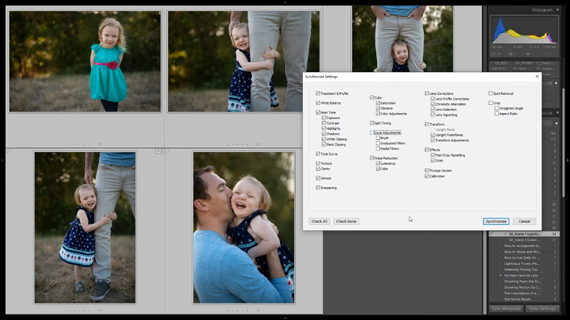
If you use an editing console like Loupedeck, it’s even easier. Follow the first two steps listed above, and then simply press Copy and Paste in the editing console. This will sync the settings across all the selected images.
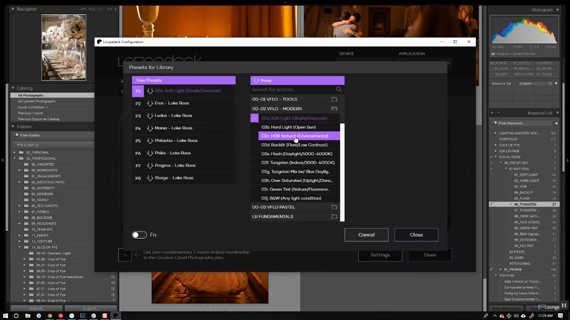
3. Create Presets Based on Lighting Conditions
“Presets are inherently limited in their functionality because we are constantly shooting in different lighting conditions.”
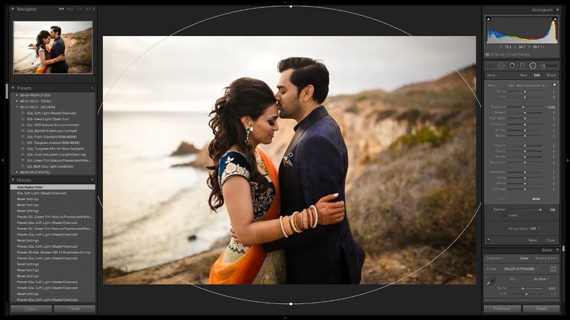
Adapt your presets to the lighting conditions that you shoot in the most. By doing so, you can significantly save your time in editing while maintaining a consistent look.
4. Assign Your Most Used Presets a Shortcut
If you’re using some kind of editing console, you can assign shortcuts to your presets. For instance, by using Loupedeck’s software, you can go through your most-used presets and assign them to any of the buttons from P1 through P8. When it comes to applying the preset, simply press the button, and the preset will be applied instantly in Lightroom.
5. Use the Mouse Minimally
Instead of dragging the sliders, place your cursor over the slider, and use the up or down keys to make small incremental adjustments. If you need to make greater adjustments, simply press Shift + arrow keys.
6. Assign Common Local Area Adjustments to Presets
If you have some local area adjustments that you do on a regular basis, you can assign them to an actual development preset.
“You can save local area adjustments to a preset, but we want them to be generic enough for regular use.”
Then, when you use that preset with images, you can always fine-tune them.
Whether you are a Lightroom veteran or you’re just starting out, these tips will surely help you make your workflow more efficient.
Go to full article: 6 Workflow Tips for Faster Photo Editing in Lightroom
What are your thoughts on this article? Join the discussion on Facebook
PictureCorrect subscribers can also learn more today with our #1 bestseller: The Photography Tutorial eBook
The post 6 Workflow Tips for Faster Photo Editing in Lightroom appeared first on PictureCorrect.
from PictureCorrect https://ift.tt/2YEpBCB
via IFTTT

0 kommenttia:
Lähetä kommentti