


Our planet is constantly moving around the sun at a pretty fast pace. However, our naked eyes don’t notice the constant movement. But with long exposures, cameras can record the movement and cause the stars to appear as light streaks, which we call star trails. Photographer Tony Northrup shares how to take amazing star trail photos:
Things to Consider for Star Trail Photography
Weather Conditions
Check the weather before heading out to photograph star trails. A sky with no moon or clouds is perfect.
“An ideal night for star trails is something cold and clear.”
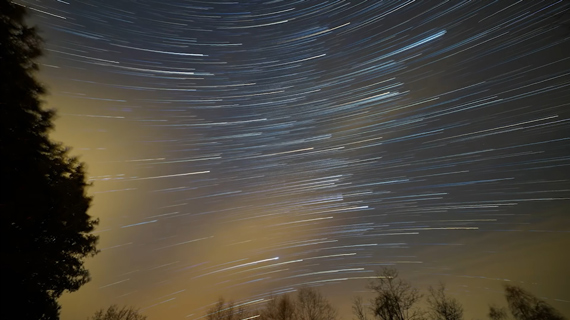
Clouds affecting a star trail photo
Batteries
Batteries lose their power quickly when shooting long exposures. And the colder the weather, the quicker the battery gets exhausted. So, be sure that you have the batteries fully charged. And if your camera supports USB charging, hook the camera up to a charger.
“If you have to interrupt the camera to replace the battery, you’re probably going to ruin your star trail.”
Memory Cards
Since you’ll be taking tons of photos, have a formatted memory card with lots of space with you. And be sure to set the camera to take raw pictures. Raw files capture greater data and let you make adjustments later if anything goes wrong.
Setup for Star Trail Photography
Gear
Photographing star trails doesn’t require any specialized equipment. You’ll need your camera, a wide angle lens, and a good sturdy tripod. Results come out great when you’re shooting in an area with minimal light pollution. And, having a flashlight with you can come in handy for walking around or adjusting the camera settings.
Camera Settings
While the camera settings will depend on the circumstances you’re shooting under, you can use the following settings as a basic guide.
- Have your lens set at the widest focal length.
- Put your camera into manual mode and set the aperture to the smallest f-stop value (largest aperture).
- Set the shutter speed to 30 seconds.
- Start with ISO 3200. You can change this later after inspecting your results.
Getting the Focus Right
Besides these settings, it’s extremely important that you nail your focus.
“Getting your camera properly focused on the stars can be a real challenge.”
If you have a modern camera, make use of the live view feature. This will allow you to have a bigger view of the night sky so that you can adjust your focus manually. If you have an older camera and can’t see the stars in live view, set your lens to focus at infinity. Review a few test shots and adjust your focus accordingly.
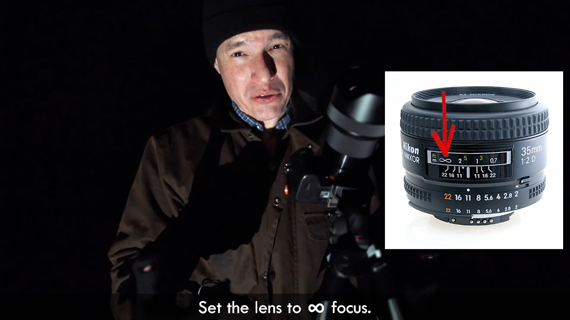
However, do keep in mind that if your objective is solely to photograph star trails, nailing focus is not that important. Even if you miss by a bit, the image will have an interesting look to it.
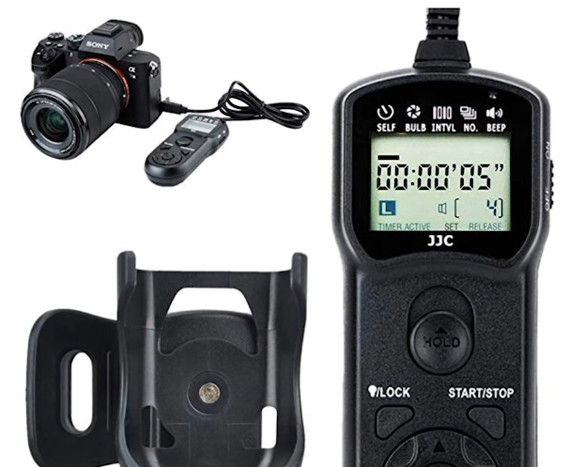
Take Multiple Shots
Rather than taking a single image with a very long exposure, take multiple long exposure images. There are multiple ways with which you can do this:
- See if your camera has a built-in intervalometer feature. If it does, set it to take a shot once every second.
- Another way is to use a remote shutter release to automatically trigger the shutter.
Northrup sets his camera to take continuous images, each being a 30 second exposure.
Make sure that you review a couple of images to check that the exposure is right. You can then increase or decrease the ISO depending on whether the image is underexposed or overexposed.
Post-Processing
Before doing anything fancy, Northrup makes basic adjustments to the images using Lightroom. For instance, to make the stars look good, and to decrease the effect of light pollution, he cools the white balance. Next, to make the details of the building in the foreground more visible, he lifts the shadows. Once satisfied, he selects all the images from the sequence and syncs the settings so that the images appear identical before exporting them as JPEGs.
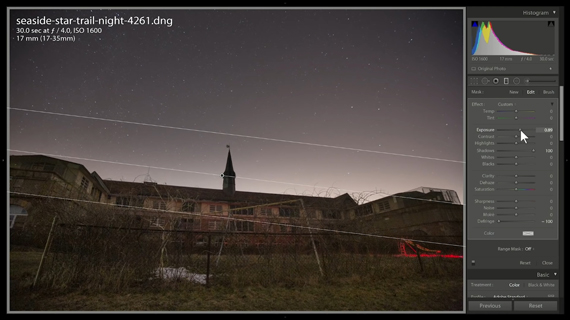
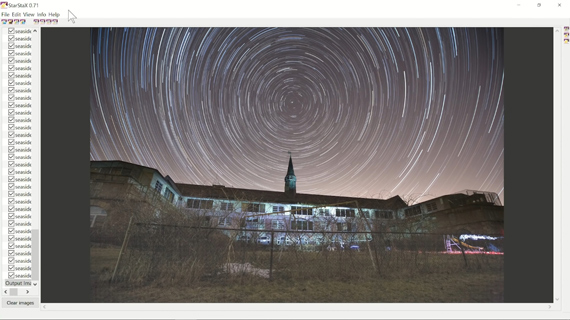
While you can use Lightroom to make basic adjustments to the star trail images, Northrup recommends using StarStaX to blend and stack them up.
What other tips do you have for star trail photography? We’d love to hear from you in the comments.
Go to full article: Camera Settings for Star Trail Photography
What are your thoughts on this article? Join the discussion on Facebook
PictureCorrect subscribers can also learn more today with our #1 bestseller: The Photography Tutorial eBook
The post Camera Settings for Star Trail Photography appeared first on PictureCorrect.
from PictureCorrect http://bit.ly/2WP2FD6
via IFTTT

0 kommenttia:
Lähetä kommentti