


Older images have a distinct look. Colors appear warm and the image lacks true blacks, creating a slightly washed out look. This dated look is vastly popular even today and that’s why photo sharing platforms such as Instagram have built-in vintage filters. While many presets are readily available, why not learn how to do it yourself? Lizzie Peirce demonstrates how to create a warm vintage film look using Lightroom:
Add Warmth
The first thing that you’ll notice about a classic vintage photo is its warm color tone. To add this color tone, simply increase the color temperature in Lightroom. While adding a bit of green tint can work as well, it can sometimes give you weird results.
Reduce Clarity
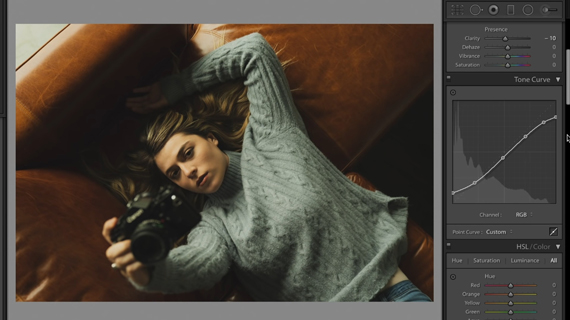
If you’re familiar with the clarity slider, you know how it adds a punch to your photos by adding contrast. But since we’re going for a washed out, soft look, reduce clarity by sliding it to the left. On the plus side, it also smooths out skin.
Create a Flat Finish
Using the tone curve, you can give the image a matte film effect. Bring down the highlights and lift the shadows up. This will make the image appear less contrasty and flat, which mimics a film look.
Adjust Hue Saturation and Luminance
To give the image a vintage look, Peirce changes the hue of the blue sweater more to the teal side and adds a bit of saturation to make it pop. Also, she adds some luminance to the orange background. While these settings were particular to this photo, play around with the HSL panel and see what works best for your image.
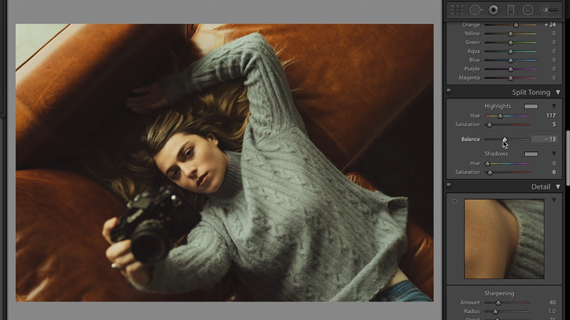
Split Tone With Greens & Reds
Greens and reds are very synonymous with the vintage look. Using the split toning panel, add some greens to the highlights and reds to the shadows and increase their saturation a bit. Be sure not to go overboard with saturation as it can easily ruin the image.
If you carefully follow these five steps, you will end up with a classic looking image. However, if you want to go that extra mile and add some light leaks, grain, and dust filters, continue with the steps below.
Commit to Grain
What we call noise in digital photography is referred to as grain in film photography. Every type of film has a distinct grain. You can emulate this characteristic by using the grain tool in Lightroom. The amount of grain to add is a personal preference.
Create Light Leaks
Light leaks were a problem in reality. Due to unwanted gaps or holes in the camera, stray light would fall on the film creating a washed out look. However, light leaks are seen more as a feature these days. To add a light leak to your image, pull out a gradient filter or a radial filter on the edge(s) of the image and play around with the temperature and exposure values. You can even add colors like yellow or red to the gradient filters and see what works best for your image.

Add a Dusty Distressed Look
Finally, if you really want your audience to believe that your image is from the good old days, add some dust. Because why not? Open up your image in Photoshop. Get a dusty filter pack layer and place it above your original image. Change the blending mode to Screen. Adjust the opacity depending on how visible you want the dust to appear.

And that’s about it! Are you a fan of this look?
Go to full article: How to Give Your Photos a Warm Vintage Film Style
What are your thoughts on this article? Join the discussion on Facebook
PictureCorrect subscribers can also learn more today with our #1 bestseller: The Photography Tutorial eBook
The post How to Give Your Photos a Warm Vintage Film Style appeared first on PictureCorrect.
from PictureCorrect http://bit.ly/2V2mKjV
via IFTTT

0 kommenttia:
Lähetä kommentti