


Color correction is an important aspect of post-processing. This process renders the right color tones and tint for your photos, making them appear the way your naked eye saw the scene in the first place. In this video, Unmesh Dinda from PiXimperfect explains some easy steps to color correct your photos in Photoshop:
Image with a Well-Defined Grey Area
First, create a Curves Adjustment layer in Photoshop. Click on the Circle Adjustment layer icon, and then select Curves from the ensuing pop-up window.
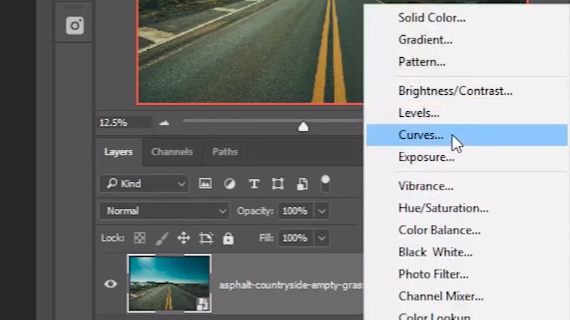
Choose the middle eye-dropper tool.
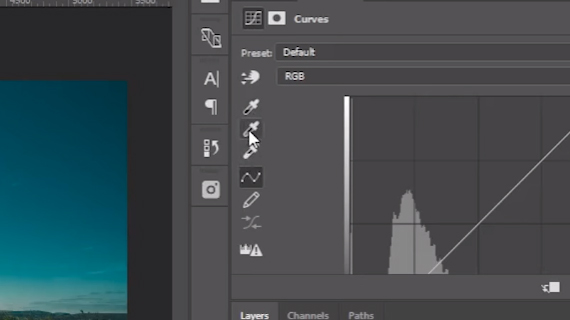
Now click on anything on the photo that should have been grey in the final image. In this image, the road has ample amount of grey. Click on anywhere on the road. Voila! The image will now be color corrected.
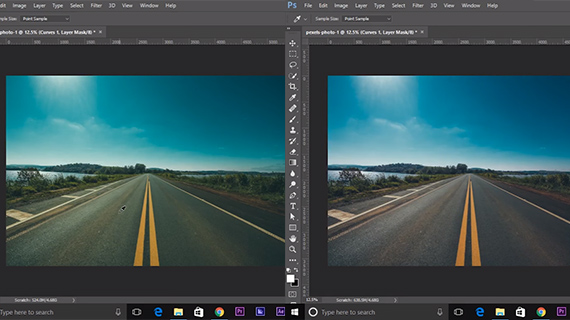
Now you can move to make subtle adjustments to the white and black levels of the image or other adjustments as you deem fit.
Image without a Grey Area
It’s all too well when your image has a well-defined grey area and you click on that with the eye-dropper tool to color correct it. Things in real life, unfortunately, are not that simple. You may have an image with no grey area. Or an image which is so complex that you can’t find a grey area to use. What do you do in such situations?
The solution is to look for an area which is closest to grey.
First, create a solid color adjustment layer. Click the layer icon, and then click on Solid Color (the first option in the pop-up window).
Now fill the layer with 50 percent grey.
The easiest way to find 50 percent grey is to type 808080 in the # box. Alternatively you can type 128 for R, G, B boxes. Alternatively, you can choose Control + Shift + N (Command + Shift + N) to bring up the New Layer dialogue box and then from there on you can choose Overlay as the mode and choose 50 percent grey color. Then change the blend mode to normal.
Once you have the 50 percent grey adjustment layer, change the Blend mode to Difference.
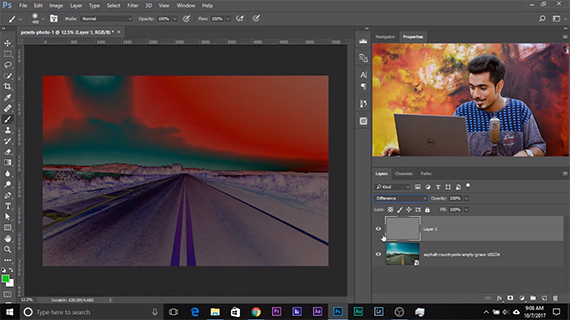
Once you do that, the areas which become dark will be closer to grey. Or in other words, precisely 50 percent grey. This is because when you subtract two colors using the Difference blending option the result becomes black and highlights the areas where the color is present. In this case the color is 50 percent grey.
Make a new layer and mark this area out using the Brush tool.
The final step is to delete the Solid Color Adjustment layer as you don’t need that anymore.
Now, create a Curves Adjustment Layer, select the middle eyedropper tool and try clicking on the area that you’ve marked away.
Have you used these methods for color correction? Did they work as expected?
Go to full article: Photoshop Tutorial for How to Color Correct Quickly
What are your thoughts on this article? Join the discussion on Facebook
PictureCorrect subscribers can also learn more today with our #1 bestseller: The Photography Tutorial eBook
The post Photoshop Tutorial for How to Color Correct Quickly appeared first on PictureCorrect.
from PictureCorrect https://ift.tt/2HnOYTV
via IFTTT


0 kommenttia:
Lähetä kommentti