


Did you know that bringing one of the oldest photographic processes is simple enough to reproduce from the comfort of your own home? Invented in 1842, the UV sensitive cyanotype process is a printing process capable of recording images entirely independent of a camera:
As photographer Dominique Hines explains, the chemistry behind the process couldn’t be more simple. Easy-to-use and affordable, cyanotype kits contain all of the chemicals necessary to get the process going, and all that’s required is to mix equal parts of the kit’s provided solutions together. Just be sure to do all of the prep work in subdued indoor lighting, as the chemicals react to the UV rays present in sunlight.
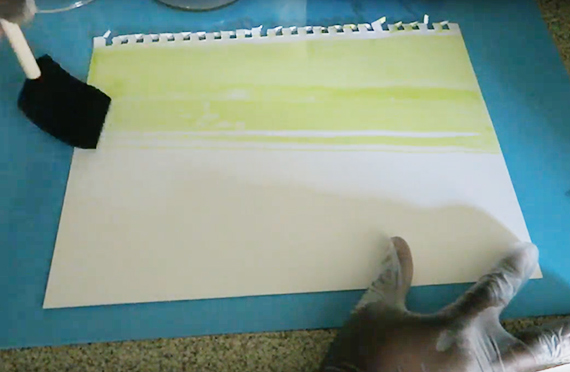
Once the chemicals are ready, just use a sponge brush to apply to a watercolor paper (or similar absorbent material). To avoid gaps in your brush strokes, apply in both horizontal and vertical motions. Once everything is brushed on, use the felt to pull up any extra liquid on the surface of the paper if you’d like—more liquid will create a darker print, so it all boils down to the aesthetic you’re after. Use a cool handheld dryer to set the chemistry in place.
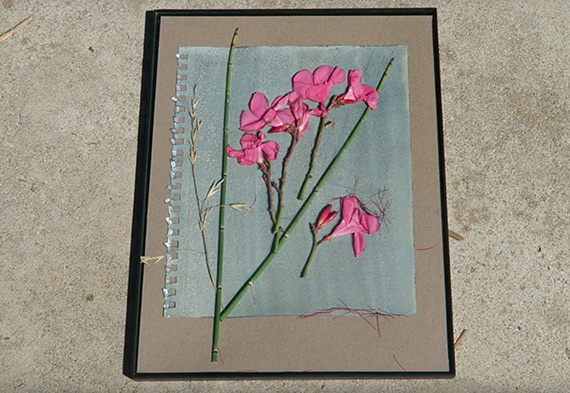
When the unexposed surface is ready, place it inside a contact frame. Before exposing the frame to any UV light, arrange the subjects over the top of the glass to coincide with the composition you’d like. As soon as the paper is exposed to sunlight, the color of the paper will begin to shift from yellow to green to the bluish tint cyanotypes are known for. Experiment with the time of day you’re making your exposure and the amount of time you leave your print out in the sun—these factors all impact the final look of your image.
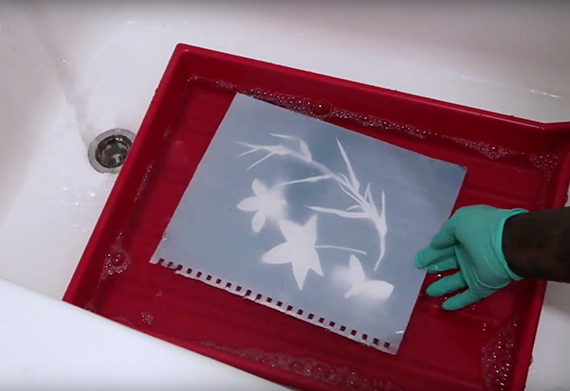
When you want to stop the exposure, bring the print indoors and put it into a wash. Using running cold water, leave the print to sit in the developing tray for at least five minutes. This will wash the leftover chemistry away and give the print its blue color. If desired, you can quickly dunk the print into a second bath with a bit of alcohol or bleach; this may or may not intensify the blues of the print. If you choose to do so, wash the print off in a cool water tray, being sure to agitate every so often.
Once the wash is finished, all that’s left to do is to let the paper dry out. Hanging the prints out on a line will do, but a hair dryer can speed the process up.
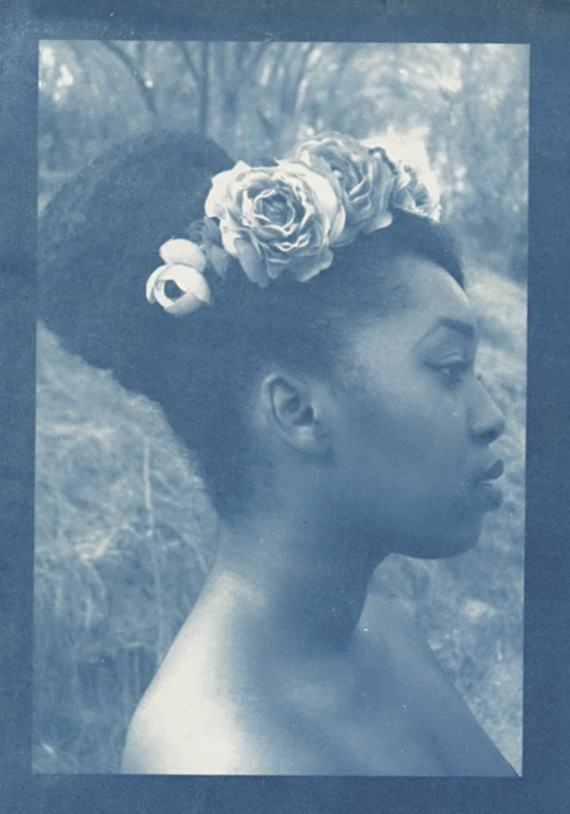
If cyanotypes strike your fancy, there’s no need to stop short at the simple photogram prints shown in this tutorial; the same process can be used with transparent negatives to create more complex images featuring a wider range of blues.
As the cyanotype proves, darkroom processes don’t need to be intimidating or difficult. For all those looking to try out a new way of making images, this simple activity proves to be an excellent jumping off points.
Go to full article: Cyanotype Photography at Home Tutorial
What are your thoughts on this article? Join the discussion on Facebook
PictureCorrect subscribers can also learn more today with our #1 bestseller: The Photography Tutorial eBook
The post Cyanotype Photography at Home Tutorial appeared first on PictureCorrect.
from PictureCorrect https://ift.tt/2IOcUg4
via IFTTT

0 kommenttia:
Lähetä kommentti