


There are few natural phenomena more popular than the picturesque Aurora Borealis. During the last years there’s been a huge influx in tourism to countries such as Norway and Iceland, where many hope to get a glimpse of “the lady in green.”
In this article, I’ll give you five tips to locate and photograph the Northern Lights.
1. Choose Your Location Wisely
The first thing you need to consider when photographing the Northern Lights is the location and time of year. Unfortunately, it’s not visible all year nor all over the world.
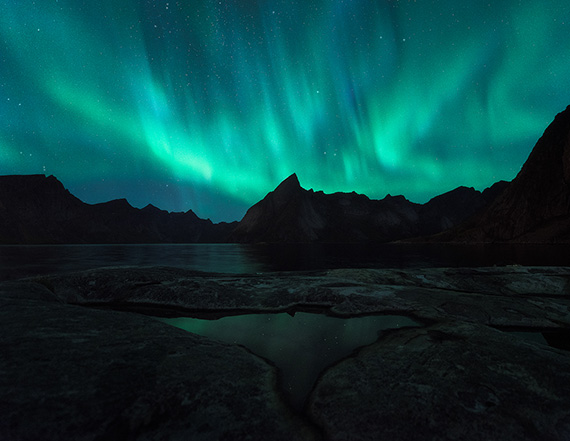
Choose your location wisely.
Northern Norway, Iceland, Finland, Greenland, and Alaska are the most popular places to witness the Northern Lights, but it is also visible in other countries in the Northern Hemisphere. To see exactly where the Aurora can be visible, I suggest looking at an aurora map.
Once you have found the destination within the Northern hemisphere that you want to visit and photograph, you need to plan when to visit. The Aurora Borealis is a phenomenon that’s only visible in the dark, which means that summertime is off the table in most of these regions. Keep in mind that the midnight sun occurs during summer in the Arctic. It’s only between September and April that the nights are dark enough to view the Northern Lights.
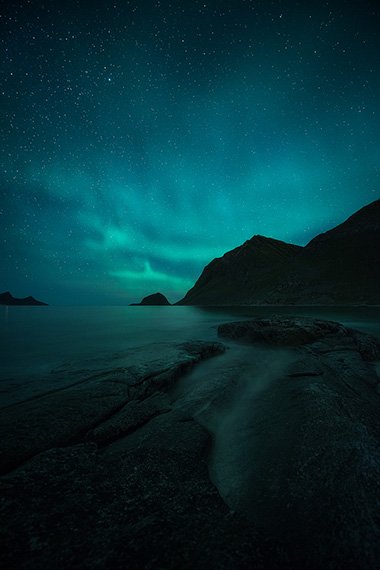
2. Avoid Light Pollution
To increase the possibility of seeing the Northern Lights you need to get away from the city lights. Sure, you might be able to witness it from the hotel balcony in Northern Norway but, trust me, the experience is much more mind-blowing when you get to a dark area. The pictures will also be more impressive.
This is a tip for night photography in general. Even when there are no Northern Lights and you just want to view the stars, they become more visible the farther away from light pollution you are.
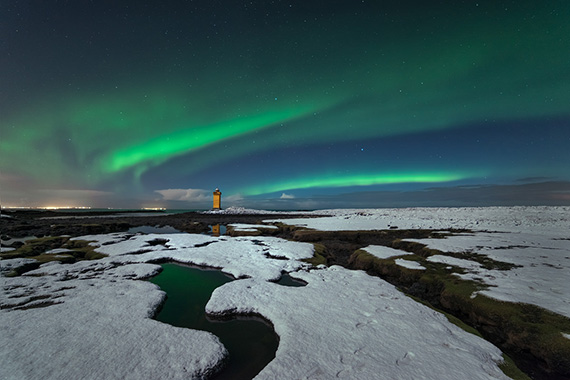
Avoid light pollution.
3. The Forecast is Key!
The benefit of ‘regular’ landscape photography is that even when the weather is bad, you can work with the conditions and create beautiful images. This isn’t the case with Northern Lights photography. There are two things crucial for succeeding:
- There have to be no—or very few—clouds. If it’s overcast and you can’t see the stars, you can’t see the Aurora.
- The Aurora forecast needs to be active.
The first one might be logical but what is an aurora forecast? Simply put, it’s a forecast that predicts how much northern lights there are. The Aurora activity is typically displayed as a number on the KP Index. The KP Index goes from 1–9 where the higher the number, the more active it is and the farther south it’s visible.
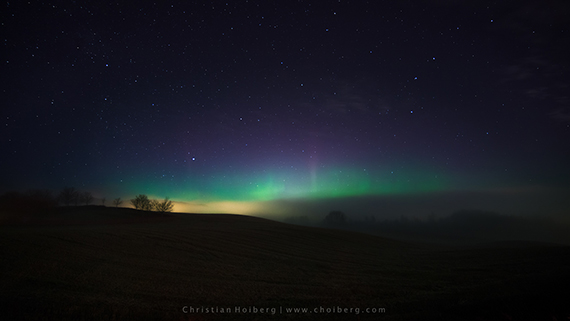
Check the forecast.
In the Arctic you’re able to see it already at the lowest KP’s, so just because the index is low doesn’t mean you shouldn’t go out looking; it’s just less likely that it will be an ‘explosive’ show.
4. Use a Quick Shutter Speed
Many nighttime photographers follow the 500 rule, while others tend to strictly use a shutter speed of approximately 20 seconds. When photographing the Northern Lights, you’ll need to adjust the settings slightly.
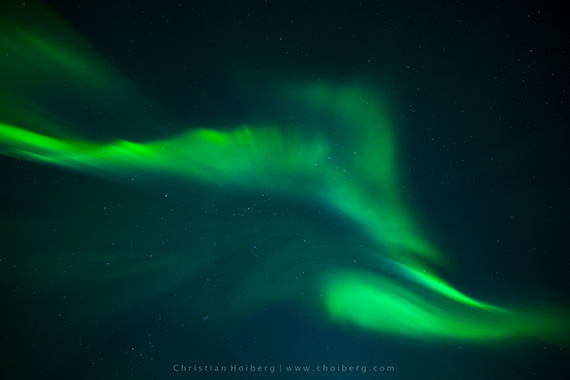
Use a fast shutter speed.
You might have heard someone say “the lady in green is dancing tonight.” While it might just be a saying, I find it perfectly describes this phenomenon. When active, the Northern Lights move quickly across the sky and can even burst into different colors. If you use a shutter speed of 20 seconds when this happens, the sky will be too bright and the Aurora will be blurry.
There’s no exact blueprint for what settings to use, but try aiming for a shutter speed of around 5 seconds. Sometimes even that will be too much, while other times you can get away with a slower one.
5. Choose a Cold White Balance
The White Balance is a setting that many beginning photographers find slightly confusing, and it’s quite often that my workshop participants set it to Automatic. I always recommend using a manual or semi-automatic setting, especially when photographing Northern Lights.
Automatic White Balance rarely does a good job at night and tends to give some weird results with the Northern Lights. A better choice is to manually set the White Balance at somewhere around 3200K. This gives a more natural and slightly colder look to the image, and makes it easier to process later on.
Choose a cool white balance.
Lastly, I want to mention the importance of staying warm. This should be obvious for most of you who are used to the outdoors, but the Arctic nights, especially during winter, can be quite harsh and unforgiving. Always dress up with warm clothes and leave an extra layer in your backpack!
About the Author
Christian Hoiberg is a Norwegian landscape photographer who has had his work published in several online and print magazines. To help inspire and educate aspiring photographers, Christian shares his knowledge through his website, CaptureLandscapes—a place to improve your landscape photography.
Go to full article: 5 Tips for Photographing the Northern Lights
What are your thoughts on this article? Join the discussion on Facebook
PictureCorrect subscribers can also learn more today with our #1 bestseller: The Photography Tutorial eBook
The post 5 Tips for Photographing the Northern Lights appeared first on PictureCorrect.
from PictureCorrect https://ift.tt/2Ac9b6x
via IFTTT

0 kommenttia:
Lähetä kommentti