


A diffusion panel is quite a handy piece of equipment. It softens hard light, allowing you to get soft shadows and a nice glow on the subject. While diffusion panels can drastically help in making your images look better, you don’t even need to spend a whole lot of money on them. Commercial still life photographer Martin Pitonak shares how to make diffusion panels on a budget:
The idea is simple. You just need a frame or a border in your desired size and then you’ll use duct tape to attach a sheet of tracing paper to the frame.
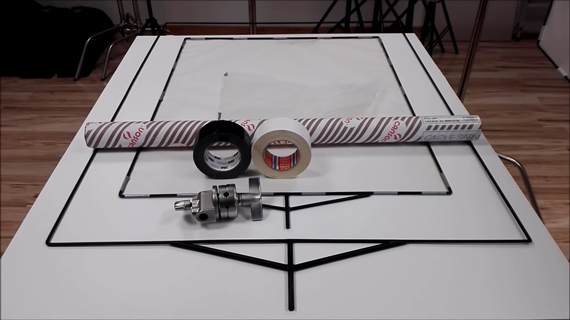
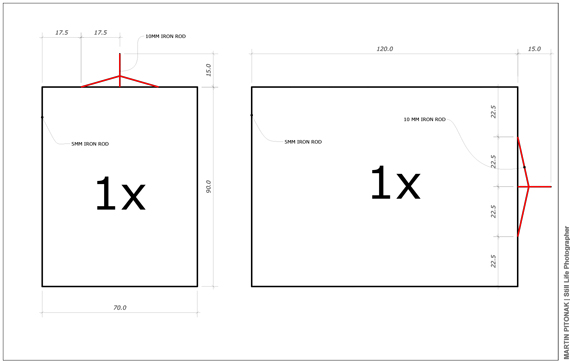
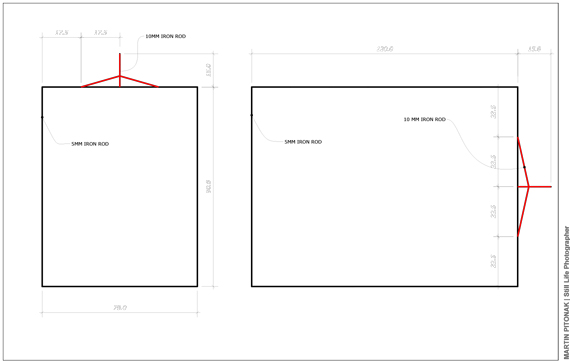
Pitonak uses 5mm iron rods to construct the frame of the diffusion panel and 10mm iron rods to construct the grip. The end of the grips can be easily inserted into a bracket which in turn can be clamped onto a C-stand. This allows you to twist and turn the diffusion panel as needed.
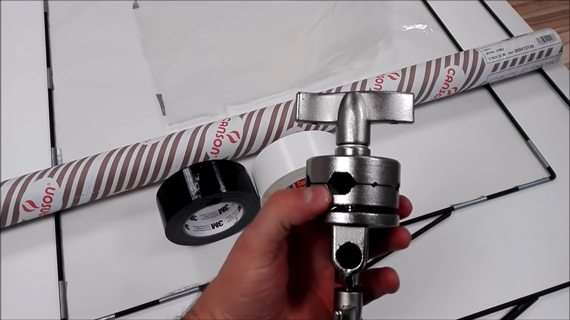
Bracket for diffusion panels
If you want to get custom panels locally made, Pitonak has been generous enough to share his design that you can use or share with the fabricator:
If you’re a still life or a product photographer, diffusion panels are a must. Now that you know how to make them, what are you waiting for?
Go to full article: DIY Diffusion Panels Tutorial
What are your thoughts on this article? Join the discussion on Facebook
PictureCorrect subscribers can also learn more today with our #1 bestseller: The Photography Tutorial eBook
The post DIY Diffusion Panels Tutorial appeared first on PictureCorrect.
from PictureCorrect https://ift.tt/2VZ3h41
via IFTTT

0 kommenttia:
Lähetä kommentti