


Would you like to take images with a retro feel to them? And do you happen to have a spare camera body cap with you? If the answer to both of the questions is “Yes”, then you are in luck. Here’s a short DIY tutorial from Blue Mantle Films that show you how to make a pinhole lens from simple household items and a camera body cap:
Here’s what you’ll need for a DIY pinhole lens:
- soda can
- scissors
- camera body cap
- drill
- tape
- knife
- safety pin
How to Make a Pinhole Lens
- Cut a small circle from the soda can and make a small pinhole in its center using a safety pin.
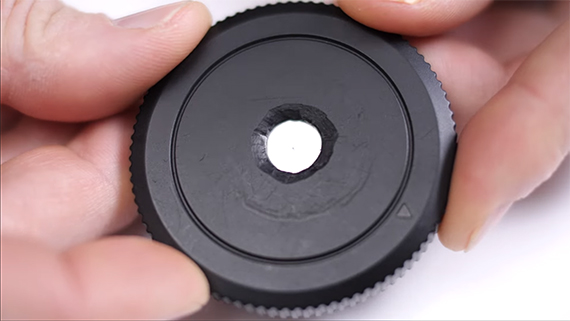
- Make a hole on the center of the body cap using a drill, and smooth the surface using a knife.
- Tape the circle that you cut out in the first step onto the body cap. Be sure not to cover the pinhole with the tape in the process.
- Remove any dust and debris from the body cap and put it on the camera.
And there you have it, a DIY pinhole lens.


The process is simple and produces some classic looking images. Give this a try and let us know how it goes!
Go to full article: DIY Pinhole Lens Tutorial
What are your thoughts on this article? Join the discussion on Facebook
PictureCorrect subscribers can also learn more today with our #1 bestseller: The Photography Tutorial eBook
The post DIY Pinhole Lens Tutorial appeared first on PictureCorrect.
from PictureCorrect https://ift.tt/2we6dPW
via IFTTT

0 kommenttia:
Lähetä kommentti