


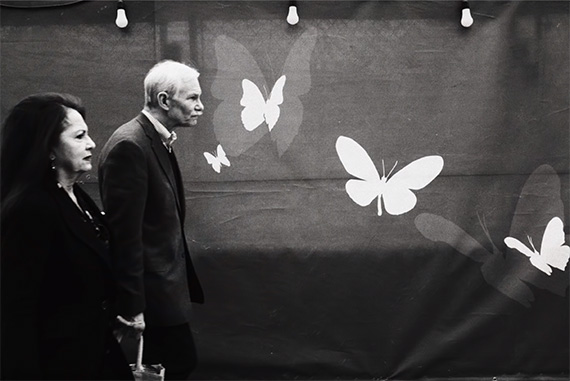
If you’ve ever tried your hand at street photography, you know how fast-paced this genre is. People move in all directions and actions happen spontaneously. You need to go with the flow and always be ready to take photos. This is where zone focusing comes in handy. Street photographer Jonathan Paragas shows how to master zone focusing for street photography:
“Zone focusing allows you to nail focus every single time and focus even faster than the fastest auto-focus system in the world.”
Zone focusing helps you capture a sharp photo at just the right moment.
The zone focusing method lets you set a predetermined range of focus. For instance, you can set the lens to focus on subjects between three and seven feet away. Everything in that range will be in sharp focus.
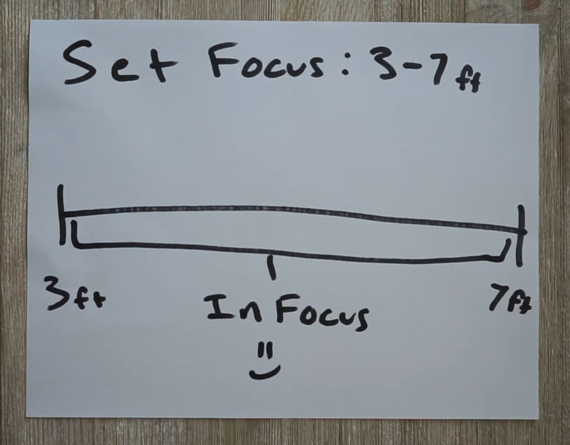
Focus Range
How Zone Focusing Works
Zone focusing works best with wide angle lenses. Lenses like 24mm, 28mm, and 35mm deliver good results when using this technique. While you can still get acceptable results at 50mm, the method will not be effective with longer lenses.
Quickly reviewing the relationship between aperture and depth of field, you might recall that wider apertures cause fewer things to be in focus. Conversely, higher aperture values have a greater depth of field with more things in focus.
“I found that zone focusing works best between f/8 and f/16.”
To use zone focusing, you need to understand how to use the hyperfocal distance scale on your lenses. If you have a look at your manual lenses, you can see three basic things: the aperture ring, mirrored aperture markings, and the distance scale.
“The mirrored aperture markings are there to tell you the range of focus you will have at any given aperture.”
In the video, you can see that at f/16, the marking read 3 on the left and 10 on the right. This means that the zone of focus, in this case, will be from three to ten feet. And at f/4, the range will be from four to five feet. You can thus set your aperture depending on the range of focus you want.
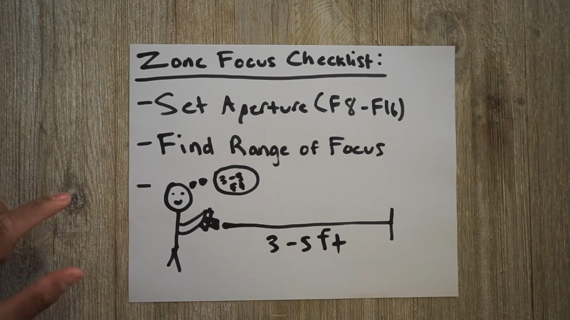
Zone Focus Checklist
Now all you need to do is go out, make sure your subjects are within the predetermined range of focus, and take a photo. As long as the scene or subject is within your calculated range of focus, the image will turn out sharp.
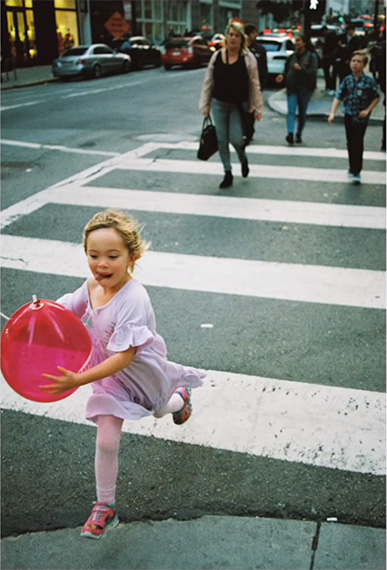
Wait for your subject to move into your focus zone.
Go ahead and give zone focusing a try if you’ve been struggling to attain focus quickly.
Go to full article: Zone Focus Tutorial for Street Photography
What are your thoughts on this article? Join the discussion on Facebook
PictureCorrect subscribers can also learn more today with our #1 bestseller: The Photography Tutorial eBook
The post Zone Focus Tutorial for Street Photography appeared first on PictureCorrect.
from PictureCorrect https://ift.tt/2UNdx43
via IFTTT

0 kommenttia:
Lähetä kommentti