


Technically known as overexposure highlight warnings or highlight alerts, blinkies perform a basic function. They indicate the areas in an image where the highlights have been clipped. Steve Perry explains how your understanding of blinkies can improve your photography:
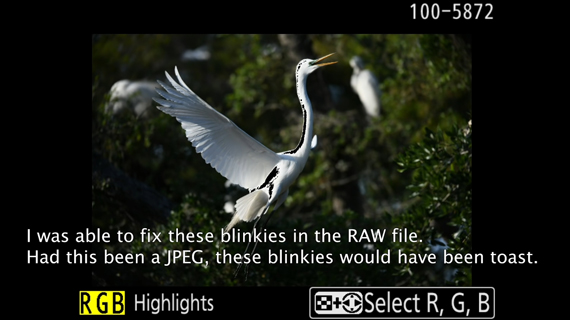
Most modern day cameras do very well at recovering underexposed images. You can easily recover shadow details in post using the exposure slider even if the image is underexposed by a stop or two. In fact, many photographers deliberately underexpose their images. However, the case is different when it comes to overexposed images. If the highlights are blown, you lose the details. You simply cannot recover them no matter how hard you try.
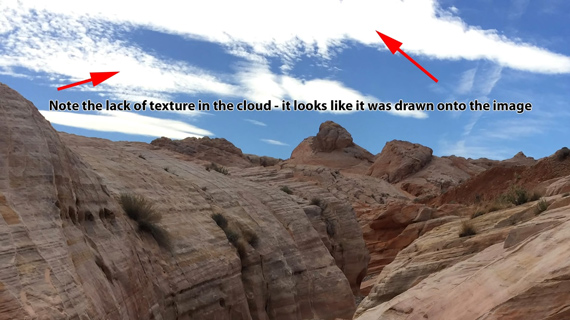
“The biggest exposure sin a photographer can commit is to blow highlights that should contain detail.”
By enabling blinkies in your camera settings, you let the camera show you when you’re losing details. That way, you can instantly make the necessary exposure adjustments to protect the highlights.
Why Not Use Histograms?
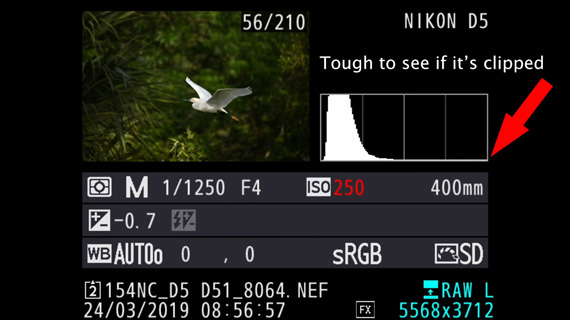
Histograms, too, can let you know if you the highlights have been clipped or not. So, why not use them instead? If you’re working in a fast-moving situation, blinkies will be much easier to work with. Blinkies instantly tell you if you’re clipping the highlights and also point out where the clipping is occurring.
Effect of Picture Profile on Blinkies
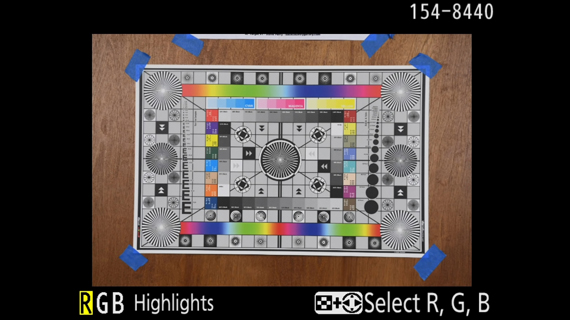
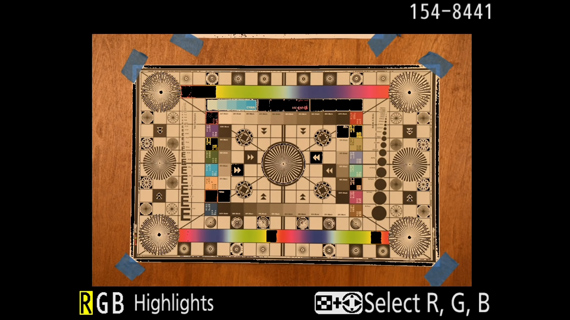
“The blinkies are based off of the embedded jpeg in the raw file and not the raw file itself. In addition, that embedded jpeg is based on your currently selected picture profile.”
What this means is that if you use vivid picture profiles, they will show blinkies much quicker than the flat picture profiles. In such cases, blinkies aren’t totally reliable. Using flat or neutral picture profiles will show blinkies that are a much closer representation of the raw files. However, if you’re a jpeg shooter, it’s certain that data is lost in any area where blinkies appear.
Setting Up Blinkies
If you’re a Canon user, look for the “Highlight Alert” feature in the playback menu and turn it on.
Nikon users, follow these steps:
- Go to the “Playback menu” and select “Playback display options.”
- Scroll down to “Highlights” and check it by pressing the multi selector to the right.
- Also, select the “RGB histogram.”
- Hit “OK” and you’re done.
Using Blinkies
After taking an image, simply press the playback button to preview it. Then, by pressing the up or down button of the multi-selector, scroll until you come across the one that says “Highlights.” This will show you the blinkies if the image has some clipping. But, if the image has no clipping, there won’t be any blinkies.
Blinkies and Color Channel
Basically, blinkies are based on the luminance histogram, which is the combination of the Red, Blue, and Green color channel. But there’s a catch:
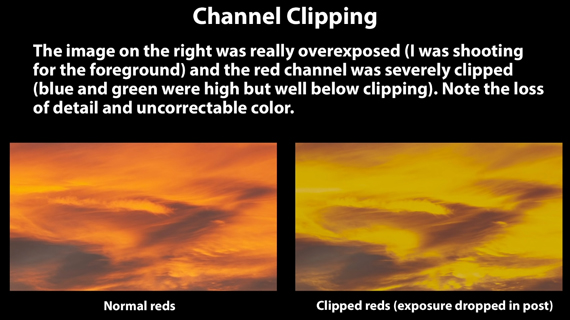
“The camera will typically only flash you a blinkie if two of the three channels are clipped.”
This isn’t a problem most of the time. However, if your image is dominated by a single color, you’ll need to be aware of this. Otherwise, the image will have a severe loss of detail and color that cannot be corrected. This is where checking individual color channels for blinkies comes in handy.
In order to scroll through blinkies based on individual color channel, simply hold the image grid button when reviewing an image and press the multi-select button left or right.
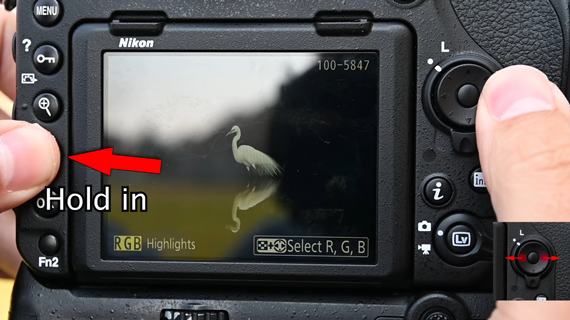
“When you do this, you’re looking at the clipping on just the selected channel.”
But again, even the color channel information is based on the embedded jpeg from the raw file. So, if you’re using a picture profile or using an incorrect white balance, the information will be misleading.
“If you want to use the color channels to check exposure information, then make sure the color balance you see on the back of the camera matches what you see in front of you.”
And don’t worry too much if the camera shows you a tiny bit of clipping. Remember, that information is based on the embedded jpeg image. With the actual raw file, you’ll be able to recover the details in minor clipping. Just keep your eyes out for massive clipping.
Are you a fan of blinkies?
Go to full article: Blinkies in Photography
What are your thoughts on this article? Join the discussion on Facebook
PictureCorrect subscribers can also learn more today with our #1 bestseller: The Photography Tutorial eBook
The post Blinkies in Photography appeared first on PictureCorrect.
from PictureCorrect https://ift.tt/2Y1EH78
via IFTTT

0 kommenttia:
Lähetä kommentti